Uploading files
New data integration content available
You're currently viewing a data integration topic that has been replaced and will eventually be removed from our documentation.
For the latest data integration content, see: Data Integration.
You can upload and import data to Celonis Platform from files on your local machine, or from Celonis Storage Manager. This one-time import doesn't need a connection to the source system which you extracted the data from, and it doesn't refresh the data automatically.
If a reference already exists in the Celonis Platform, manually uploading a file will re
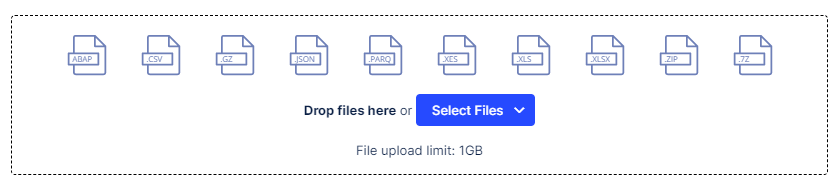
You can upload these file formats:
ABAP report files, which are special CSV files produced by the Celonis ABAP Generator (see Generating the ABAP Report). For the naming convention of ABAP report files, see: ABAP report files - file naming convention
.csv- CSV (comma-separated values).gz- GZIP compressed file.json- JSON (JavaScript Object Notation).parq- Apache Parquet.xes- Extensible Event Stream.xlsand.xlsx- Excel Workbook.zip- ZIP archive of compressed files.7z- 7-Zip archive of compressed files
If you want to upload data from multiple files to the same table, put all the related files into one zipped file before you upload it. To go into the same table, the files must all have the same schema.
Important
The file upload feature has a file size limit of 1GB. If your file is bigger than this, use one of the compressed file formats (GZIP, ZIP, or 7-Zip).
This video has an overview of the file upload process that's explained in the steps.
Follow these steps to upload and import your files:
From the Celonis Platform navigation bar, select Data > Data Integration, then select the Data Pool to which you want to import the files.
Select Data Connections, then + Add Data Connection, and choose the Upload Files option.
To upload a file that's on your local machine, you can drag and drop it onto the file selection panel:
Or click Select Files and choose Upload from your computer from the dropdown, then use the file browser to choose a file to upload.
Important
You don't need to decompress or unzip files in the supported file formats before uploading them. The file upload feature handles this.
To upload files that are in Celonis Storage Manager, click Select Files and choose Import from Celonis Storage Manager from the dropdown. There's no browser or preview in this case - the file upload feature just uploads everything it finds in the SFTP bucket. If you don't have Celonis Storage Manager set up for the team, you can't select this option.
For files extracted using the Celonis ABAP report, upload all of the files by either dragging and dropping or using Select Files. The file upload feature recognizes ABAP files based on the file name syntax (so don't change this), and it carries out additional validation for them.

For each uploaded file, select Configure Upload from the file's context menu (the three vertical dots).

Verify the name that the file upload feature will import the data as. This defaults to the original file name or the name of the zipped archive. If you want the original file and the imported Data Pool table to have a different name, edit it here to the table name you want.
Important
Non-Latin characters aren't supported during the import. If the original file name contains any of these, make sure you rename it to remove them.
Verify the Data Connection that the file upload feature will use to import the data. This defaults to the built-in Global Data Connection. You can pick another existing Data Connection in the Data Pool if you want.
Select Save to save your changes.
For each uploaded file, select Configure Data Schema from the file's context menu.

Use the displayed data preview to verify that the file upload feature has interpreted the file format correctly.
If the data doesn't look right, make any fixes that you need to. You can correct the file encoding, field separator, quote character, escape sequence, or end of line character by overtyping them, and you can specify whether or not the data has a header row. Select Reload to see the effect of your fixes on the data preview.
When the data looks right, select Next.
Verify that the file upload feature has identified the data type for each column correctly.
You can select a different data type for a column from the dropdown, and change the string length or date formatting. You can convert all of the columns to strings by checking the checkbox. You can also change the separator used for thousands and decimals. Select Reload to see the effect of your fixes on the data preview.
When everything is correctly specified, select Save.
When you're ready to start the import for each uploaded file or file archive, select the play button on the file's row under Action. The icon under Status shows you the progress of the import.
If the import isn't successful, click the icon under Status to view the execution history and check what the problem was.
If there's an error relating to the data schema, such as an incorrect data type or blank column, select Configure Data Schema from the file's context menu and see if you can fix the issue there. When you're done, select the play button to try the import again.
When you've imported a file or file archive, its contents are available as a table in the Data Pool, which you can use in Data Models. The table has the name you gave it in the Configure Upload dialog, which defaults to the name of the original file or file archive.
After you've verified that the import was successful and the table is in the Data Pool, you can remove it from the file list in the file upload feature by selecting Delete from the file's context menu.
ABAP report files - file naming convention
The ABAP report generates the filenames as per a special logic. This logic is later used by the ABAP Uploader to group the files, and also validate the data completeness. Therefore, DON'T modify the file names. However, if you have to modify them, then make sure to not break the following conventions. Otherwise, the upload or processing will lead to errors:
Uppercase table names: The table names in all files need to be uppercase.
Correct example: T001_0_20180806_120624.csv
Incorrect example: t001_0_20180806_120624.csv
Uppercase header: The header indicator of the respective file needs to be uppercase as well.
Correct example: T001_HEADER_20180806_120624.csv
Incorrect example: T001_header_20180806_120624.csv
No blank spaces: Blank spaces at the beginning of the file are not allowed.
Correct example: 'T001_0_20180806_120624.csv'
Incorrect example: ' T001_0_20180806_120624.csv'
No underscores within the table name: Underscores as part of the table name can lead to failures in the upload process.
Correct example: _OPTVIM1HEAD_1_20200807_192251.csv
Incorrect example: _OPT_VIM_1HEAD_1_20200807_192251.csv