Configuring comments
Using user IDs with names and email addresses
In the augmentation table storing the user information, only the User ID is stored. This means that comments will be displayed using a user ID, rather than the names or email addresses of those users.
To replace the user IDs with names and email addresses, see Replacing User IDs.
The comment component allows app viewers to add text-based comments within a View. These comments are associated with individual rows in a Data Model table, so you must provide an identifier definition for the respective table in the Data Model before configuring your comments component.
Once a Data Model table has an identifier set, you can then configure your comments component. This includes mapping the identifier to ensure that the comments are added for their correct row in the Data Model. Usually, those inputs are filled by variables, but they can also be filled with plain-text values.
In this example, a comment box within a View is allowing team members to communicate about a KPI:
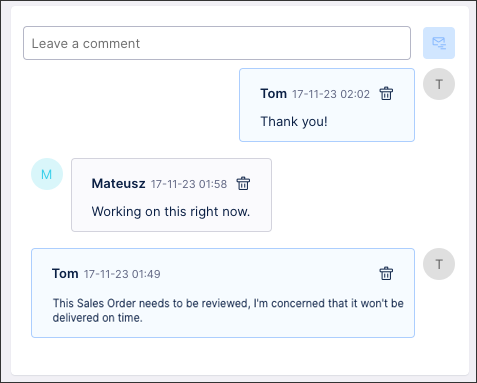 |
If either of the users in this example are removed from the team, their comments persist and remain visible in the component.
Before configuring your comments component, you must set an identifier for the Data Model table you want to associate the comments with.
For the step-by-step instructions, see Setting identifiers.
Note
If your Studio View utilizes an OCPM back end and cannot modify the Data Model table, you will need to also follow the instructions in Using the comments component in Views with object-centric data models to configure your comments component in JAB.
To configure a comments component, you need to create and reference an "identifier" for the Data Model table you want to associate comments with:
Drag and drop the Comments component onto your View.
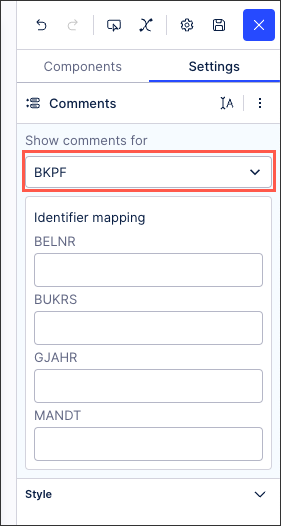
Using the component settings, click Show comments for - Select table and then select the table you want to use for this comment component.
In this example, use the table BKPF:
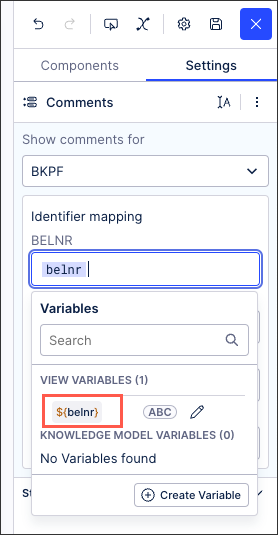
For each column in the selected table, assign either a variable or a plain-text value.
In this example, add a variable for the BELNR column:
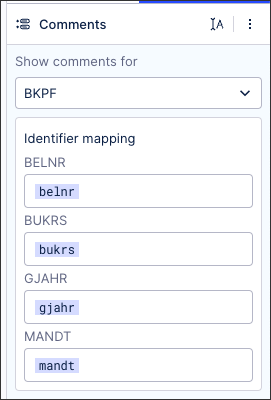
The screenshot below shows the completed configuration with four columns:
Optional: Click to expand the Style section to select your comment style, such as the date formatting or the maximum number of comments displayed.
Use Interactive Mode to test your comment component and correct any highlighted errors if necessary.
Note
This section only applies to components in Views with an OCPM backend. For all other configurations, you can skip this section and go to Using comment information in PQL the section below.
Since the Data Model cannot be modified when using OCPM, the following steps are required to configure the comments component in Views:
In your Studio View, go into Edit Mode and select the Comments component.
Select the object on which you want to be able to enter comments. In the example below, we chose the "Sales Order" object.

Click the Variables icon and then click the + button to add a new variable. This variable will be used to hold the ID of the object on which you want to enable comments.
In the Create View Variable window, enter a name for the variable such as "indent" in the example below and then select "String" as the variable type.

Enter a Default Value for this variable and then click Save.
Note
The Default Value field is shown as being optional. However, if you do not set a default value then your Comments component will display an error indicating that the identifier mapping has no value set.
On the Settings tab, go to the Identifier mapping section, click on the ID field and then select the variable you created.

Another option to set the value of the variable ("ident" in this example) is by dynamically using a linked View.
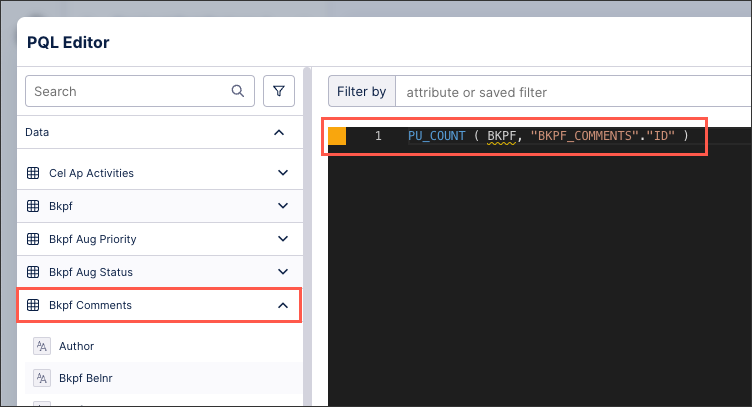
Once the first comment is written in the component, an augmentation table is created and added to the Data Model automatically. This table contains information for the comment such as the author, the message, or the creation time. The table storing comment information gets updated in real time and can be queried in the PQL editor.
For example, all comments created for one row of the BKPF table can be counted via PQL:
 |
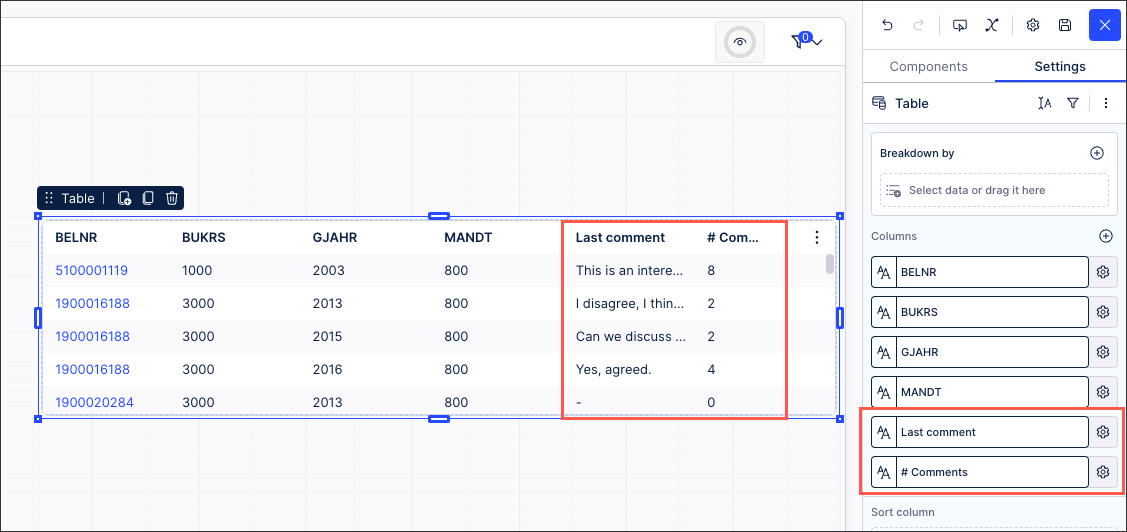
As comments are saved in augmented tables in the Data Model, they can also be added as columns in a table and used in linked Views.
For more information about creating tables, see Tables.
In this example, the table has been configured to include columns on "Last comment" and "# Comments":
 |
Users are leaving comments but I'm not seeing them in the Knowledge Model.
If users are leaving comments while you are updating the View in Studio, you won't be able to see their comments since the View is in a draft version while it is being updated.
To see comments entered while the View is in a draft version, you need to either:
publish your current version OR
revert to the previous version where the users entered their comments.