Transformation Hub in Views: Configuring the Admin workbench
With the object-centric data model (OCDM) and Action Flows established, the Admin Workbench acts as the final bridge to actionable insights. While the OCDM organizes the data, the workbench defines its impact by mapping snapshots to a structured Value Realized Journey. Proper configuration ensures that only verified, accurately calculated figures reach your Value Reports and executive dashboards.
Before using the workbench, you must link the Action Flow to the View interface:
Click Studio and open the package where you've installed and configured the Transformation Hub in Views app.
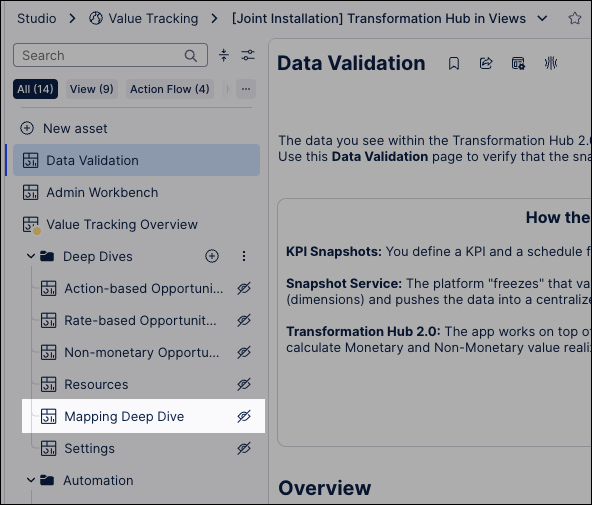
Expand the Deep Dives folder and open the Mapping Deep Dive asset.
Click Edit View.
Select the table component inside the container and navigate to the Interactions tab in the right-side panel.

Note
Before setting up the Action Flow, verify that the Snapshot ID column is unhidden in the table settings.
Click Add Action and Select Run Action Flow.
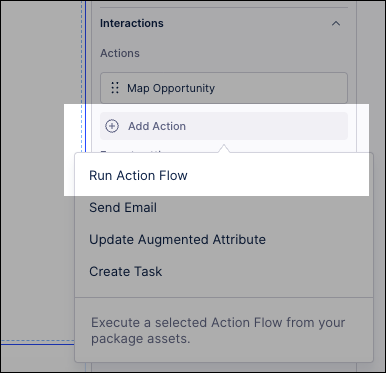
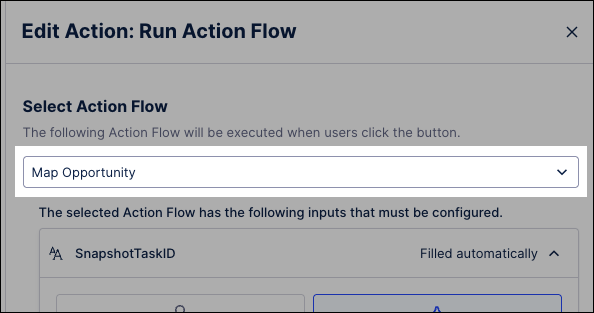
Select Map Opportunity from the Action Flow dropdown menu.
Configure the following inputs:
Input Field
Source / Selection
Configuration Details
Screenshot of configuration
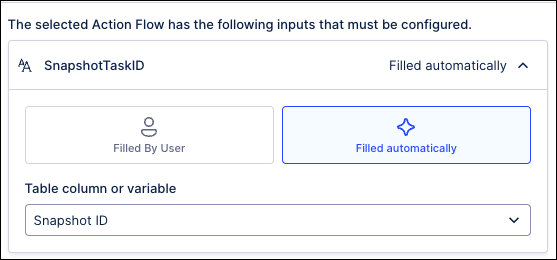
SnapshotTaskID
Filled automatically
Choose Snapshot ID from the column dropdown.
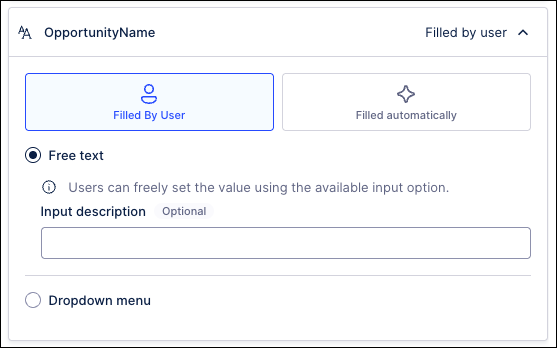
OpportunityName
Filled By User
Select the Free Text option.
OpportunityType
Filled By User
Select Dropdown; add options: Action Based, Rate Based, and Non Monetary.

Click Add.
With the interface linked, you now transition into active data management. In this phase, you sort your raw system captures into specific business buckets (Opportunities), allowing Celonis to track them as distinct value drivers.
Tip
For Rate-Based opportunities, ensure your source snapshot contains all four mandatory KPIs (Baseline, Current, Volume, and Impact) or the calculation logic will not function.
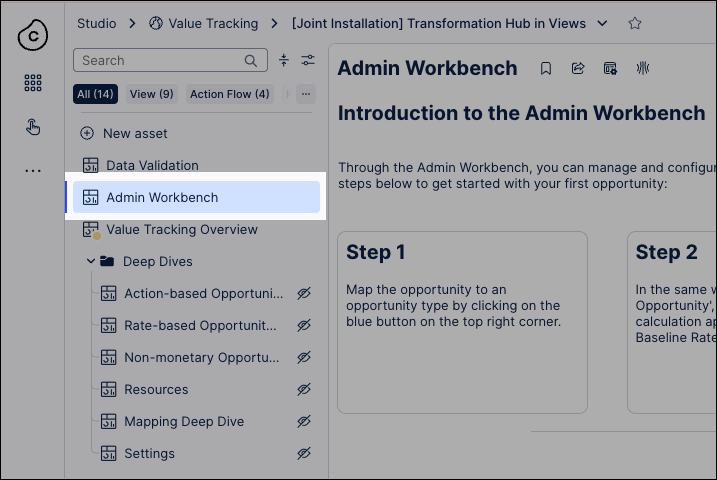
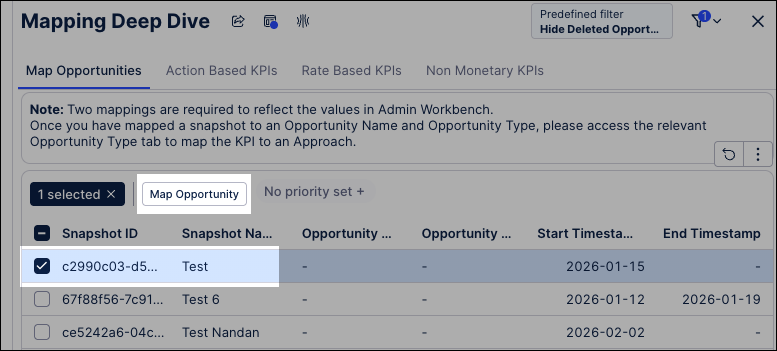
From the Transformation Hub in Views package, open the Admin Workbench asset.
Click Map Opportunity.
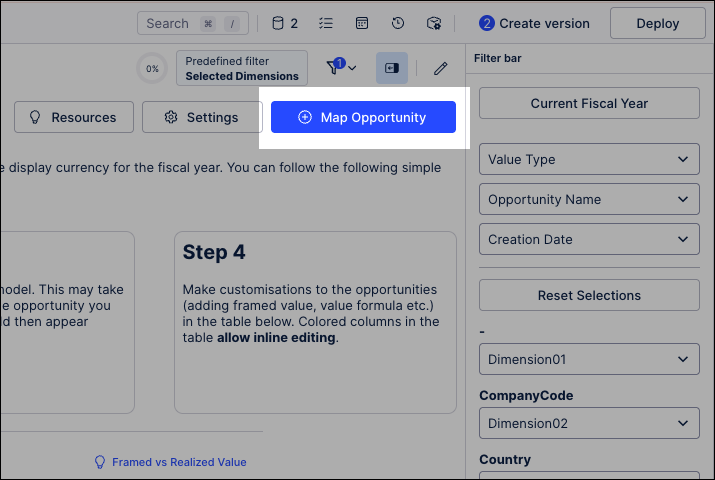
Select the specific data snapshot you want to classify and click Map Opportunity.
In this example, we're using a test snapshot:
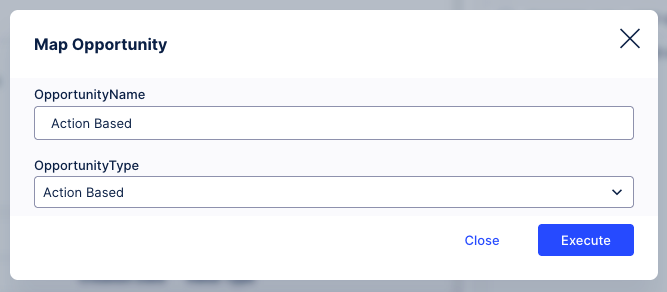
Add an opportunity name and select an opportunity type, then click Execute.
Mapping a name isn't enough; the system needs to know how to calculate the "Impact." This phase defines the mathematical approach (such as realized savings or volume-based gains) that will be applied to your data snapshots.
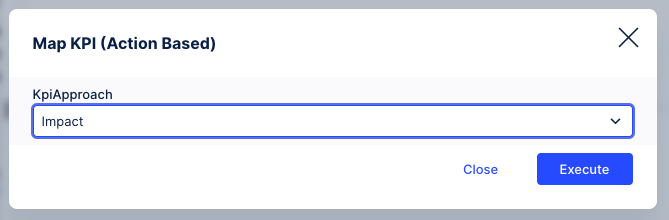
Navigate to the specific tab for your Opportunity Type (e.g., Action Based KPIs or Rate Based KPIs).
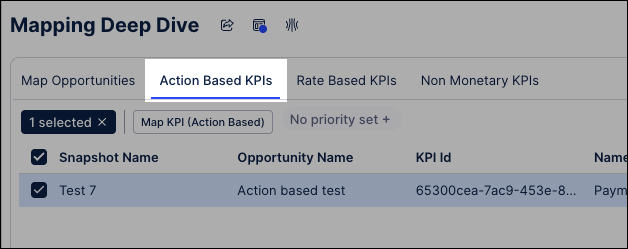
Locate your newly mapped opportunity in the table.
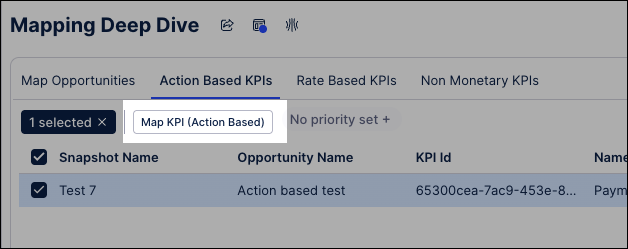
Select the opportunity and click the Map KPI option.
Select the KPIApproach (e.g., Impact) from the dropdown.
Click Execute.
Manual Inputs: In these tabs, look for greyed-out cells to provide manual data. For Non-Monetary tabs, you can enter a Value Formula and a Target Value to define success metrics.

The final phase moves your configuration from a sandbox state to live reporting. By changing the status to Active and refreshing the data job, you ensure that your value realization is visible to stakeholders in the Transformation Hub.
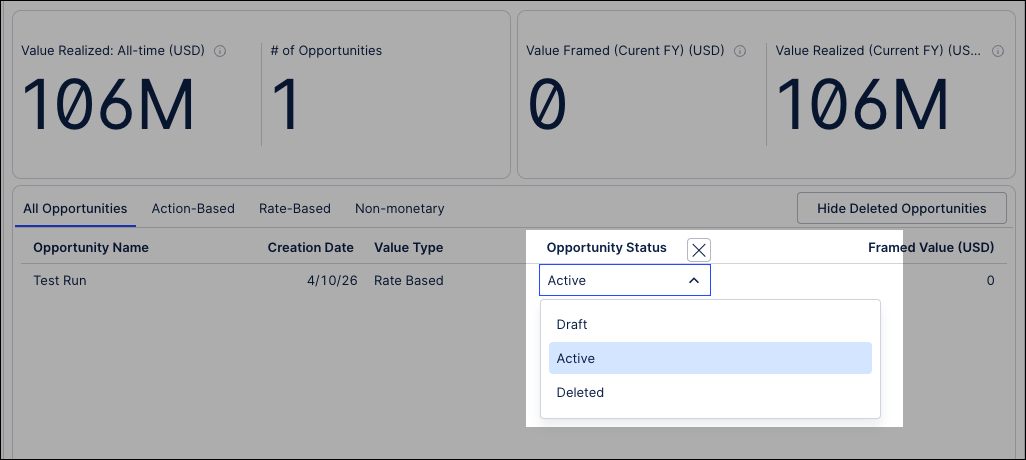
Navigate to the All Opportunities tab.
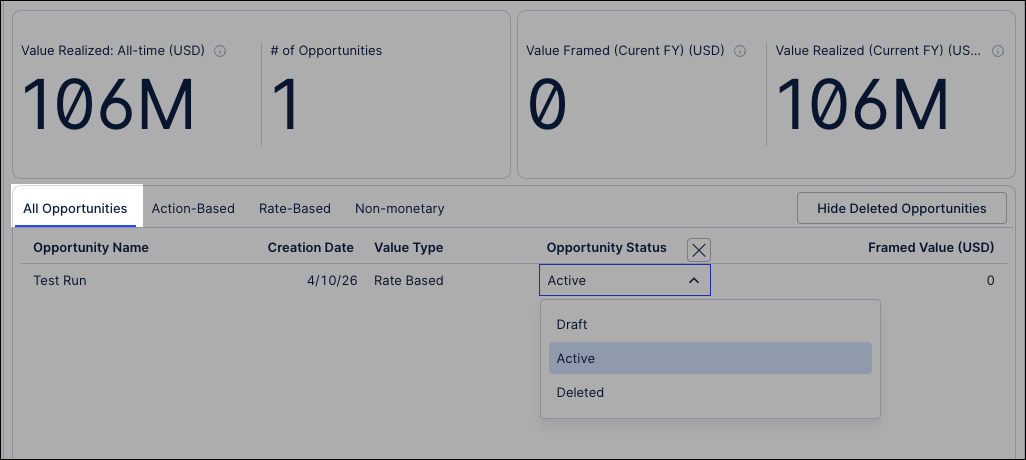
Set the Opportunity Status:
Active: Visible in Value Tracking Overview and Deep Dives.
Draft: Remains contained within the Admin Workbench for testing.
Deleted: Use this for old samples. You can toggle Hide Deleted Opportunities to clean up the table view.
Tip
If your workbench is cluttered with test data, toggle the Hide Deleted Opportunities switch in the top right to clean up your workspace.
To ensure that your newly defined opportunities and logic are reflected across the Transformation Hub, you must perform a formal data synchronization. This process commits your changes to the data pool, providing stakeholders with an accurate, up-to-the-minute view of realized value."
Click Data - Objects and Events and select your Marketplace Installed Pool.
Click Create version.
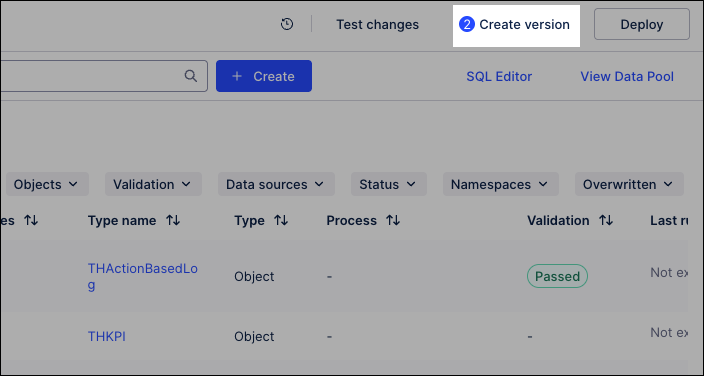
Select Open deployment after creating the version and click Create Version.
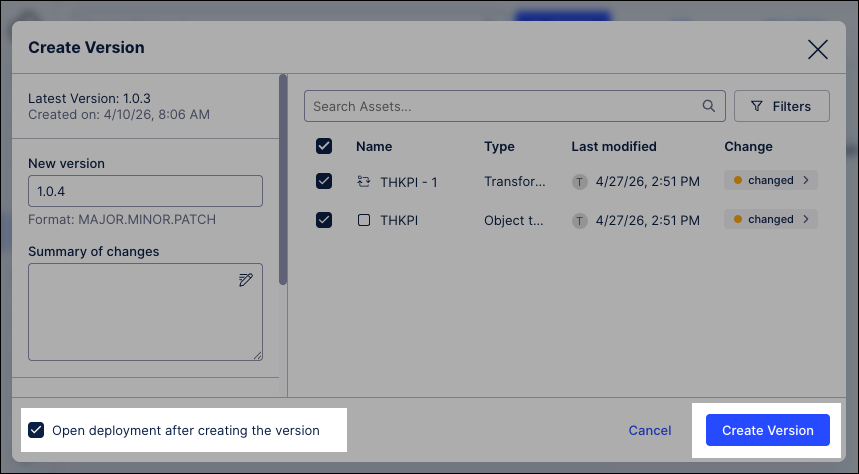
The data model version is created and the deployment window opens.
Select the deployed version of the data model, choose the Development environment, and then click Deploy.
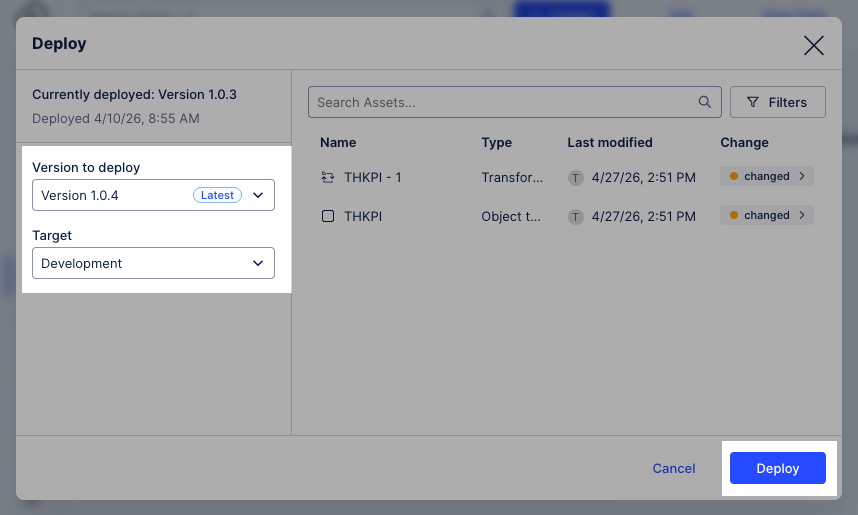
The data model is now deployed to the data pool.
Click View Data Pool, opening your
Marketplace Installed Pool.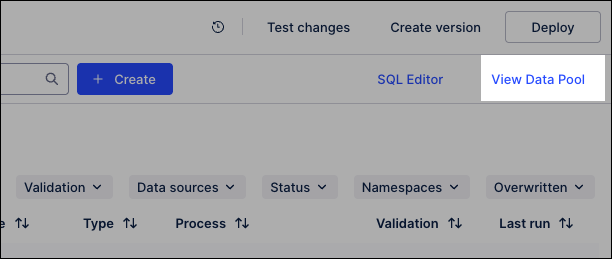
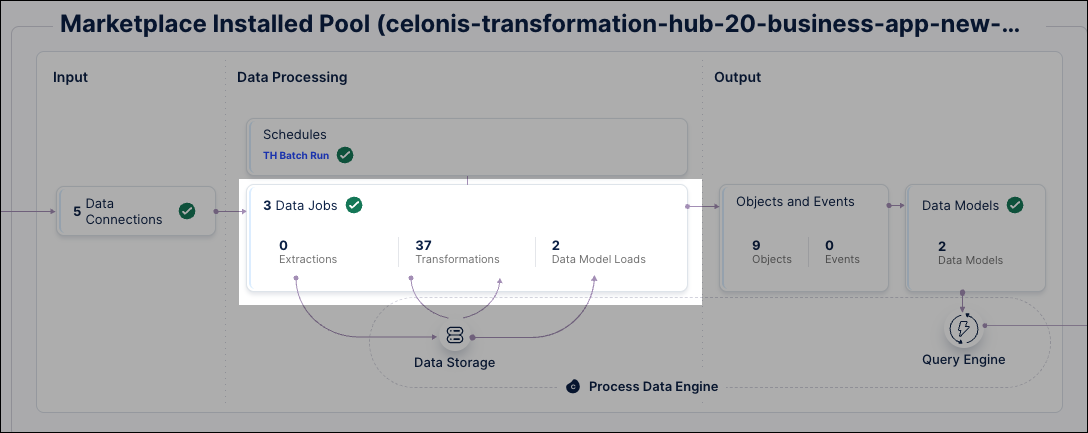
Click Data Jobs.
Locate the test data jobs and click Options - Execute Data Job.
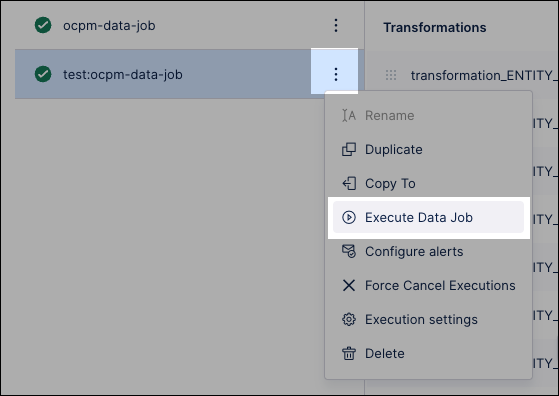
Select Full load and click Execute Selection.
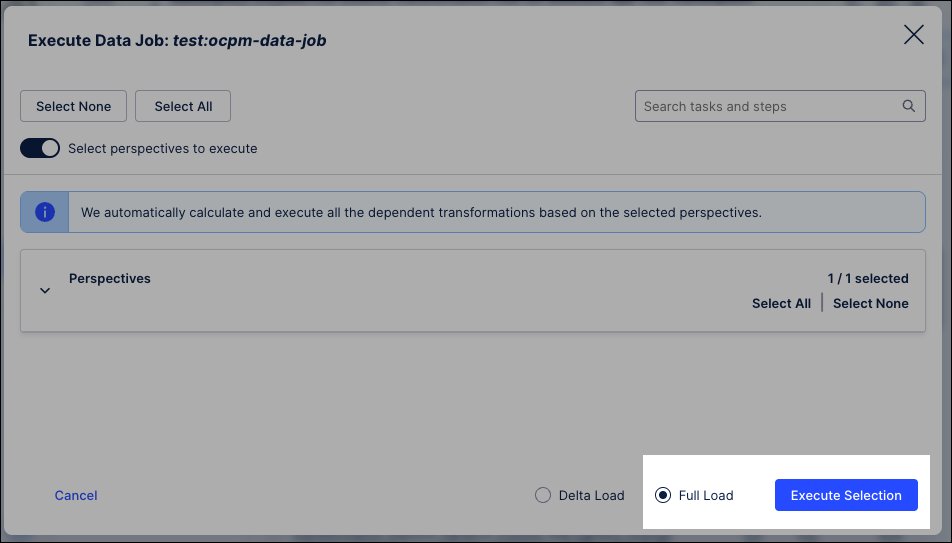
The data jobs execute, updating the data available.
From the data pool diagram, click Data Models and select your perspective.

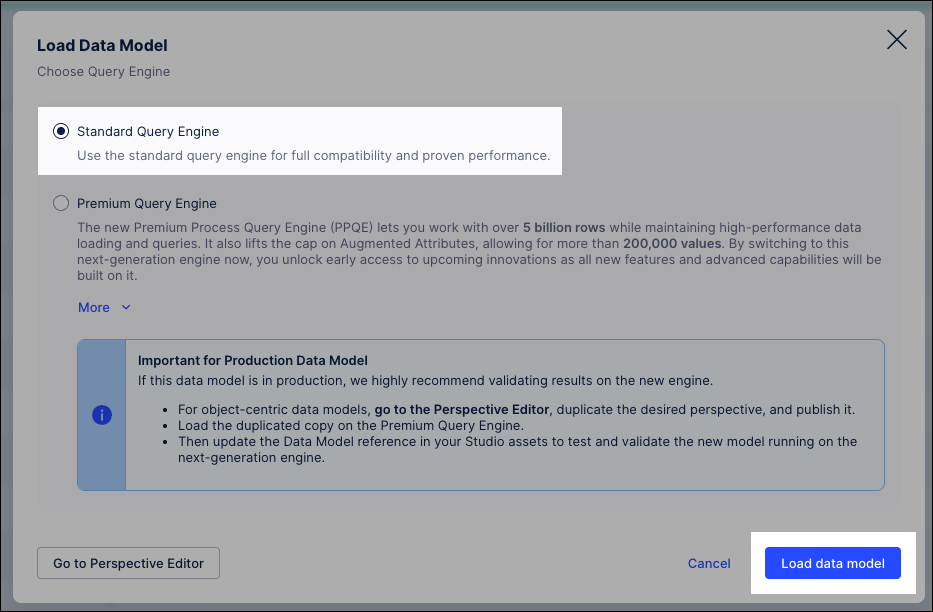
Click Data loads and then Load Data Model.
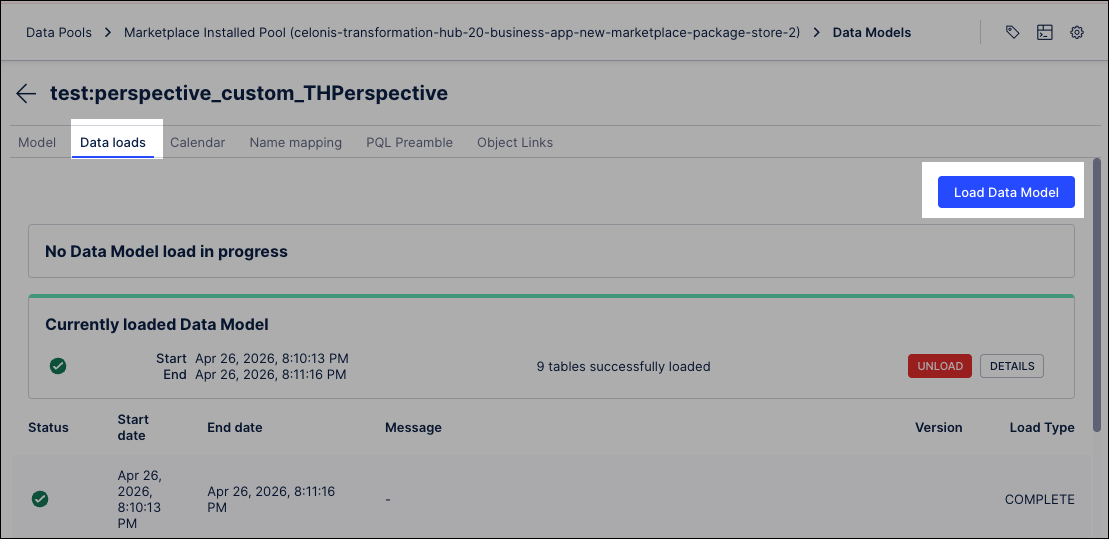
Select Standard Query Engine and click Load data model.
Verify the load: Wait for the status to change to a green checkmark.
Automate with Data Job Schedules
As a best practice, once you have verified your manual load, create a Schedule within the data pool. This ensures that your data jobs execute at a defined frequency (e.g., hourly or daily), keeping your Value Reports synchronized with the latest system activities without manual intervention.
Next steps
While the Admin Workbench tracks total value, configuring dimensions allows you to slice that data by attributes like Country, City, or Company Code in the Transformation Hub filters.