One-time extraction from SAP ECC or SAP S/4HANA
While we recommend that you create a continuous connection between the Celonis Platform and SAP ECC or SAP S/4HANA, you can also perform a one-time data extraction from these systems. This involves creating and executing an ABAP report (a GUI program) that runs directly in your SAP system to create CSV files. These CSV files can then be imported into your Celonis Platform using the file uploader.
This is a four stage process, with your SAP Basis team supporting with the third stage:
 |
For a video overview of the process:
The first stage of the process is to define your data scope and the extraction metadata. This specifies which data is extracted from your SAP system and configures how this data is outputted. This includes your data tables, columns, filters, and the pseudonymization options.
To define your data scope, we recommend using a process connector template that includes a one-time ABAP extraction template. This enables you to define your data scope within the Celonis Platform.
For example, the SAP Order-to-Cash process includes the one-time ABAP extraction template:
 |
However, should your chosen process connector template not include the ABAP extraction template, you must manually define your data scope using Excel. You can also edit the Excel if you want to extend your data scope.
To define your data scope:
From your Data Pool overview screen, click + New Data Pool and select Start with a Process Connector Template.
Search for your required process connector and then click Install Process Connector.
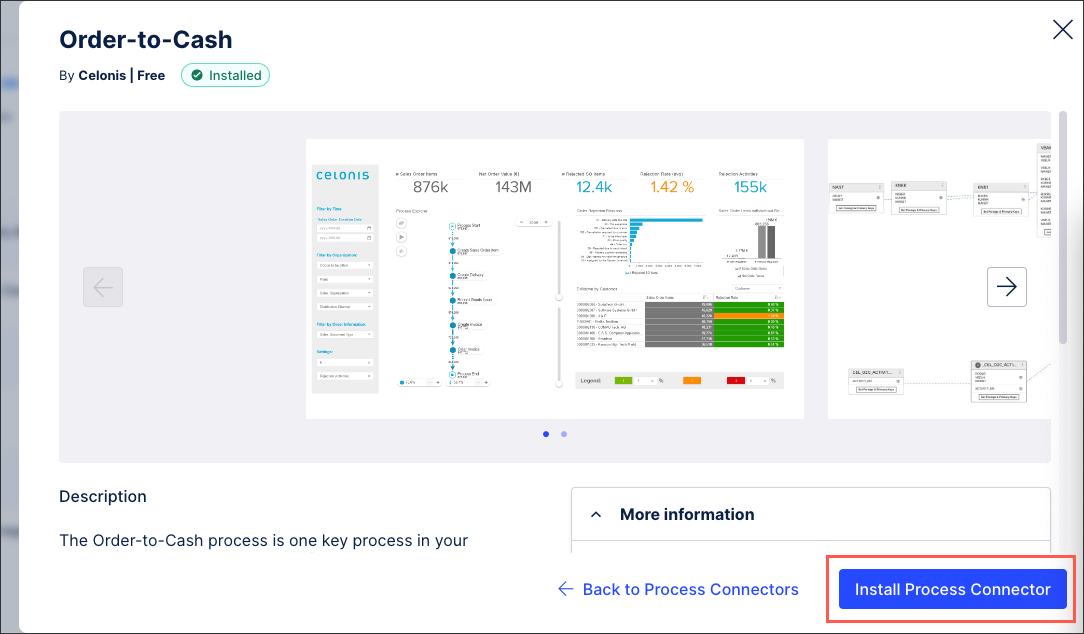
The process connector installs and your data pool diagram is displayed.
From your data pool diagram, click Data Jobs.
Either use the ABAP template or manually define your data scope:
If an ABAP extraction template is available for your connector:
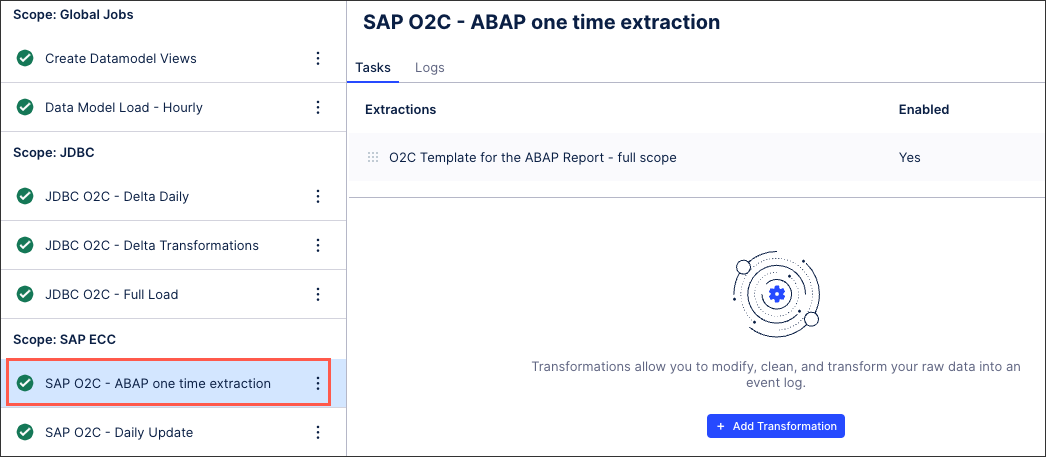
Click on ABAP one time extraction and then click on the available extraction.
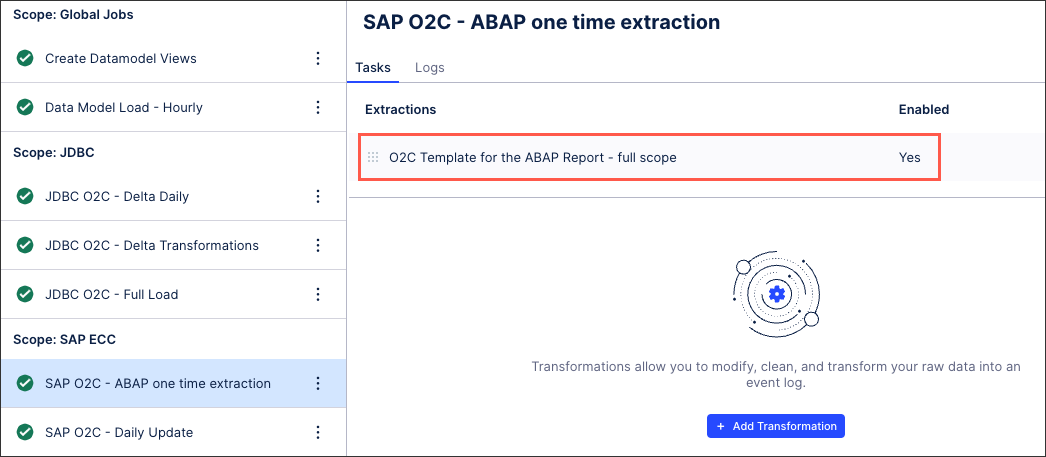
You can now define the data scope for the existing tables within the browser. This includes configuring the table, editing the parameters, and configuring the extraction settings.
Alternatively, if an ABAP template is not available for your connector or you would like to manually define your data scope:
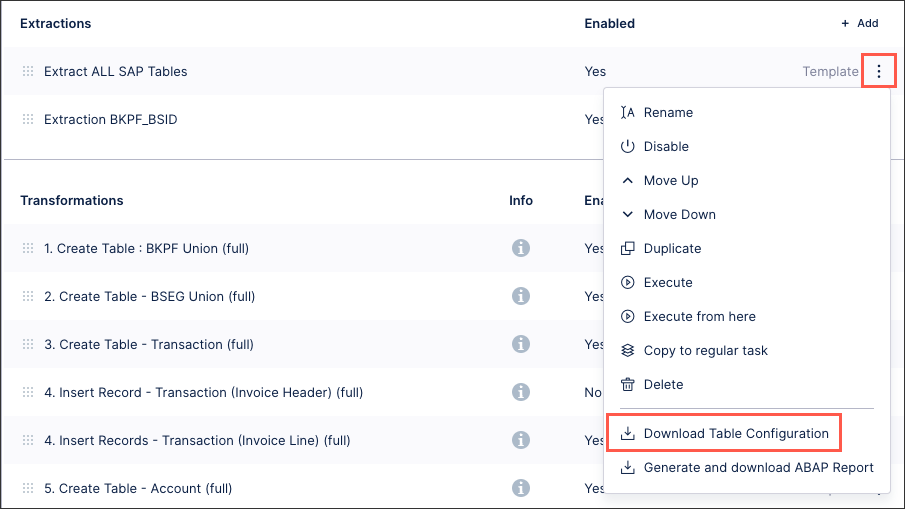
Click on an existing data job, ideally one that is listed as full extraction or similar. Then select the available extractor and click Options - Download Table Configuration.
For more information, see: Manually defining the data scope in Excel.
Once your data scope is defined, either using the browser or in the Excel file, continue to Step 2: Generating and downloading the ABAP report.
When manually defining or extending your data scope in Excel, the table configuration zip file you download and extract has two files:
Table-ABAP-Configuration.xlsx
Table-Configuration.xlsx
You need to use the ABAP configuration file, giving you access to all the tables and their configurations. When editing the file make sure to keep the formatting and syntax rules, especially for the filters and join conditions. It is a good idea to generate the file from a template and use it as a starting point.
In the Excel, each row represents a table with the following details:
Table: The data table you’re extracting from your SAP system.
Filter: The filters you want to apply to the extracted table.
Column: The columns from the table that you want to extract. An asterisk (*) indicates that you want to extract all columns, with specific columns only being defined by a comma-separated list.
Columns to pseudonymize: A comma-separated list of columns that you want to hash, removing personal information.
Join table: The table you want to join on to the existing table for filtering purposes.
Join table filter: The filters you want to apply to the tables joined in the previous column.
PK_JOIN: Indicate whether the joined table should be included in the primary key or not.
Parent / child: If the join is not on the primary keys, then the comma-separated list of the columns on which the join should be done. The join operator is always =, and the condition is AND. Parent is the table on which the join is done, and the child is the extracted table (column A).
After defining your data scope, you now need to generate and download the ABAP report. The process for generating and downloading this report depends on whether you defined your data scope using the extraction template in the browser or using the Excel file:
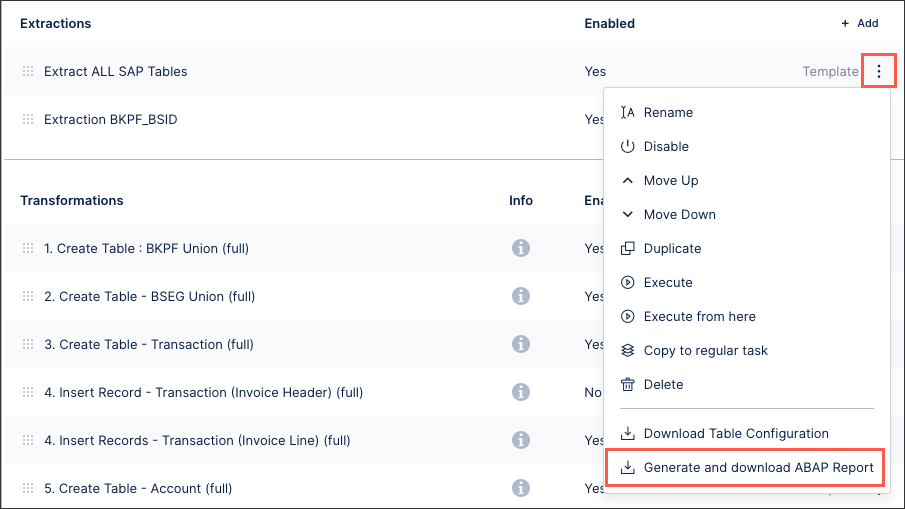
From the extraction view of the data job, click Options - Generate and download ABAP Report.
The ABAP Generator window is displayed.
Select the SAP version you are using and then choose how many tables you want to include per report.
Click Generate.
The report generates and is automatically downloaded. You can now send this file to your SAP Basis team and they can follow the steps provided here: Step 3: Generating ABAP output in SAP.
From your data pool diagram, click Data Connections.
Click + Add Data Connection and select Upload Files.
Click Open SAP ABAP Generator.
Upload the Excel file and verify the SAP version you’re using and choose how many tables you want to include per report.
Click Generate.
The report generates and is automatically downloaded. You can now send this file to your SAP Basis team and they can follow the steps provided here: Step 3: Generating ABAP output in SAP.
Important
Any references to third-party products or services do not constitute Celonis Product Documentation nor do they create any contractual obligations. This material is for informational purposes only and is subject to change without notice.
Celonis does not warrant the availability, accuracy, reliability, completeness, or usefulness of any information regarding the subject of third-party services or systems.
With access to the SAP ABAP report created in the previous stage, you can now generate the ABAP output in your SAP source system. This involves creating an executable programme that extracts the data information required by the Celonis Platform.
To generate the ABAP output in your SAP source system:
Open transaction SE38.
Create a new program:
Name: Z_DATENABZUG_XXX (the name has to begin with Y or Z)
Subobjects: Source Code
Title: Data Export (or similar)
Program type: Executable program
Create the report as a local object, avoiding the need for a change request.
Insert the code of the generated ABAP report into the input field. We recommend using Windows Editor or Notebook + for this.
Click Activate (or press Ctrl + F3). The program is activated and starts running.
Click Direct Processing (or press F8) to continue processing when required.
When prompted, you have the following configuration options:
File path: This specifies the target path for the download. The report is created in the SAP system, not your local machine. By default, the file is extracted to the HOME_DIR in your SAP system, which is system and user-specific.
You can check the location of the HOME_DIR by using the SAP transaction AL11.
Dry run: This runs a test on the required tables, giving you information if something is incorrectly configured.
Records per file: This is the number of records exported per CSV file.
Pseudonomizer secret: Enter any columns that need to be pseudonymized, with each column set to a secret string.
Compression type: Select from the types available.
Tables: Select each table you want to extract and then upload to the Celonis Platform.
Click Execute extraction in background and select the time the background job should start.
The job runs at the time selected and can be verified by using transaction SM37. Once extracted, the files can be accessed in the SAP file system at the file path specified in step 7. These can files can then be uploaded to the Celonis Platform.
With access to the ABAP output from the SAP system, you can now upload those files into the Celonis Platform.
For more information about uploading files, see: Uploading data files.