Working with data in Data Explorer
Caution
Data Explorer is in maintenance mode. Only critical issues that significantly impact the functionality will be addressed.
If you previously used Data Explorer, we recommend the enhanced features offered by the following products:
Insight Explorer: Insight Explorer is an AI-powered Studio asset designed specifically to uncover observations from your Knowledge Model. See: Insight Explorer.
Studio Views: Instead of a temporary exploration, you can build a Studio View to act as a permanent data validation dashboard. See: Views.
Knowledge Model (KM) and PQL editor: Since Data Explorer relies on Knowledge Models, you can perform much of the same work directly within the Knowledge Model itself. See: Knowledge Models.
Data Explorer is a Studio asset which allows you to quickly aggregate, drill down into subsets, and analyze your data. It also allows you to generate KPIs, Attributes and Filters and save them to your knowledge model.
Filter your data to narrow down, broaden, or shift your focus on a subset of data tailored to your current interest. At the top of Data Explorer, click on the filter bar and start typing the name of the attribute you want to filter on. Once you find it, you can specify individual values to narrow down your results even more.

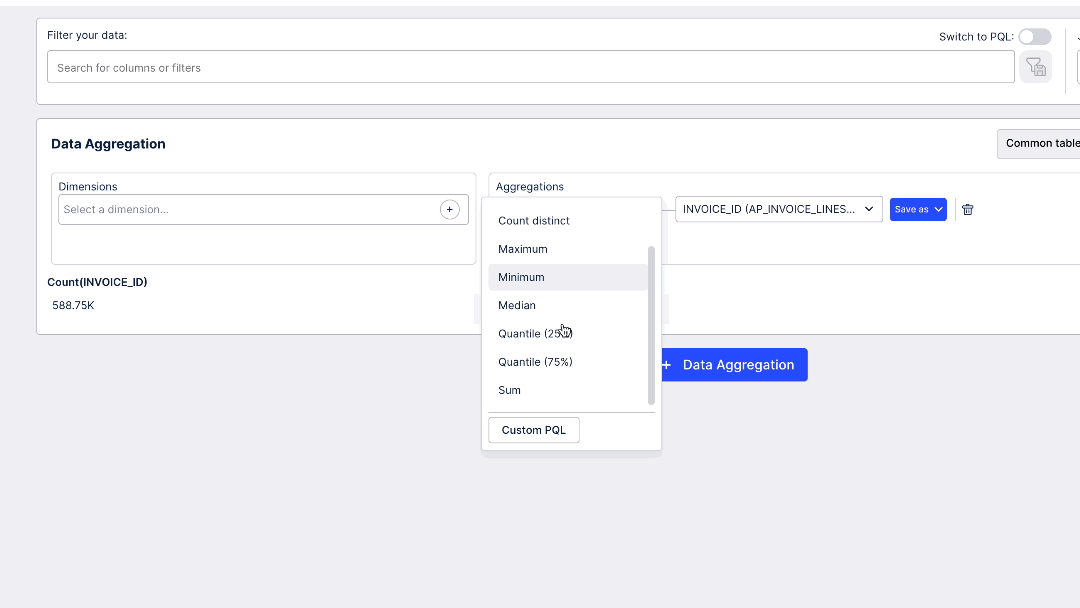
When you want to analyze a subset of your data, you can group it by the specific attributes. From the Table drop-down select the table data for which you want to analyze, and toggle Group and aggregate. This will immediately display data from a selected table in a grouped fashion. From here, you can select attributes for which you want to display data and choose up to five standard aggregations from the following set: average, count, count distinct, max, min, media, quantiles, and sum.
Combine grouping and aggregating with filtering to best results and visualize relevant data. This can help you look at your data in perspective and draw some conclusions that can be useful in a decision making process. Depending on the data type of the attributes you are grouping, you can see different types of visualization.
If your aggregation is switched off, your data is presented as a KPI list.
If you’re aggregating by strings, your data is presented as a bar chart.
If you’re aggregating by numbers or dates, your is presented as a histogram.
If you’re aggregating two or three attributes, your data is presented as an OLAP table.
Once you’ve established your perfect mix of filters and grouping settings, you can export them to your Knowledge Model to reuse them later or in different contexts as KPIs or Attributes.
To save grouping and aggregation results to a Knowledge Model:
To the right of the grouping and aggregation area, click Save to Knowledge Model.

Select how you want to save your choice:
Save KPI - save your aggregation as a KPI.
Save KPI with filter - save your aggregation, and the filter as a KPI.
Save as Attribute - save your grouping, and the aggregation as an Attribute.
Save as Attribute with filter - save your grouping, the aggregation, and the filter as an Attribute
Provide more details of your new KPI or Attribute and click Save.