Editing views for the object-centric Duplicate Invoice Checker
The Duplicate Invoice Checker comes with a prebuilt set of views. The views that users can access are the Action View and the Setup and Validation view. Edit the app’s views in Studio if you need to:
Make any customizations and changes to suit your business process.
Change the look of the supplied views.
Include custom items that you added to the perspective that you’re using with the app.
The app doesn’t do anything automatically with custom items in a perspective - they won’t be surfaced in views. If you want to use them, you’ll need to edit the app’s views to include them. You don’t have to surface all (or any) of your custom attributes and relationships in the app’s views. If you don’t, it doesn’t cause a problem, the app just ignores them.
Important
The Duplicate Invoice Checker relies on the VendorAccountItem object type, which is a Celonis object type supplied with the dedicated perspective for this app, perspective_DuplicateInvoiceChecker_DuplicateInvoiceCheckerApp. To create it, we combine the VendorAccountCreditItem and VendorAccountDebitItem object types from the standard Accounts Payable perspective. VendorAccountItem only contains the attributes that are part of those Celonis object types as supplied - it won’t contain any custom attributes that you added to extend those object types.
It’s possible to add custom filters in the Duplicate Invoice Checker's Action View to hide groups that contain a specific type or combination of documents. It's better to exclude documents from checking by pre-filtering them in the AI Annotation before they appear in the results, because then you haven't wasted resources. Post-filtering in the Action View is useful as a backup if you don't want to reset the result table or modify your backend settings, or if you want to handle a false positive that only comes up occasionally. Configuring the AI Annotation for the object-centric Duplicate Invoice Checker explains how to set the standard filter dimensions and how to add custom PQL filters to remove documents from checking.
Tip
In the new Studio experience, we keep a history of comments and other updates to augmented attributes. If you want to display these in a view, edit the view to add the Activity history component from the Object-specific details group.
You’ll need Analyst permissions for Studio and for the relevant views and components to modify them. If you need training, check out the training track “Build Knowledge Models and Views” on the Celonis Academy.
Here’s how to edit the Duplicate Invoice Checker’s Action View:
In the Celonis navigation menu, select Studio.
In the Studio overview, find the Duplicate Invoice Checker app in the space where you installed it, and click its tile.
Expand the app’s structure, then expand the folders to find and select the view you want to edit.
In your selected view, click Edit View to enter edit mode.
Select any component of the view to go to the component editor. Here you can add and remove data fields shown in a table or chart, change sorting and display attributes, add action buttons, and make other edits, as relevant for the component type.
When you’ve finished editing a component, click the Save icon to save and exit.
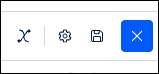
When you’ve finished editing all the components you want to, click the Save icon to save the view, then click the Exit Edit Mode icon (the blue square with the X) to lock it again.
Tip
It’s also possible to edit views in the YAML editor if there’s something you can’t achieve in the visual editor. To view the YAML, click the View settings icon and select Edit View YAML.
When you’ve finished editing all the views you want to, publish a version of the app package. There's a Publish button at the top of all the screens in your Studio space.