Inviting users to your Celonis Platform team
You can invite users to your Celonis Platform team manually, with the ability to invite users controlled by your security settings and user permissions.
When inviting users to your Celonis Platform team, they receive an email containing further joining instructions. Once invited, users have 14 days to accept the invitation. After 14 days, if a user doesn't accept the invitation, the admin can send the invitation again. During that time, pending invitations count toward users' seat allocation for 30 days.
After 30 days, users who don't respond to the invitation are automatically removed from the system. This event is recorded in logs in the following way: TEAM_MEMBERSHIP_DELETED and the user ID “celonis-service (SYSTEM)"
Before you begin
To invite users to your Celonis Platform team, you must hold full or variable admin permissions.
See: Seat allocation and Celonis Platform roles and Assigning variable admin permissions.
Inviting users to your team
To invite users to your team, follow these steps:
Click Admin & Settings and select Users.
Click Invite new users.
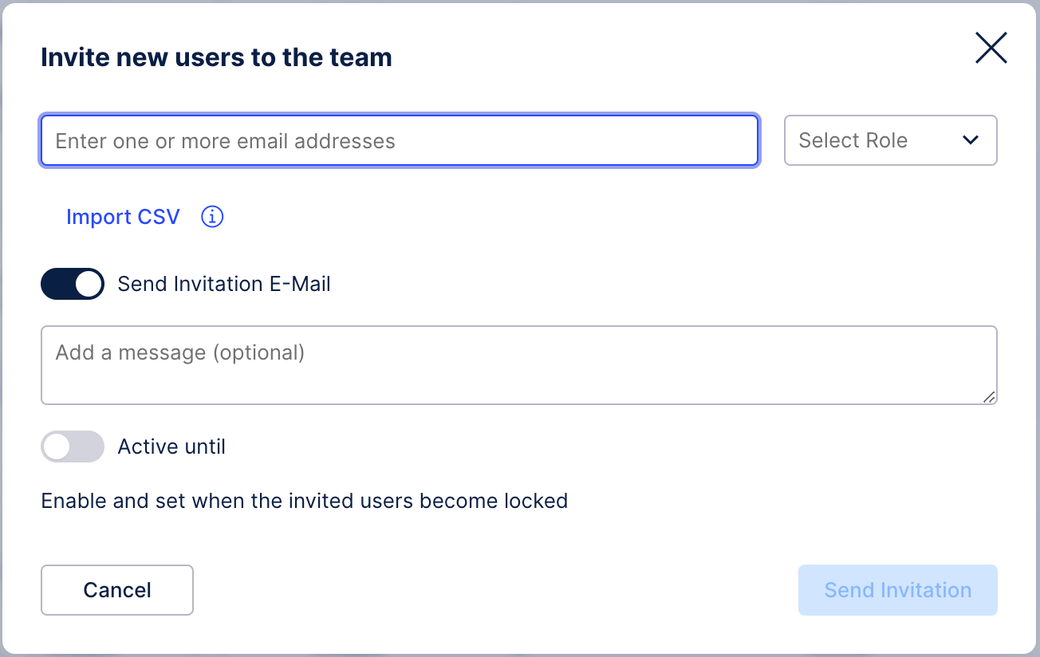
Configure the invitation using the following fields:
Email address: Enter one or more comma separated email addresses. For larger numbers of users, import a single .csv file here. Use a single column format with one email address in each row.
Role: Select from Member, Analyst, or Admin. For information about available roles, see: User and team roles.
Send Invitation E-Mail (optional): You can choose whether your users receive an invitation e-mail immediately after you click Send Invitation. It's a toggle that defaults to on. Be aware that this influences the onboarding process for new users depending on which identity provider you are using:
External SSO: The user will receive a verification email when they log in the first time your team.
Celonis ID: To login for the first time, the user navigates to your team URL and resets the password using the 'Forgot password' link on the team login page. They will then receive the registration email. After registering and navigating back to the team URL, the user will receive a team invitation email.
Celonis Login: To log in for the first time, the user navigates to your team URL and resets the password using the 'Forgot password' link on the team login page. They will then receive the standard invitation email.
Message (optional): Enter a message for your users.
Active Until (optional): If you want to make the invitation temporary, switch the Active until toggle and provide the date by which the user will be locked from accessing the team.
If set, regular user locking policies apply. See User locking policy
Click Send invitation,

An email invitation is sent to your users, giving them further joining instructions. The invited users are now visible in your User overview area.