Studio App Building Guidelines - 'Home' or 'Start Here'
'Home' or 'Start Here' page give new users a quick overview of your app as well as providing a navigational aid for returning users. Linking to a 'Home' page gives you control over the entry point for your app, helping you guide users through the experience. Whereas 'Start Here' pages are great because they can be easily bookmarked and then referenced outside of the Celonis Platform (such as in your internal knowledge tool).
While we recommend adding a 'Home' or 'Start Here' for your app, they work best when you have high numbers of users who haven't been trained specifically on the application. They're also best used when you have extensive data or a high number of assets.
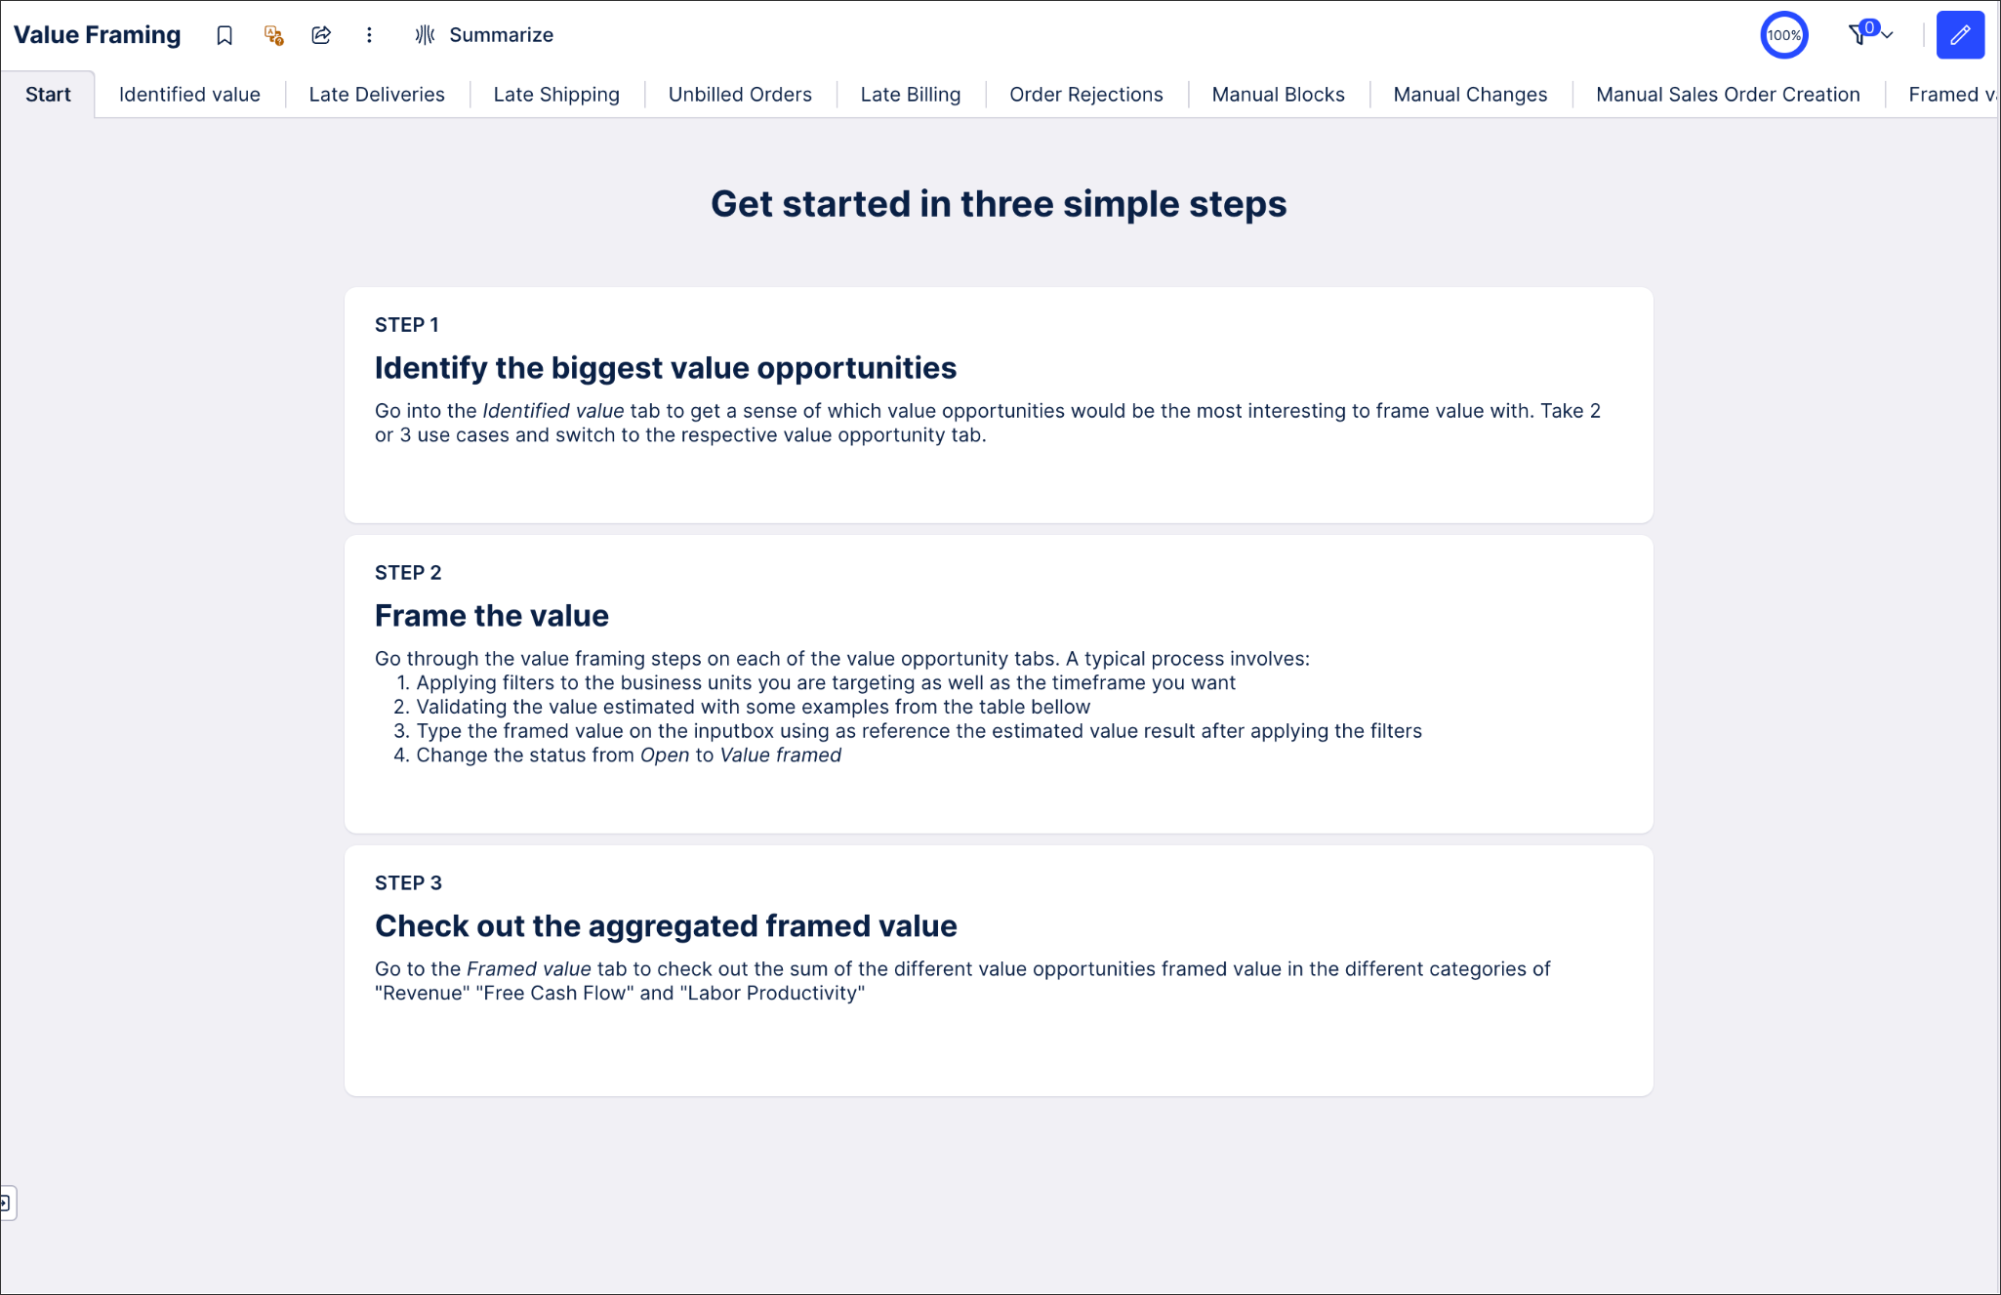
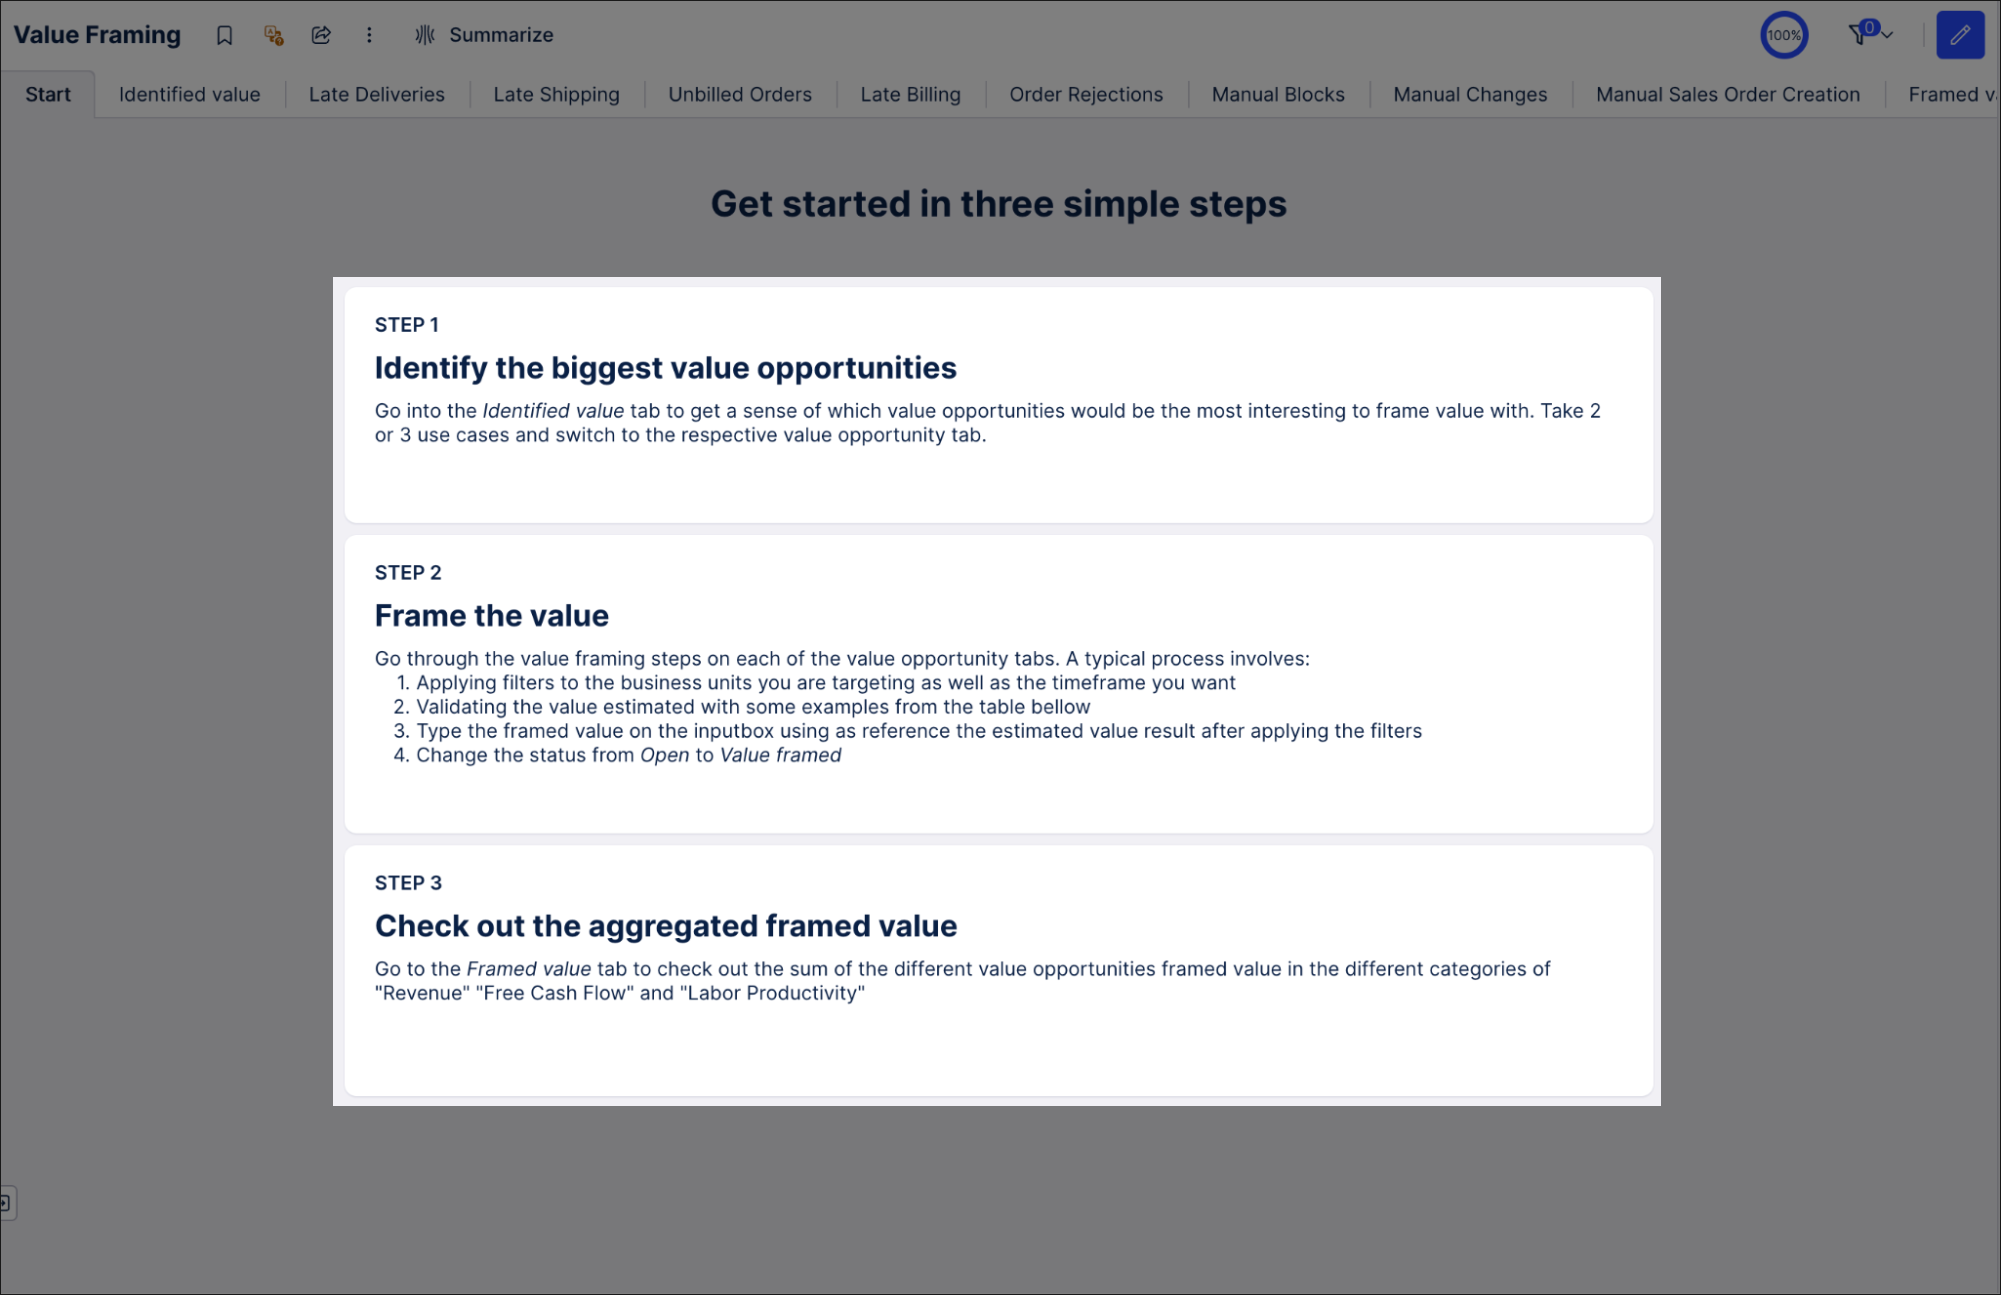
You can find an example of a step-by-step 'home' page can be found in the Value Framing View of the OCPM Order Management Starter Kit:
 |
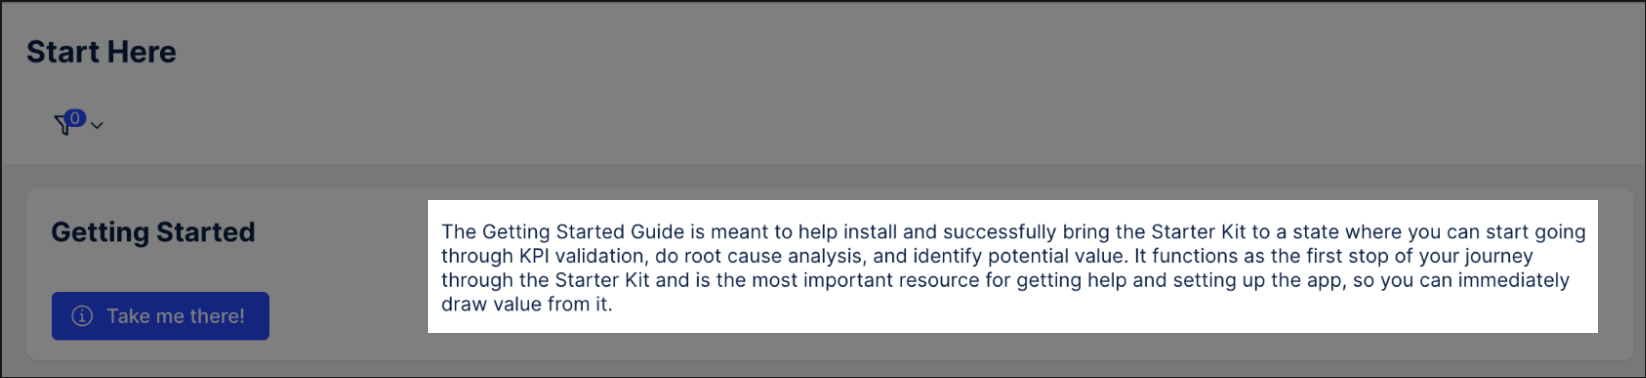
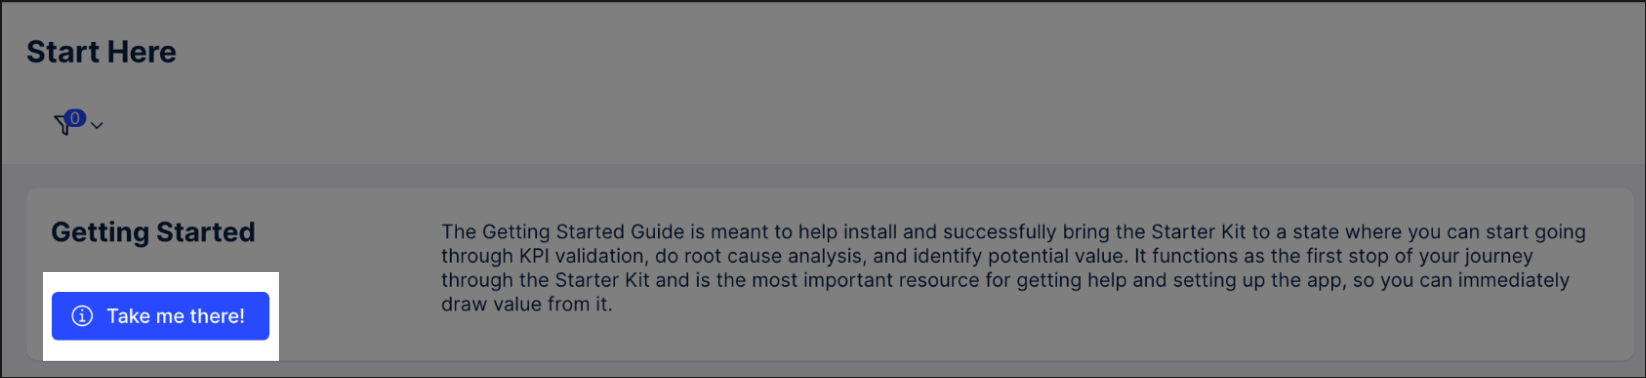
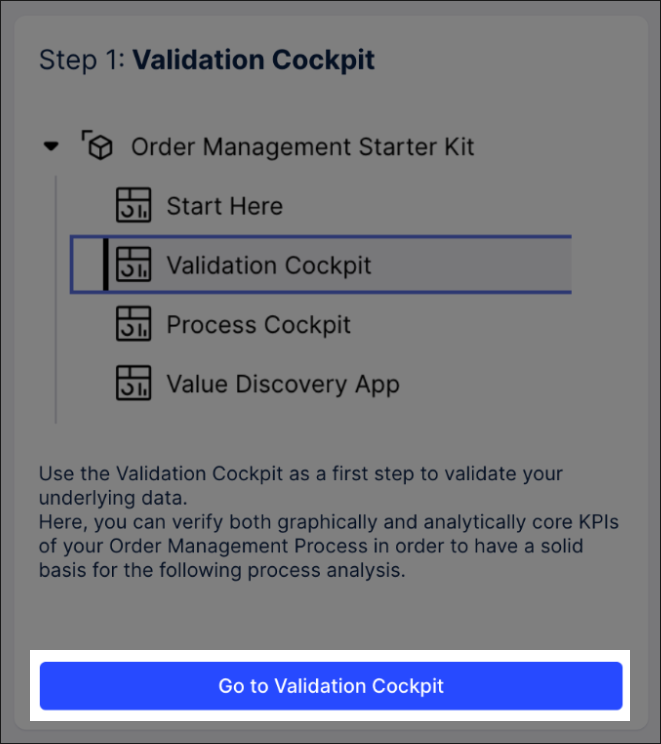
Alternatively, you can find an example of a 'Start Here' page in the Order Management Starter Kit for legacy views:
 |
The layout of your 'Home' or 'Start Here' page will be specific to your application, however we find it useful to have a header (area 1) with general information and then multiple subsections below for further content (areas 2, repeated as required).
We'd also recommend using the 'fit to screen' layout feature, allowing your view to scale based on the device or size of content.
 |
The header area can be used to give general information about the app. When creating your header area, consider using the following components:
Image component for logo: You could add your company's logo in the header section so that users that land on the View for the first time see the familiar logo. This also strengthens brand identity and usually creates trust in the data.
To learn more about configuring the image component, see: Logos and Images.
Tip
Optimizing the image size will result in quicker view loading times, reducing the chance that your users click away from the app.
Text box component for welcome message: Use text boxes to draft a welcoming message for your users. The main goal of the page is to give new users an overview of what to expect here and existing users an easy way for navigating. Be precise with the description but also encouraging in your tone. Add a contact name (email address) to allow people to reach out to you if needed.
Button component for links: Think about adding buttons to your 'Home' page that allows users to reach out to the builder (e.g. with a mail hyperlink), provide feedback (e.g triggering a feedback form that you set up) or read up on documentation (which could be inside or outside Celonis). Ensure to use the correct button styling; link style if you link outside of the app and secondary if the button opens another View or is performing an action.
To learn more about configuring buttons, see: Buttons.
The content area allows you to provide more focused information about your application, such as steps, persona-specific recommendations, and links to other material.
Depending on your use case, your content could include some of the following ideas and components:
Step-by-step guidance: For every step in the journey, you would bundle all information relevant for this individual step visually in a container with a shared white background. This way, the distinct steps can be easily distinguished by the eye. Ensure to have them in the right order and either display the steps ordered from left to right or from top to bottom.
Persona-specific recommendations: Similarly, all information relevant for one persona should be grouped in one container. A container next to it would then contain all information for persona 2 and so on. Include information about the target audience already in the title of the subsection so users can immediately find the information that is relevant to them. Try to use language that is targeted to the personas and avoid technical jargon. Persona specific recommendations could include information to personalized documentation or training material or parts of the app that are specifically relevant for this persona (e.g. operational users working on Action Views and managers working on Steering Views).
Use case overview: Another way to organize your content is by use case. This is applicable if your app contains multiple use case deep dives. Use case deep dive views let users find opportunities for improvement, identify which inefficiencies are affecting the performance of processes, and find solutions to problems. An example of a use case could be “Unbilled orders” or “Unshipped orders” or “Late deliveries” in the Order Management process.
This could even include showing the main KPI of the respective use case as a preview. Ensure to use tooltips to include the definition of the KPI so that also new users can understand its definition.
Text box for description: Use the pre-defined heading styles in the textbox editor to create visual hierarchy through font sizing and styling. But use with caution: mixing too many font sizes can make your View look cluttered and unorganized.
Button component to link to: Be precise with your wording on what users can expect from the app and offer actionable recommendations on what to do next and more importantly: where to go for that. Use buttons with links to other Views or View tabs to guide your user in navigating the app. Always link the App version and not the Studio version when creating links.
Tip
Using the link of a View created via the “share URL” feature lets you include tab information. This way you can create buttons that link between tabs of the same View.
When creating a 'Home' or 'Start Here' page, we recommend:
Thinking about how the 'Home' page will be used and by whom. Guiding questions could include: Who is landing there? Do they know what Celonis is? Do they know what this app is about? Do they receive training before they land here?
Ensure that users can easily navigate back to the 'Start Here' page from other parts of the application (e.g. via buttons). This helps them return to your guidance if they need further assistance.
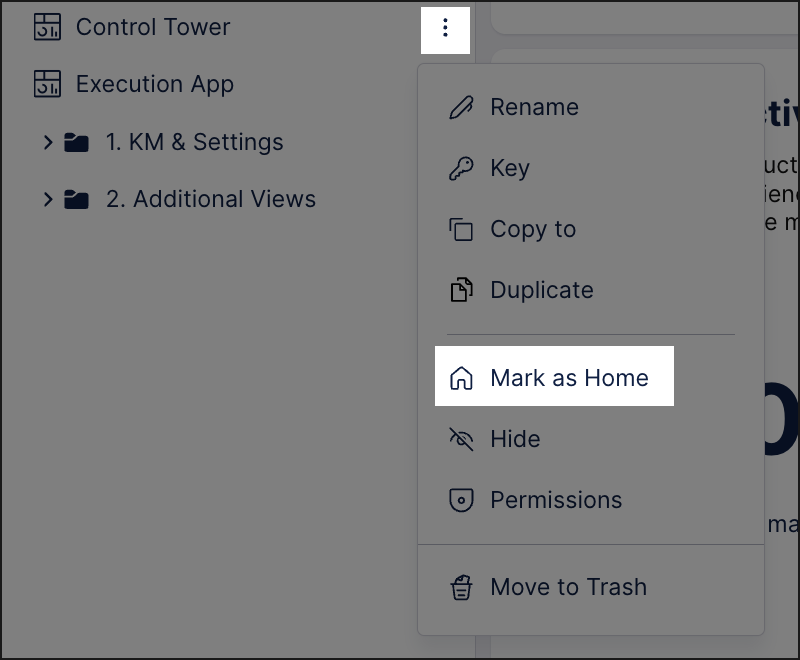
Use the Mark as Home setting to ensure your users land on this View when opening a package.