Configuring SAML single sign-on
View our security recommendations
Your team security and user provisioning settings may vary depending on your team size. Before setting up your team, we therefore recommend that you choose a coupling approach and relevant settings.
For more information, view our Celonis Platform security recommendations and best practice: Security recommendations
Your users can access the Celonis Platform using their existing Identity Provider (IdP) credentials by configuring SAML single sign-on (SSO) for your team. This process establishes a trust relationship between the Celonis Platform and your IdP, enabling secure user authentication when logging in to the platform.
The section provides important information for configuring SAML SSO. Review each of the following before starting Configuring and activating your SAML SSO:
We strongly recommend enabling Allow bypassing via login form (step 3) for your current configuration before changing your single sign-on configuration. If this setting is not enabled:
SAML SSO will be the only method of authentication, and users who are outside of your identity provider will be prevented from accessing the team.
In the event of a misconfiguration, your team members, including admins, can be locked out of your Celonis Platform.
Note
In the event of a misconfiguration, enabling Allow bypassing via login form (step 3) still allows users to access your team with an email address and password.
Your Celonis Platform team environment supports SAML 2.0 with the SHA-256 hash algorithm. However, it doesn't support SAML logout functionality or identity provider initiated flows.
When configuring SAML SSO in Celonis Platform , you must select a certificate management method (step 4). For more information about your options, see Certificate management for SAML SSO.
When configuring your IdP, some configuration fields may require specific formatting. For specific field information, see External identity provider configuration .
Celonis Platform only supports the HTTP POST binding for SAML SSO. Ensure your IdP is configured accordingly, as other binding types such as HTTP redirect are not supported. For more information, see Using HTTP POST binding for SAML SSO.
To configure and activate your SAML SSO:
Note
The next step is to configure your IdP.
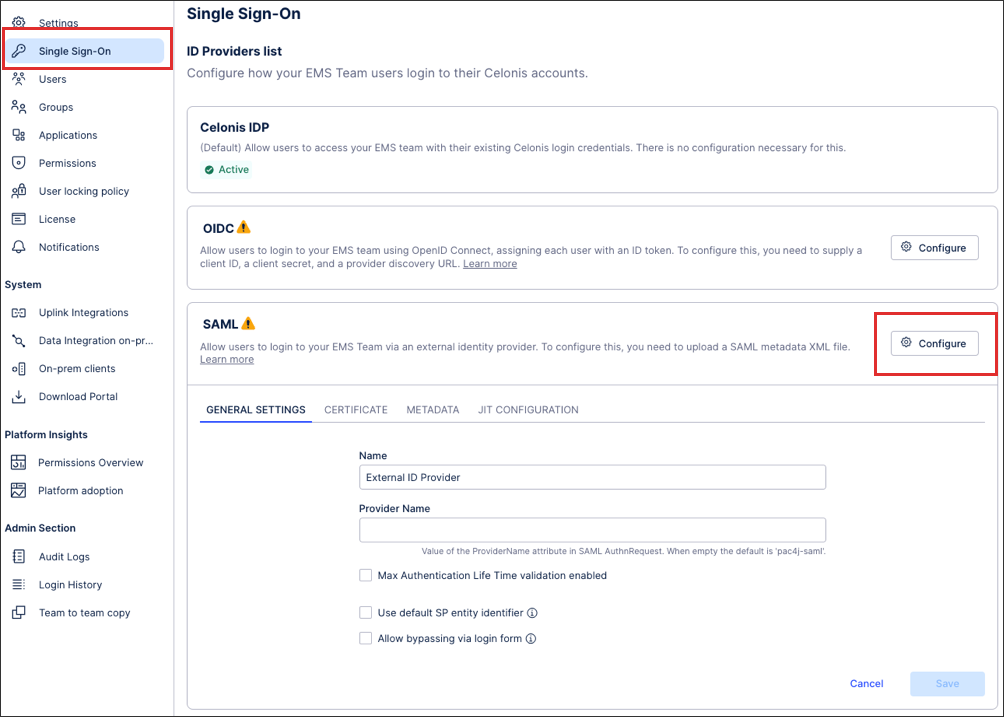
Click Admin & Settings - Single Sign-On.
Click SAML - Configure.
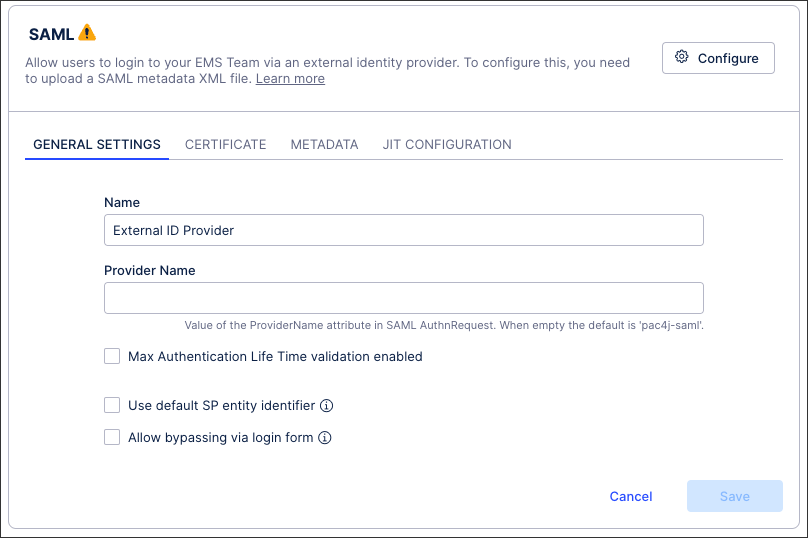
Configure your general settings, including a name and provider name.
You can also configure the following options here:
Maximum Authentication Life Time: This enables you to control how long the user remains signed in (minutes), with the default set to 480 mins (8 hours). After this time, the user must sign-in again with their identity provider to regain access to your Celonis Platform .
If this option is disabled, the maximum period allowed by the Celonis Platform is 10 years. Typically this means that the timeout period is defined and configured on your identity provider.
Allow bypassing via login form: Enabling this option allows users who are outside of your identity provider to still access your team with their email address and password. This feature is beneficial when working on implementation projects or when adding the user to your identity provider is not possible. You can also enable this option if you need to give a member of the Celonis Support team access to your environment to problem solve.
When bypassing via login form, your login from can be accessed via the following URL format:
https://<team>.<realm>.celonis.cloud/ui/login
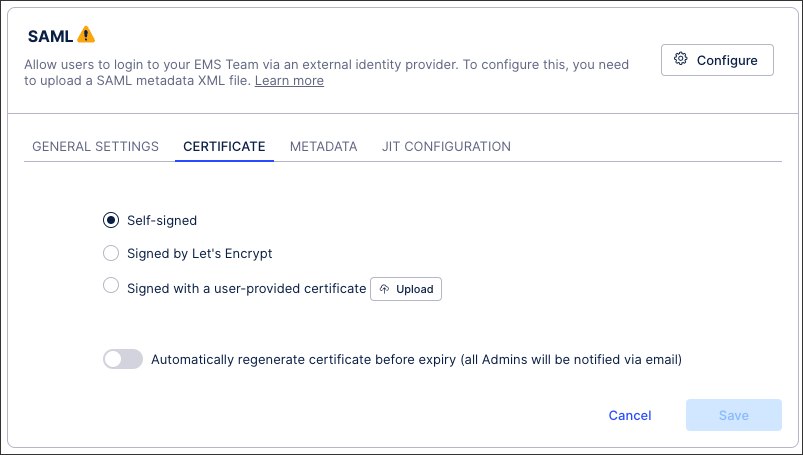
Select your certificate type (uploading a user-provided certificate if necessary).
See: Certificate management for SAML single sign-on
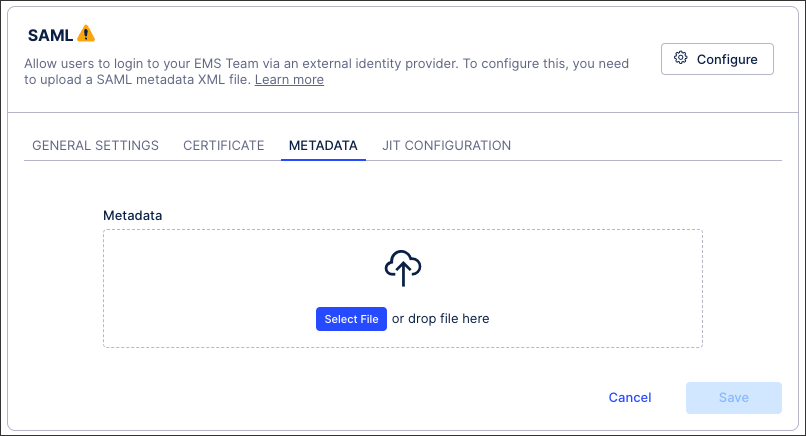
Upload your identity provider's metadata. The metadata is an XML file representing the configuration of your SSO and should be available for download in the SSO’s admin interface.
You can also use the following features here:
Download SP Metadata: The service provider (SP) metadata file allows for quick configuration on the identity provider and is available once you have uploaded your identity provider metadata file.
Enable SP Metadata Access via Public URL: This gives you access to a link that reduces the manual effort involved when certificate changes are needed. Depending on your identity provider, this link can enable you to automatically update the certificate when required and without accessing the Celonis Platform to do so.
Click Save.
When prompted, either click Activate or choose to activate your configuration later.
Your SAML SSO is now active, with all active users at that point being automatically logged out of your Celonis Platform .They’ll need to re-authenticate to regain access.
Note
The following external identity providers have been successfully configured with Celonis: Microsoft Azure, Okta, OneLogin, ADFS, and JumpCloud. For detailed instructions on how to configure these providers, refer to their documentation.
When configuring your SAML SSO on your external identity provider, the following information may be needed:
Relying Party Trust Identifier (also referred as entityID, Identifier, or Audience)
Use the following format:
<team>.<realm>.celonis.cloud
For example: testcompany.eu-1.celonis.cloud
Relying Party Identity Provider Endpoint (also referred as Reply URL or Recipient)
The login type should be: SAML Assertion Consumer.
And the endpoint should be provided in this format:
https://<team>.<realm>.celonis.cloud/api/auth-handler/saml/callback?client_name=SAML2Client
For example: https://testcompany.eu-1.celonis.cloud/api/auth-handler/saml/callback?client_name=SAML2Client
Login URL
As your SAML SSO configuration can't be tested within your Celonis platform team, you should use the following URL format to access the platform:
https://<team>.<realm>.celonis.cloud/
For example: https://testcompany.eu1.celonis.cloud/
Celonis platform signed authentication requests
To enable your Celonis Platform to sign authentication requests sent to your identity provider you must set your WantAuthnRequestsSigned attribute to 'true'.
For example:
<md:IDPSSODescriptor protocolSupportEnumeration="urn:oasis:names:tc:SAML:2.0:protocol" WantAuthnRequestsSigned="true">User Attributes and Claims - custom email assertion
For many identity providers (such as Azure), you must create a custom "email" assertion to the User Attributes and Claims section.
Azure AD: By default when you add a new claim in Azure AD, the namespace is set to:
http://schemas.xmlsoap.org/ws/2005/05/identity/claims.
Delete this default setting and leave the namespace field empty.
The new claim "email" must be lowercase and mapped with an email address field from the source, as individual users in Celonis are must have unique email addresses.
Using HTTP POST binding for SAML SSO
The Celonis Platform only supports the HTTP POST binding for SAML SSO. Ensure your IdP is configured accordingly, as other binding types, such as HTTP Redirect, are not supported.
These include:
Microsoft Azure: Ensure the SAML response is configured to use HTTP POST for the ACS (Reply) URL.
Okta: In the SAML app settings, ensure the Response Binding is set to HTTP POST.
OneLogin: In the SAML app configuration, set the SAML Assertion Consumer Service Binding to HTTP POST, and ensure both SAML assertions and responses use the POST binding.
ADFS: In the Relying Party Trust settings, open the Endpoints tab, and ensure the ACS endpoint uses the POST binding.
JumpCloud: In the application’s SAML settings, set the SAML Response Binding to HTTP POST.