Creating and managing process categories
Process categories are the second highest level of structuring within Process Designer, used as a container for your main processes, sub-processes, repository objects, and related content. By creating and using process categories in Process Designer, you can organize and classify your process models, making them easier to navigate, manage, and reuse.
In Process Designer, you start with three default categories. These are suggested categories only, meaning that you can edit, adapt, and delete them if required. You can also create your own categories at any time, organizing your content to suit your organization's structure.
Default categories: Core, management, and support processes
By default, your process overview page starts with three commonly used categories:
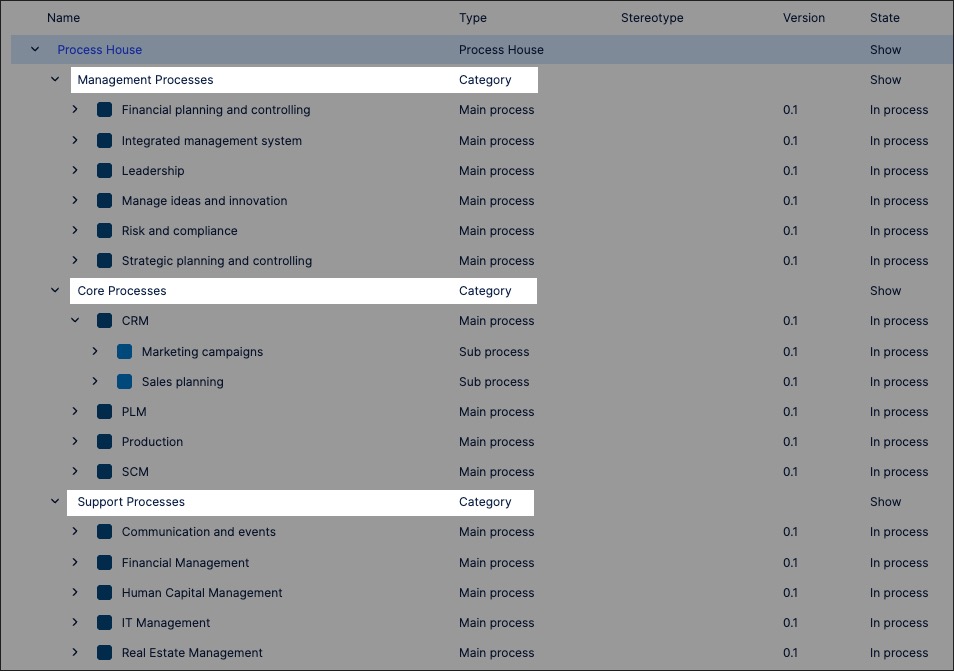
Core processes: This category often includes cross-functional processes that deliver value to clients (or in other words: processes that clients are willing to pay for). They represent essential activities that a business performs to reach its business goals and fulfill its mission.
Management processes: This category can be used for management related processes, such as financial planning, strategy, governance, and leadership initiatives.
Support processes: This category is commonly used for administrative and operational work. This can include human resources, travel and expenses, communication, and license management processes.
In this example, you can see suggested uses for each of the default process categories.
In addition to using the default categories provided, you can create your own process categories.
To create a category in Process Designer:
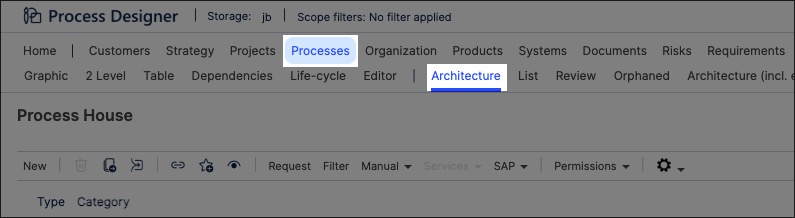
From the main menu, click Processes - Architecture, opening the Process overview page.
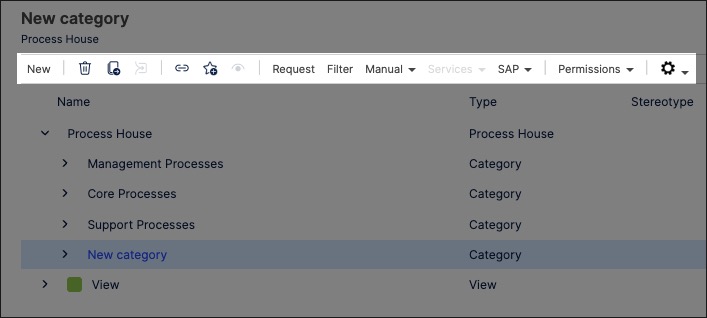
Enter a Category Name and click New.
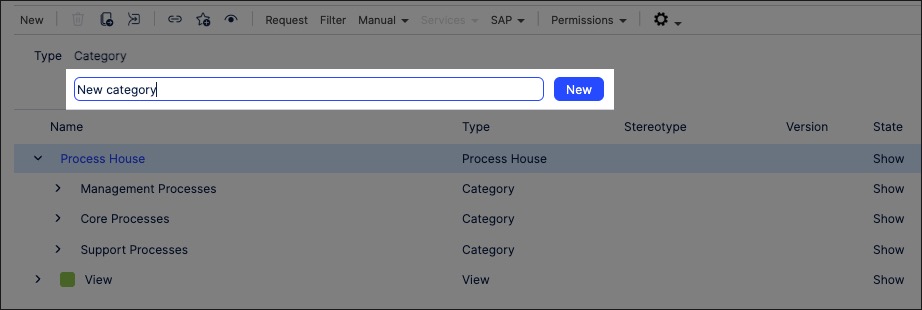
The category is created and listed on the process overview screen.
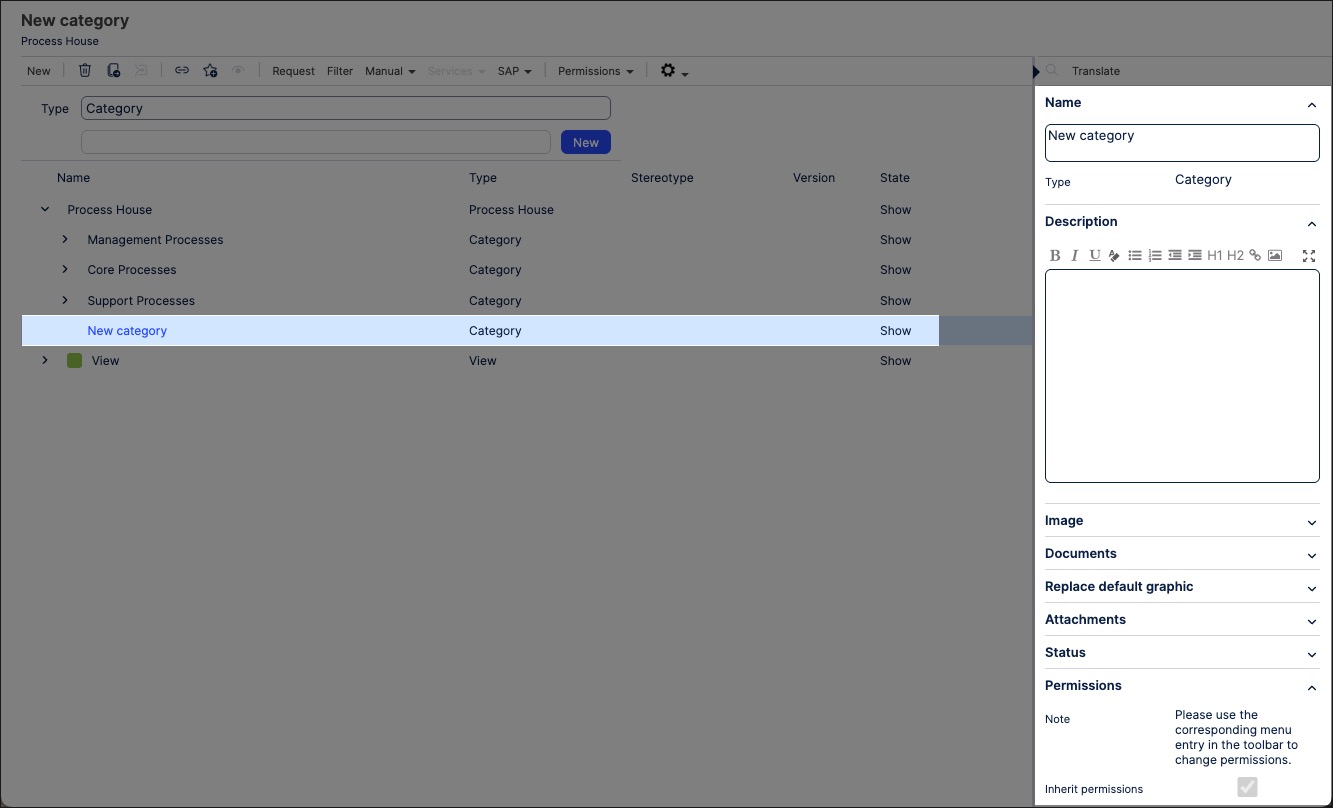
Select the newly created category and edit the category details in the side panel.
You have the following category options here:
Name: A text based reference for this category.
Description: Use the text editor to add further information about this category, helping your team to identify and correctly use it.
Image: Add a PNG or JPEG file that represents this category. For best quality, upload an image with a ratio of 16:9 and 1300 x 640 pixels in size.
Documents: Add any documents that are related to this process.
Replace default graphic: Choose to replace the overview graphic for this category from an existing one within the Process House.
Status: Select whether to Show or Hide this category.
Permissions: This displays an overview of existing permissions.
Sorting: Set the weighting for where this category is sorted in related to others in the Process House. The top level is zero, with subsequent levels typically weighted by 10, 20, 30, 40, and so on.
Hierarchy levels: Choose which level this category should sit in the category hierarchy by entering a numerical value.
Translate: Based on your selected languages, you can manually map your descriptions and fields.
As an architect, you can manage existing Process Designer categories by clicking Processes - Architecture and selecting the category you want to edit.
|
In addition to editing the category details (with full options available above), you can use the toolbar to manage categories.
 |
The toolbar options here include:
Delete category: This permanently removes the category, with no recovery possible.
Move the category: This allows you to move the category within the Process House, such as moving the category inside another category.
Consolidate: This allows you to merge / consolidate all elements from this category into another one.
Link: Create a shareable link to this category.
Favorite: Add this category to your favorites, giving you easier access to it.
Subscriptions: Add a link to this category to your subscriptions.