Execute Action Flows in Skills
In this topic, we are going to show how to execute an Action Flow from a Skill. If you're interested in how to do it the other way around, i.e. execute a Skill from an Action Flow, please refer to this tutorial.
If you want to use the OAuth connection method for your Action Flow, your OAuth app must have the following scopes assigned to it:
skills:read
skills:execute
studio.packages:read
For more information, see Registering your OAuth client in the Celonis Platform and OAuth scopes.
In your Action Flow editor, go to edit mode.
Click the '+' icon to add a new module.
Search for Celonis.
Select Custom Webhook.
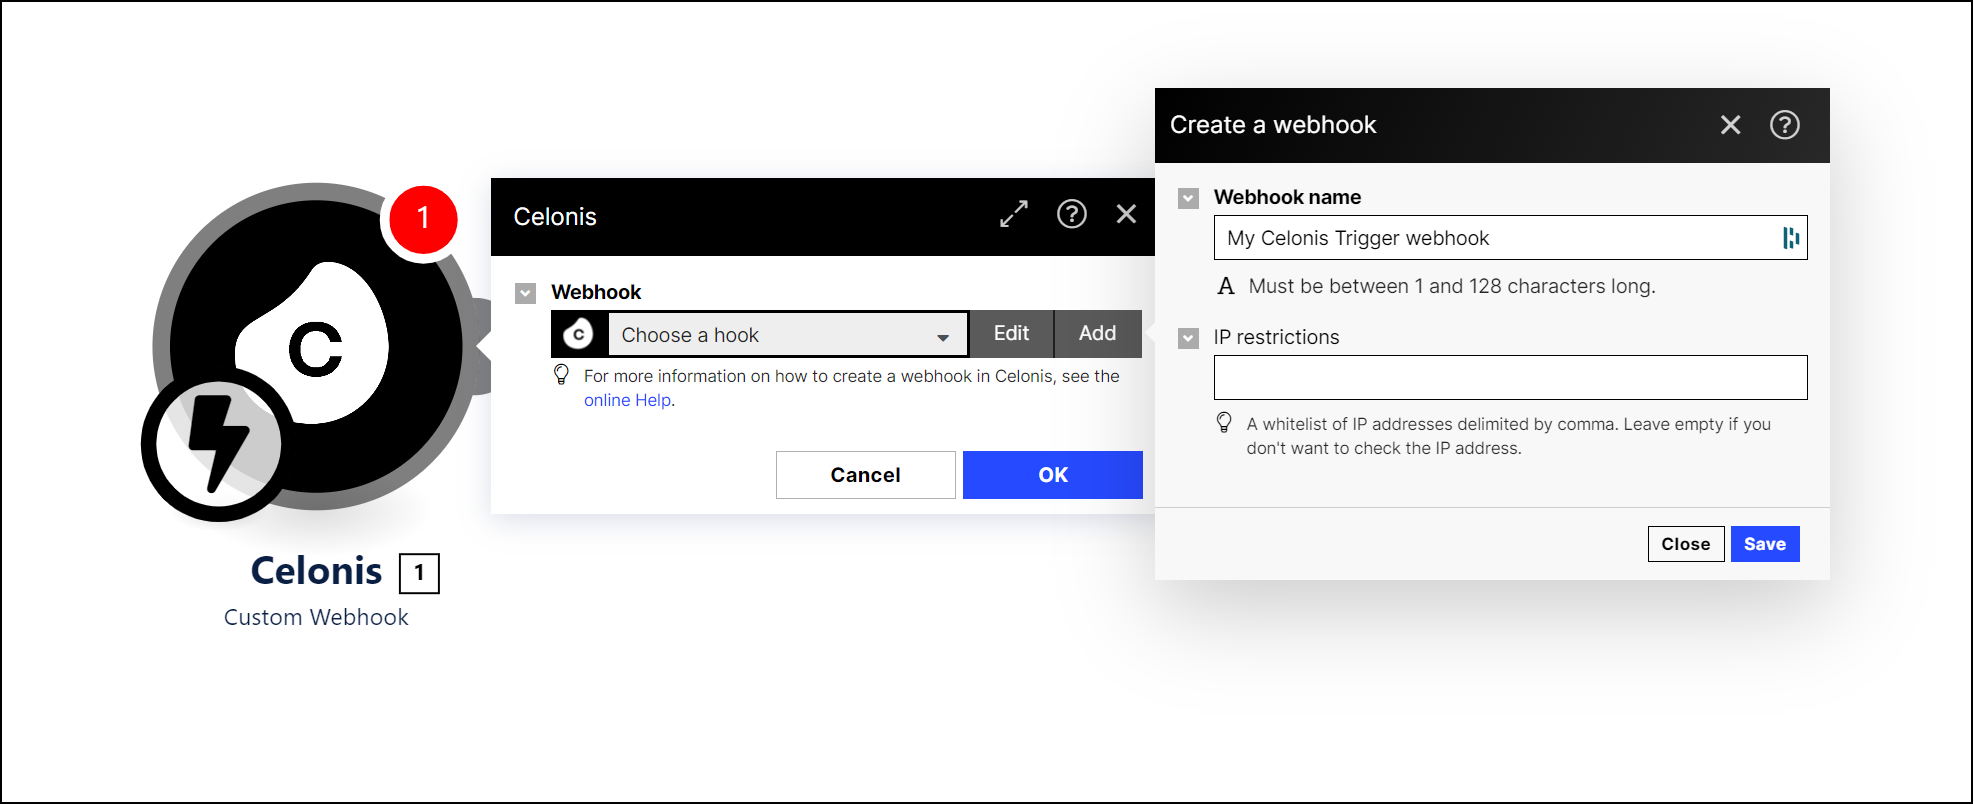
Configure a Webhook by clicking Add in the Action configuration by naming it and adding any IP restrictions. The URL is created automatically.
Save your changes and deploy the Action Flow to make it accessible from within skills.
Go to the Skill from which you want to execute an Action Flow.
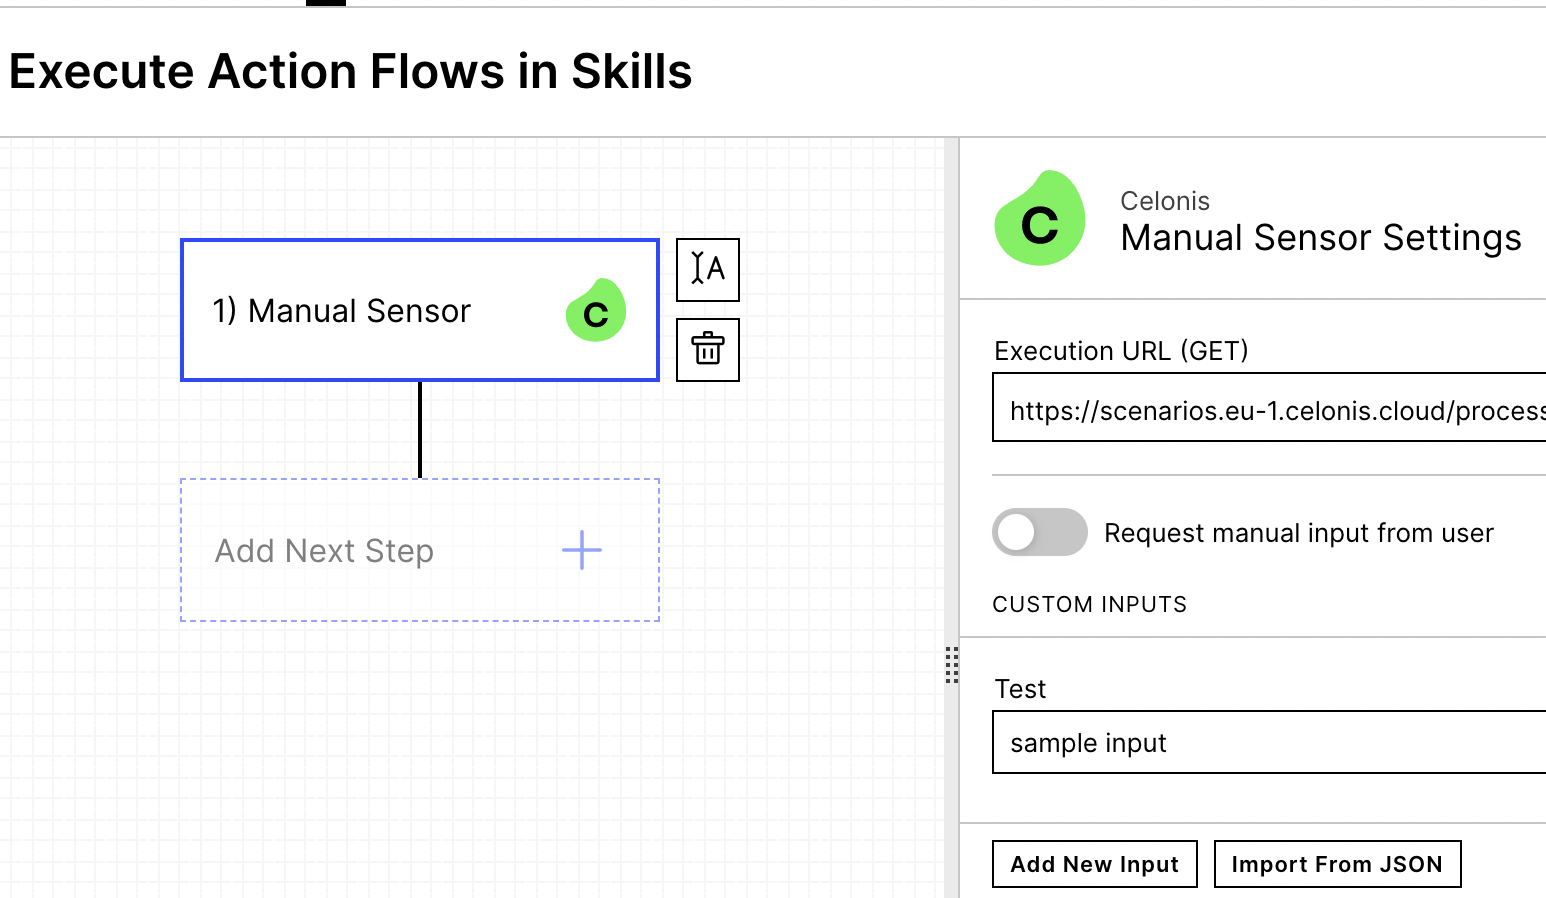
Add a sensor to your Skill. In the example below, we've used a Manual Sensor, allowing for a manual execution of the skill by copying and inserting the execution URL in the browser.
(optional) You can specify a custom input (called 'Test' with the initial value 'sample input' in the example below) that will be passed on to the Action Flow to be executed.
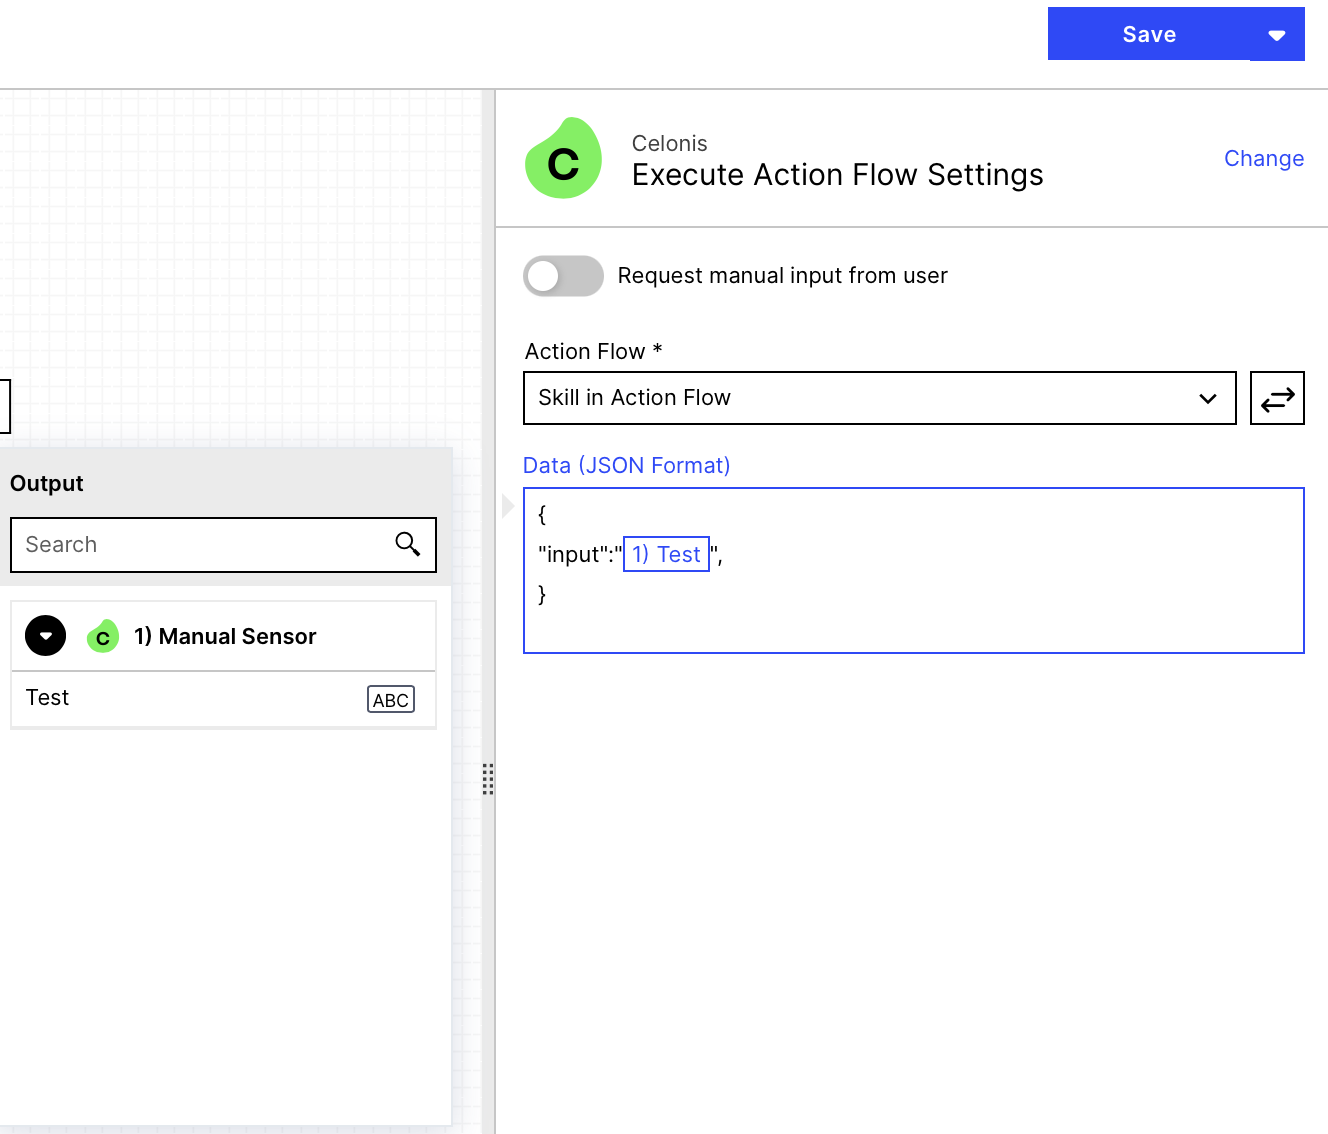
Go to Next Step > Celonis > Execute Action Flows and select the Action Flow you want to use.
The list displays Action Flows that have been deployed.
In the Data field below, you can specify additional data to pass to the Action Flow in JSON format.
Note
An additional menu called 'Output' opens when you click on the 'Data' field. From this menu you can see all outputs from previous Skills (in our case: the Manual Sensor) that you can reference in the 'Data' field to be forwarded to the Action Flow.
If you now run your Action Flow once by clicking the Run icon in the upper right corner, you will have the parameters available as inputs, allowing you to use them in further Actions.
Important
Your Action Flow will only receive something if your Skill sends something, so make sure to trigger the Sensor to make the Skill send Bundle(s) to the Action Flow.
To use output generated from Action Flows in Skill, you must add a response action module to your automation. This module is responsible for sending content back to the Skill in which you execute the Action Flow.
Configure a Webhook Response Action:by adding a new Action → Webhooks → Response Action.
In your Action Flow, go to edit mode.
Click on the '+' icon to add a new action.
Search for Webhooks.
Select Response Action.
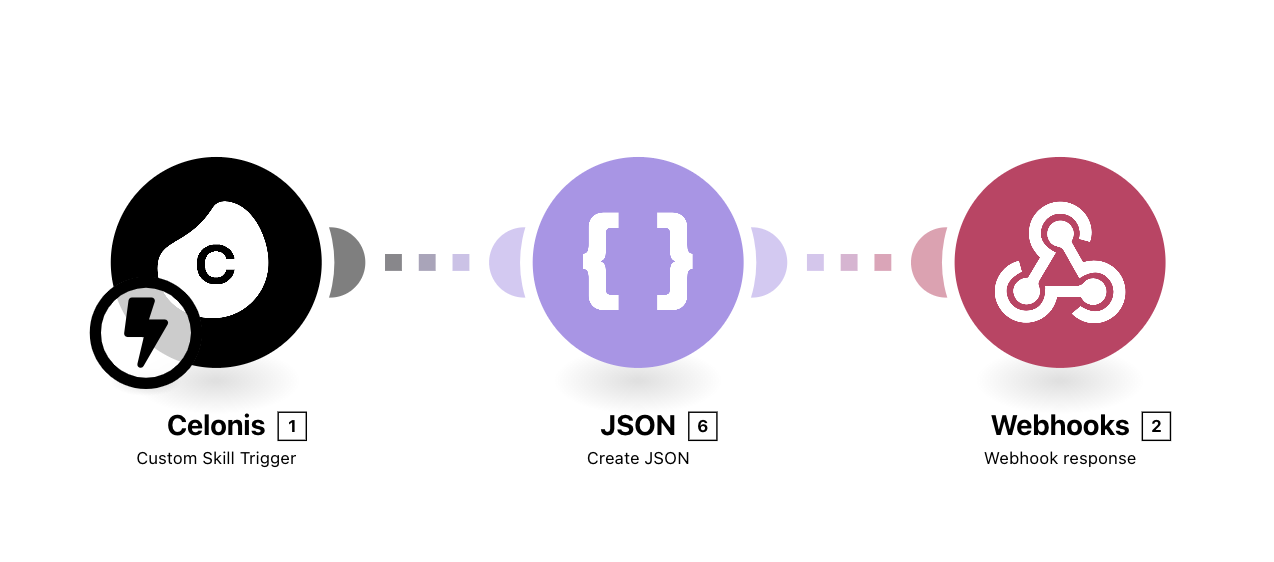
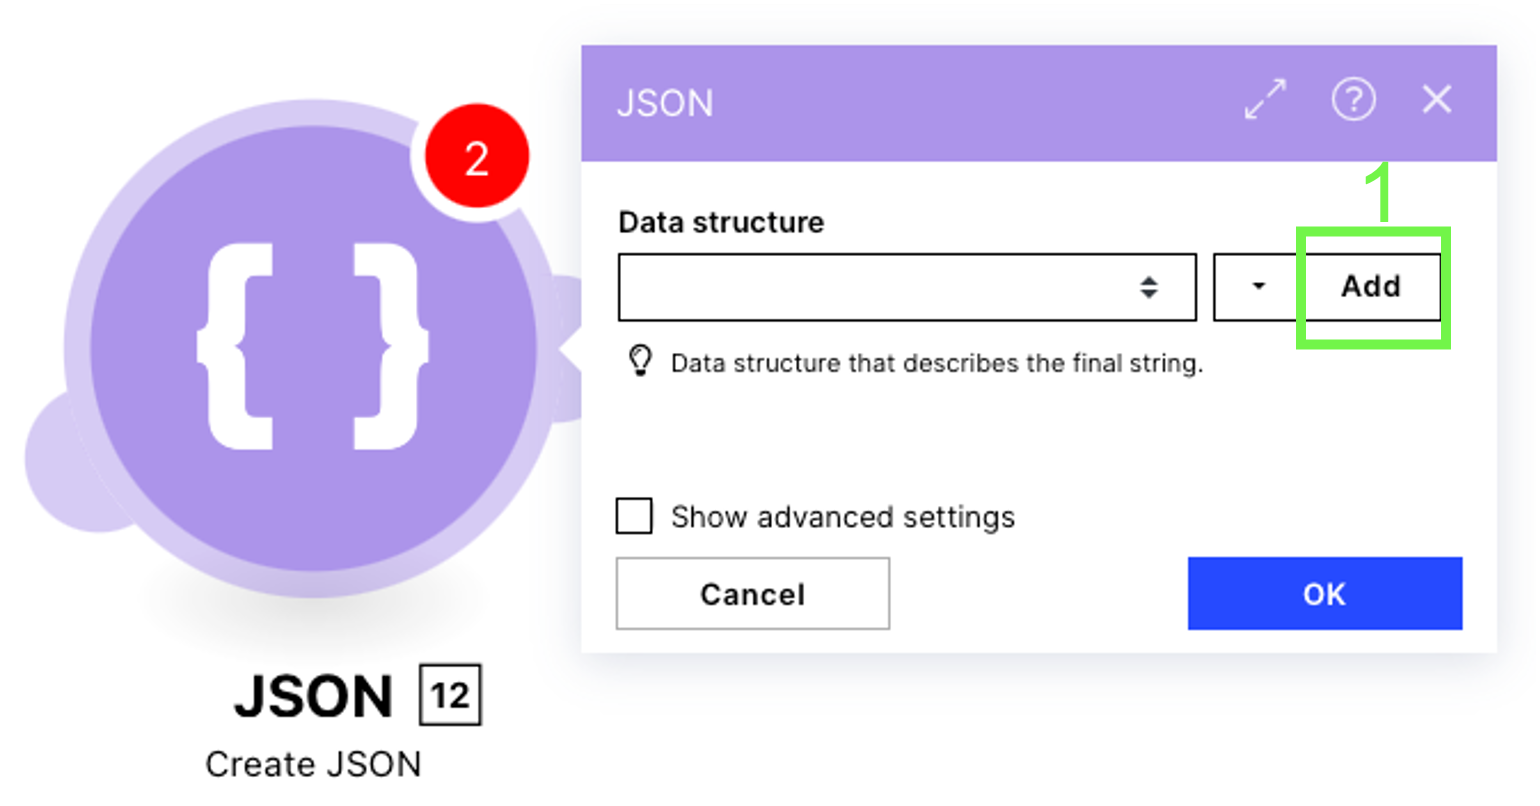
In this example, a JSON-formatted text is created to send back to the Skill. Follow these steps:
Create the data structure: Add a new data structure (1) and assign it a name (2).
Define an item: Click to add an item (3) to the structure. Choose a name for this item (4) and remember it, as you will need it shortly.
Verify and save: Add the item (5), ensuring your configuration matches the provided screenshot. Once confirmed, save the data structure (6).
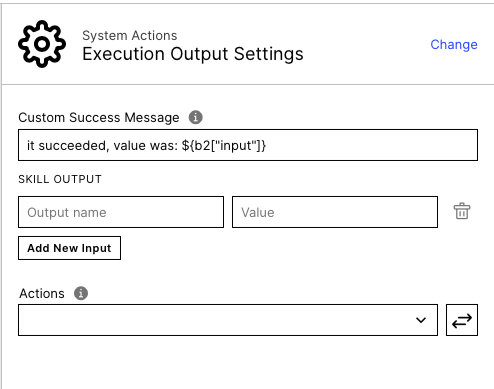
Map the module data: After saving, a new field will appear bearing the item name you just defined (shown as 'input' in the screenshots below). Fill this field with the corresponding item from the Celonis module (7).
Confirm the setup: Click OK (8) to save and finalize your configuration.
After saving, publishing, let the Action Flow run and trigger the sensor with the corresponding link to get the Custom Success Message defined before, in our case, including the data we passed to the Action Flow and sent back.
 |