Administration and sharing of favorites
Clicking on the user name in the header on the right lets you make the basic settings (language, client, and so on).
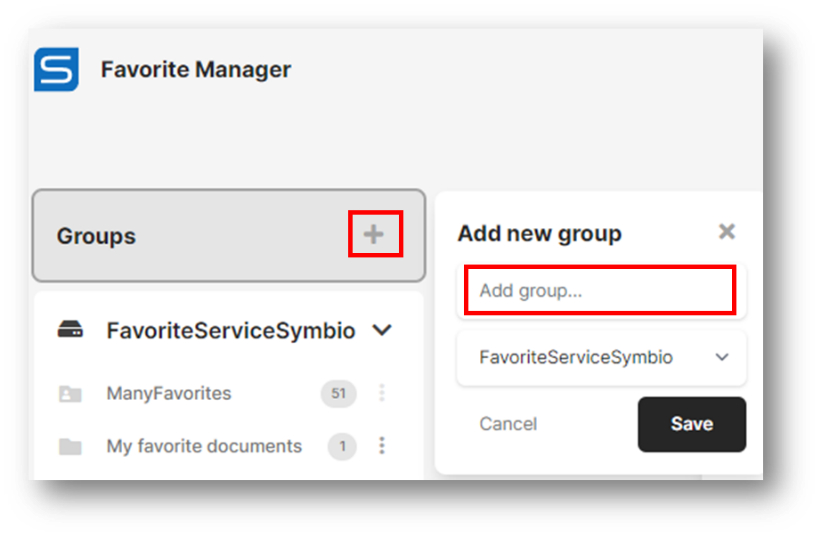
To use the Favorite Manager efficiently, the Groups to which the respective favorites will later be assigned must first be created.
Clicking on the "+" symbol opens a dialog in which the new group's name is entered. The corresponding one must be selected from the drop-down list if several clients are used. Then confirm with Save.
 |
As soon as favorites are assigned to this group, their numbers are displayed in the gray circle behind the respective group.
Note
The order of the groups cannot be changed. We recommend a prefix (abbreviation) before the name, e.g., consecutive numbering or letters in alphabetical order.
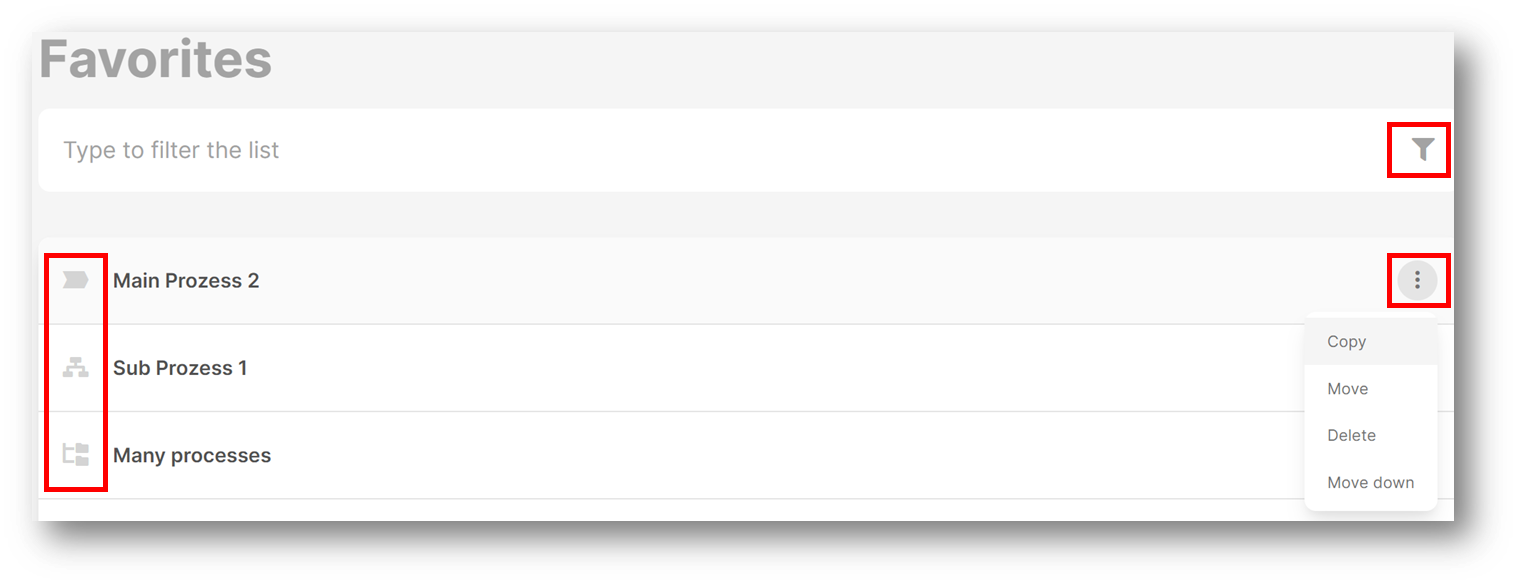
The current contents are displayed in the Main Content by clicking on the group. The corresponding object type, e.g., Main Process or Category, is displayed as a preceding gray symbol. The corresponding object type is also displayed when hovering over it.
Specific search terms or subwords can be found quickly in the list using the filter function.
 |
Figure 60 – Administrate favorites
Click on the three-dots symbol to edit the selected favorite. You can:
Copy to another favorite group.
Move to another favorite group.
Delete.
Move up or down in the list.
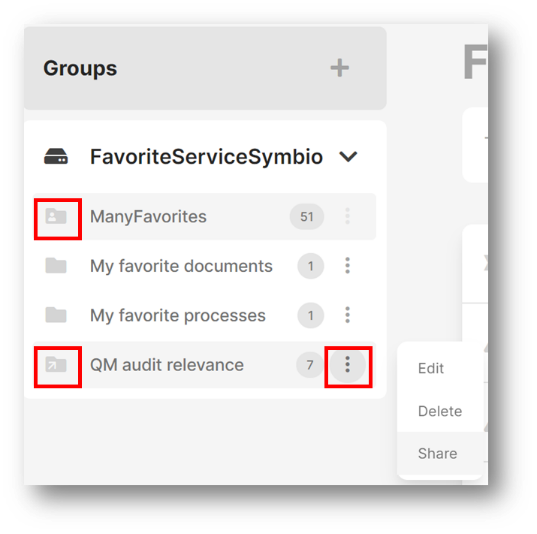
The groups themselves can also be edited by clicking on the 3-dot icon. You can:
Rename.
Remove (including the contained favorites).
Share (with other users).
 |
Sharing groups allows regulatory requirements and policies to be communicated easily and quickly to affected employees. Relevant processes or documents are defined as favorites and shared.
Click Share and enter the first letters of the user with whom you want to share the favorite group. Then, select the user from the dropdown.
 |
The gray folder icon of the group now gets a small arrow, or if favorite groups are received, a small person icon is displayed. A hover function also shows the users in the form of tags with whom the group is shared.