Scheduling and managing View reports
In addition to manually exporting your Views as PDFs, you can also schedule automated emails to be sent with the View report PDFs attached. These emails can be sent on a daily, weekly, or monthly basis, with the ability to customize the email and the PDF settings for each report.
The following is an example of an Order Management Report email:

External content in View reports
For security reasons, any content on your Views that tries to load from websites other than your Celonis domain will not display correctly. This security measure helps protect against risks associated with loading data from external sources. For example, images or data from other sites won't load. Only content from your Celonis domain is allowed.
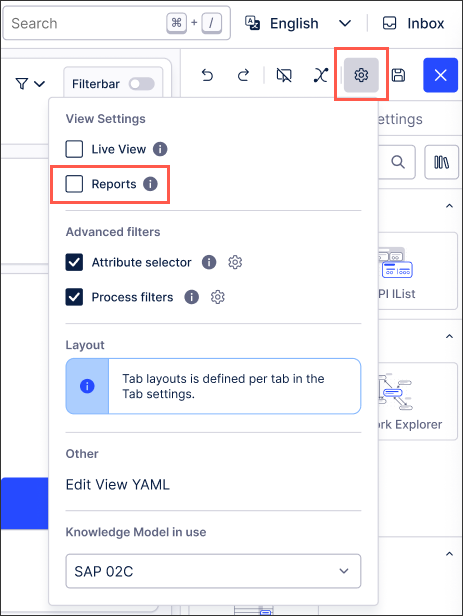
Before you can schedule View reports, the feature must be enabled within the View settings. To enable View reports, click View Settings - Reports:
Once View reports are enabled, the following user access is available:
Analysts: Users with Analyst permissions can view all scheduled reports for this View, either within the View or in the published App.
App users: Users with App permissions only can only view the reports they have scheduled in the published App.
Reports use published versions of the View
Reports always use the published version of the View, meaning that the View and Knowledge Model must be published for the latest data to display in the report. Alternatively, you can schedule reports directly from the published App.
To schedule View reports within the View or published App:
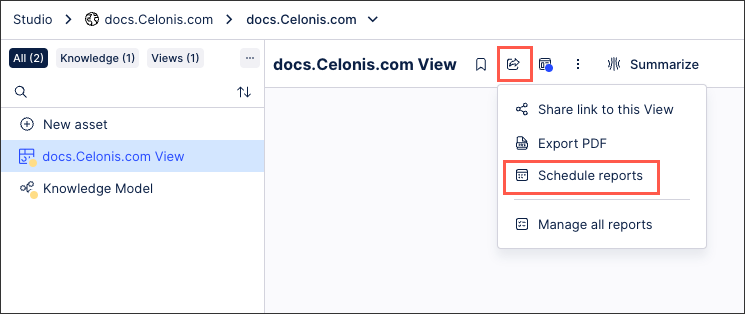
Click Share or export View - Schedule reports:
Choose your scheduling settings:
Connection type: Choose between a personal or technical connection type:
Personal connection: The report is linked to the creator's user. The data permissions of the creator also apply for the export.
Reporting application connection: The report is linked to a technical connection (independent of the creator). Recommended to prevent reports from breaking if the creator leaves or permissions change. The creator must ensure correct permissions for data access.
To create a technical connection, you need access to a reporting application (managed in the Admin & Settings area). See: Technical connection for View reports.
Add recipients: Choose who will receive the emailed reports from this view. Either select from team members or enter comma separated email addresses. You can also include reply to, copied, and blind copied addresses for the reports.
Enabling external sharing
By default, you can only share reports with other members of your Celonis Platform team. The interface flags any email addresses that aren't associated with a team member.
As an team admin, you can enable external sharing of reports. This sends a request to team admins, allowing them to decide on a case-by-case basis.
To enable external sharing, click Admin & Settings - Enable external sharing.
Set a schedule: Configure the frequency and delivery times of the report emails.
Define email: Customize the subject, body, and attachment name for your email.
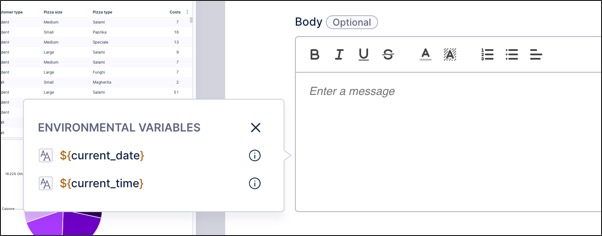
You can also use environmental variables such as current date and time to adjust the email subject and content dynamically:
PDF settings: Configure how your PDF report looks and what information it includes. For settings and examples, see: View reports - PDF settings.
Click Schedule Reporting.
The report schedule is set and begins on the configured date and time. The schedule is then displayed on the Manage all Reports page, with further information available here: Managing View reports.
The reports you schedule using this feature are sent from or with the following:
Address: noreply@celonismail.com
Mailed-by: mail.celonismail.com
Signed-by: celonismail.com
Encryption: Standard encryption (TLS)
We recommend adding the celonismail.com domain to your allowlist, preventing the emails being flagged as spam.
When configuring your View reports, you have the following PDF settings available:
Tabs
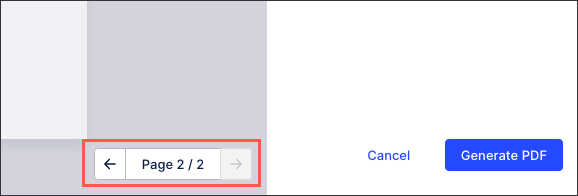
Choose whether to export all tabs or select specific tabs to export. When multiple tabs are selected, each tab will be displayed on a separate page in your PDF by default.
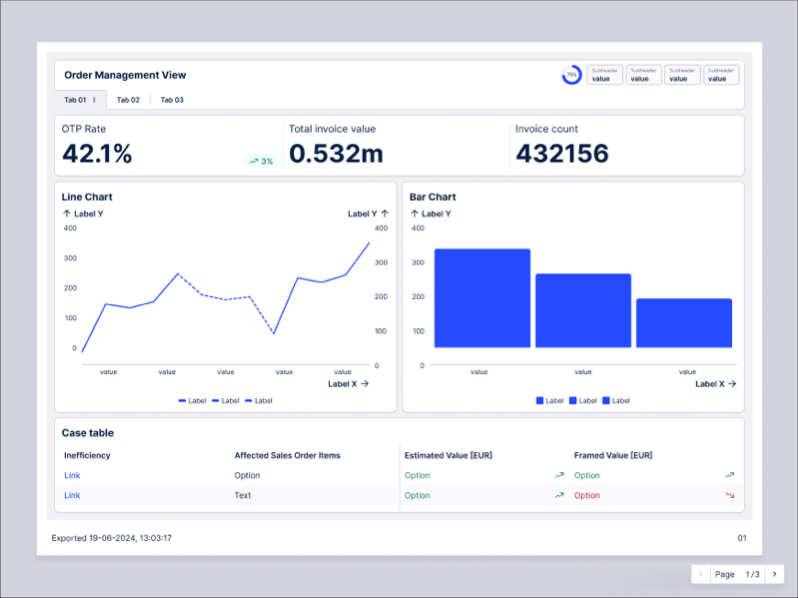
In this example, two tabs are being exported as two pages in the PDF:
 |
Page orientation
Set the layout of the page to either landscape (horizontal) or portrait (vertical).
As a comparison, this is the same View exported in both landscape and portrait.
Landscape
Portrait
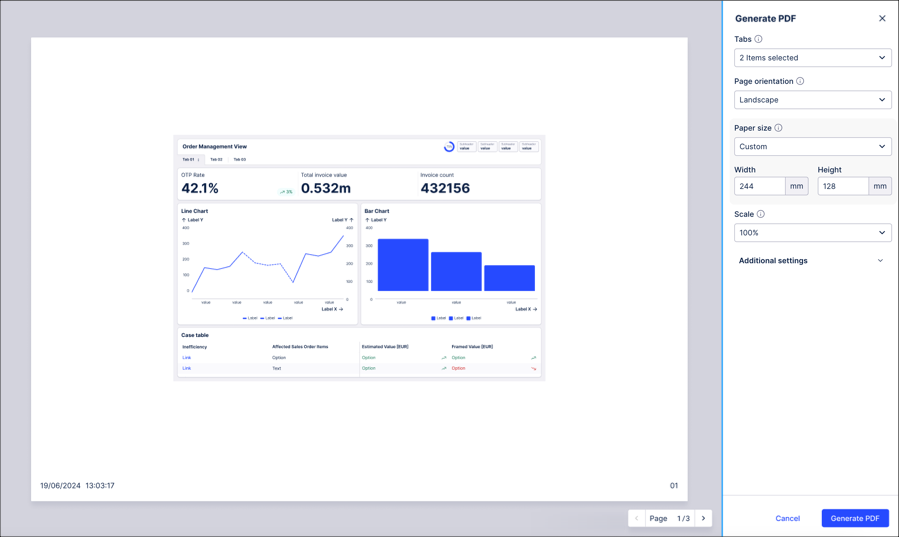
Paper size
Select from:
A4
Letter
Tabloid
Custom (in mm)
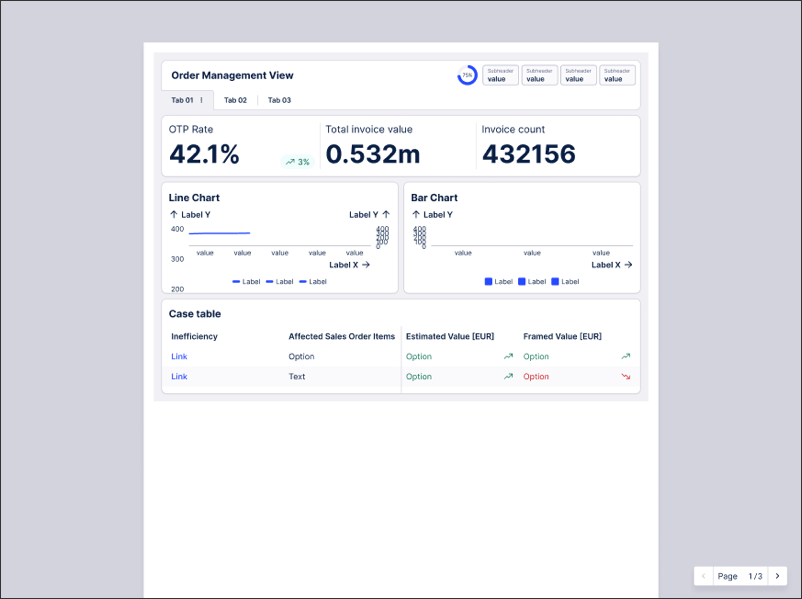
In this example, a smaller custom size has been entered and the view is resized:
 |
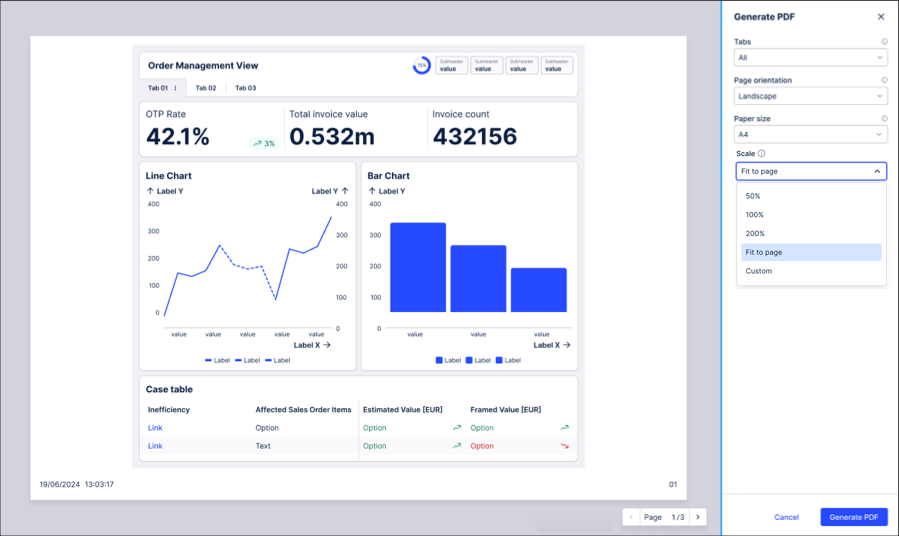
Scale
Adjust the scale of your View within the page, meaning the content is scaled up or down proportionally. By default, this is set to 'Fit to page'.
In this example, the scale is set to 'Fit to page' and the View is adjusted:
 |
Include page number
Choose whether to display the page number that the viewer is currently looking at. This is displayed on the bottom right of the PDF.
In this example, the viewer is currently looking at the 1st page (of 3).
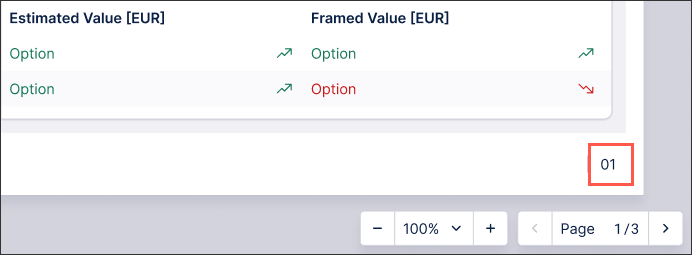 |
Note that the page selector controls only the export preview, this is not an alternative including the page number.
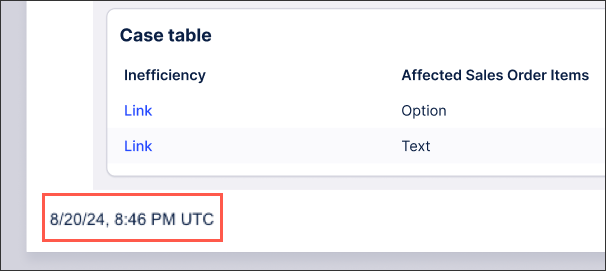
Show export date and time
Choose whether to stamp your export with the date and time the View was exported. This is displayed on the bottom left of the PDF.
In this example, the View was exported on 8/20/24 at 8:46 PM UTC.
 |
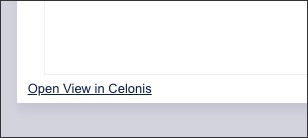
Include View share URL
When selected, the exported PDF will include a clickable link that opens the report in the Celonis Platform. To open this URL, the person must be a member of the Celonis Platform team.
The share URL is displayed at the bottom left of the PDF, as seen in this example:
Reports use published versions of the View
Reports always use the published version of the View, meaning that the View and Knowledge Model must be published for the latest data to display in the report. Alternatively, you can schedule reports directly from the published App.
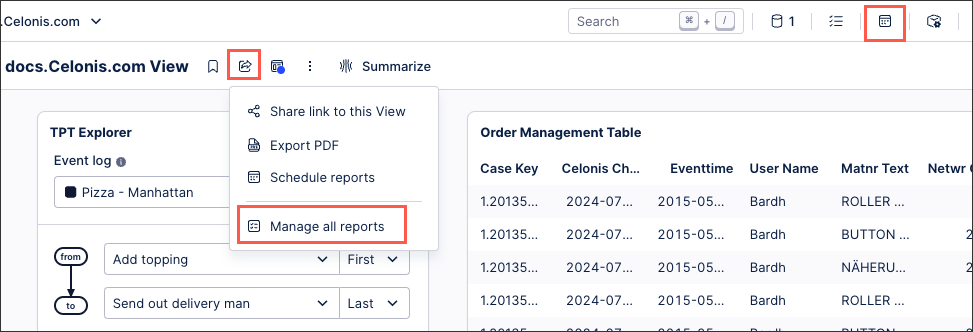
Once a View report has been scheduled, you can manage it from within the View by clicking either Share and export View - Manage all Reports or using the Reports icon:
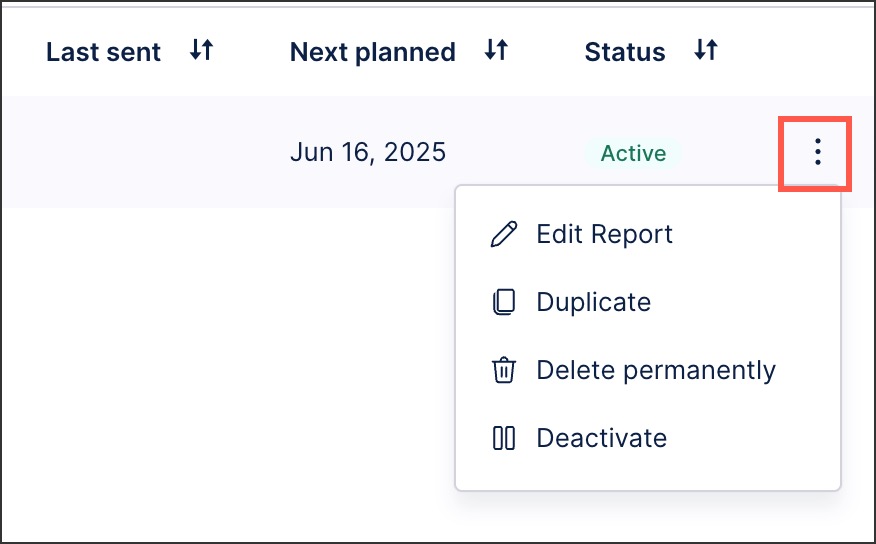
You can then manage the individual schedules by clicking Options and selecting from the following:
Edit Report: This enables you to edit the scheduling settings, such as frequency and PDF settings.
Duplicate: This opens a draft report creation screen using the existing report as a template. You can then continue to configure and then schedule the report.
Delete permanently: This deletes the scheduled report from your View, with no recovery possible. Once a scheduled report is deleted, it must be manually created again.
Activate / Deactivate: This either starts, restarts, or stops the schedule from running, depending on the current state of the schedule.
 |
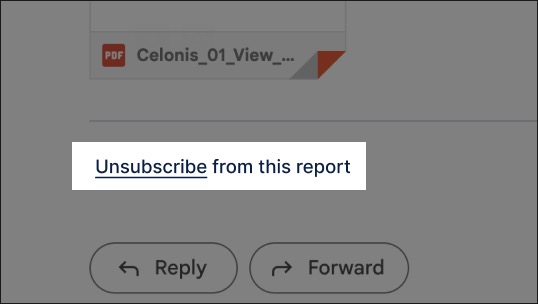
In addition to permanently deleting and deactivating View reports, you can also unsubscribe to them directly from a report email. This removes the requested email address from the report mailing list only, meaning that the report continues to run as scheduled.
To unsubscribe from an individual report:
Open the report email and click Unsubscribe from report.
The Celonis Platform website loads.
Enter the email address you want to unsubscribe with and then click Unsubscribe.
A confirmation email is then sent to the address from noreply@celonismail.com
Open the email and click Confirm Unsubscribe.
The email address is then removed from the report mailing list.