Configuring tasks and actions for the object-centric Open Purchase Order Management app
The Open Purchase Order Management app comes with skill templates to create tasks and carry out default actions. Customize these for how you want to use tasks and actions and integrate them into your users’ day-to-day activities. You can change or delete the default skills and add your own custom skills. At the end of these instructions, we’ve noted the most important things to check and configure if you’re using the supplied skills.
Here’s how to configure the app’s tasks and actions. Make sure you’ve published the app before you start this step, as the tasks are only created when you do that.
In the Celonis navigation menu, select Studio.
Find the Open Purchase Order Management app in your Studio space navigation.
Expand the package’s structure using the arrow.
Expand the Skills folder and the Tasks and Execution subfolders.
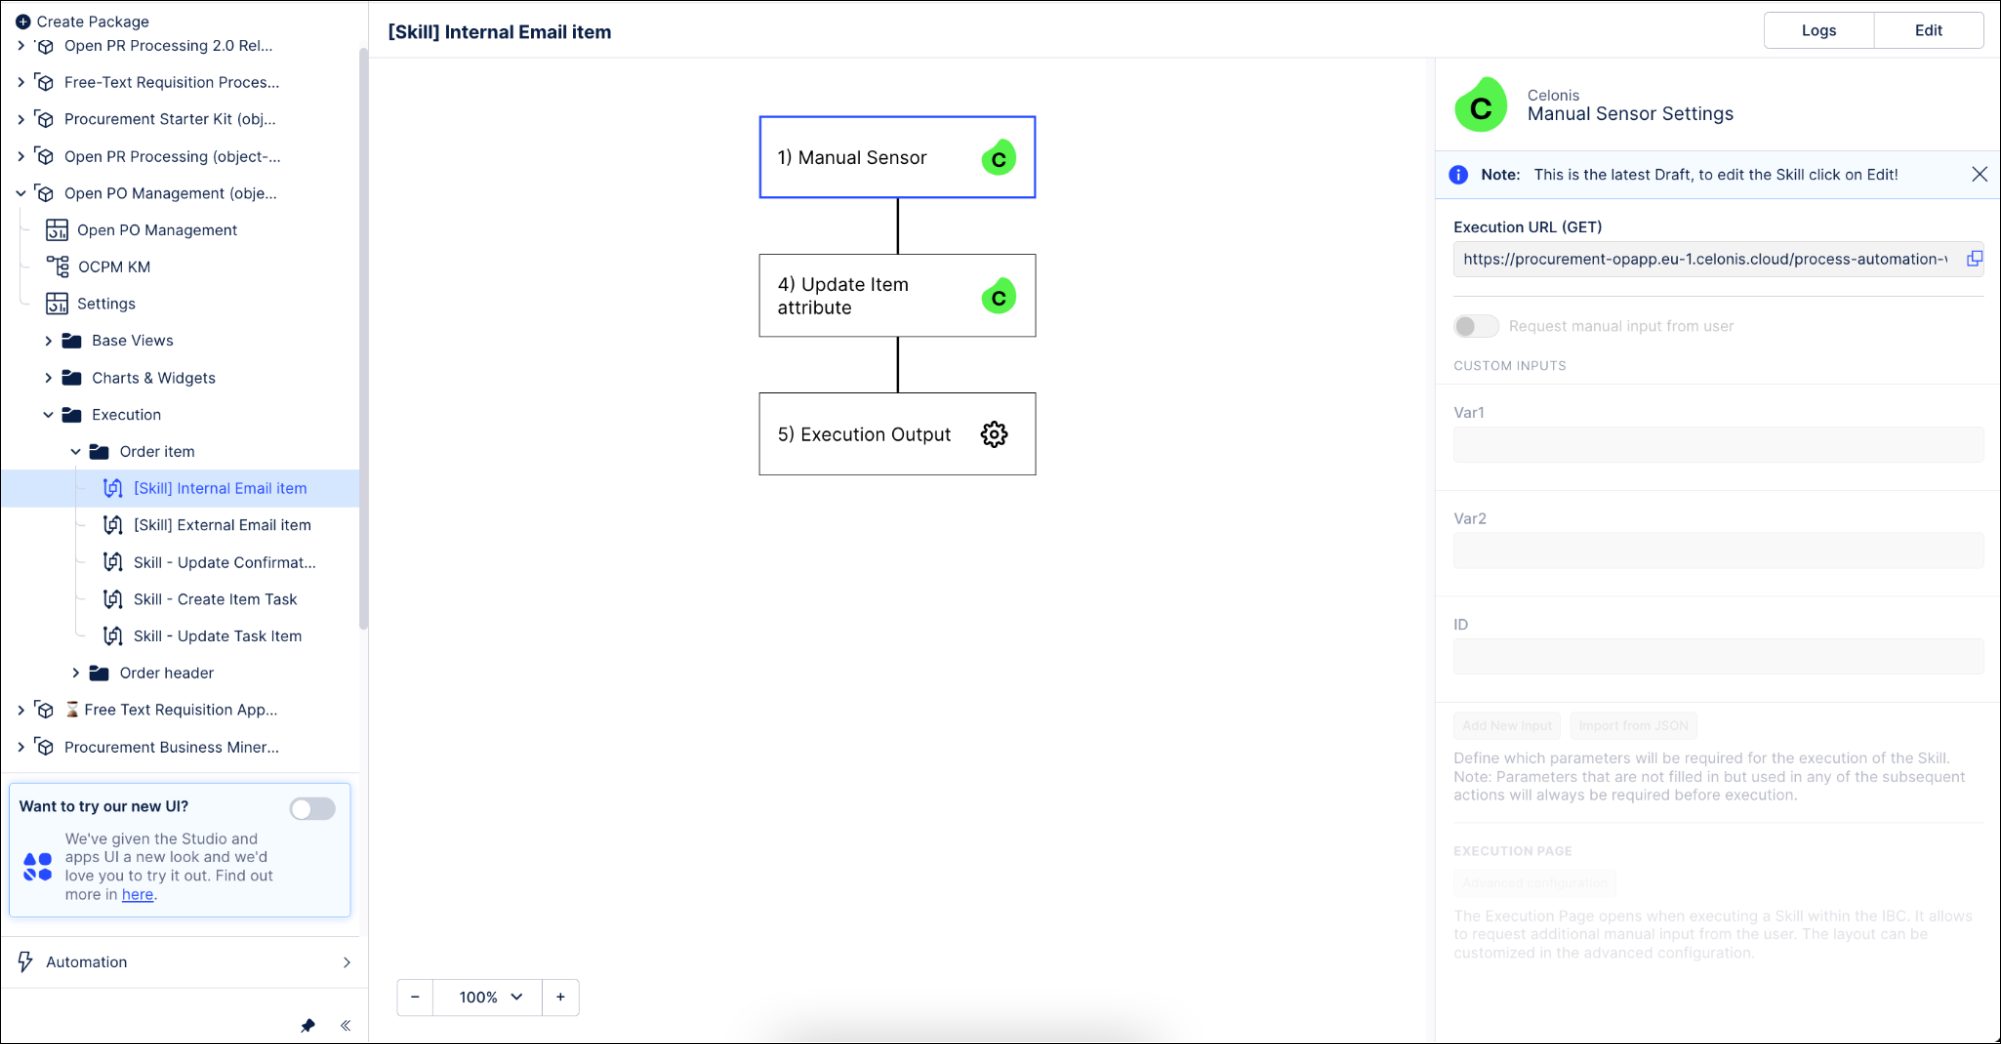
Select any of the listed actions to open it in the visual editor.
Click Edit to work with the skill template.
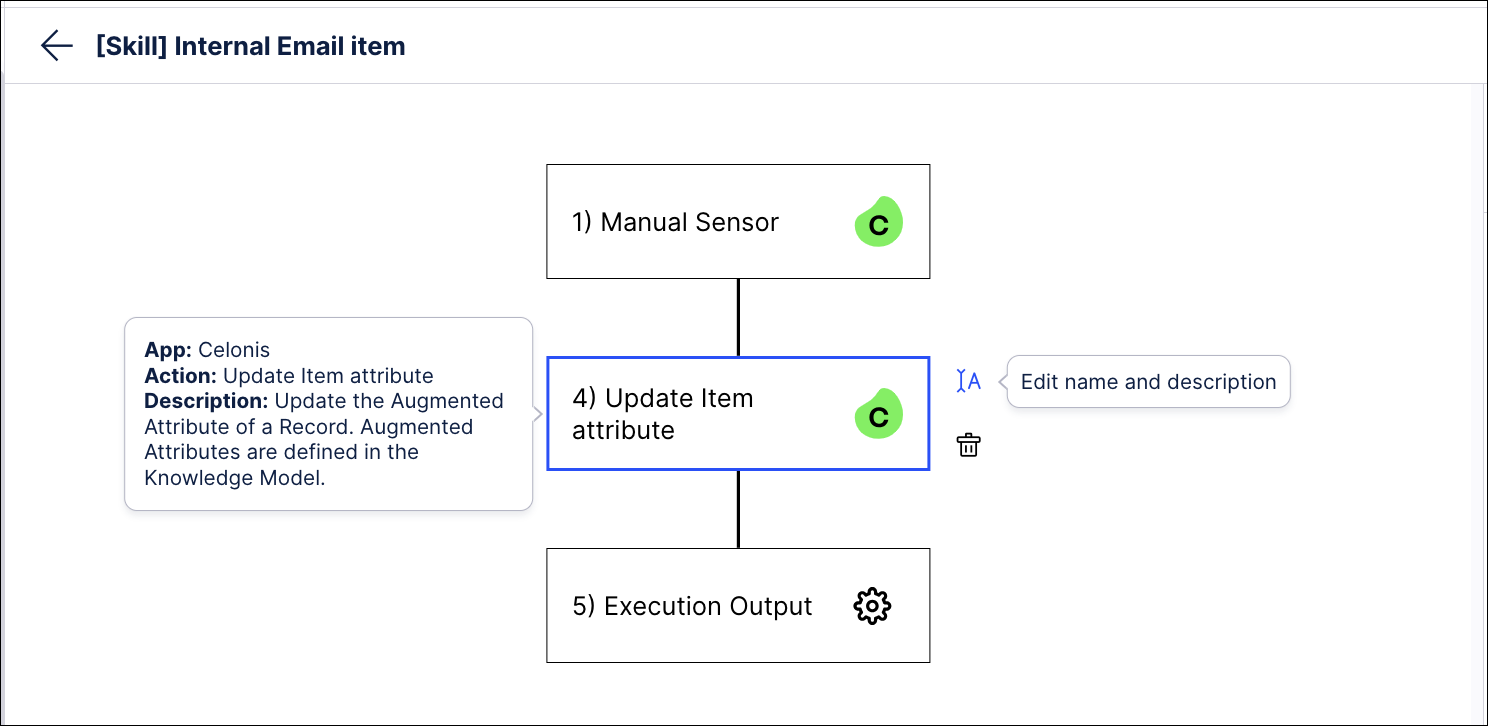
To change the name or description of an action, select the step and click the Edit name and description icon next to it.
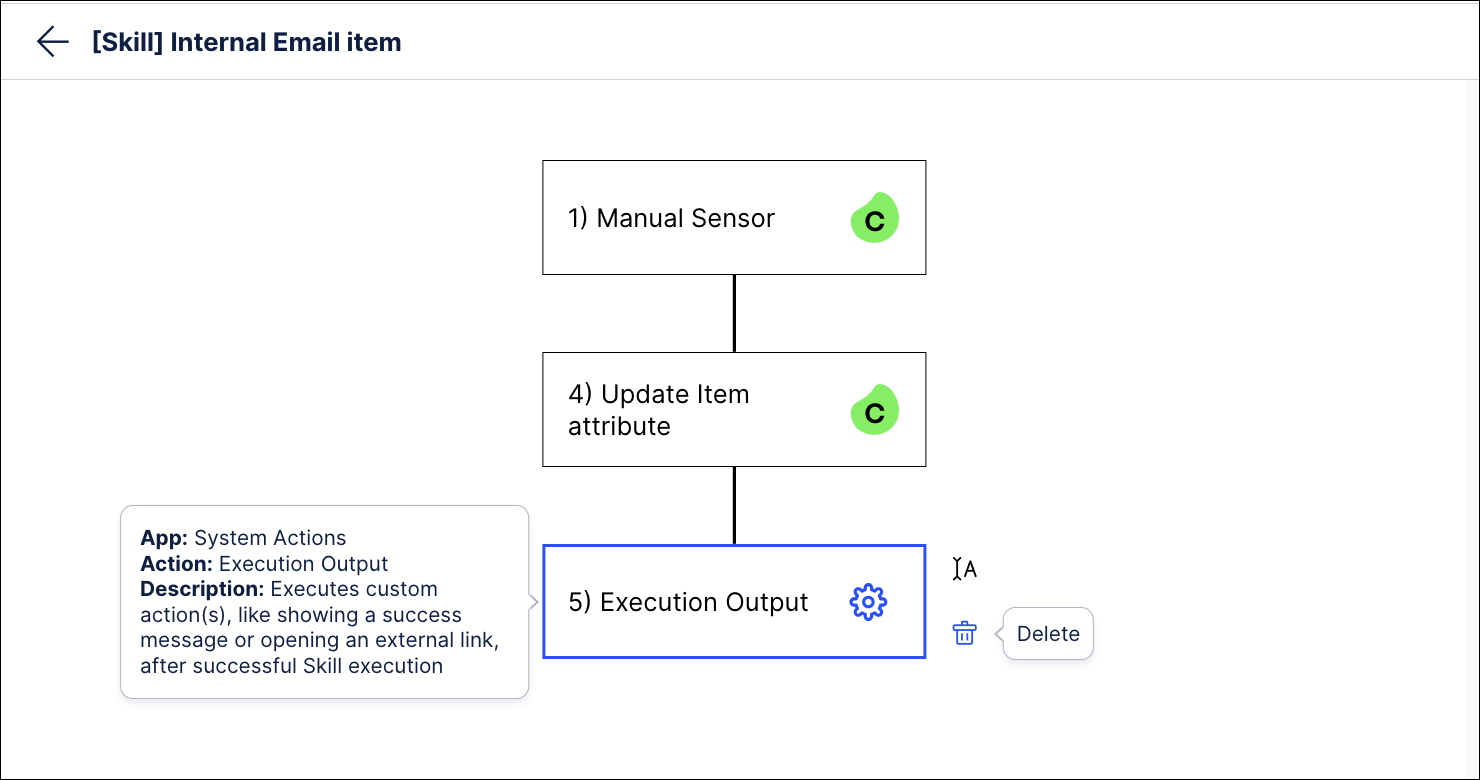
To remove a step in the skill template, select the step and click the Delete icon next to it.
Click on a step to configure the action. Here we’re working with the step “Execution Output” to change an email template.
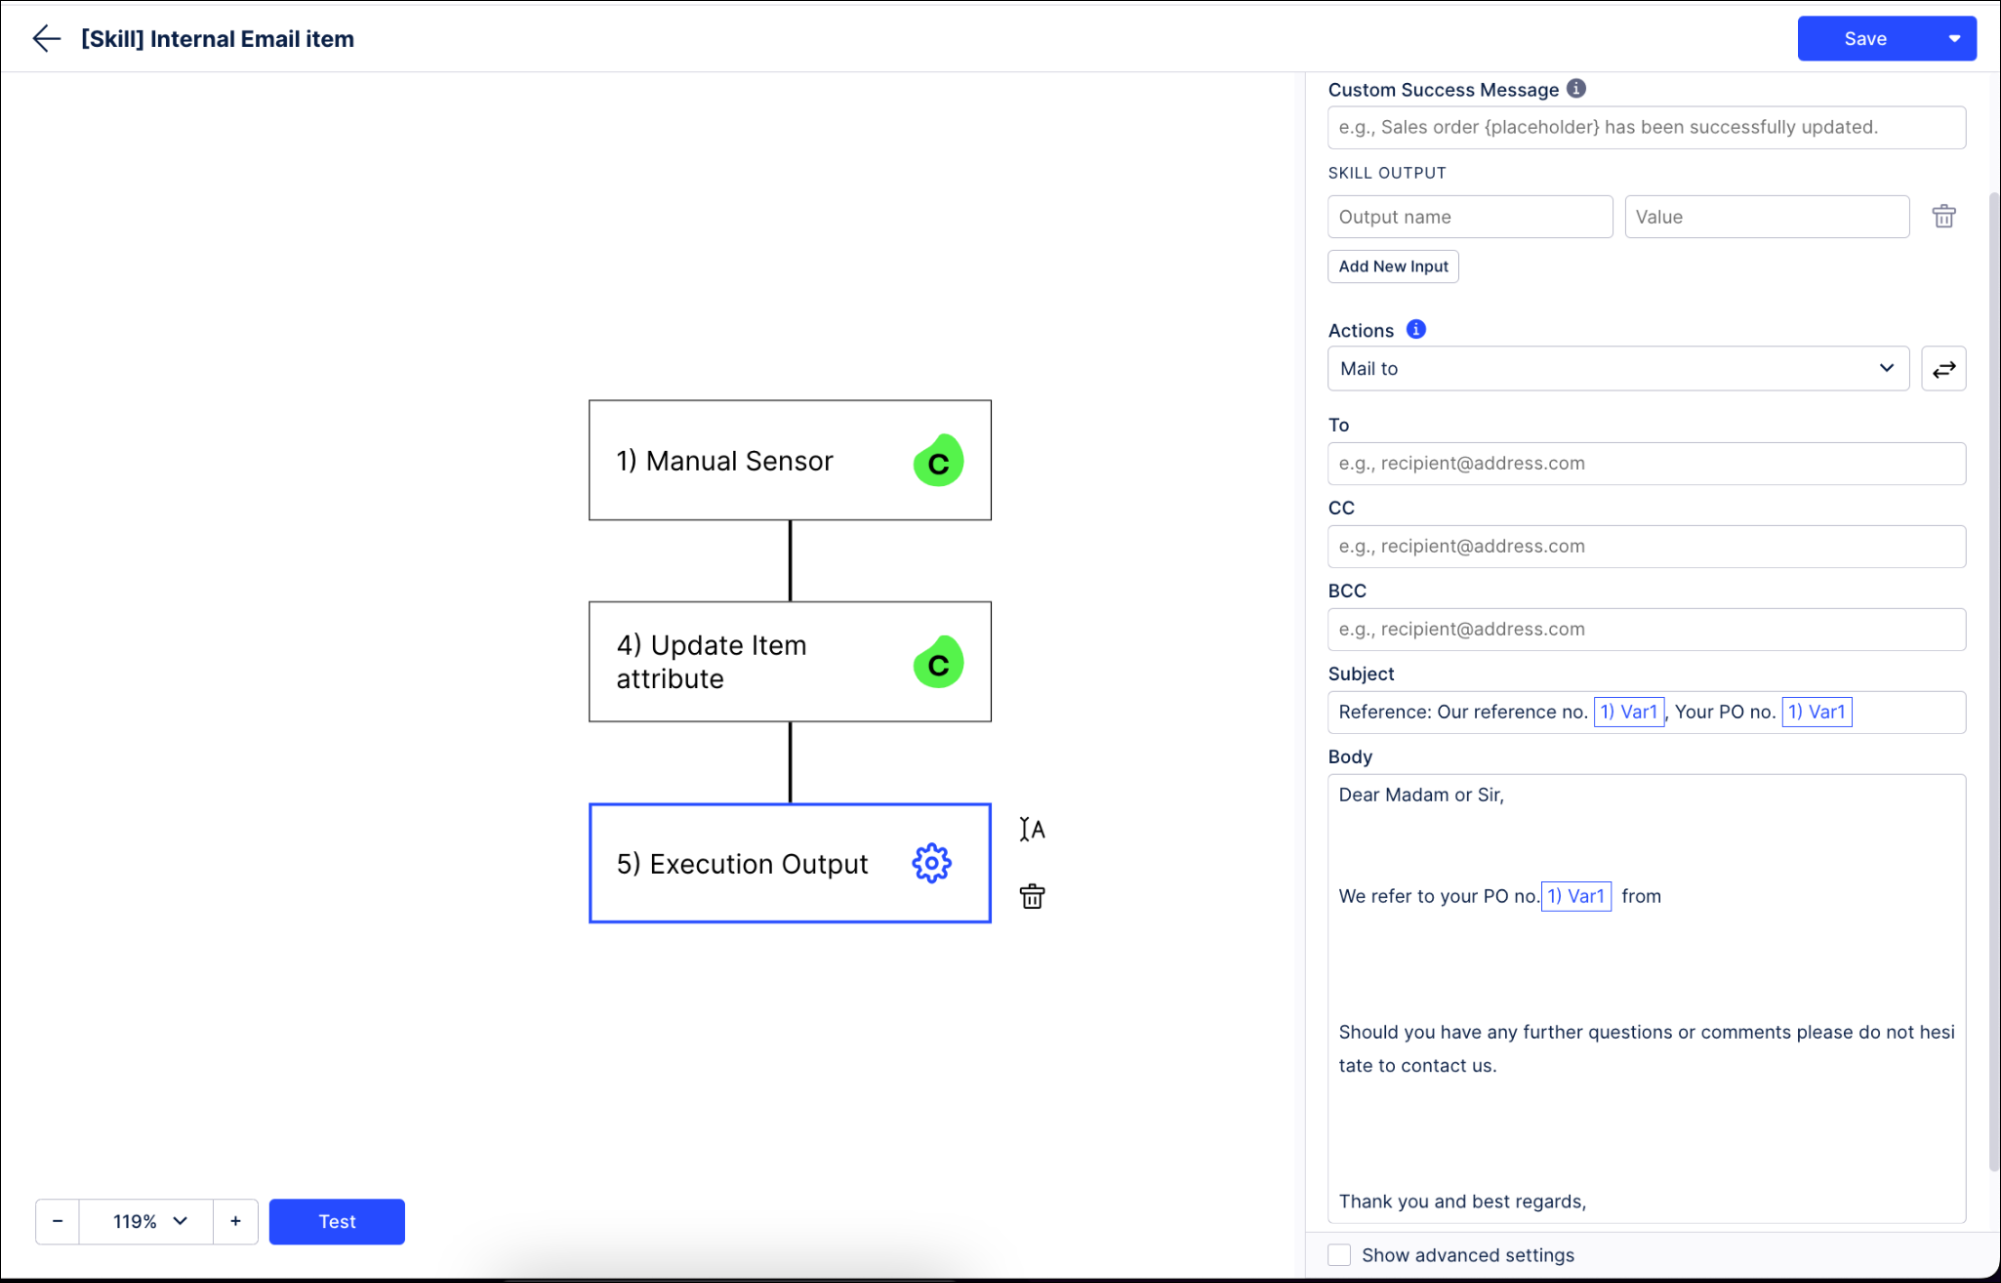
Click Save when you’ve finished configuring a skill.
When you’ve made all the customizations you want to the skills, use the Publish Package button at the top of the screen in your Studio space to publish a new version of the app.
Actions to configure
For the Open Purchase Order Management app, you’ll need to configure the templates for these skills in the Execution folder, if you’re using them:
Order item subfolder (item level)
[Skill] Internal Email item
[Skill] External Email item
Skill - Update Confirmation
Skill - Create Item Task
Skill - Update Task Item
Order header subfolder (header level)
[Skill] Internal Email
[Skill] External Email
Skill - Create Task
Skill - Update Task
The email skills open a pre-populated email in the user’s email client for them to send. You can find the email templates in the “Execution Output” step in each skill. Edit them according to your business needs.
If you add any other inefficiencies that have profile views, or if you want to add additional user actions, you can add and configure similar skills for those in the Execution folder. If you don’t want to use the default user actions, you can delete them.
Tasks to configure
You’ll need to configure actions for the task-related skills if you’re going to use them. The item level skills Create Item Task and Update Task Item are in the folder Execution > Order item, and the header level skills Create Task and Update Task are in the folder Execution > Order header. In each case the tasks will be visible in the profile views. For each of these skills, we’ve provided two default actions:
Send mail opens a prepopulated email in the user’s email client for them to send.
Close task closes the task without taking any action.
You’ll need to configure each action for each skill if you’re going to use them. You can delete these actions if you don’t want them, in which case you don’t have to configure them. You can also add your own actions as well as these.
The Create Task step for each of the skills can also be configured if you want to customize the task setup. The screenshot shows the out of the box setup for the skill Create Item Task, with a description afterwards:
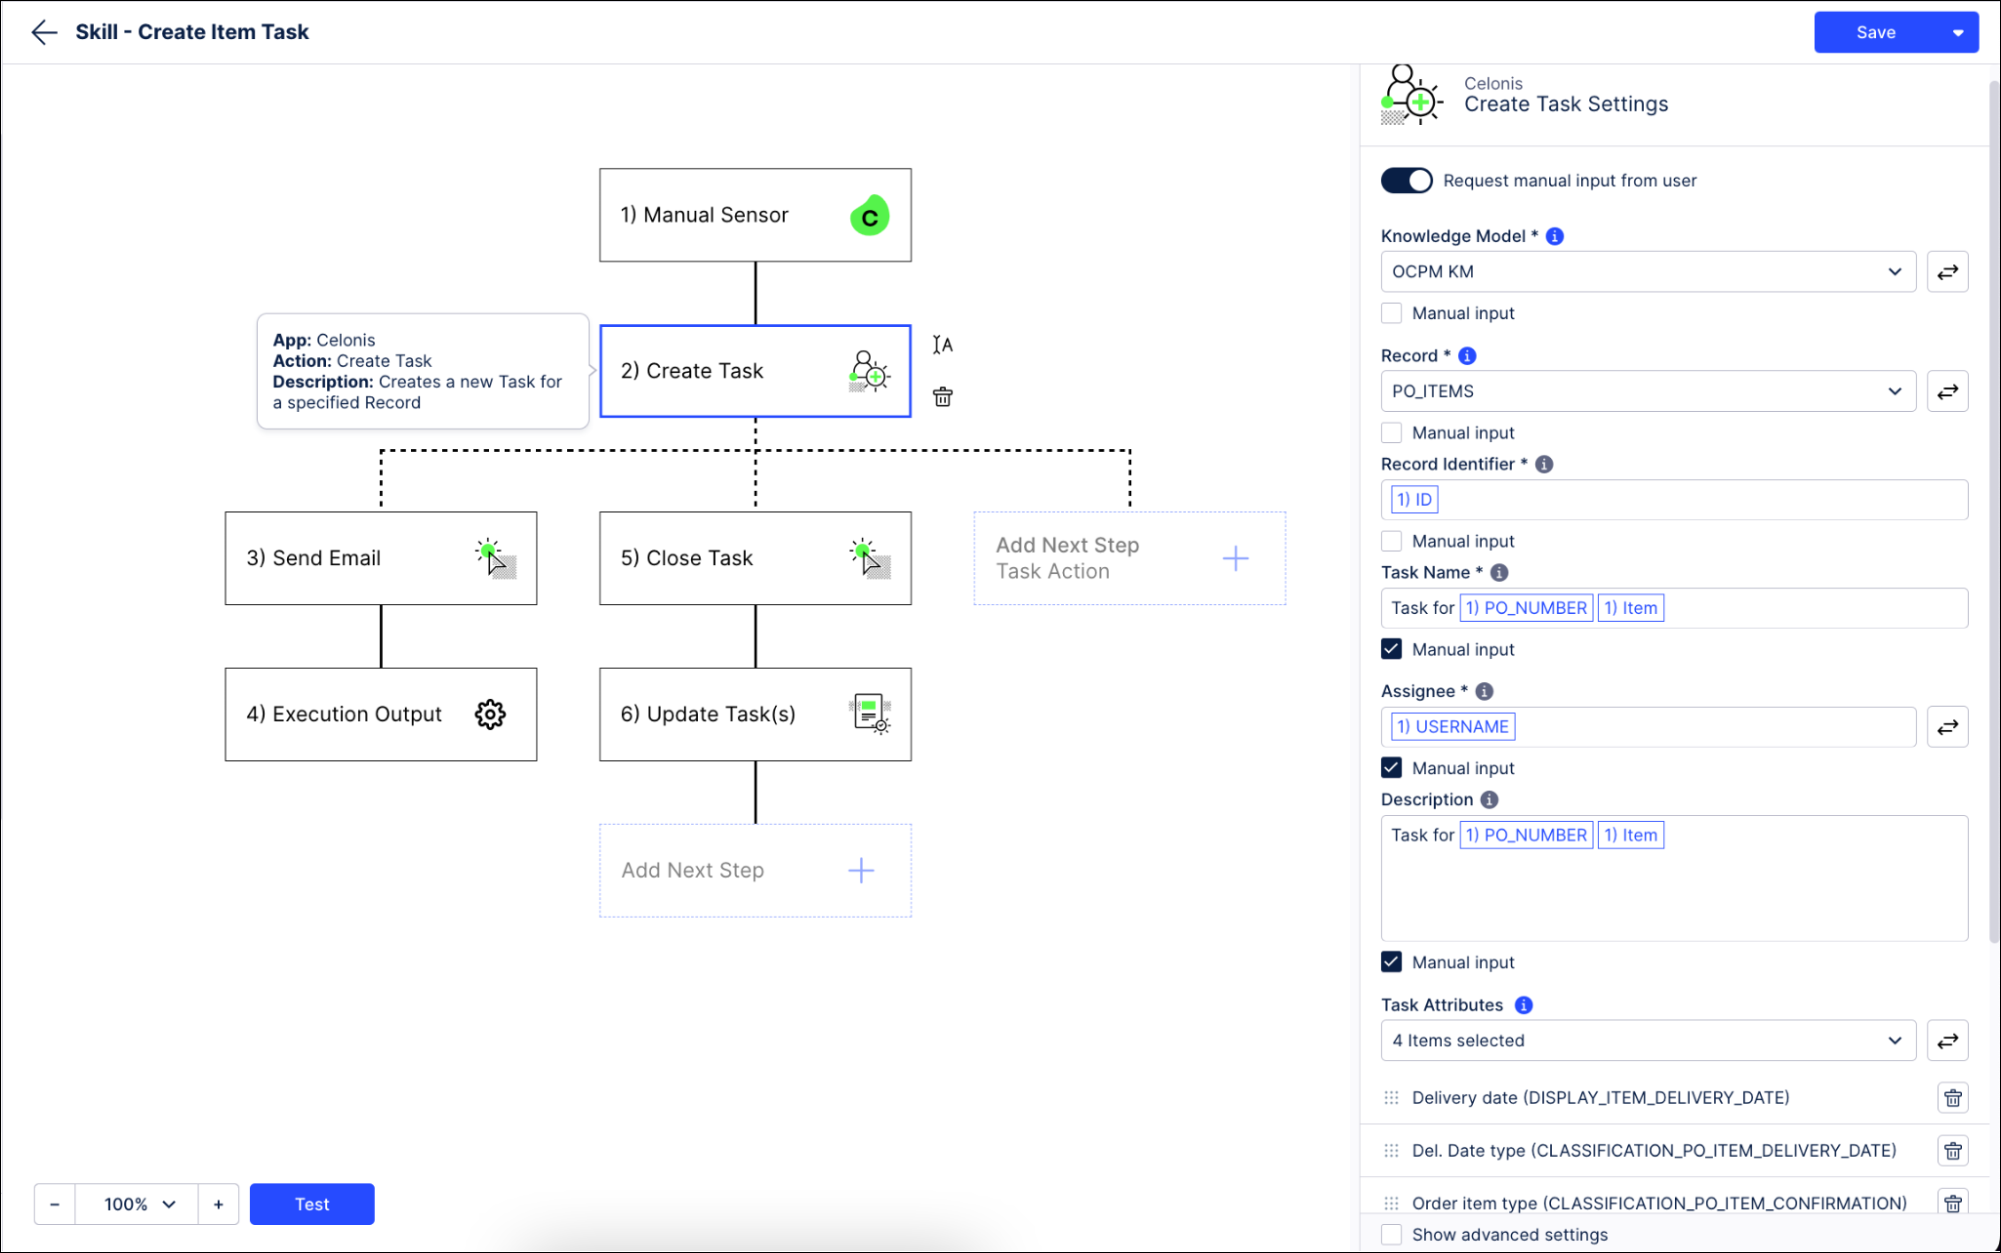
Knowledge Model is the name of the Knowledge Model for the app.
Record is the type of record that the task is created on (here, PO_ITEMS).
Record identifier is the ID field from the specified record. If the record you want to create the task on doesn’t have a unique identifier attribute, you’ll need to add one in the Knowledge Model.
Task Name is the name of the created task. By default it’s populated with some identifying information taken from the record.
Assignee is the user or group that the task is for. Business users will select this from a dropdown.
Description is what goes in the description of the task. By default it’s populated with the same as the task name.
Items with the Manual input checkbox checked are the ones that business users will get the option to specify and overwrite during task creation. Don’t allow manual input for the Knowledge Model, Record, or Record Identifier, and don’t customize what goes into them - these need to stay as they are for each task to work correctly. By default, manual input is allowed for the task name, assignee name, and description, and if you want to customize what these fields are populated with by default, you can do that.
Task Attributes lets you choose what attributes from the record you want to include in the task to provide context for business users. You can remove or add to the preset attributes. If you check the Manual input checkbox for Task Attributes, the end user can select their own choice of attributes to add to the task.
Tip
The variables that you set up for the Manual Sensor can be reused in other skill blocks. Celonis Manual Sensor explains how to work with manual sensors.