Using Network Explorer
Network Explorer (formerly Object Link) component allows you to examine how objects are related across your business. By choosing different node dimensions, you can explorer your object-to-object relationships by country, plant, material, or distribution and the KPI to display for each object.
Before using the Network Explorer, you must configure it within your Studio view:
You can create ‘dimensions’ in Network Explorer, to help visualize your data. In this example, we’ve set up three dimensions:
Country
Plant
Material
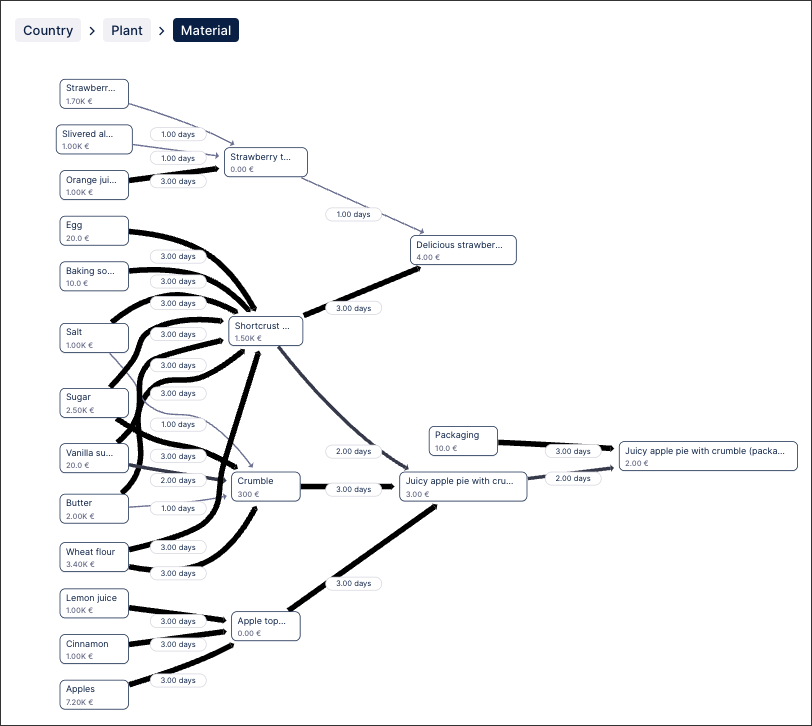
For example, here we see a low-level dimension showing details of materials:
 |
You can then select a new dimension, updating your view.
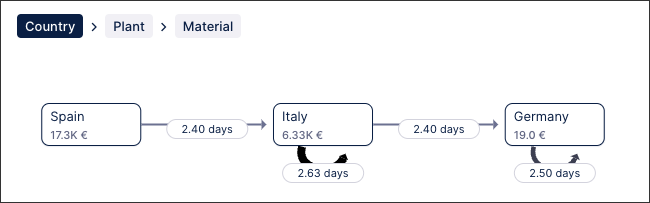
For example, here we can see activities at a very high level by selecting the Country dimension:
 |
Filters give you a simple, powerful way to drill down into your data. You can use them with any dimension.
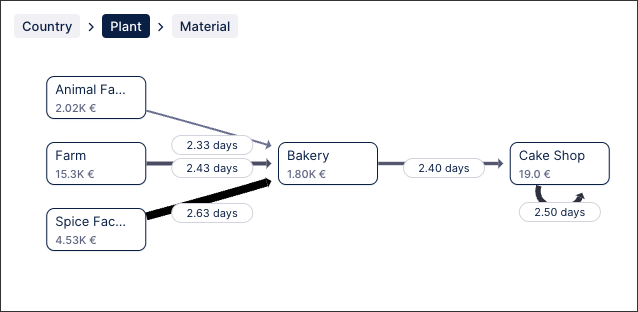
For example, if we select the plant dimension, we can see the flow from suppliers to the bakery itself and to a retail outlet.
 |
Setting a filter
A filter allows you to choose the details you want to investigate.
To set a filter:
Select the dimension you want to work with.
Here the dimension is Plant.
Select a node. For example, click Bakery.
In the popup, choose a filter.
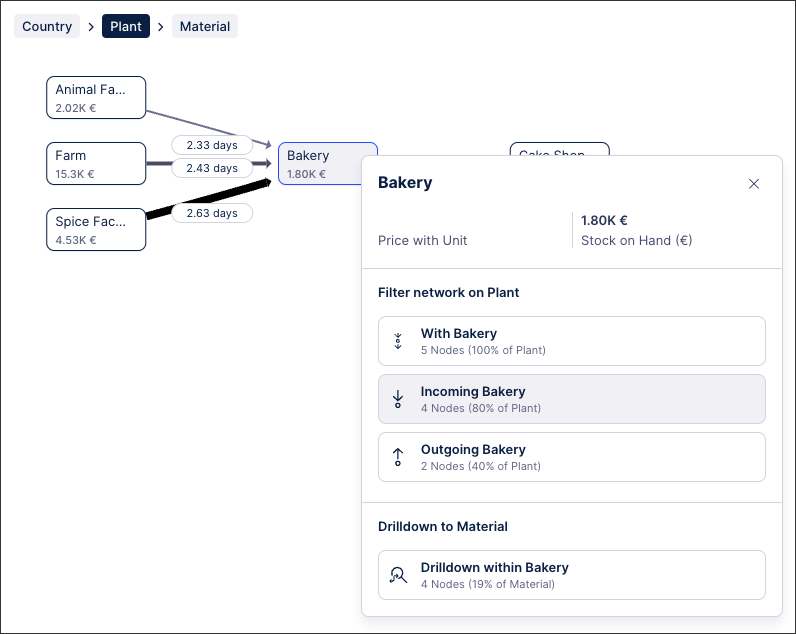
There are three options.
Make this choice:
To investigate these nodes
With Bakery
The Bakery node and everything coming into it and going out of it. All the connected nodes are included, no matter how far away they are.
Incoming Bakery
Same as With Bakery but does not include the nodes after the bakery.
Outgoing Bakery
Same as With Bakery but does not include the nodes before the bakery.
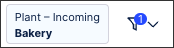
Network Explorer displays the filter you set up.
You can see Plant - Incoming Bakery above the list of dimensions.
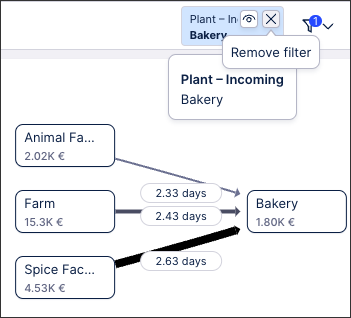
Clearing a filter
You can remove filters individually. In the previous steps, we set up a Plant - Incoming Bakery filter.
To remove a filter:
Hover over the filter you want to remove.
Network Explorer shows an X on the filter.
 |
Drilling down into the details
When you're filtering, you have the option to drill down by one level, to reveal more detail.
Select the dimension you want to work with.
Here the dimension is Plant.
Select a node. For example, click Bakery.
In the popup, choose a Drilldown within Bakery.