Skill Configurations
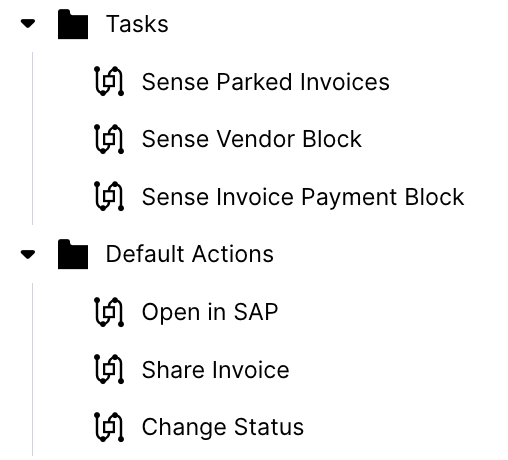
The app comes with a few skill templates for the creation of tasks and for the execution of default actions.
![]() |
Skill Configuration Permissions
If the user/group doesn’t have package permissions, it is required to give the user/group permission on every skill individually in order to see and execute it.
Tasks - Smart Sensor
Tasks can serve multiple purposes such as:
User guidance recommending next best action
Invoice assignment
(Issue) specific actioning directly from Celonis
By default, the app comes with three smart sensor skills that create a task for the following scenarios:
Skill Name | Filter(s) | Task | Action |
---|---|---|---|
Sense Parked Invoices | FILTER_IncomingInvoice_Parked | Resolve issue and post invoice | / |
Sense Vendor Block | FILTER_Vendor_HasBlock | Resolve Vendor Block | / |
Sense Invoice Payment Block | FILTER_AccDocItem_HasBlock | Resolve Invoice Payment Block | / |
The default tasks are very basic and don’t offer any proper actioning. Depending on the desired purpose of the task, it does make sense to look into the customization options below.
For the assignment, the KM field “INVOICE_ASSIGNEE” is used which is by default NULL meaning that the tasks don’t have any assignee.
Customization Options
Add actions for the different types of tasks. It can be very simple such as creating an email action with different action templates for a vendor and an invoice block but it’s also possible to call any other kind of ActionFlow.
Add additional task attributes or descriptions that help the users understand the problem and guide them on how to resolve it.
If the action is very specific to an “issue detail”, it makes sense to create different types of tasks. For example, create one task for invoices with block R and another task for invoices with block A.
Note
With the current platform limitations, one smart sensor can only create 10,000 tasks at once. This means if you have more than 10,000 parked or blocked invoices, not all invoices will have tasks (see Celonis Smart Sensor).
Actions - Manual Sensor
The default actions are actions that can be executed when selecting an invoice in the table in the Action View or in the top of the invoice details slider.
![]() |
Default Action in invoice table
![]() |
Default Action on invoice details view
Open in SAP - FB03 and Open in SAP - MIR4
Celonis comes with actions that allow users to quickly open an invoice in SAP and skip the input mask. By default, the FB03 action is shown for all posted invoices and the MIR4 action for all invoices having a connected incoming invoice.
By clicking the Open in SAP button, Celonis automatically opens a new tab and opens the invoice in the SAP Web GUI. When using this action, the runtime variable “SAPWebGUIBaseUrl” needs to be updated in the Settings view (e.g. erp.company.com).
The full link will then be concatenated using the two KM attributes: https://${b1["urlSAP"]}/sap/bc/gui/sap/its/webgui?~transaction=${b1["invoiceLink"]}
In case the SAP GUI interface is not installed, the action can be disabled by going into the KM YAML Editor and pasting the following snippet in the actions section:
id: ACTION_AccDocItem_OpenInvoiceInSAPFB03
scope: disabled
id: ACTION_AccDocItem_OpenInvoiceInSAPMIR4
scope: disabled
As an alternative, it might be still helpful to create an action that copies the T-Code into the clipboard. This way, it will still be possible to skip the SAP input mask and open the invoice in SAP with fewer mouse clicks. The fastest way to do this is to leverage the customAttributes section in the KM and add the following code snippet:
sourceSystem: - pql: > CASE WHEN "_CEL_AP_CASES"."CASE_TYPE" NOT LIKE '%POSTED%' THEN '/*MIR4 RBKP-BELNR='|| "_CEL_AP_CASES"."BELNR" || ';RBKP-GJAHR='|| "_CEL_AP_CASES"."GJAHR" ELSE '/*FB03 RF05L-BELNR='|| "_CEL_AP_CASES"."BELNR" || ';RF05L-BUKRS='|| "_CEL_AP_CASES"."BUKRS" || ';RF05L-GJAHR='|| "_CEL_AP_CASES"."GJAHR" END labelPql: '"_CEL_AP_CASES"."BELNR"' labelTitle: Invoice ID title: Copy T-Code
Share Invoice
This action sends an email via a “Celonis no-reply” address containing relevant invoice information that helps the recipient to identify the invoice. The recipient, the subject and the text can be adjusted for every invoice. In addition, the “reply-to” field is set to the user’s email address so that email replies from the recipient are sent to the sender’s email inbox.
During the rollout, it’s recommended to:
Revise the email template or even create multiple ones for different scenarios.
Evaluate whether the “To” field can be pre-filled, such as purchaser (PURCHASER_EMAIL), purchasing group (PURCHASING_GROUP_EMAIL).
Evaluate whether it makes sense to replace the no-reply Celonis email action with an SMTP setup.
Change Status
This action updates the Celonis Invoice Status.