Uploading data files
You can add data to the Celonis Platform without establishing a continuous connection to a source system by uploading data files.
While this method allows you to associate the data with existing data connections, your data can also be uploaded independently (and labeled as a global data connection). As this is a one-time upload, the data will not be automatically refreshed or updated.
For a video overview of the process, see:
The following file types can be uploaded when integrating your data with the Celonis Platform:
ABAP report files (see: One-time extraction)
.csv - CSV (comma-separated values)
.gz - GZIP compressed file
.json - JSON (JavaScript Object Notation)
.parq - Apache Parquet
.xes - Extensible Event Stream
.xls and .xlsx - Excel Workbook
.zip - ZIP archive of compressed files
.7z - 7-Zip archive of compressed files
Should you want to upload multiple files simultaneously, we recommend zipping these files into a single file. For the data to be in the same tables, ensure that they all use the same schema.
File size limits
When uploading files, there is a 1gb limit per file. We recommend using compressed file formats if required (such as zip or 7-Zip).
Use of non-latin characters
Non-Latin characters aren't supported in file names during the import. If the original file name contains non-Latin characters, you must rename it or the upload will fail.
To upload and import your dates files to the Celonis Platform using the file uploads wizard:
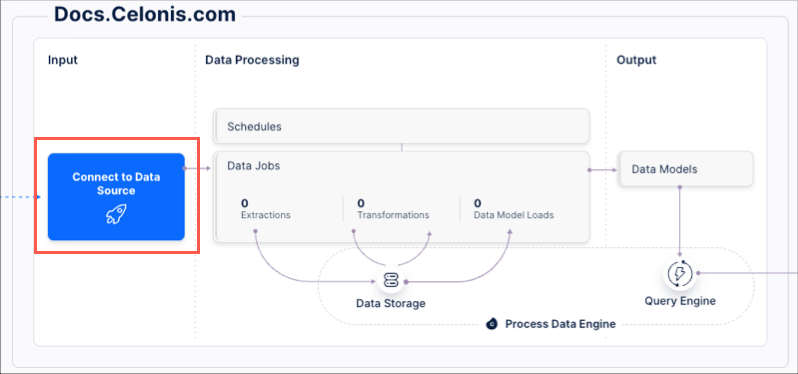
Click Data - Data Integration and then either select an existing data pool or create a new one.
From your data pool diagram, either / or:
When no other data connections exist: Click Connect to Data Source.
When other data connections exist: Click Data Connections (the button is in the same location in the following screenshot).
Either / Or
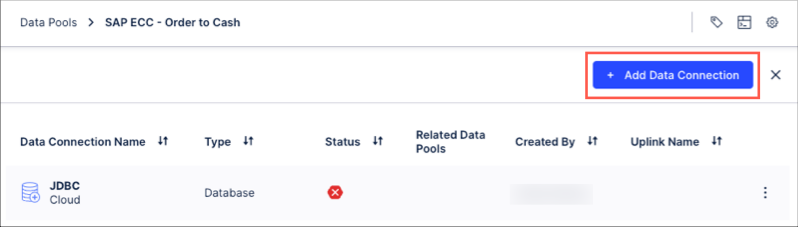
When no other data connections exist: Click Upload Files.
When other data connections exist: Click + Add Data Connection and then click Upload Files:
Either drag and drop your files into the uploader or click Select Files.
The files are now uploaded into the Celonis Platform, with relevant status or error messages displayed with more information.
If you use the Celonis Storage Manager, all files found in the SFTP are uploaded.
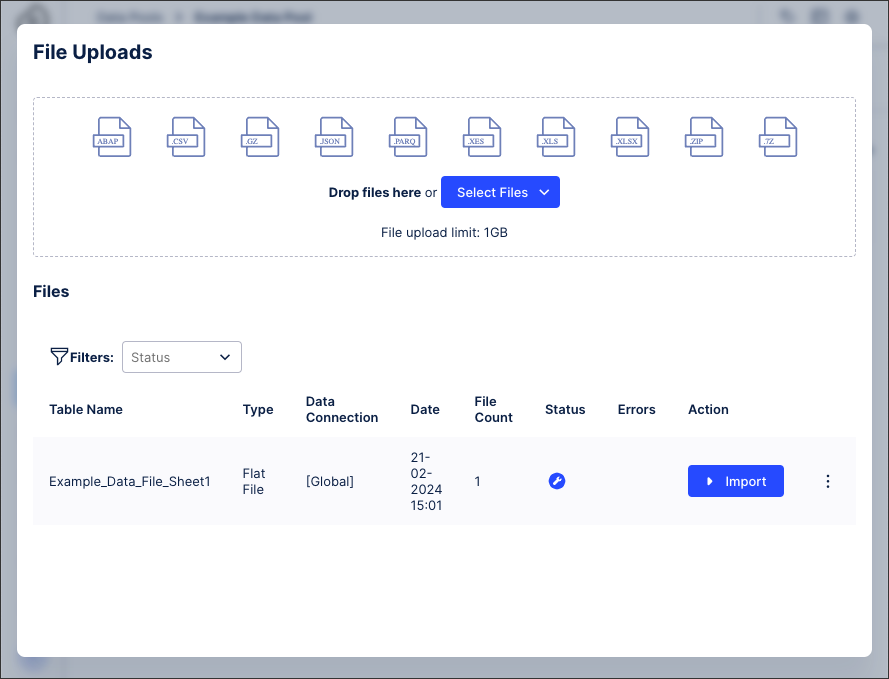
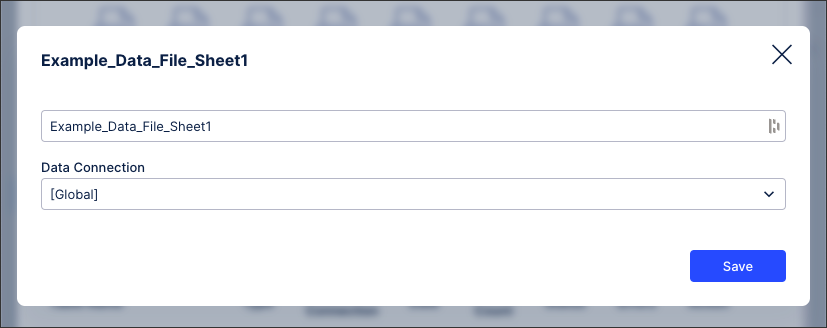
For each file uploaded, click Options - Configure Upload and then verify both the name you want to use and optionally the data connection you want to associate this data with.
Name: Only Roman / Latin characters are supported, so you may need to edit the default name provided.
Data connection: Select from available data connections in your data pool, with the default set to Global Data Connection if you don’t want to associate this data with an existing connection.
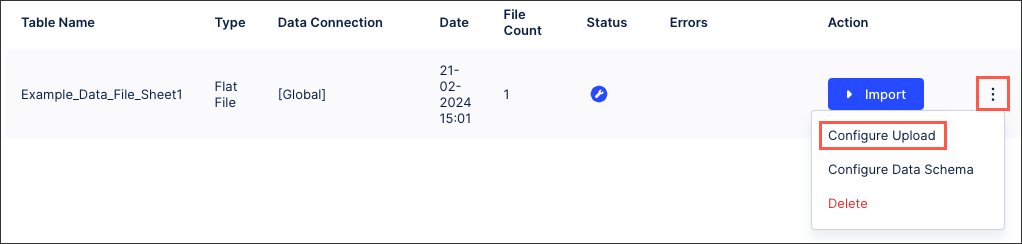
Click Save, returning you to the file uploads wizard.
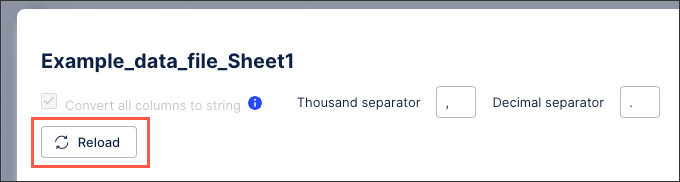
For each file uploaded, click Options - Configure Data Schema. The data loads and a preview is displayed.
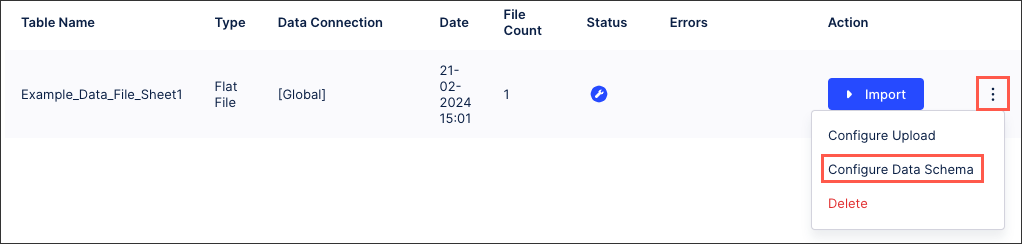
You can now verify that the file uploader has interpreted your data correctly and make edits where necessary. This includes changes to the data types and formatting preferences.
After making changes, click Reload to preview your changes.
Click Save, returning you to the file uploads wizard.
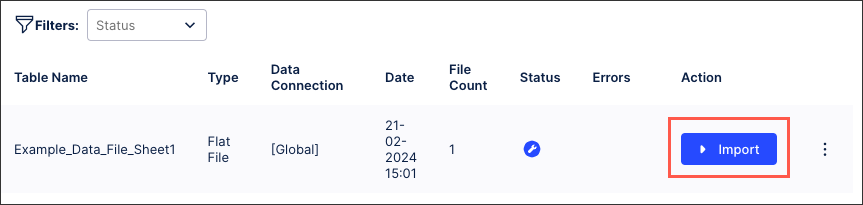
Click Import.
The file upload wizard imports the data, with success and error messages displayed as appropriate.
If there are errors importing your data, you are prompted to re-configure your data schema and then attempt the import again.
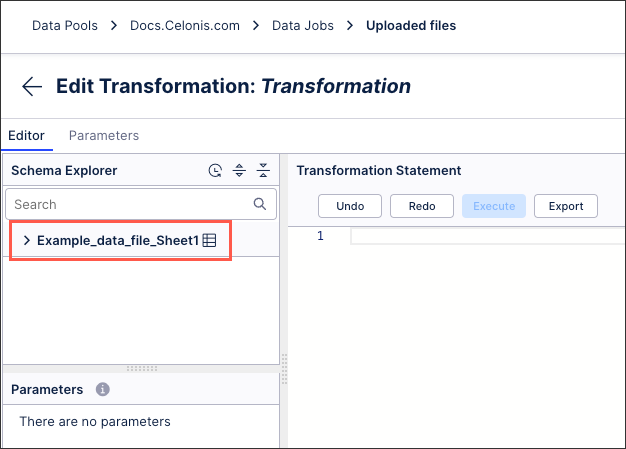
Once the data is successfully imported, you now need to create a data job to use this data productively. By creating a data job, a global data connection is added to your data pool and this enables you to use the data you've imported.
For more information abouting creating data jobs, see: Extracting and transforming data.
In this example, we've created a data job and we can then use our 'Example_Data_File_Sheet1' data when configuring a transformation task: