Opening a linked View in an existing View
Note
Linking Views and Legacy Views from the same package isn't supported.
You can configure a linked View to open as an overlay within another View, triggered by a user clicking data in a table or a button. This overlaid View can then be displayed as a modal overlay or a side-panel.
To overlay a View, both the target View (the one you want to overlay) and the View you're editing must be in the same package. You also need to grant permissions to both Views for the end-users to be able to access.
If you want values in your target View to be replaced with values from your current View, the target View needs to have View variables defined. For more information, see: Enhanced variables.
When using a table component, you can select the column where the overlay can be accessed from.
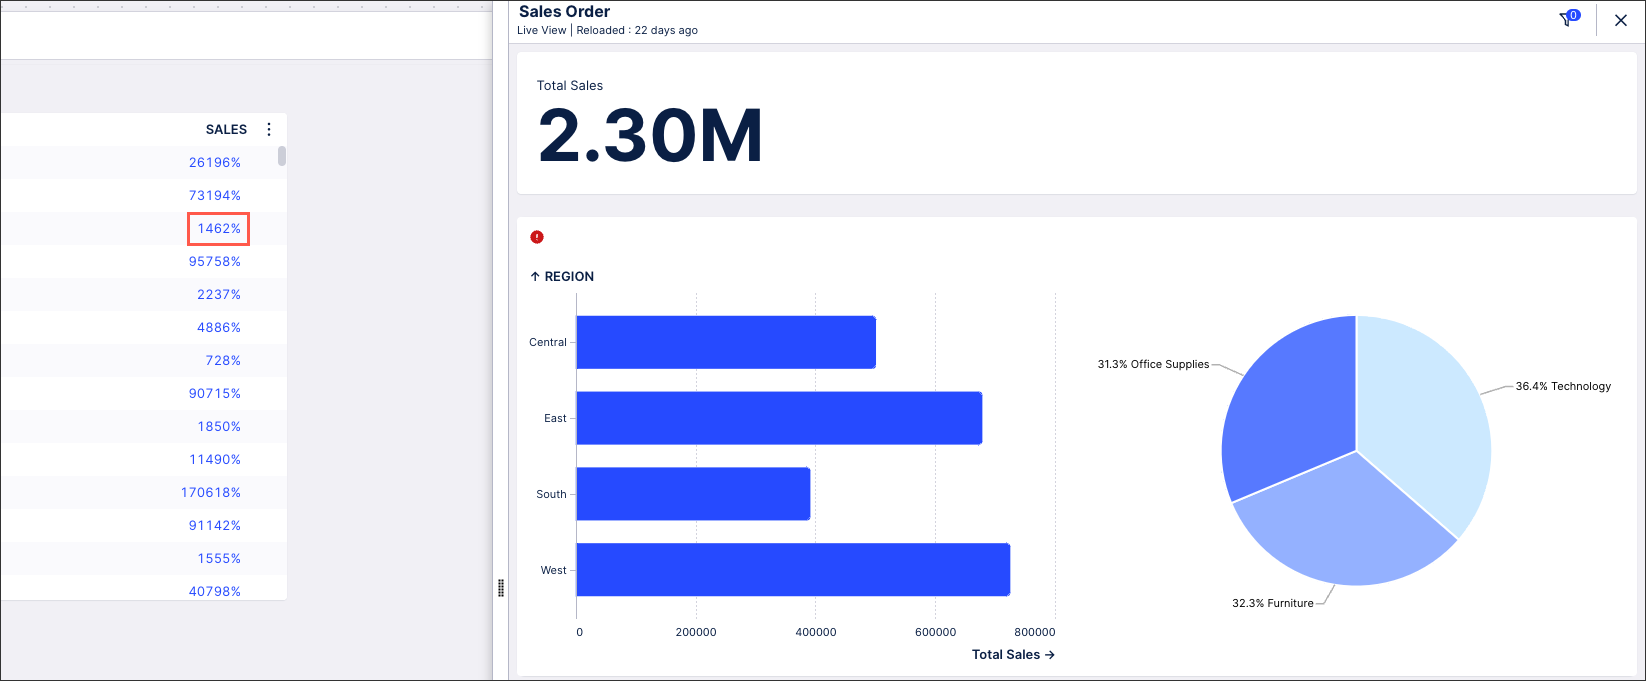
In this example, when clicking data in the SALES column the app will display the 'Sales Order' target View as a side panel. There is also an active mapping for the View variable "SalesOrder" from the target View. This variable will get updated with the "Order_ID" of the row in which the click in the table is done.
 |
To configure a linked View:
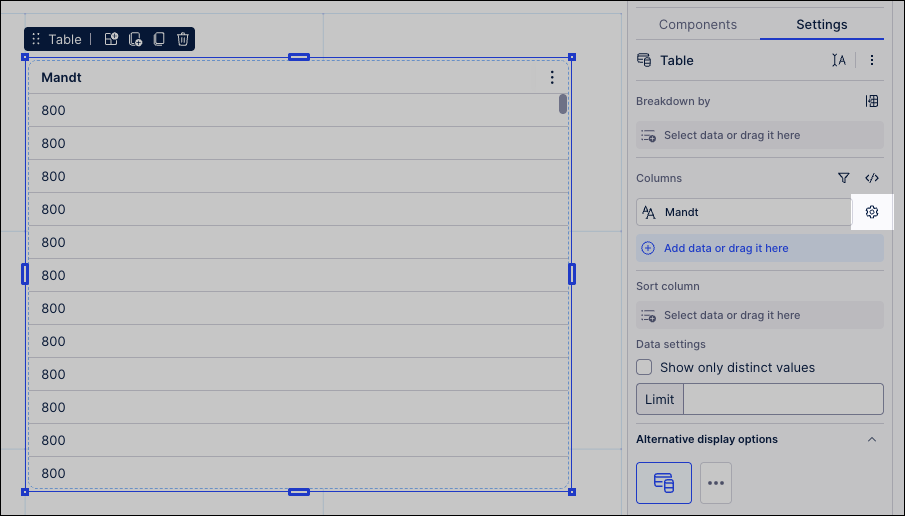
Either drag and drop a table component into your View layout or select an existing table and open the settings panel.
For the column you want to enable the overlay for, click the Settings icon:
Enable Interactions - Open linked view.
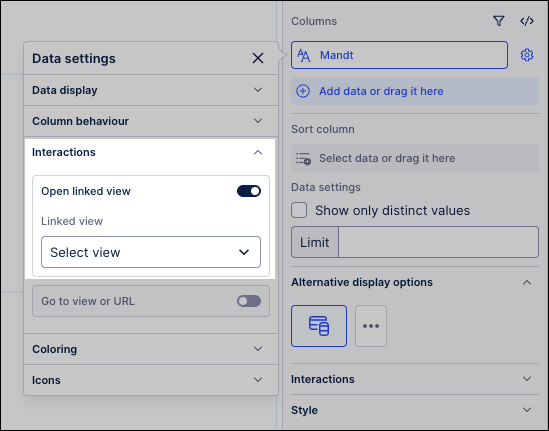
Either select an existing View or create a new View.
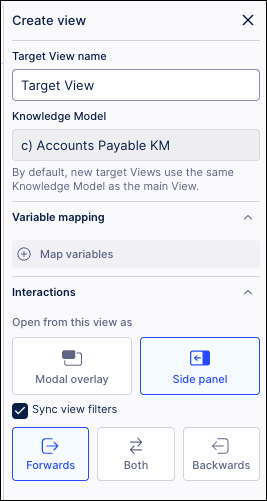
Configure Open View in overlay settings:
Target View: Select the View you want to display in the overlay or, if creating a new view, enter the name.
Knowledge Model: By default, new target Views use the same Knowledge Model as the main View.
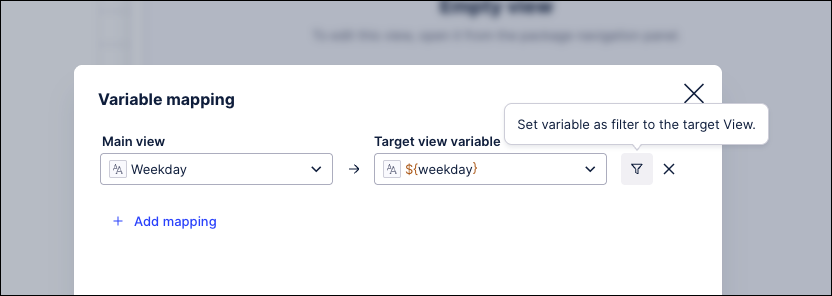
Variable mapping (optional): Select the variables from the current View that you want to replace values in the target View with. It is optional to create this mapping, however. Without mapping your variables, the View variables of the target View will display their respective current values.
If you intend your linked View to be scoped to a single item that you’ve stored to a variable, you can select Set variable as filter to the target View.
Interactions - Open from this View as: Select either a modal or side panel overlay.
Sync filters: Enable the syncing of filters between the two Views. You can choose between forwards, backwards, and both here.
Forward: Filters set on the main View and filters set on the component that is opening the linked View, will be immediately applied to the linked View.
Backward: Filters set on the linked View will be immediately applied to the main View.
Both-ways: Filters set on the linked View are immediately applied to the main View and filters set on the main View are immediately applied on the linked View.
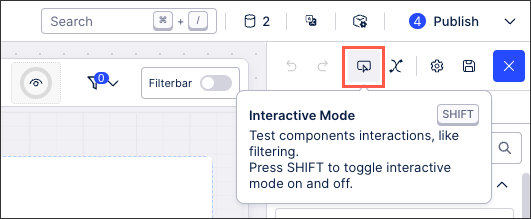
Click Preview and test that your overlay works as expected.
When using a button component, you can configure an overlay to appear when an app viewer clicks the button. In this example, a simple button has been added to 'Show Related View' (with the overlay appearing at the side):
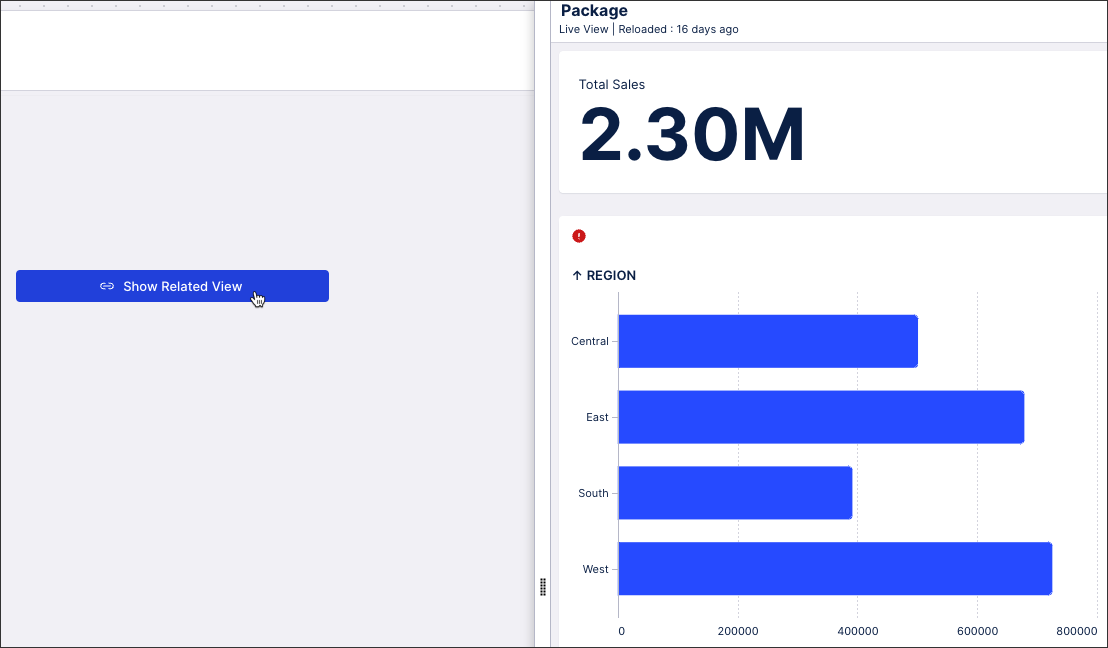 |
Drag and drop a button component into your View layout or select an existing button and open the settings panel.
Enable Interactions - Open linked View.
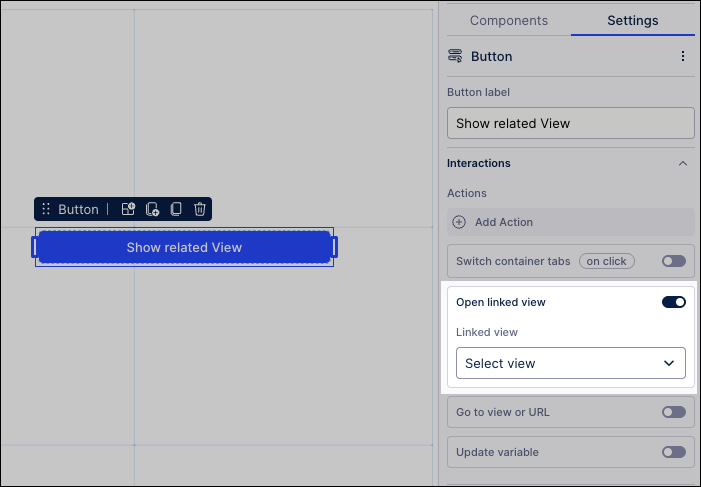
Either select an existing View or create a new View.
Configure linked View settings:
Target View: Select the View you want to display in the overlay or, if creating a new view, enter the name.
Knowledge Model: By default, new target Views use the same Knowledge Model as the main View.
Variable mapping (optional): Select the variables from the current View that you want to replace values in the target View with. It is optional to create this mapping, however. Without mapping your variables, the View variables of the target View will display their respective current values.
Interactions - Open from this View as: Select either a modal or side panel overlay.
Sync filters: Enable the syncing of filters between the two Views. You can choose between forwards, backwards, and both here.
Forward: Filters set on the main View and filters set on the component that is opening the linked View, will be immediately applied to the linked View.
Backward: Filters set on the linked View will be immediately applied to the main View.
Both-ways: Filters set on the linked View are immediately applied to the main View and filters set on the main View are immediately applied on the linked View.
Configure your button style.
Click Preview and test that your overlay works as expected.