Signal List
The Signal List (commonly referred to as My Inbox) is the central command center for business users within the Celonis Action Engine. Rather than just a list of tasks, it is a prioritized feed of data-driven insights that require immediate intervention to optimize business processes.
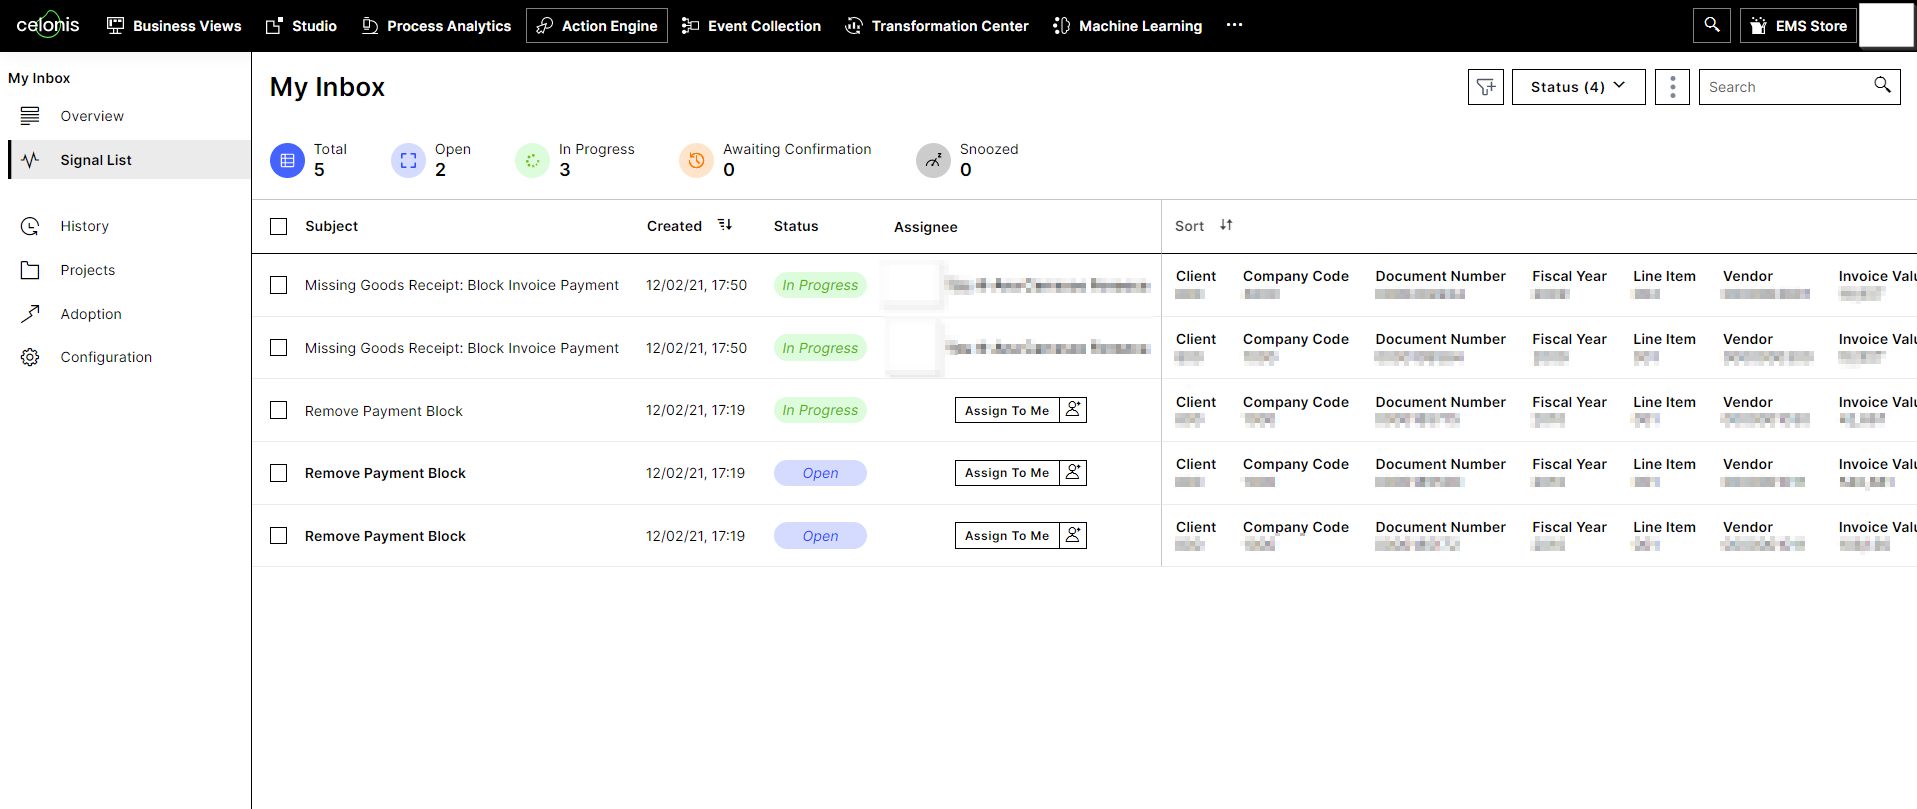
To view the specific details of an issue, click directly on any Signal row. This will take you to the Signal Details page, where you can execute actions or review the underlying data.
Every Signal is defined by six core attributes to help you triage your work:
Subject: A concise headline describing the specific process anomaly or opportunity.
Created: The exact timestamp when the Action Engine first detected the Signal.
Status: The current lifecycle stage of the Signal (e.g., Open, In Progress, or Snoozed).
Assignee: The team member currently responsible for resolving the Signal.
Sorting: A customizable tool to order your inbox by the attributes that matter most to your workflow.
Filtering: High-precision controls to narrow your view based on specific criteria like vendor, value, or urgency.
By default, the Signal List focuses on Open and In Progress items to keep you focused on active tasks. However, you can expand your view to include long-term or pending items.
Status drill down: Click the "Status" filter in the top right to toggle the visibility of Snoozed or Awaiting Confirmation Signals.
Search and discovery: Use the full-text search bar to find specific Signals by keyword or ID instantly.
History tracking: Note that Resolved or Deleted Signals are automatically moved to the History section to keep your primary inbox decluttered.
Tip
If your inbox feels empty, check your Status filters. The counts for "Snoozed" and "Awaiting Confirmation" only appear once their respective boxes are checked in the Status dropdown.
Users can nominate a colleague to substitute them during a period of absence. During this time, the substitute will be able to view and manage your Signals directly within their own Signal List.
Create a substitution request: Navigate to the Configuration page and locate the My Absence section. Enter your "Assigned Substitute" and the specific time period for your absence, then click Get Approval.
Substitute approval: Your substitute will receive an email notification containing a link to the Action Engine. They must navigate to the Substitution for others section in their configuration to either Accept or Reject the request.
Active substitution period: Once approved and the start date is reached, your "Pending" status will change to Approved. The substitute will then see your Signals until the end date of the absence, at which point access is automatically revoked and subscriptions return to normal.