Editing Assignment Rules
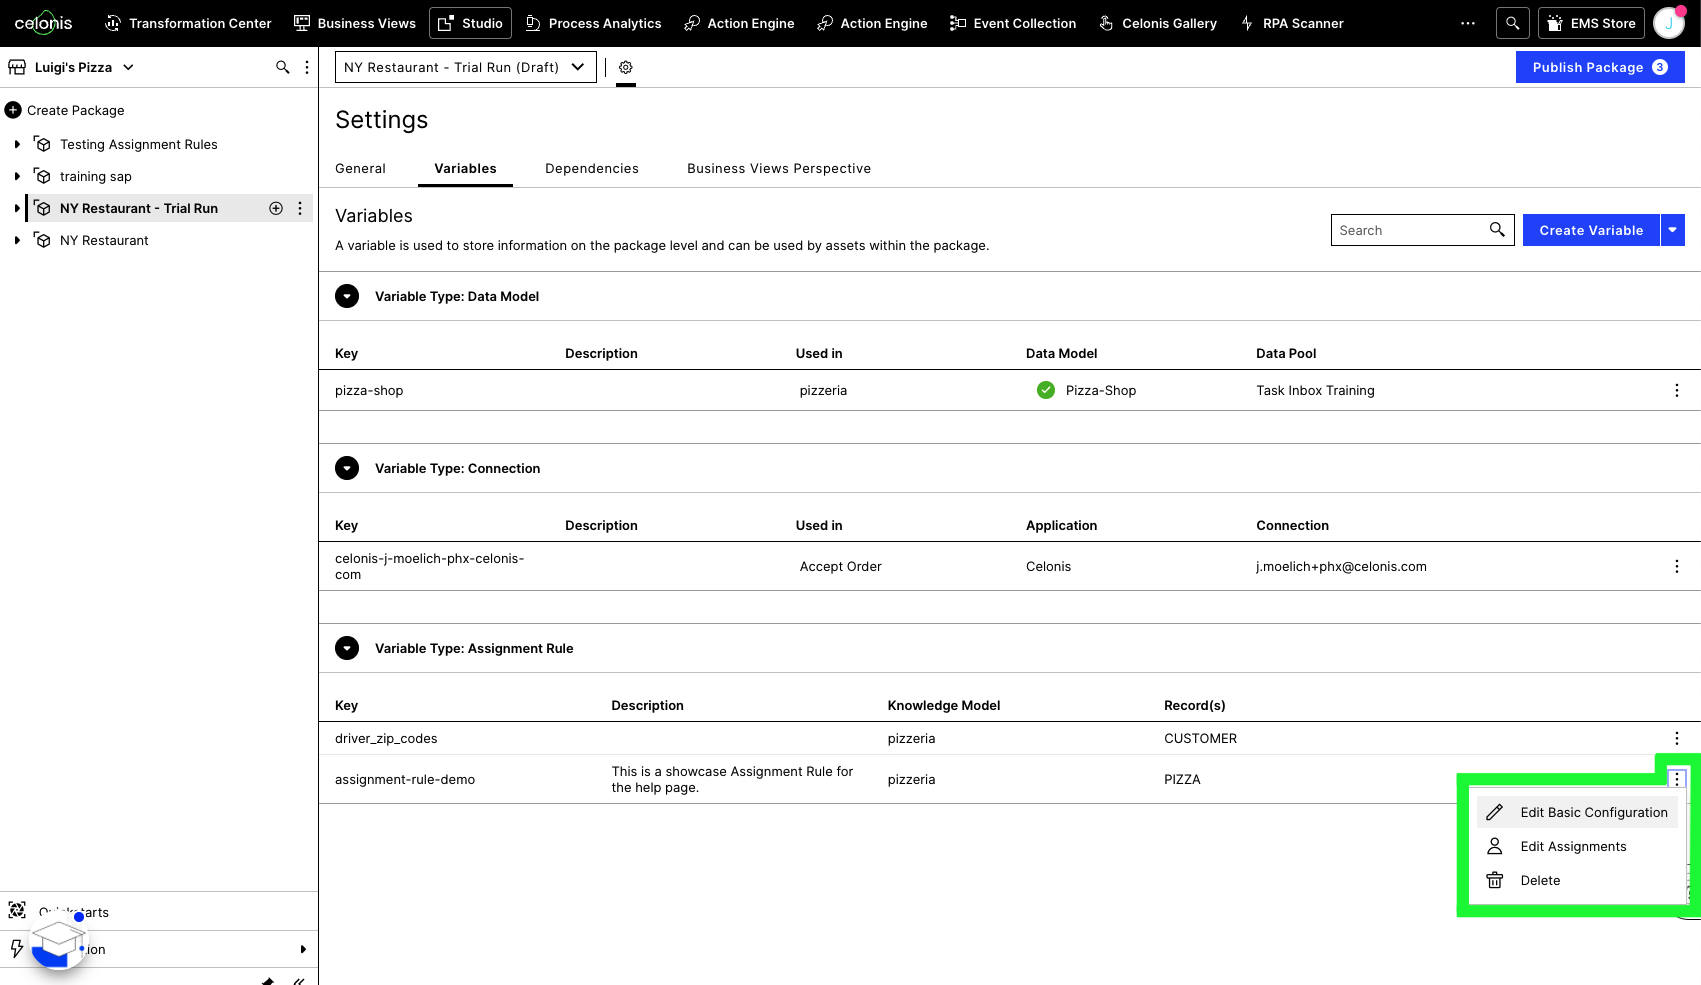
Once you have created an Assignment Rule, you can edit it by going to the variables tab in your package settings. You can then select your desired edit mode by clicking the three dots displayed to the right of your Assignment Rule. There are two options for editing an Assignment Rule.
Edit basic configuration: This lets you edit the underlying configuration of your Assignment Rule (Name, Description, Default Assignee, Knowledge Model, Records & Input Attributes).
Note
In the Basic Configuration, any changes to the Knowledge Model, Record, or Input Attributes will overwrite all existing assignments.
Edit assignments: This lets you change the assignments for the previously-selected Input Attributes. Any saved changes here will be instantaneously represented in any Skills or Actions Flows using this rule.
 |
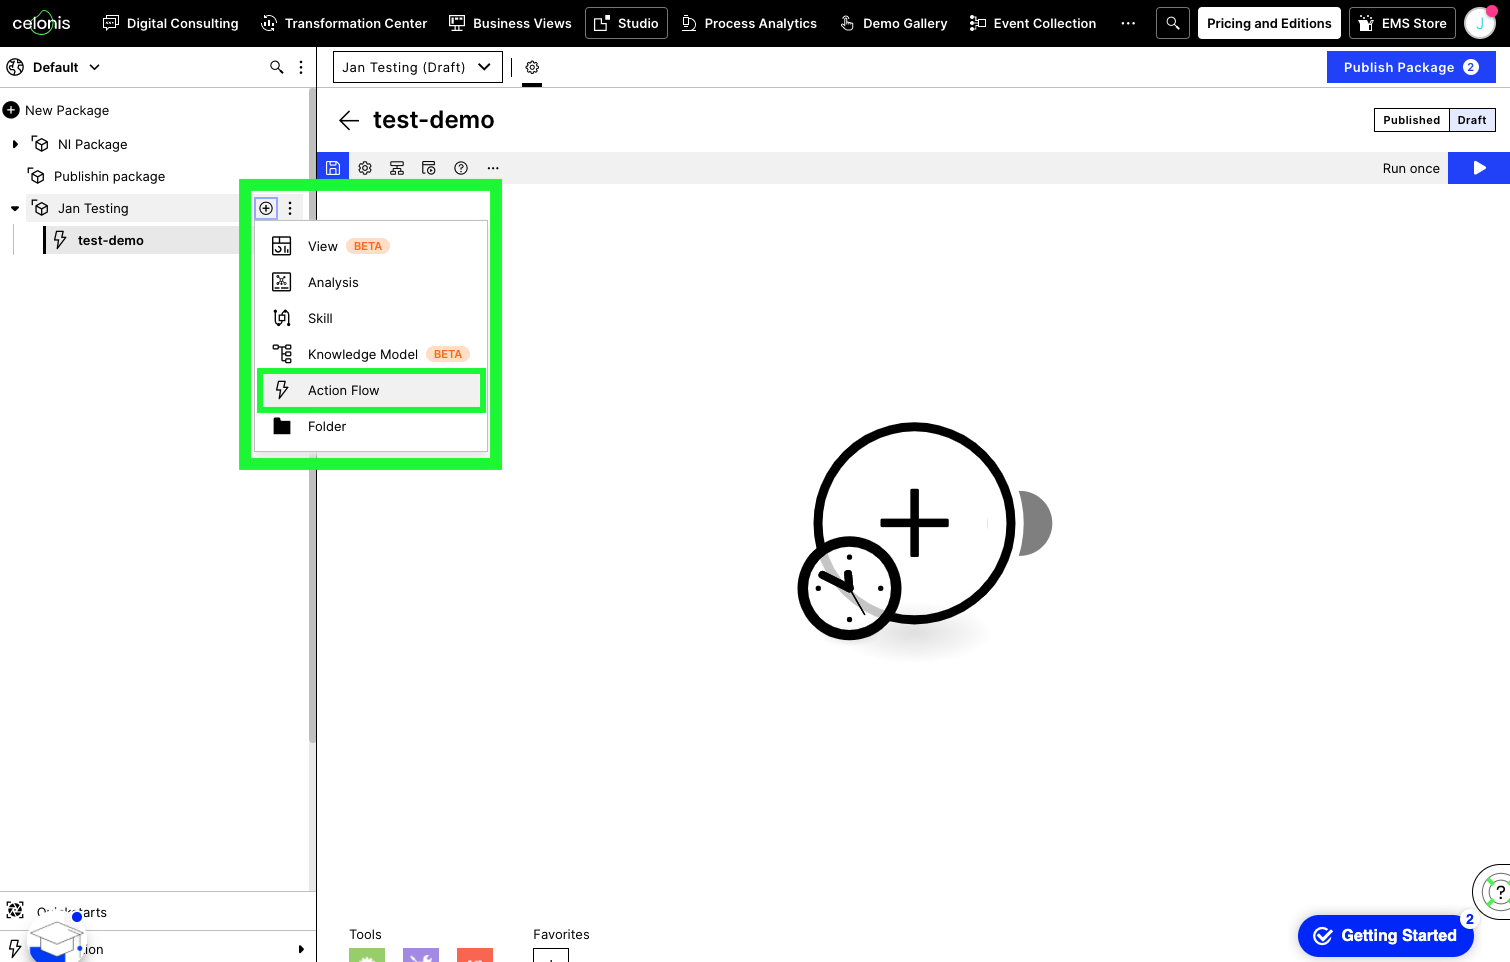
Navigate to Celonis Studio using the taskbar.
Once within the Studio, hover over the package you wish to add a skill to and click the plus (+) button. Select Action Flow from the resulting dropdown. Alternatively, you can also create a new package using the "New Package" button at the top.
Input an Action Flow Name and Description in the initial window. The Key will be automatically created for you.
Note
Please ensure that you have created an Assignment Rule in the package settings before creating an Action Flow using the Assignee Action. Instructions on how to do this can be found above.
 |
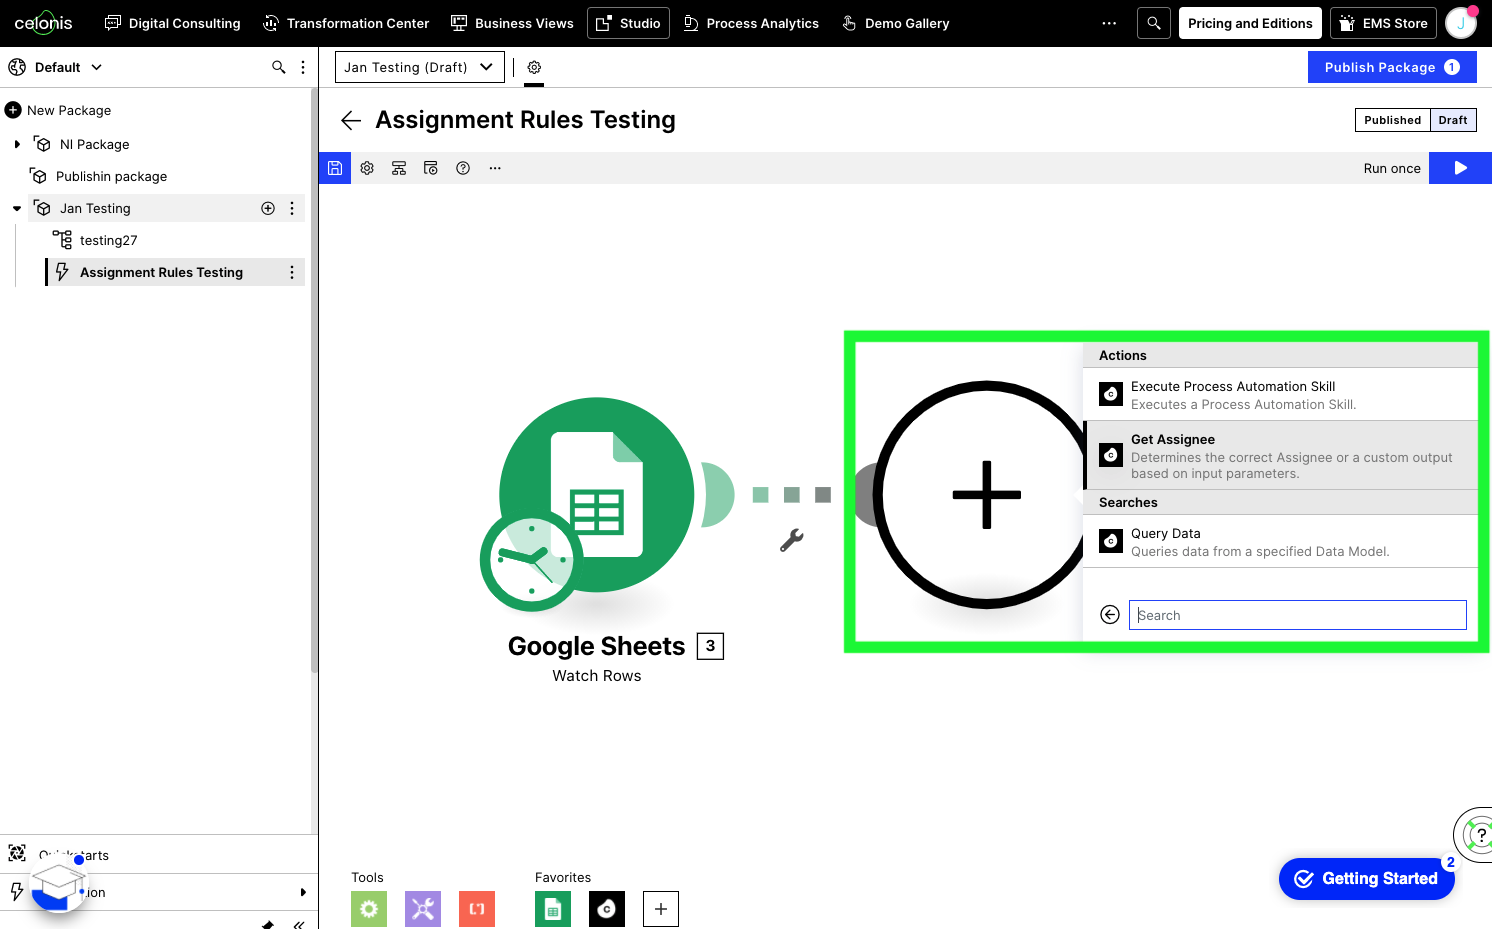
After creating an initial module as the input to your assignment rule, click the semicircle to its right to Add Another Module.
Use the search field to search for 'Get Assignee' and select the respective Celonis Action.
See Setting up Action Flows in Studio for more information.
 |
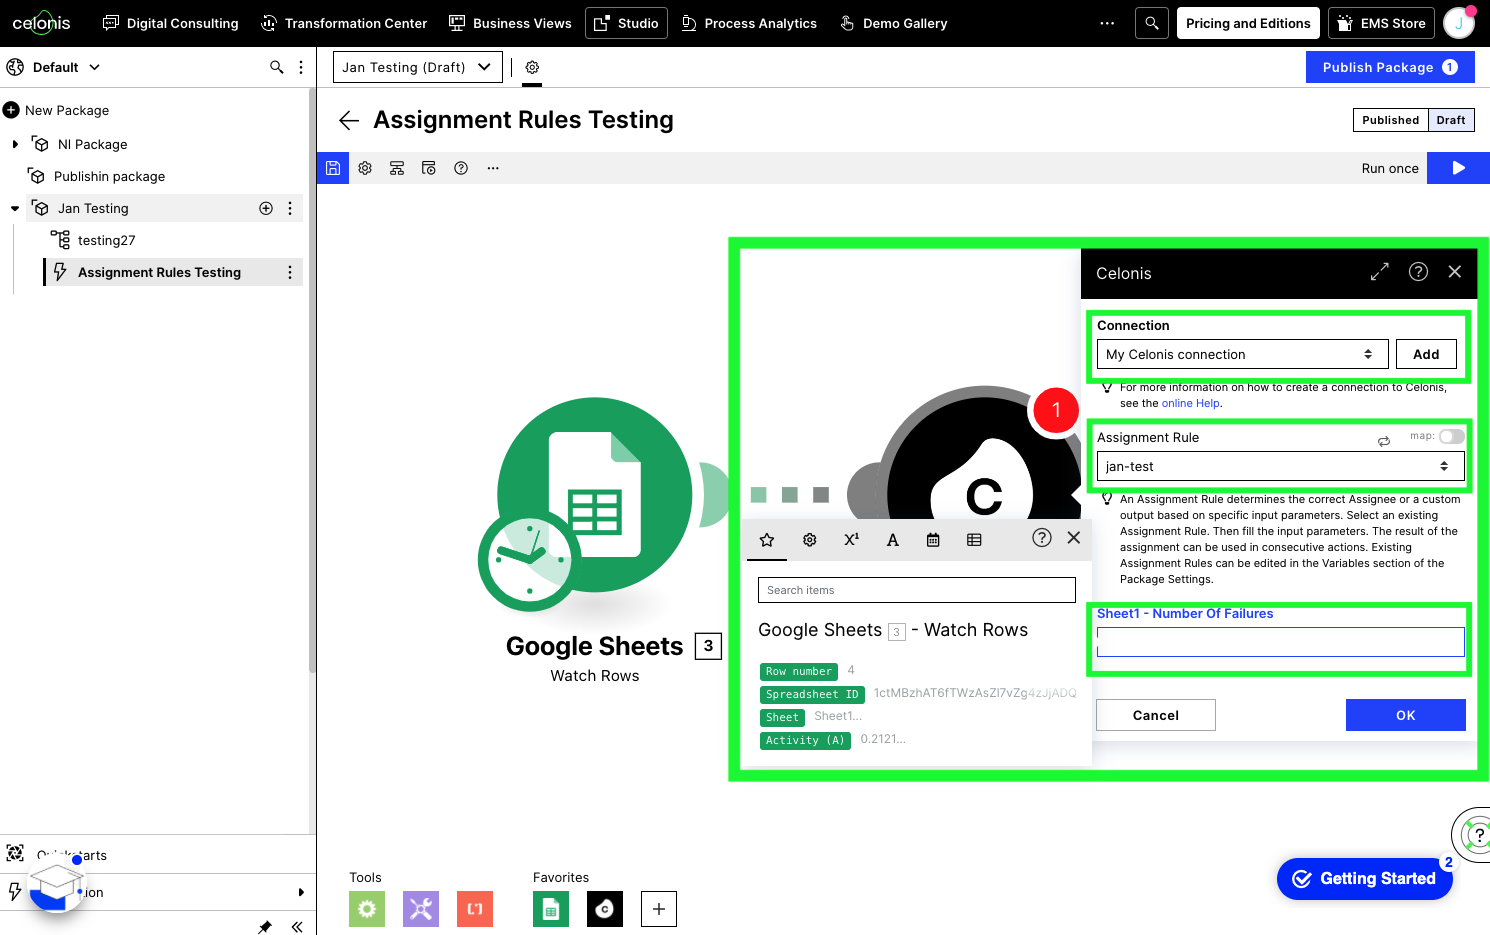
Create, or select the Connection you want to use for this action.
In the Assignment Rule dropdown, select the rule you want to apply. See Step by Step Guide to Assignment Rule Creation" above for the creation of a new rule.
Fill in the required Input Attributes by clicking in their boxes and selecting the respective attributes using the pop-out menu.
Navigate to Celonis Studio using the taskbar.
Hover over the package you want to add a skill to and click the plus (+) button.
Select Skill from the resulting dropdown. Alternatively, you can also create a new package using the New Package button at the top.
Note
Ensure you have created an Assignment Rule in the package settings before creating a skill using the Assignee Action. Instructions on how to do this can be found above.
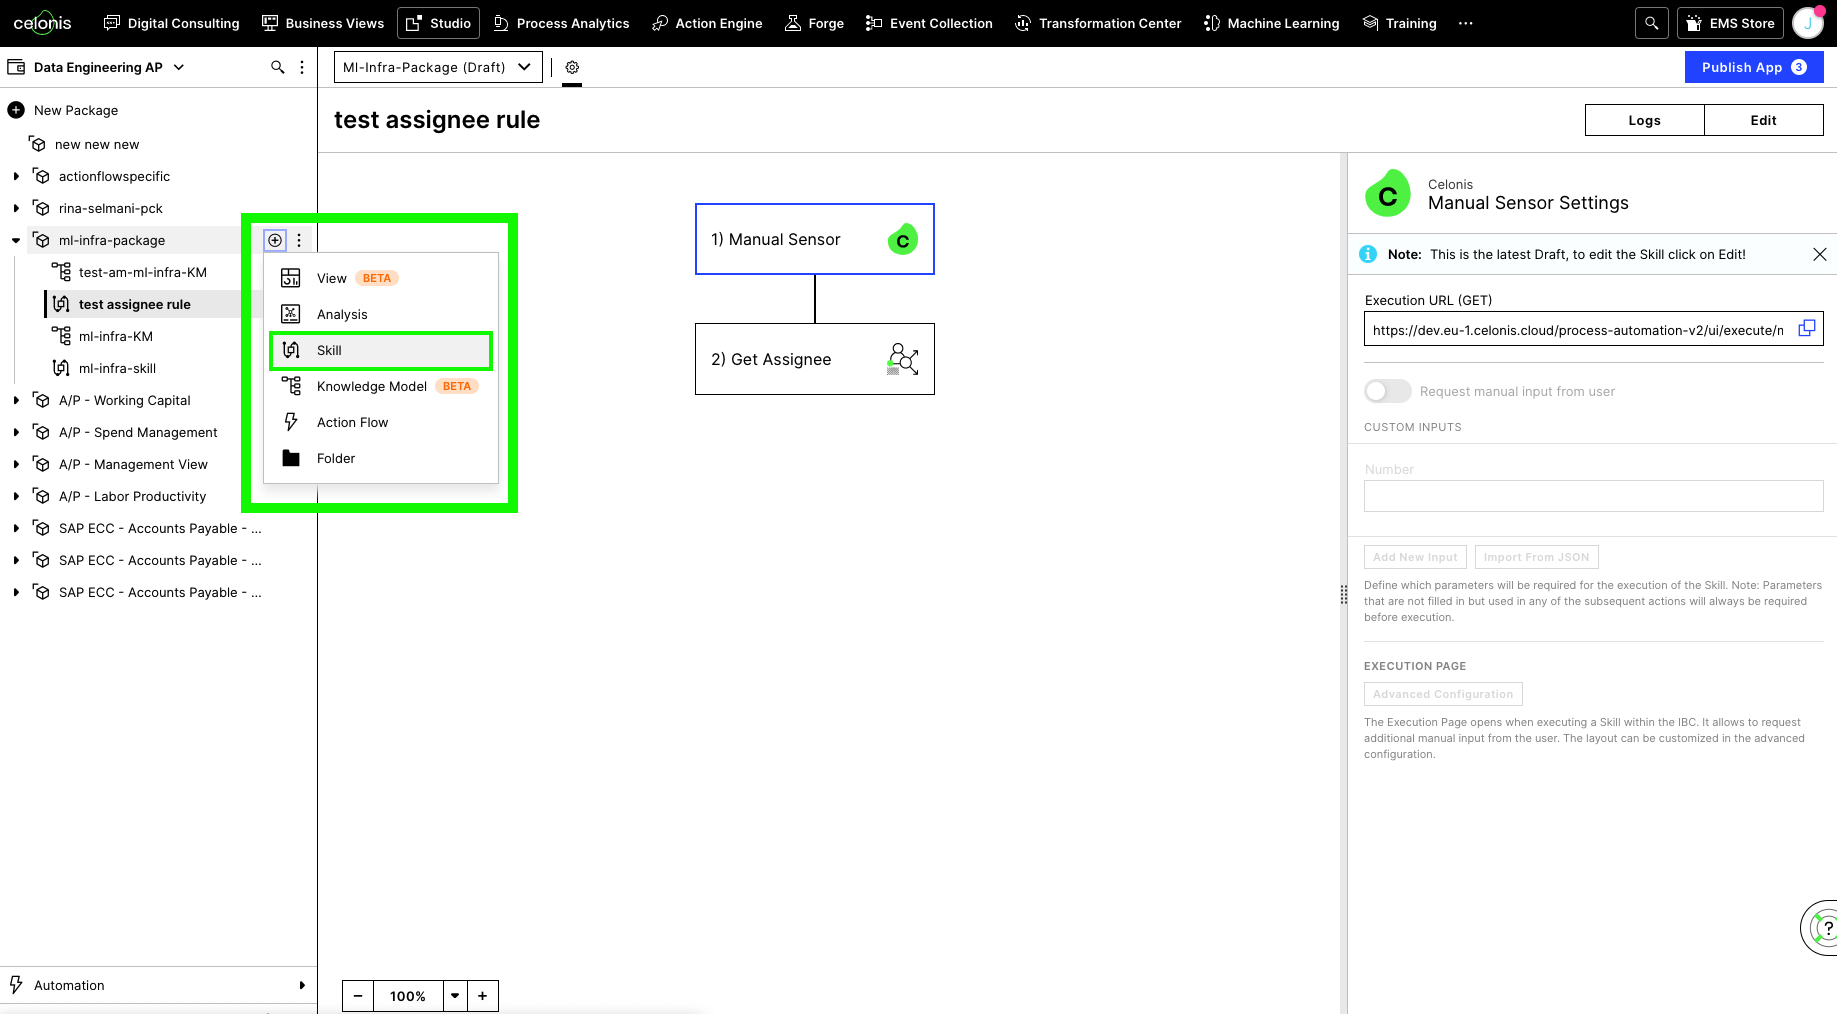 |
Click Add a Sensor to add an initial sensor to your skill.
Add the "Get Assignee" Action by clicking Add Next Step. The assignment action can be found in the Celonis section.
 |
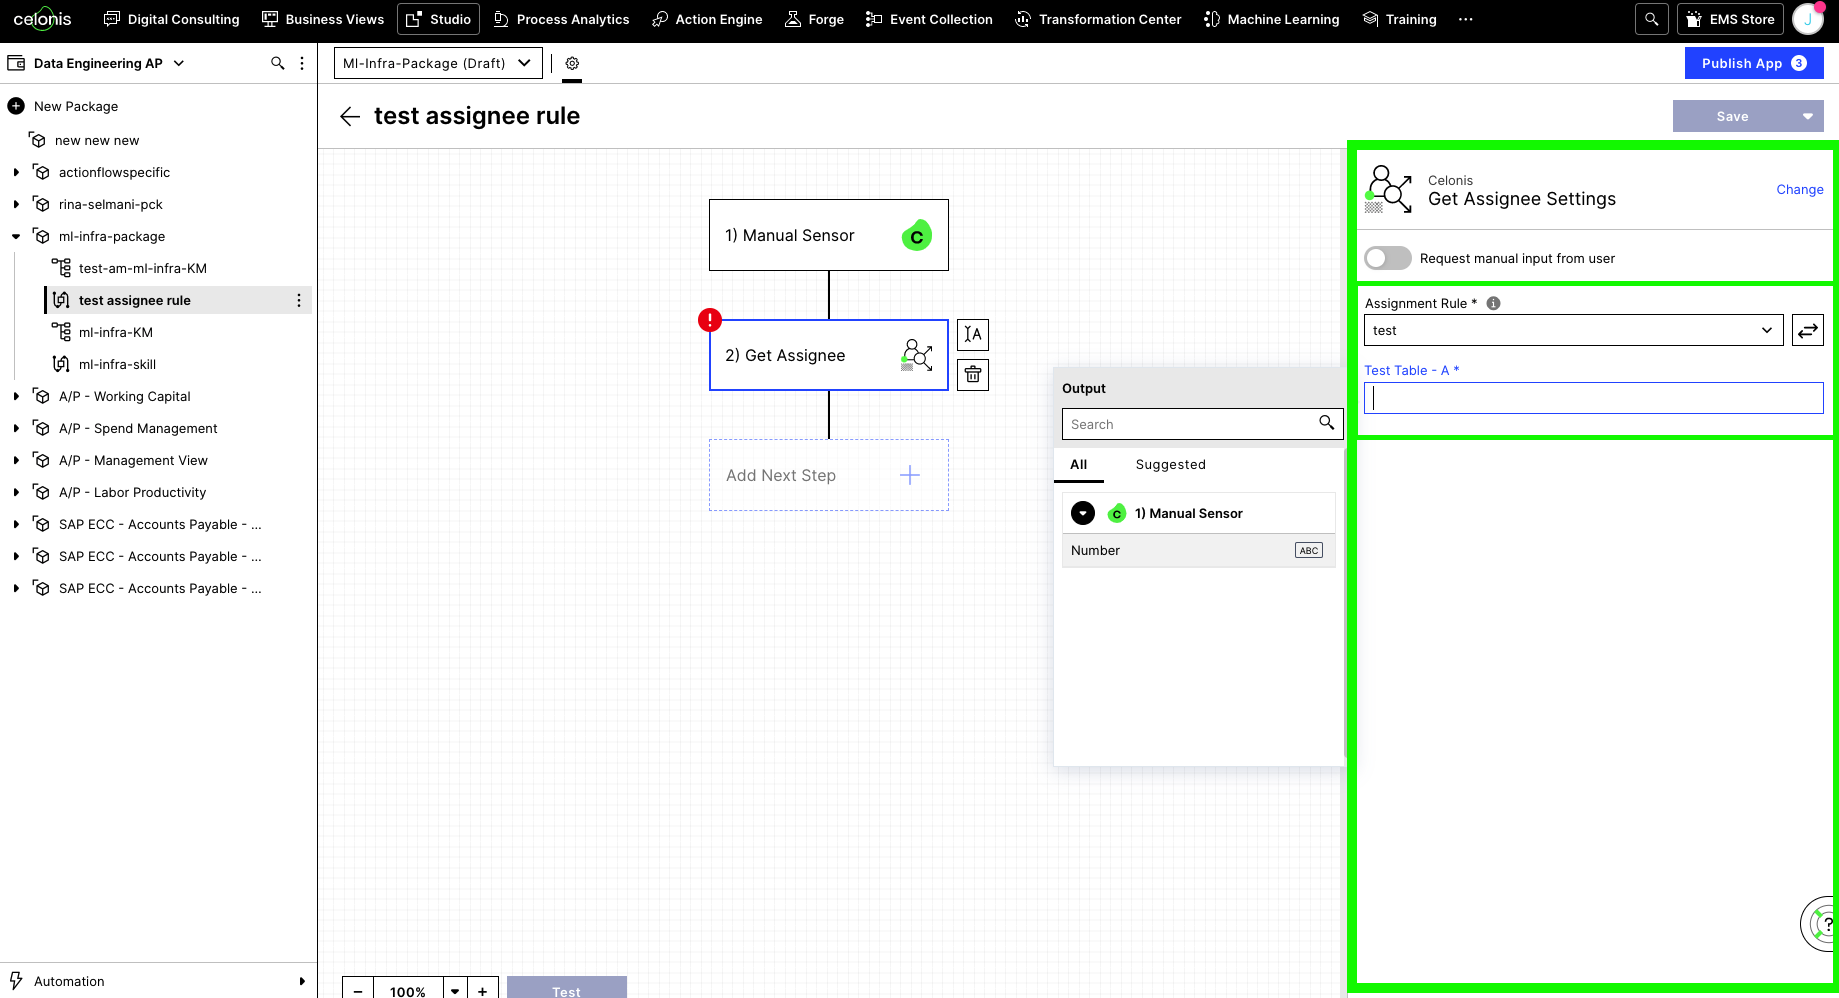
Click the assignment action created in the previous step and select the Assignment Rule you want to apply within this action. Use the dropdown menu to select the desired rule. Please see the section "Step by Step Guide to Assignment Rule Creation" above for the creation of a new rule.
Fill in the required Input Attributes by clicking in their boxes and selecting the respective attributes using the dropdown menu.
 |