Creating KPI Snapshots
Creating KPI Snapshots allows you to record historical performance baselines at defined operational intervals. Instead of dynamically recalculating metrics against live transactional changes, this task saves calculated results as static historical data. This ensures consistent trend tracking for strategic goals, such as monitoring monthly reductions in touchless invoice processing exceptions within your Procurement cycle.
Complete these prerequisites before creating KPI Snapshots:
Prequisites | Requirements | Link |
|---|---|---|
Studio service permissions | Analyst accounts require explicit service-level permissions to create snapshots within assigned Studio spaces. | |
Target data pool access | Admins must grant explicit data access permissions for the centralized team repository where snapshot tables are stored. | |
Published Knowledge Model | The target KPIs must reside within a fully published Knowledge Model before initiating configuration. | KPIs. |
To create a KPI Snapshot:
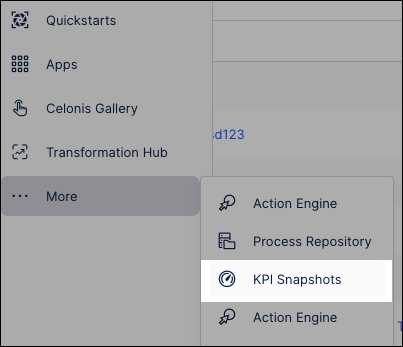
From the main Celonis menu, click More - KPI Snapshots:
Click + Add KPI Snapshot.
Configure the KPI source parameters:
KPI Snapshot name: Enter a unique tracking name (for example, enter `Procurement_DPO_Baselines`).
Knowledge Model: Select the model containing your operational definitions (for example, select your **Accounts Payable Performance Model**). The snapshot engine automatically targets the latest published version of this model.
Configure target KPIs and operational attribute breakdowns:
KPIs: Select the specific metrics to track over time (for example, select your **Paid Late Rate (%)** KPI).
Filtered by (optional): Select a pre-configured filter profile to restrict your snapshot scope (for example, select `High_Value_Invoices` to isolate enterprise transactions).
Breakdown: Select process dimensions to segment historical results. For example, choose **Vendor_Country** to split your snapshot tables into distinct historical rows per supplier region, allowing you to catch regional performance shifts over time.
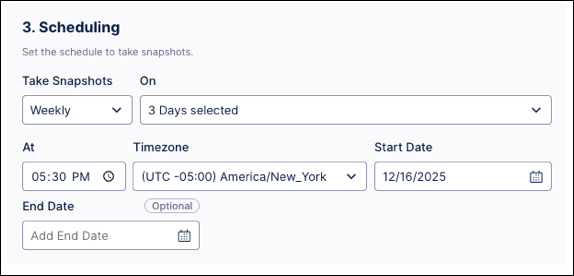
Configure the snapshot schedule:
Take snapshots on: Select from daily, weekly, and monthly.
On: Select the days to take the snapshot on.
At: Select the time to take the snapshot on.
Timezone: Select the timezone to use.
Start date / end date: Select the date to start and end the snapshots on.
Click Save.
The KPI Snapshot now runs as configured, with the results displayed on the overview page.
Warning
Deleting a KPI Snapshot is permanent. This action will also delete all historical data points and records previously captured by this snapshot. This data cannot be recovered.
To delete a KPI Snapshot:
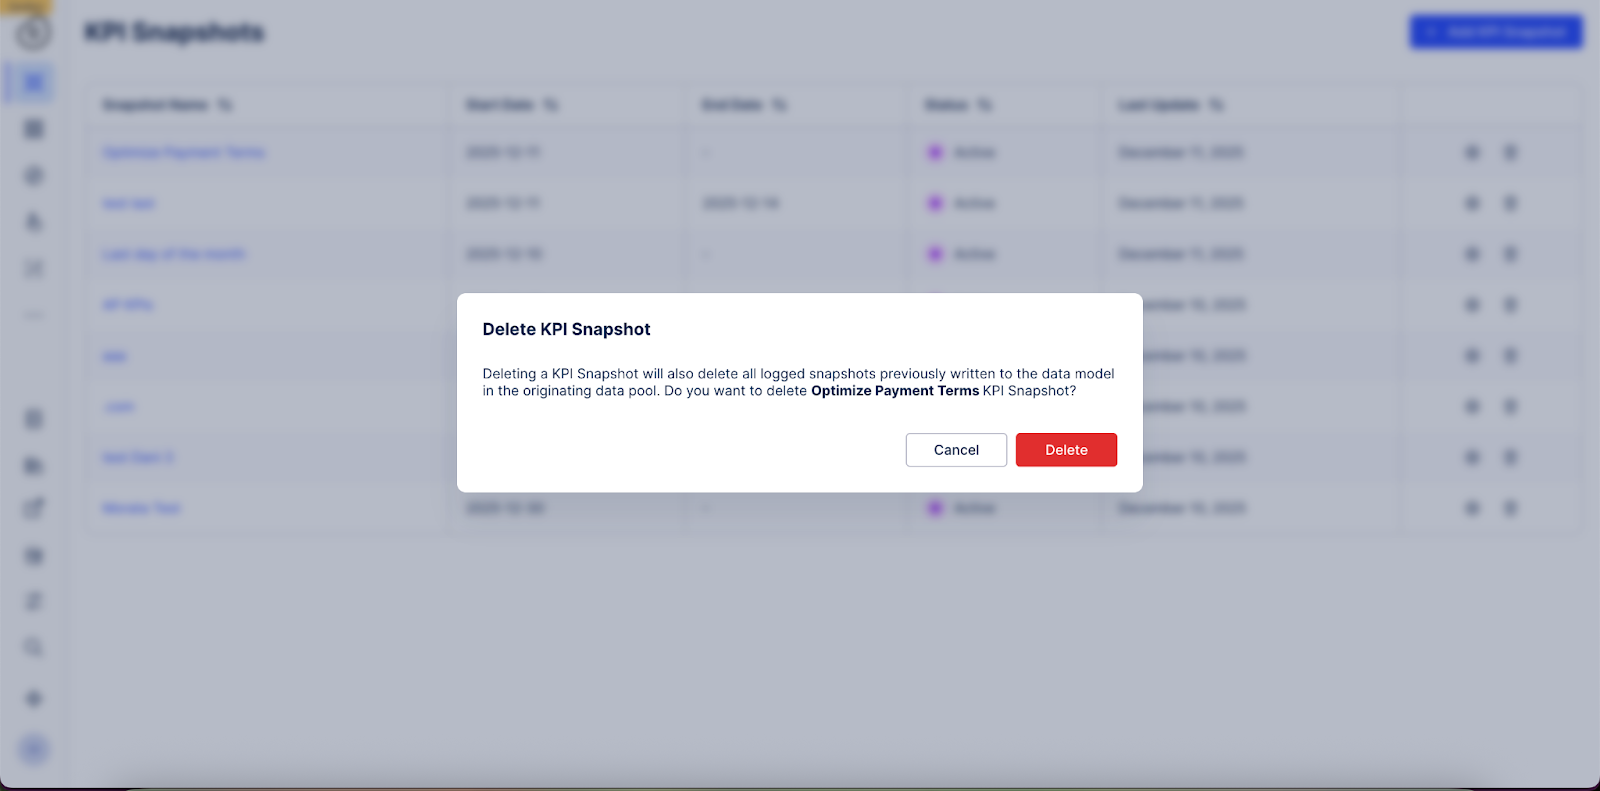
From the KPI Snapshot list, click the Delete icon. The Delete KPI Snapshot modal will open.
In the confirmation modal, click Delete to confirm.
Use KPI Snapshots to monitor enterprise-wide performance or track value realized from implemented solutions. For these use cases, the Transformation Hub in Views app is available in the Celonis Marketplace.
Avoid over counting (Incremental vs. Cumulative)
The Transformation Hub calculates total value by summing all logged entries. To avoid inflated results, do not log cumulative (Total to Date) KPIs. Instead, log only the incremental value (delta) generated since the last snapshot.
Recommendation: Use time-based filters
To ensure your snapshots capture the correct window of data, apply a filter within the KPI Snapshots:
Daily Snapshots: Filter for
Date = previous day. Schedule the execution for 00:05 to ensure the full previous day's data is processed.Weekly Snapshots: Configure the KPI to filter for the last 7 days only.
Handling execution delays
If you schedule a snapshot at 23:59:59, a delay of even one second can cause the filter to skip data or target the wrong date. Schedule snapshots shortly after midnight to account for late-arriving transactional syncs and using this PQL command to target the previous day:
FILTER ROUND_DAY("Table"."TimestampColumn") = ADD_DAYS( TODAY(), -1);Note
Always align your PQL time zone with your snapshot schedule. Since TODAY() defaults to UTC, specify your time zone (e.g., TODAY('Europe/Berlin')) to prevent inconsistent data.