Studio App Building Guidelines - Object details view
An object details view provides extra information on an individual object, such as other objects linked to it, the process involved in this object, and any comments made against this. The primary user persona for this view is an Analyst, using the view to gather further details for their work.
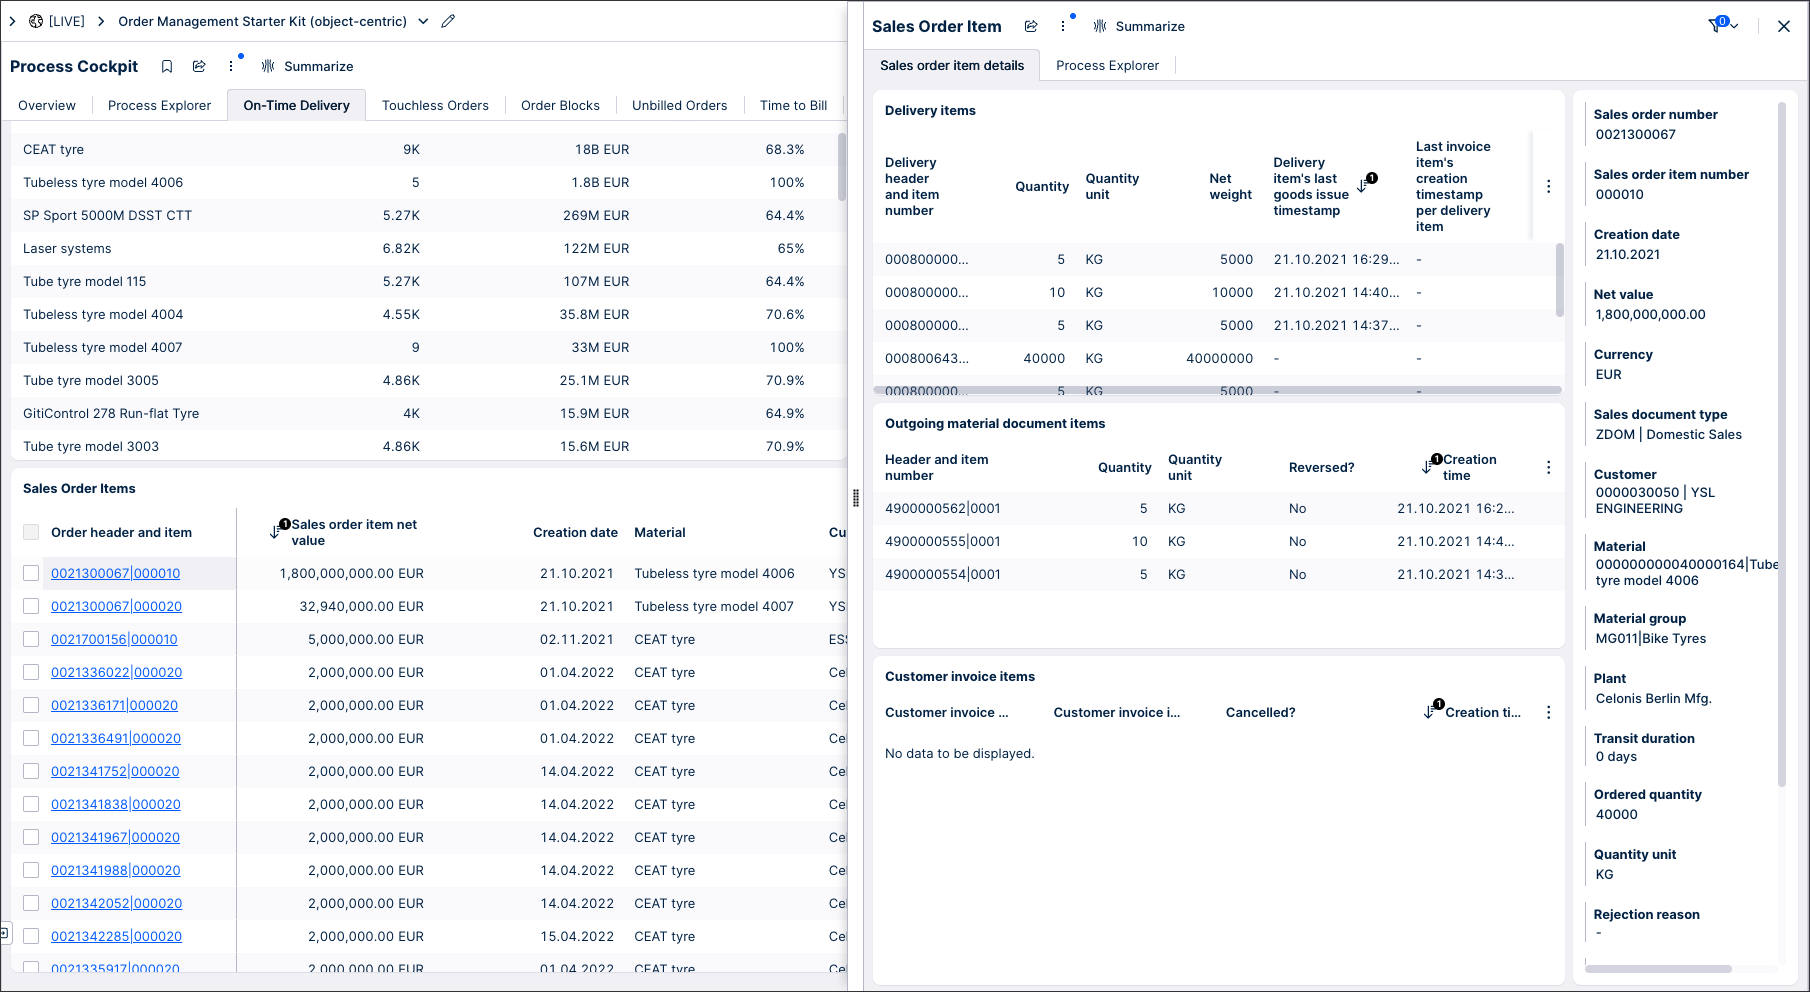
Object details views are often accessed by clicking the object identifier column in a case table when viewing an app. For example, when using the Order Management Starter Kit, an Analyst could click a value in the Sales Order table and view further details about that individual sales order.
When creating an object details view for your app, consider the following:
For an example of a well-structured object details view, see the Order Management Starter Kit in the Celonis Marketplace:
 |
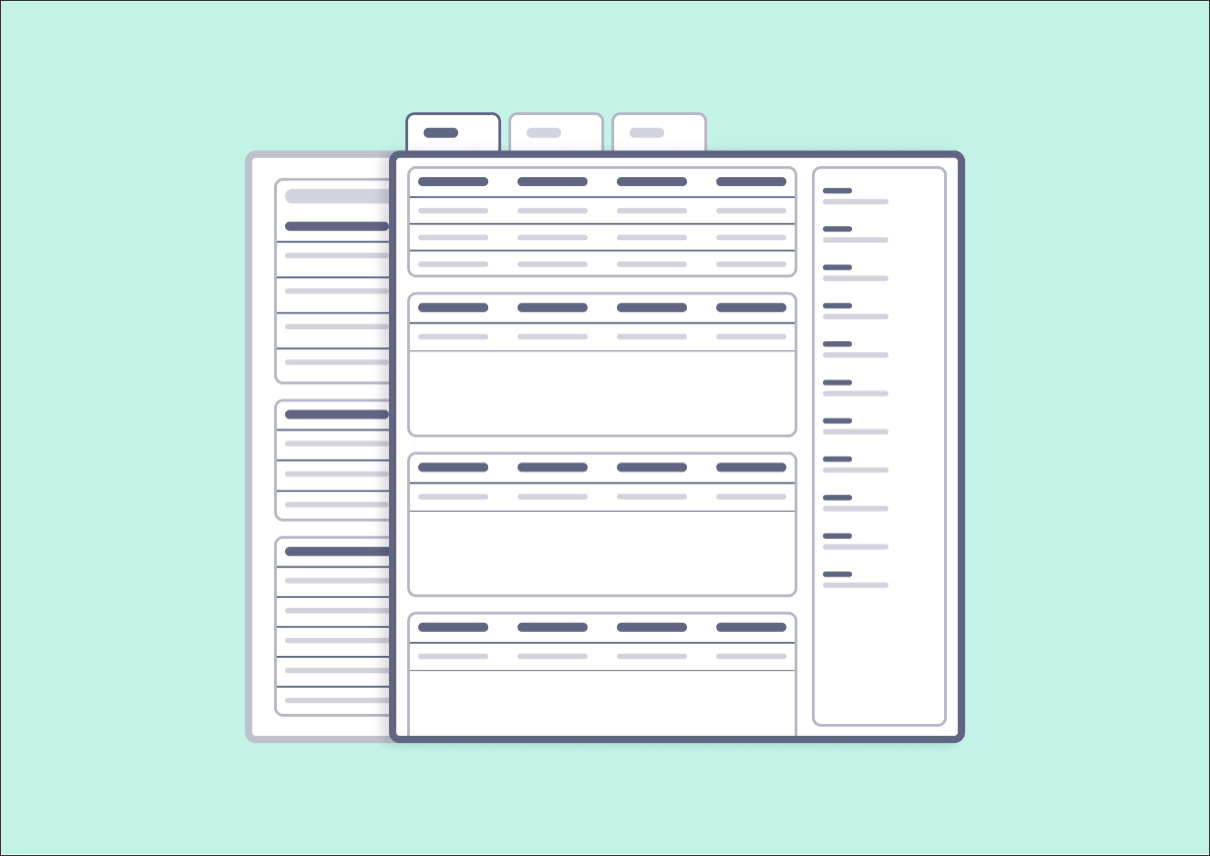
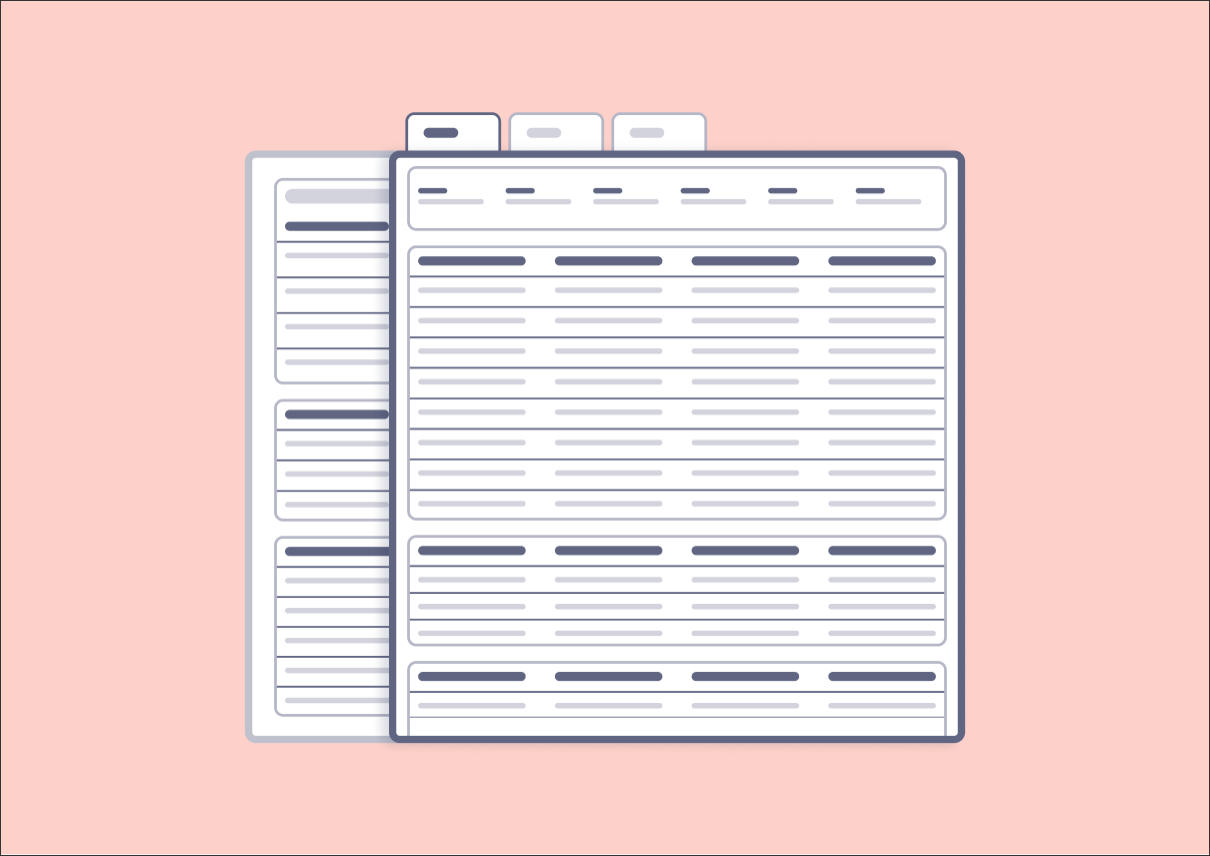
Object details views can be created using four areas:
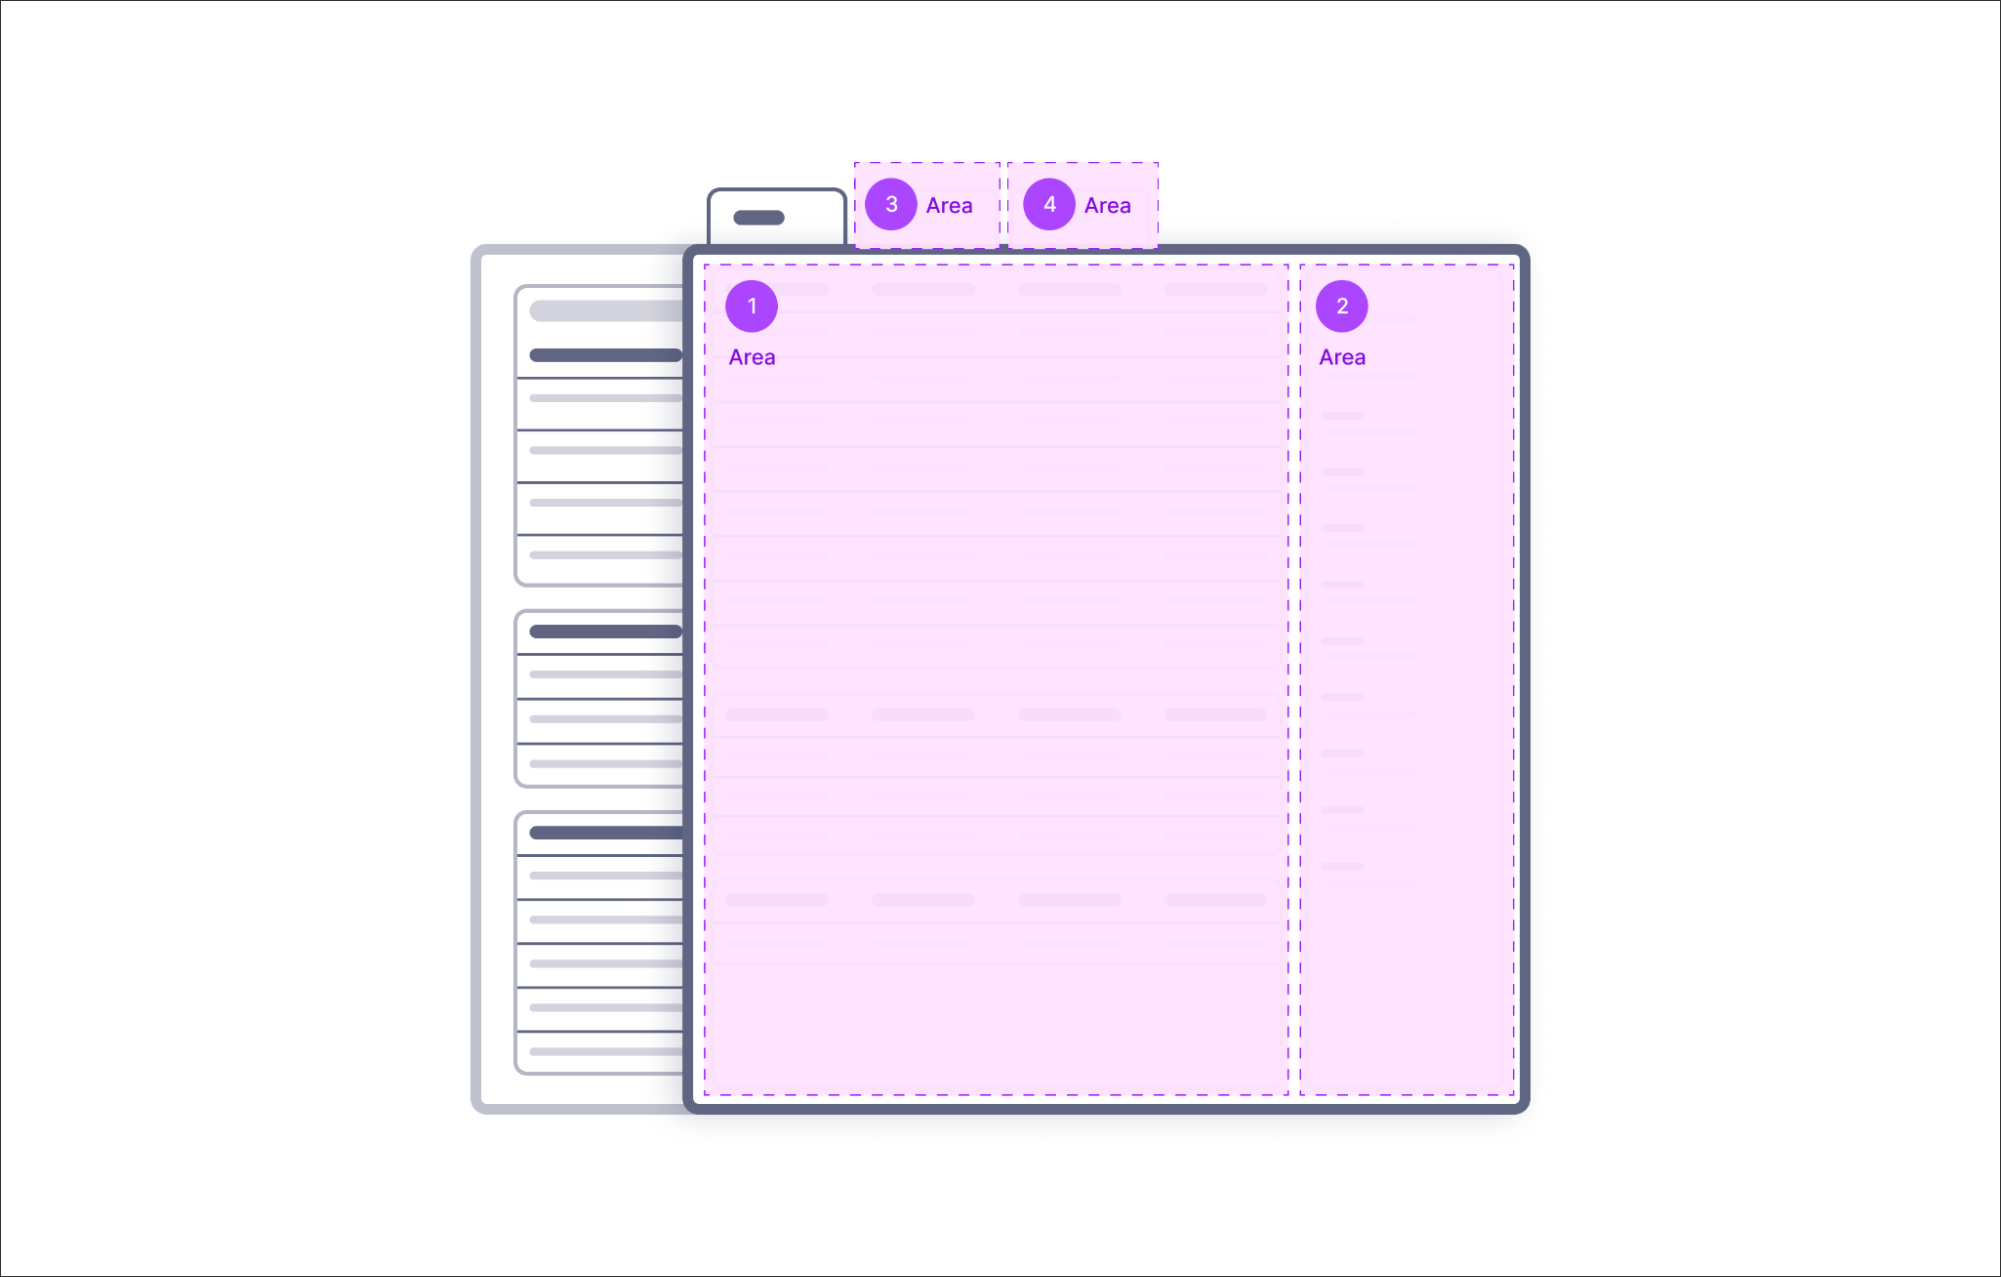 |
When creating this view, you can use a number of Studio components:
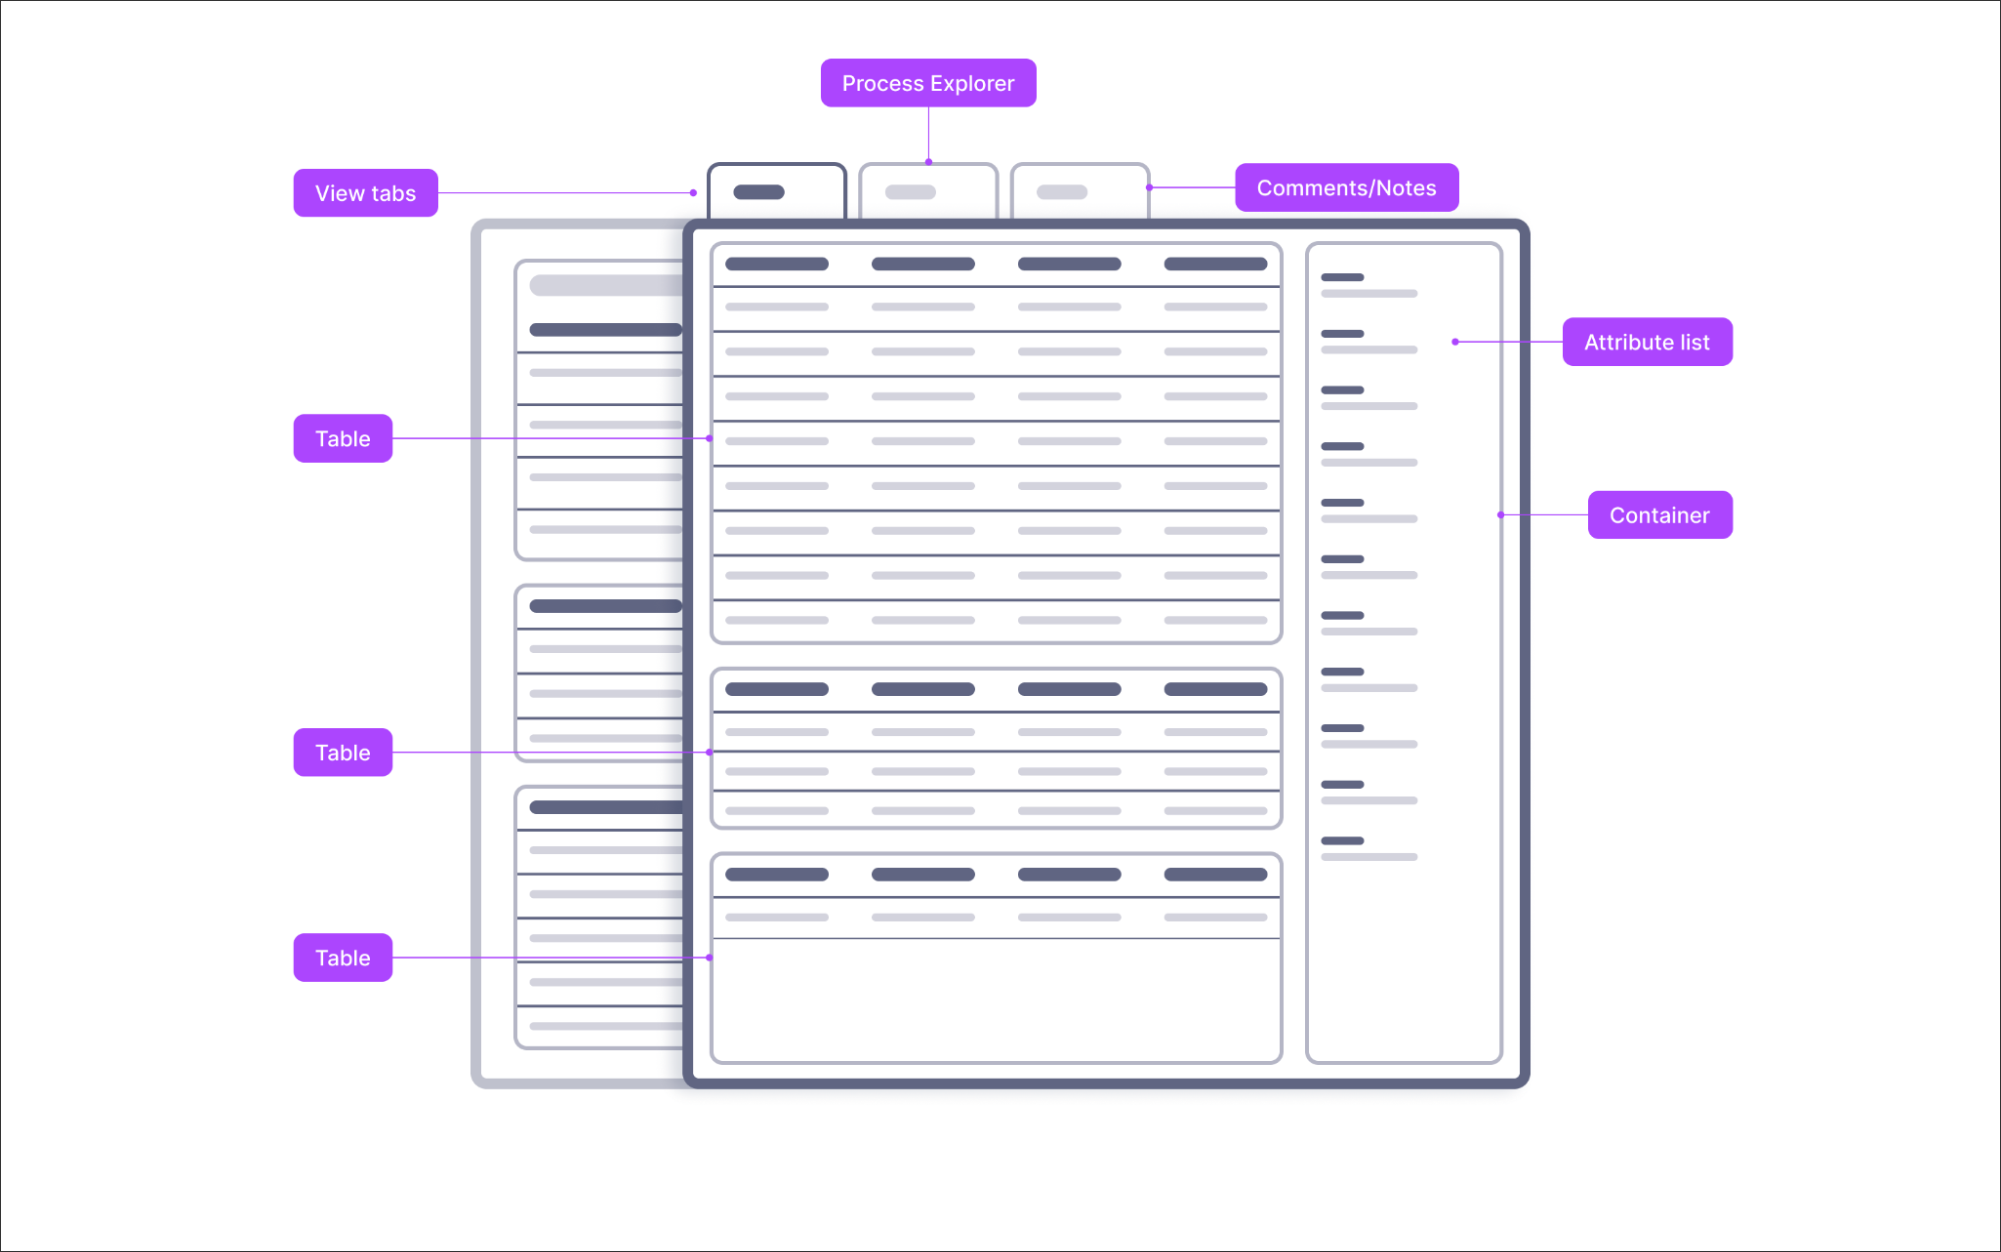 |
Related objects area
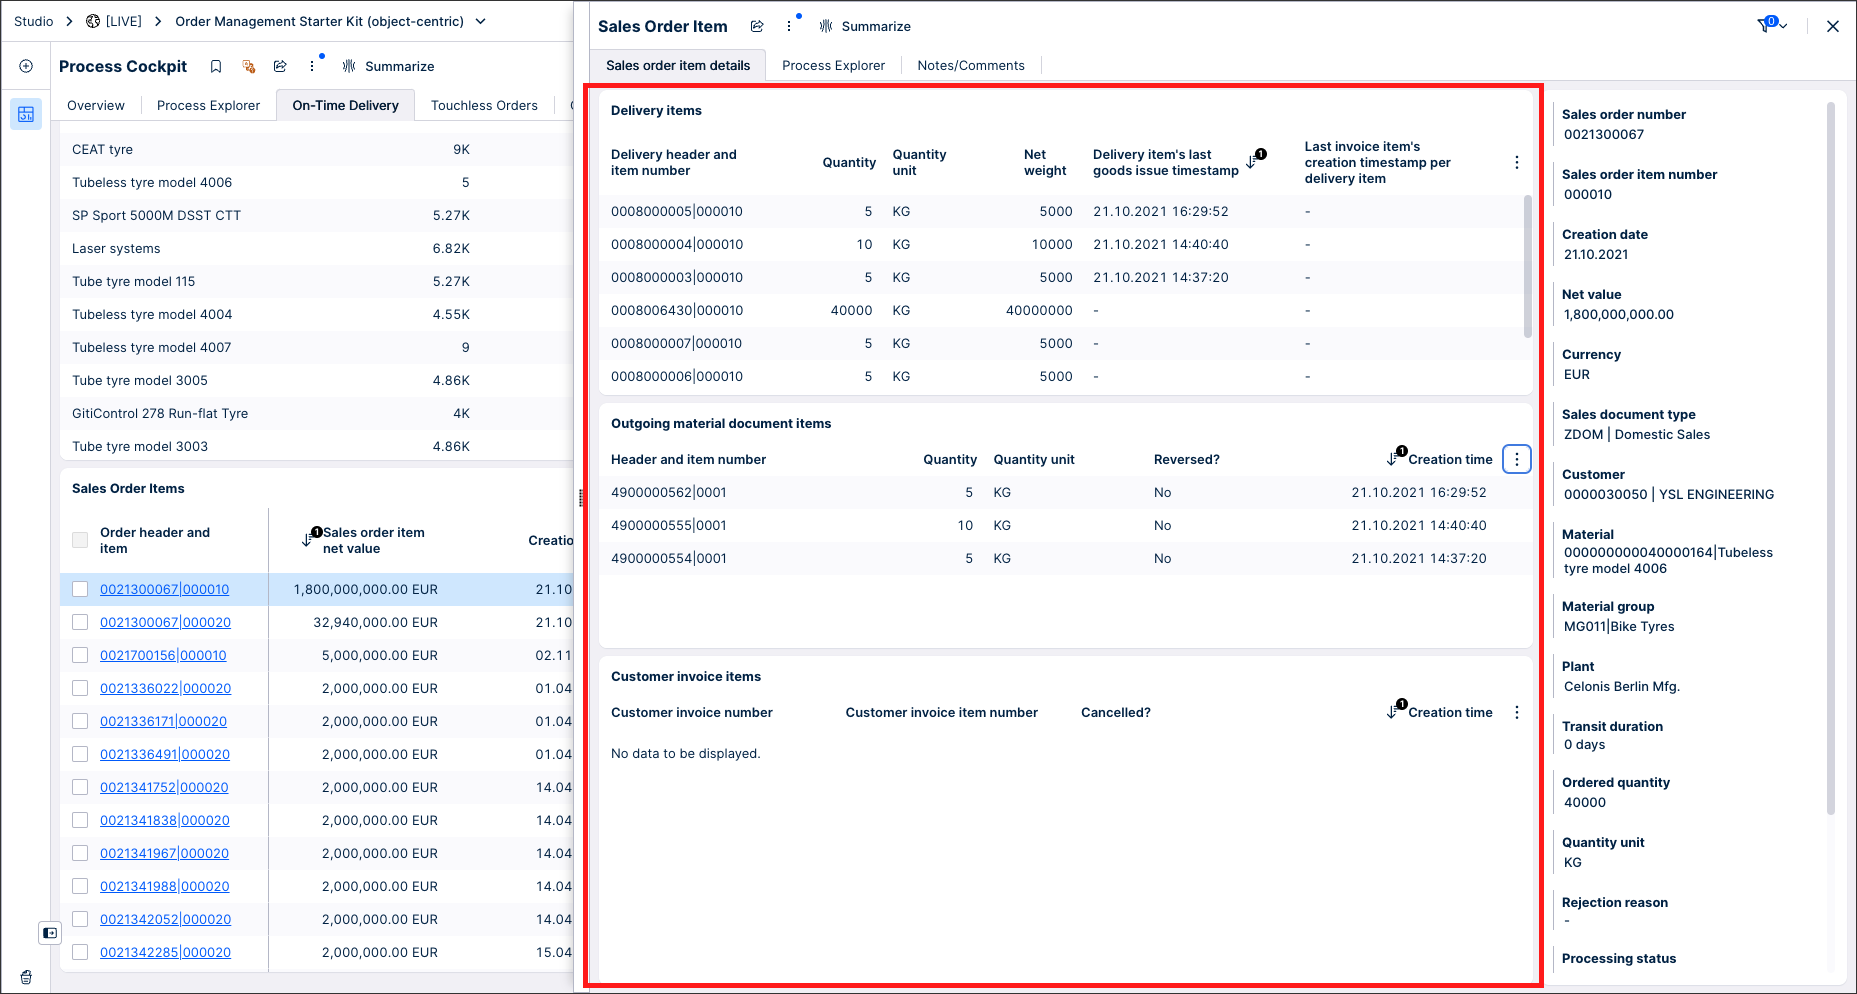
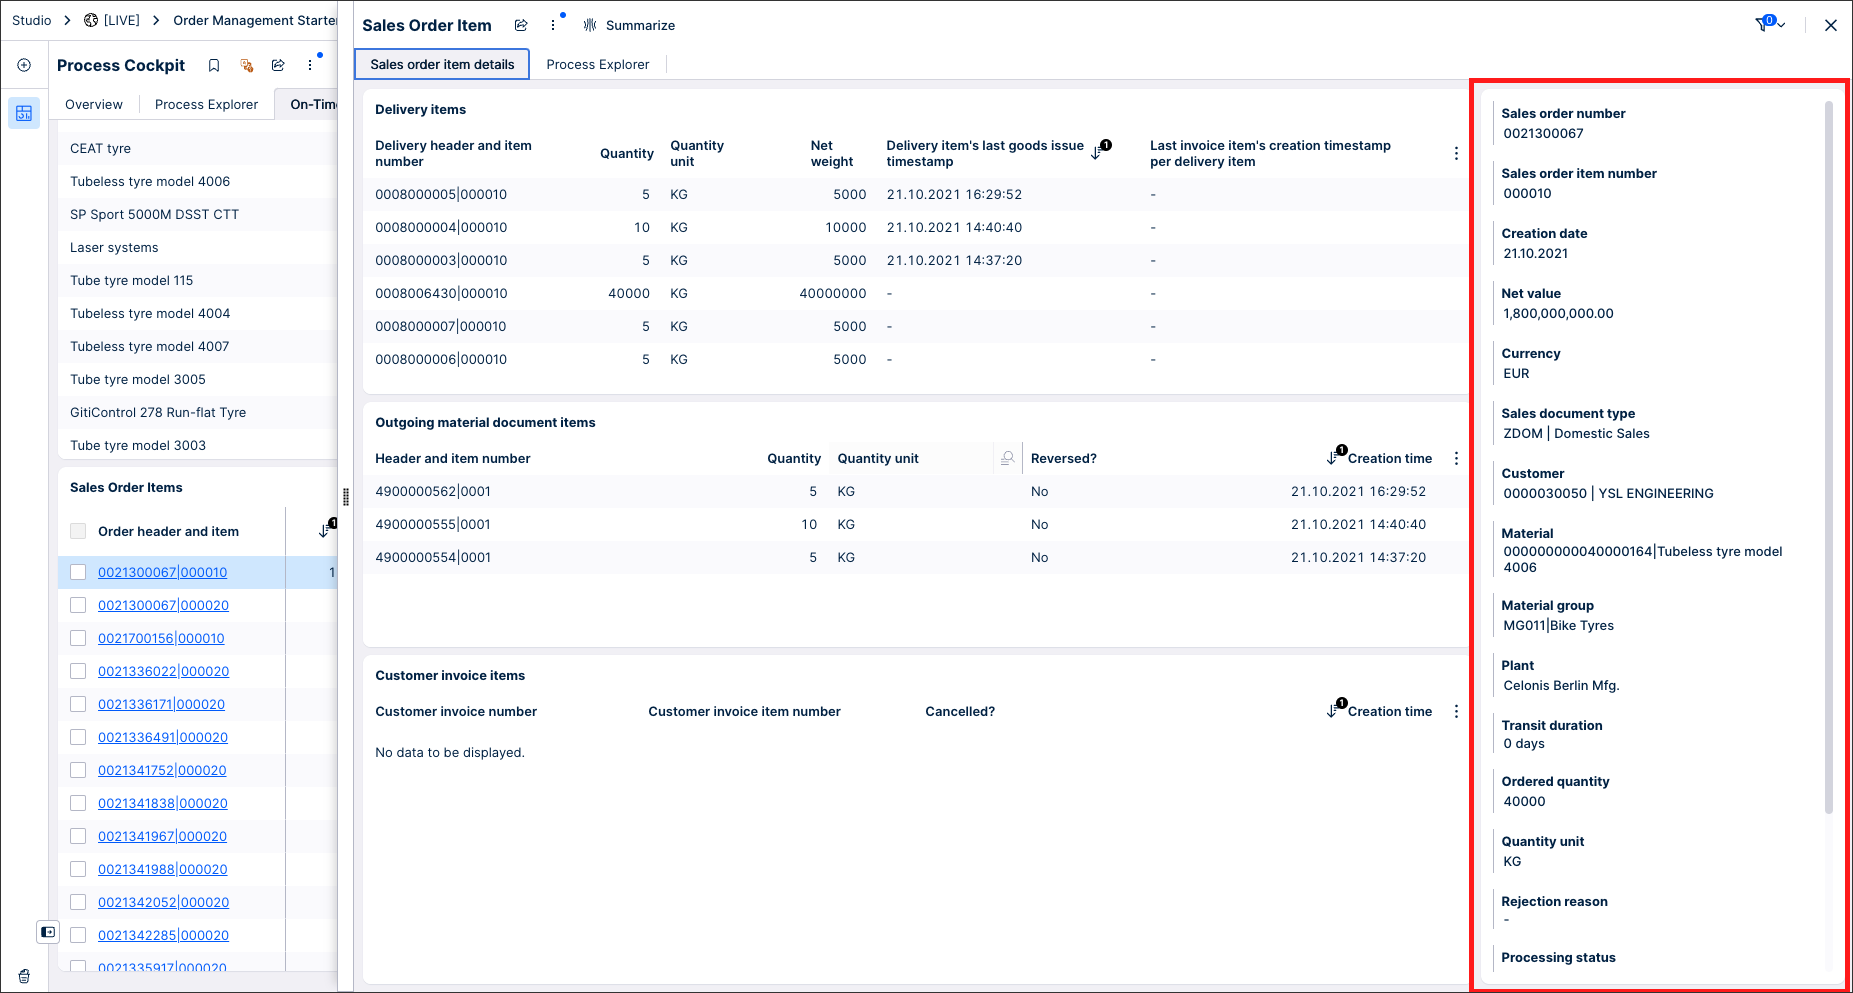
In this part of the view, the Analyst can see the other related objects (e.g. the line items of a header object) and information about them. The Analyst can understand the object's current situation by looking at the number of associated objects and their characteristics. For example, by seeing the quantity in the delivery items or if there are any customer invoice items related to the sales order item, the Analyst can understand the processing status of that object.
When creating the related objects area, we recommend allocating enough space for each table so that at least three rows of data show on the screen. Think about which attributes you want to add to each of those tables. To limit the need for horizontal scrolling, only add attributes related to use cases related to the object you are opening.
Our recommended settings for each of the related object tables include:
Fit to content
Line break in the header
Infinite scrolling
For more information about creating and configuring tables in Studio, see: Tables.
 |
Tip
Limit the number of related objects to five. Only add the objects relevant to the use case you are analyzing.
Object attributes area
The objects attribute area consists of an attribute list containing all relevant attributes for the analyzed object. Add as many attributes as necessary for the use case in question.
 |
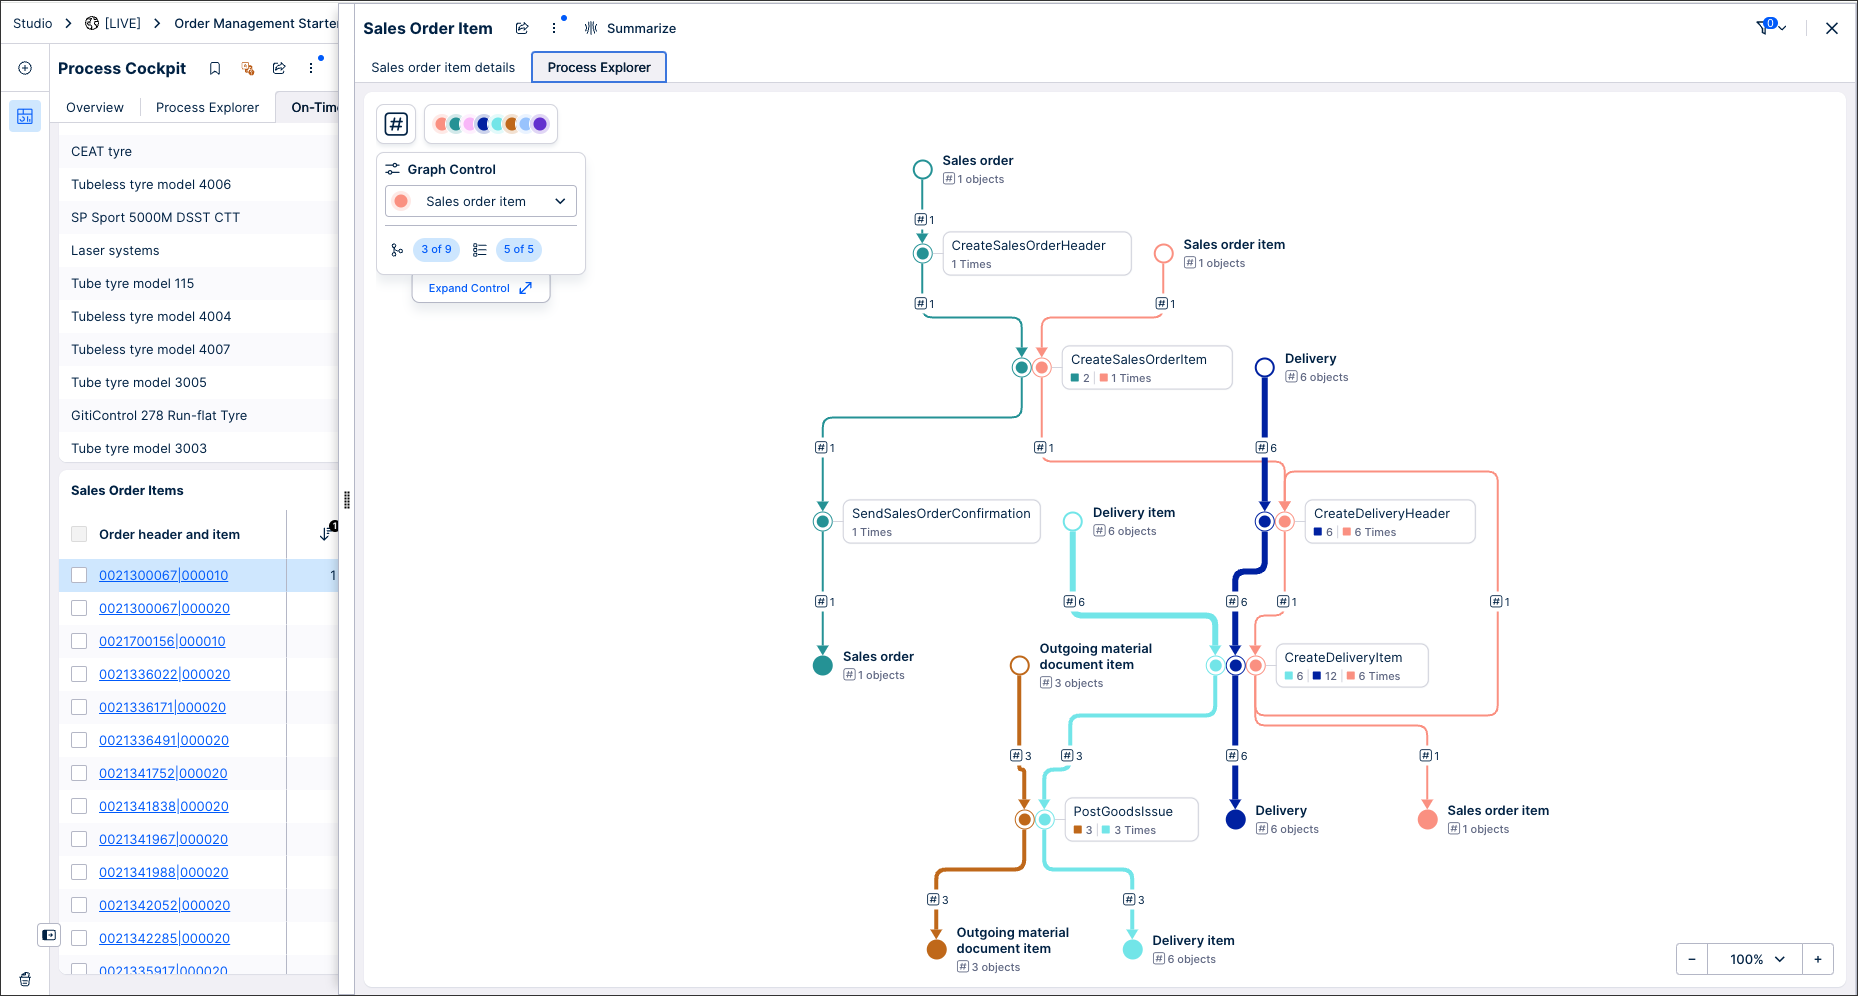
Object process area
The object process area lives in a tab inside the object details view. This way, the process explorer will have enough space to display all object event logs.
To learn more about the Process Explorer component, see: Process Explorer.
 |
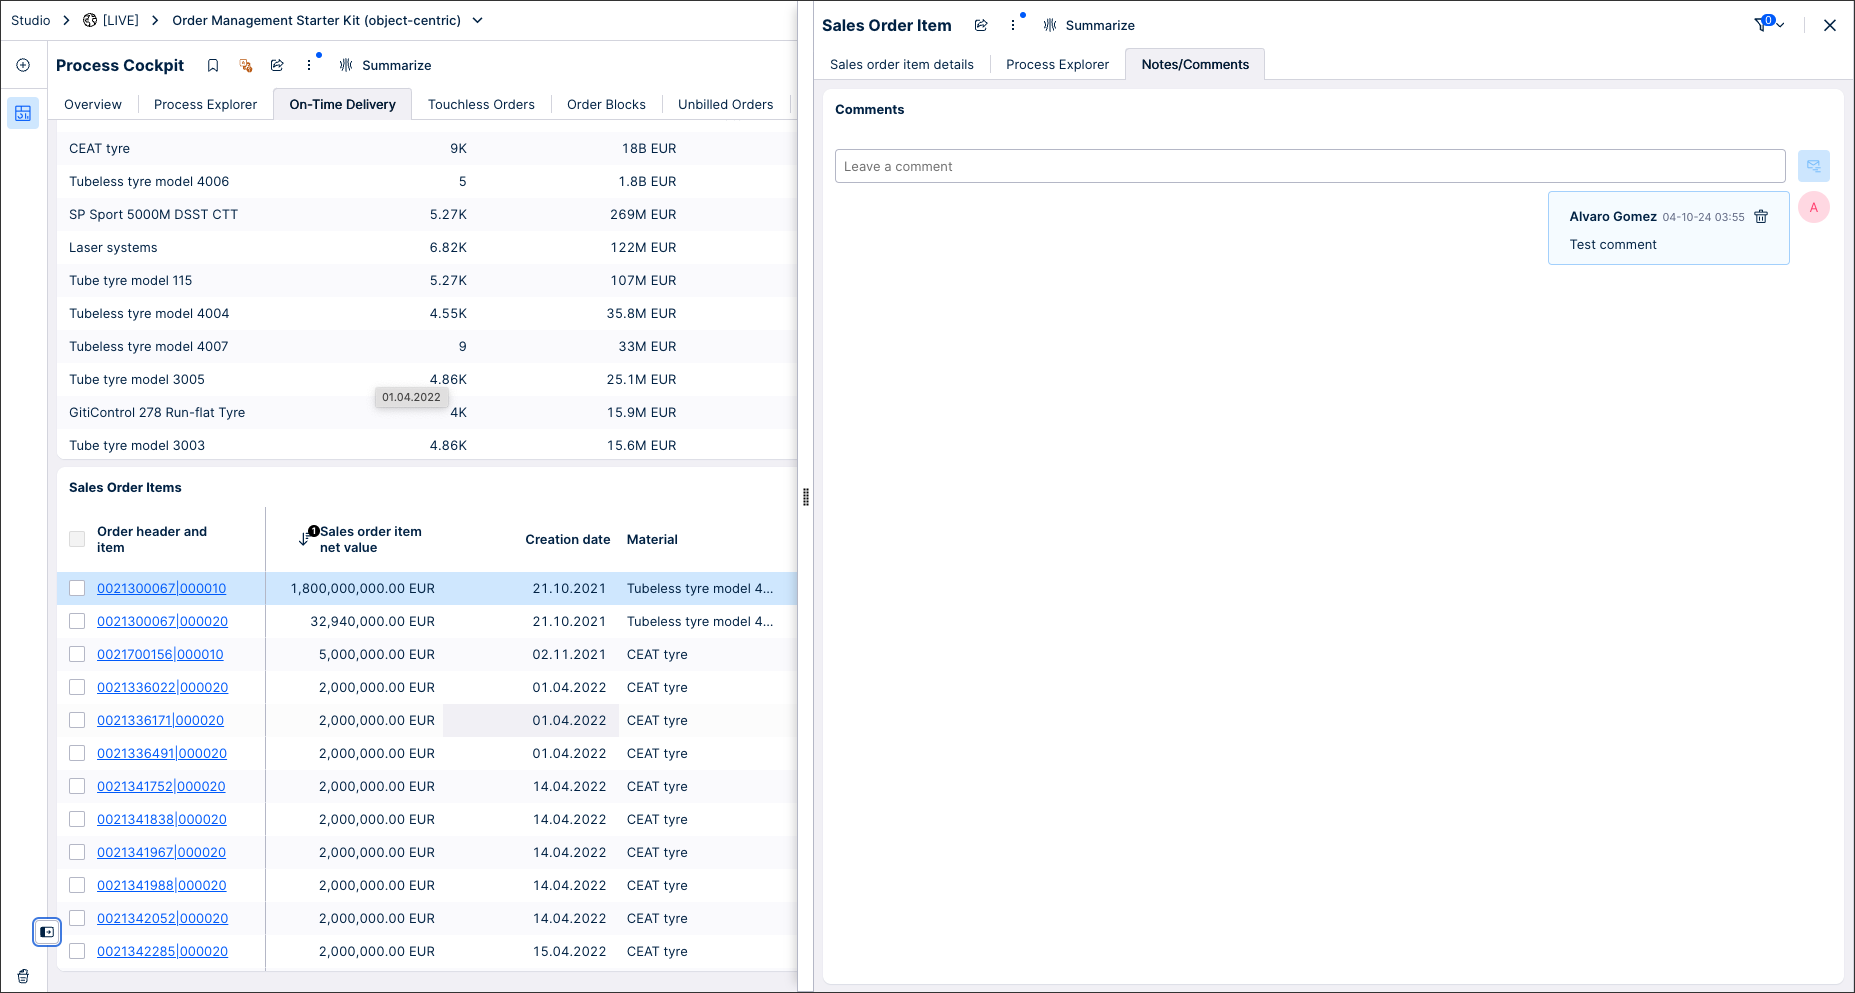
Comments area
By using a comments component, you allow Analysts to ask questions, share updates, and discuss the objects. They can also tag each other, highlighting new comments or questions where needed. Comments are linked to the object and then stored in Celonis.
To learn how to configure a comments component for your app, see: Comments.
When creating your object details view, we recommend the following:
When selecting the attributes to add from the object and related objects, consider the use case being analyzed and what works best for the Analysts and their role.
Always use a human-readable name for the object attributes.
Only add up to five related object tables to avoid excessive scrolling.
 |
We'd also discourage:
Using the source system IDs/names to name the objects or attributes.
Placing the attribute list horizontally on the view. Use the vertical orientation.
 |