Flow Control
Whether you are automating a simple repetitive task or building a complex data pipeline, Flow Control modules give you the steering wheel for your data. By using these tools, you can dictate exactly how many times a process runs and how your information is structured.
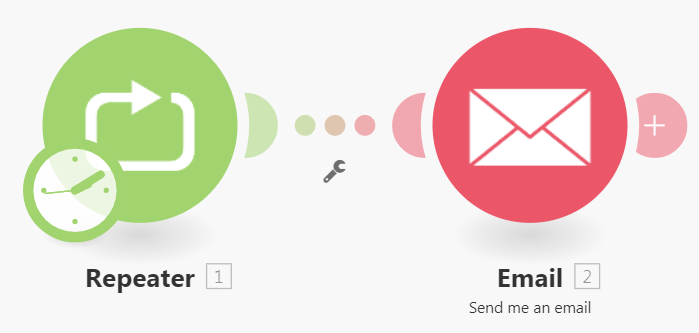
Think of the Repeater as your automation’s "loop" engine. You can use it to generate a specific number of bundles, starting from an initial value and increasing by a step you define.
The benefits include:
Automate Redundancy: It saves you from manual data entry or redundant module placement. If you need to send five identical follow-up emails or generate ten placeholder records, you simply set the count and let it run.
Sequential Logic: Because it outputs an incrementing value ($i$), you can use it to create indexed entries, such as "Order 1", "Order 2", etc., without manual intervention.
The Repeater acts as a bundle generator. Each bundle it produces contains an item named i (a Number). You control the output through three main settings:
Initial Value: Where the count begins.
Repeats: The total number of bundles you want to generate.
Step: How much the value of i increases with each iteration (this is found under Show advanced settings).
While a Repeater creates bundles from scratch, you use an Iterator when you already have a collection of data—specifically an array—and you need to handle each item inside it individually. It acts as a bridge that converts a single large array into a series of separate bundles.
The benefits include:
Granular Processing: Instead of treating a list as one giant block, you can perform specific logic on every single item independently. For example, if you receive a list of 20 orders, the Iterator lets you check the credit status or send a personalized notification for each order.
Data Transformation: It allows you to "unpack" complex data structures received from APIs or databases so they can be mapped into other apps that only accept one record at a time.
Precision Filtering: You can place a filter immediately after an Iterator to drop specific items from the array that don't meet your criteria, ensuring only relevant data moves forward.
The Iterator is a specialized module that requires an array as input.
Input: You map an array (a list of items) into the module.
Output: It produces one bundle for every item in that array.
Visual Guide: In your Action Flow, any modules placed after the Iterator will execute once for every bundle the Iterator creates. If your array has 10 items, the subsequent modules will run 10 times.
The Array Aggregator is the tool you use when you need to "clean up" your flow and consolidate data. While an Iterator breaks things apart, the aggregator does the exact opposite: it scoops up multiple separate bundles and fuses them back into a single array.
The benefits include:
Consolidate Results: You can prepare data for systems that require bulk uploads. For example, after processing 50 individual invoices, you can aggregate them back into one consolidated report to send as a single email attachment.
Organize with Grouping: You can split your output into several groups based on specific formulas. This is incredibly helpful if you need to bundle items by a shared attribute, like grouping all orders by "Customer ID."
Custom Structure Control: By pairing this with a JSON > Create JSON module, you can define the exact nested structure your data needs to follow, ensuring it is perfectly formatted for the next step in your process.
If you wish to fully customize the Array aggregator's output structure, proceed as follows:
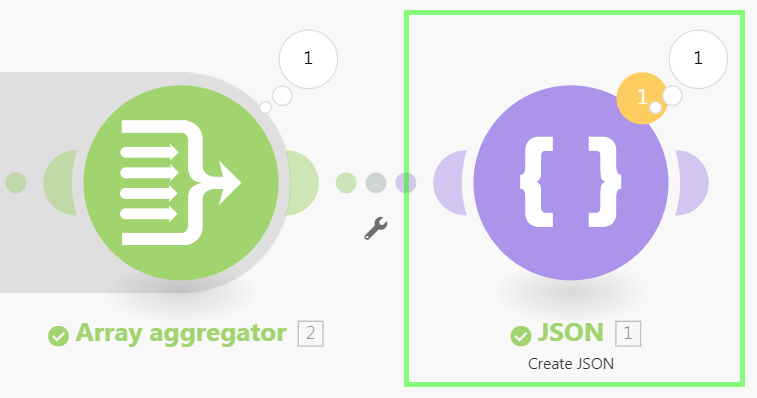
Insert the JSON > Create JSON module after the Array aggregator module:
Open the JSON > Create JSON module's setup.
Setup a Data structure for the items you want to be outputted from the Array aggregator. The Data structure should be an array of collections and the collections should contain the items you want to include in the output. Here is a sample Data structure with two text items
NameandEmail: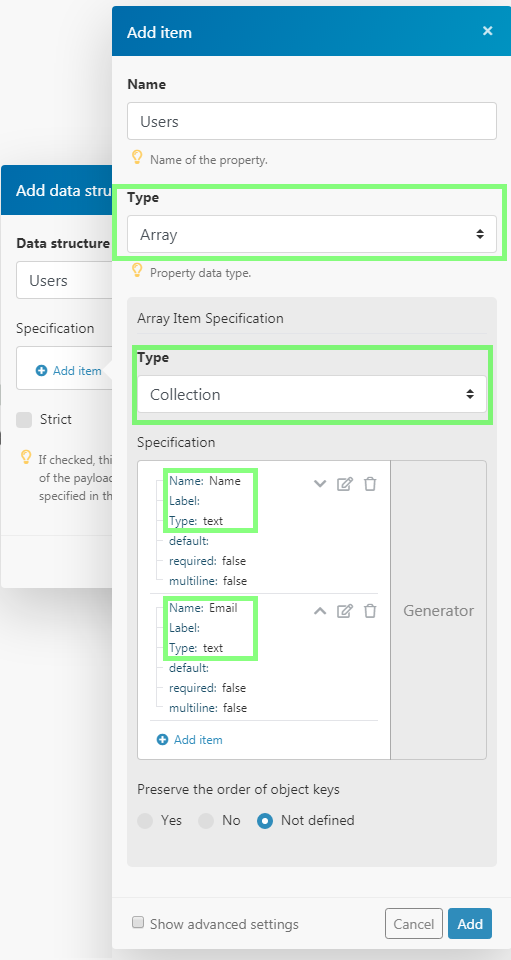
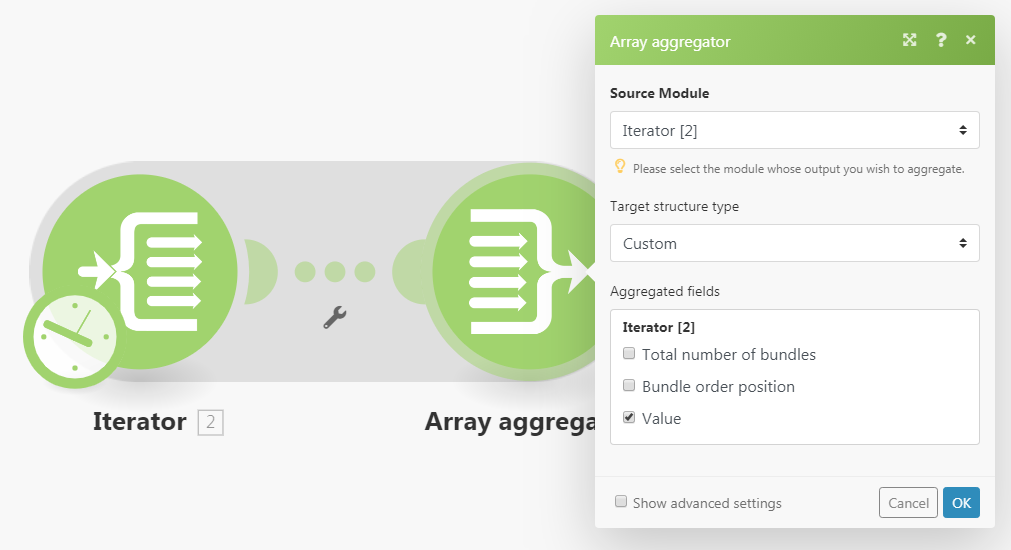
Open the Array aggregator module's setup.
In the Target structure type field, choose the JSON > Create JSON module's array field:
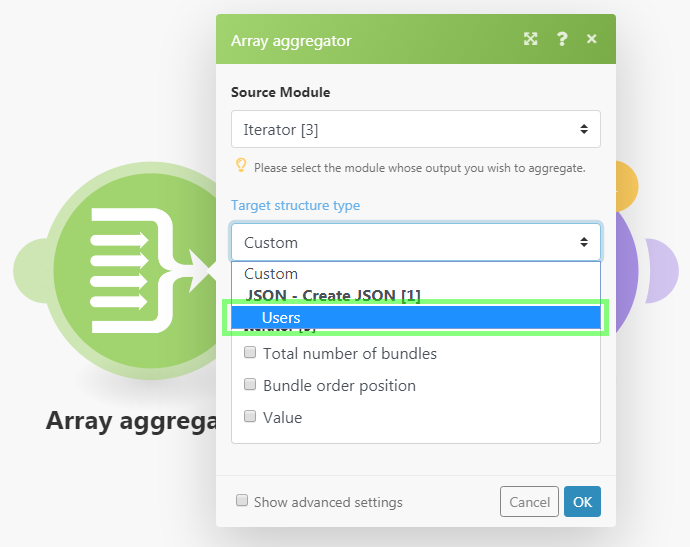
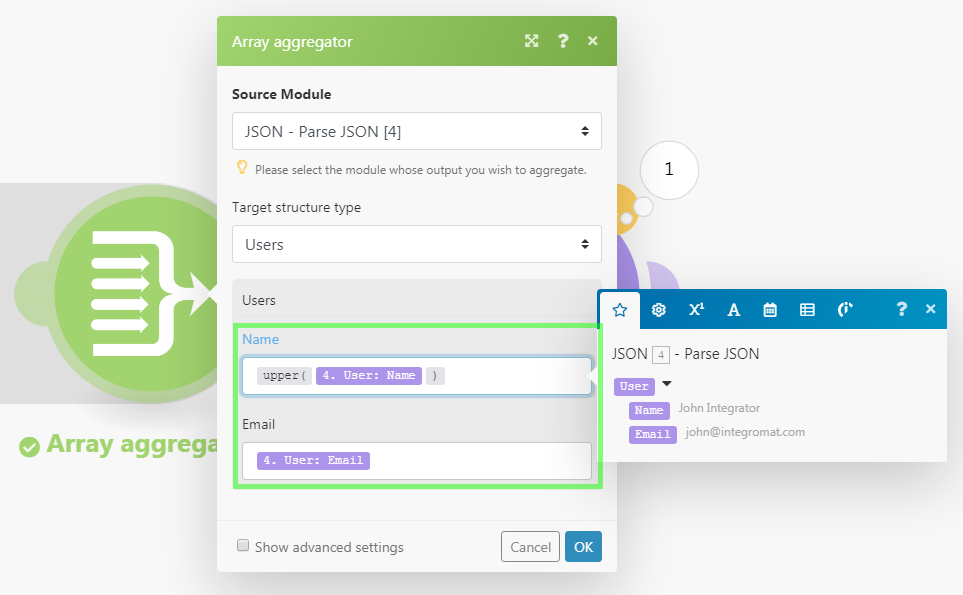
Fields corresponding to the Data structure created in step 3 will appear in the setup of the Array aggregator module. Map any items into the fields as you see fit. You can now easily map nested items using the mapping panel and even use formulas:
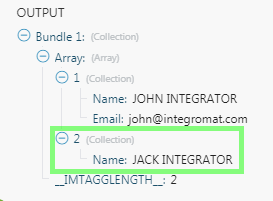
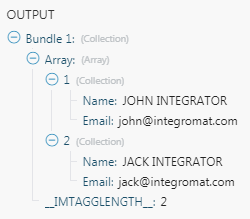
The Array aggregator module's output will now look like this:
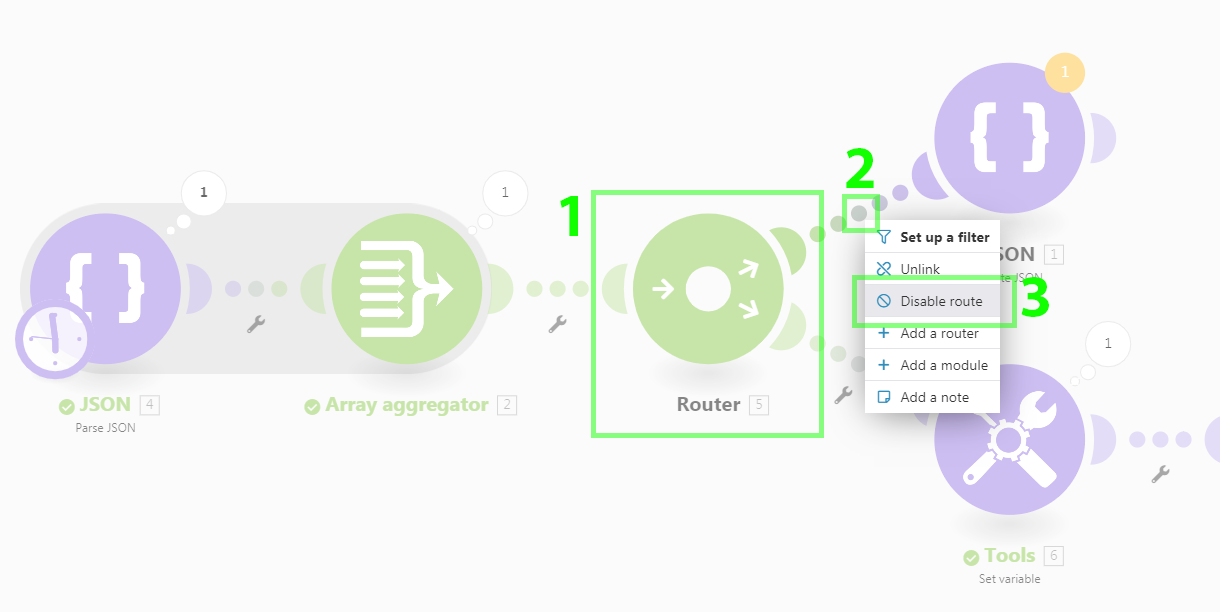
If you wish to save the operation performed by the dummy JSON > Create JSON module, just put it on a disabled route after a Router:
If you wish to conditionally omit an item from the module's output, use a formula that evaluates to ignore keyword:
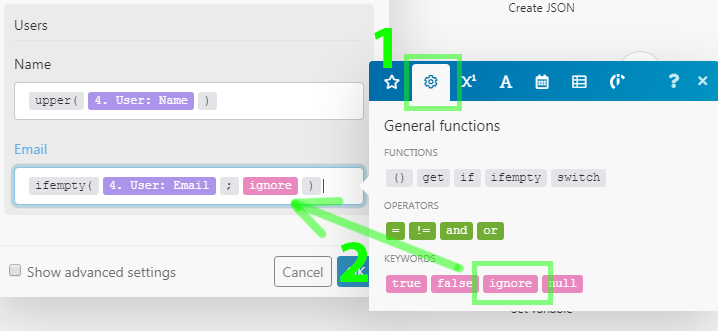
If the 4. User: Email is empty then the Email item will be completely omitted from the output: