Sharing data between data pools
You can share data between data pools within the same Celonis Platform team by exporting their data connections and then importing them into the target data pool. By sharing data, you can both granularly control permissions to it and can make use of commonly used data for different business reasons or processes.
You must first export your data connection and then import that data connection into your selected data pools. These steps must be performed in order, rather than selecting either / or.
Sharing data between data pools without a data connection
Some use cases require you to share data between data pools when a data connection doesn't exist (for example, when data is captured using Task Mining).
For help to do this, see: Sharing data between data pools without a data connection
For a video overview:
Exporting data connections
By exporting data connections, you share the data from those data connections with other data pools. This includes sharing the data connection’s table configuration, with views of that table being taken so that the data isn’t duplicated.
To export a data connection from your data pool diagram:
Click Data Connections.
For the data connection you want to share, click Options - Share Data with Other Data Pools.
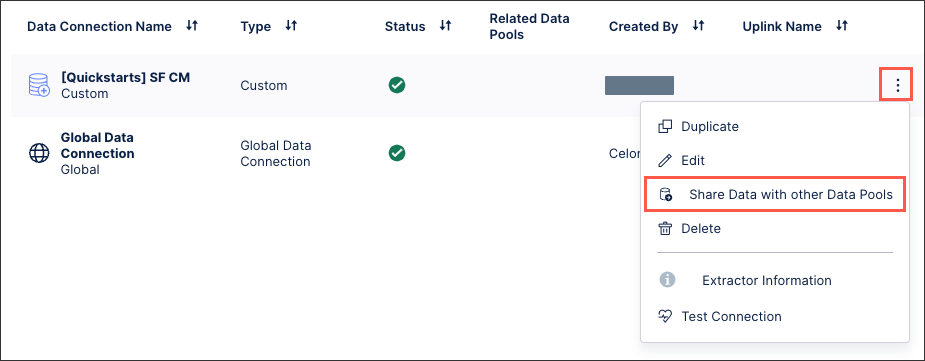
Select the data pool(s) you want to share your data connection with.
Select the tables you want to share with the selected data pools. If multiple data pools are selected, you can choose whether to use the same configuration for all target data pools or manually select the configuration for each.
Same configuration for all target data pools: Best used for sharing the same data tables across one or more data pools.
Manually select configuration per data pool: Best used for sharing different data tables with different data pools.
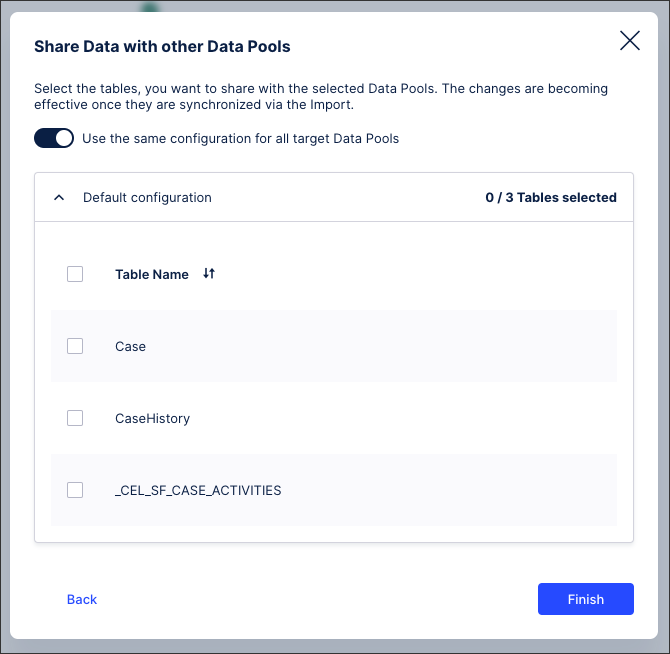
Click Finish.
The data connection is shared with the selected data pools and is ready to be imported.
Importing data connections
After exporting your data connections to selected data pools, you must then import them into that data pool. This adds the data connection to a draft data pool, with that draft needing to be saved before the connection can be used in production.
To import your data connections to a data pool from your data pool diagram:
Click Data Connections.
Click + Add Data Connection and select Import Data from another Data Pool.
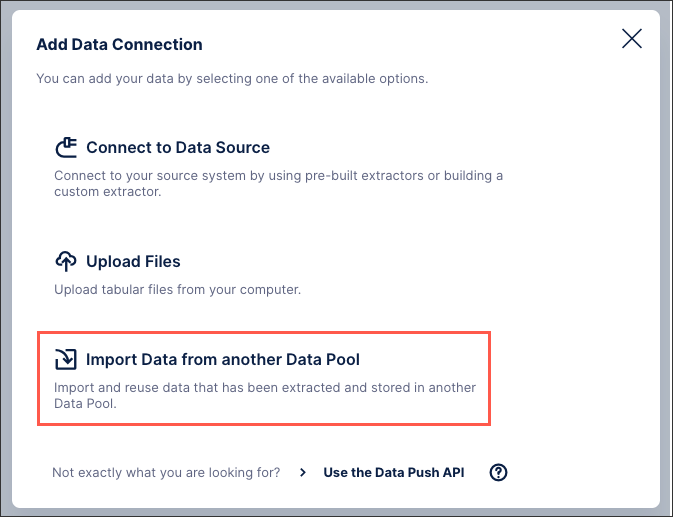
Select the data connection you want to import.
Choose the tables you want to synchronize between the data pools.
This is a one time synchronization with the existing table configuration, with any subsequent changes needing to be manually synchronized to be applied. See: Manually synchronizing data connections.
Click Finish.
The data connection and related tables are now imported into the data pool, with the data pool remaining in draft until the version has been saved.
Manually synchronizing data connections
If new rows are added to the tables and views of the exported data connection, the data will be available automatically in the imported data pools, e.g. when executing a data job with those tables. However, if the structure of the tables change or tables are added/removed, the data connection needs to be synchronized.
To manully synchronize your imported data connections from your data pool diagram:
Click Data Connections.
For the data connection you want to share, click Options - Synchronize.
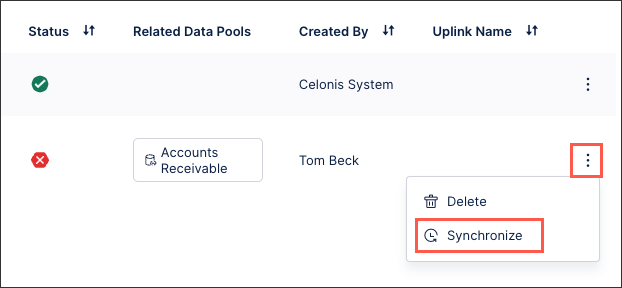
Select the data connection tables you want to synchronize.
Click Synchronize.
The new versions of the tables are now imported and available in your current data pool.
Automatically synchronizing data connections
Limited availability
This functionality is currently in limited availability. If you’re interested in trying it out, get in touch with us at Celopeers.
You can also automatically synchronize your data connections, with changes simultaneously replicated across linked connections. The automatic synchronization recreates and updates the view automatically in the background on query execution, as a result your data job execution time may slightly increase.
To automatically synchronize your data connections:
Click Data Connections.
For the data connection you want to share, click Options - Synchronize.

Toggle on Activate automatic synchronization.
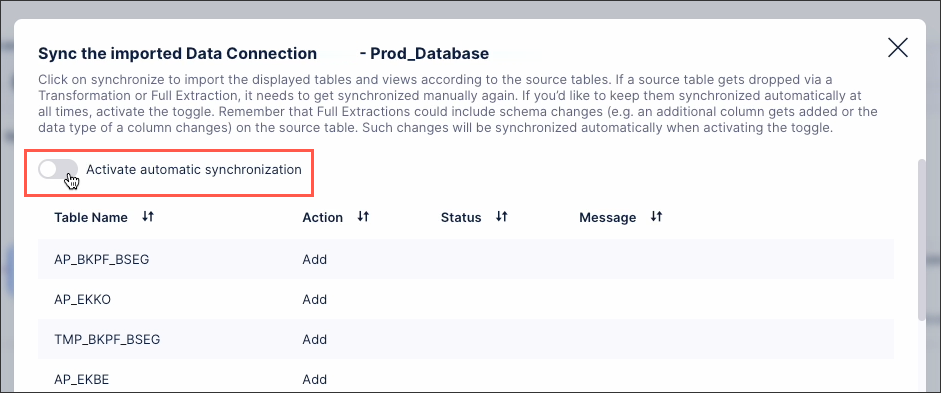
With the confirmation message displayed, click Activate automatic synchronization.

Your selected data connection is now automatically synchronized with the main connection. This can be deactivated at any time by returning to the synchronization screen and disabling the same toggle:
Sharing data between data pools without a data connection
Some use cases require you to share data between data pools when a data connection doesn't exist (for example, when data is captured using Task Mining).
If this applies to you, we recommend adding a dummy data job to your data pool. This create a Global data connection, allowing you to share any data available in that data pool:
For the steps:
From your data pool, click Data Jobs - Extractions.
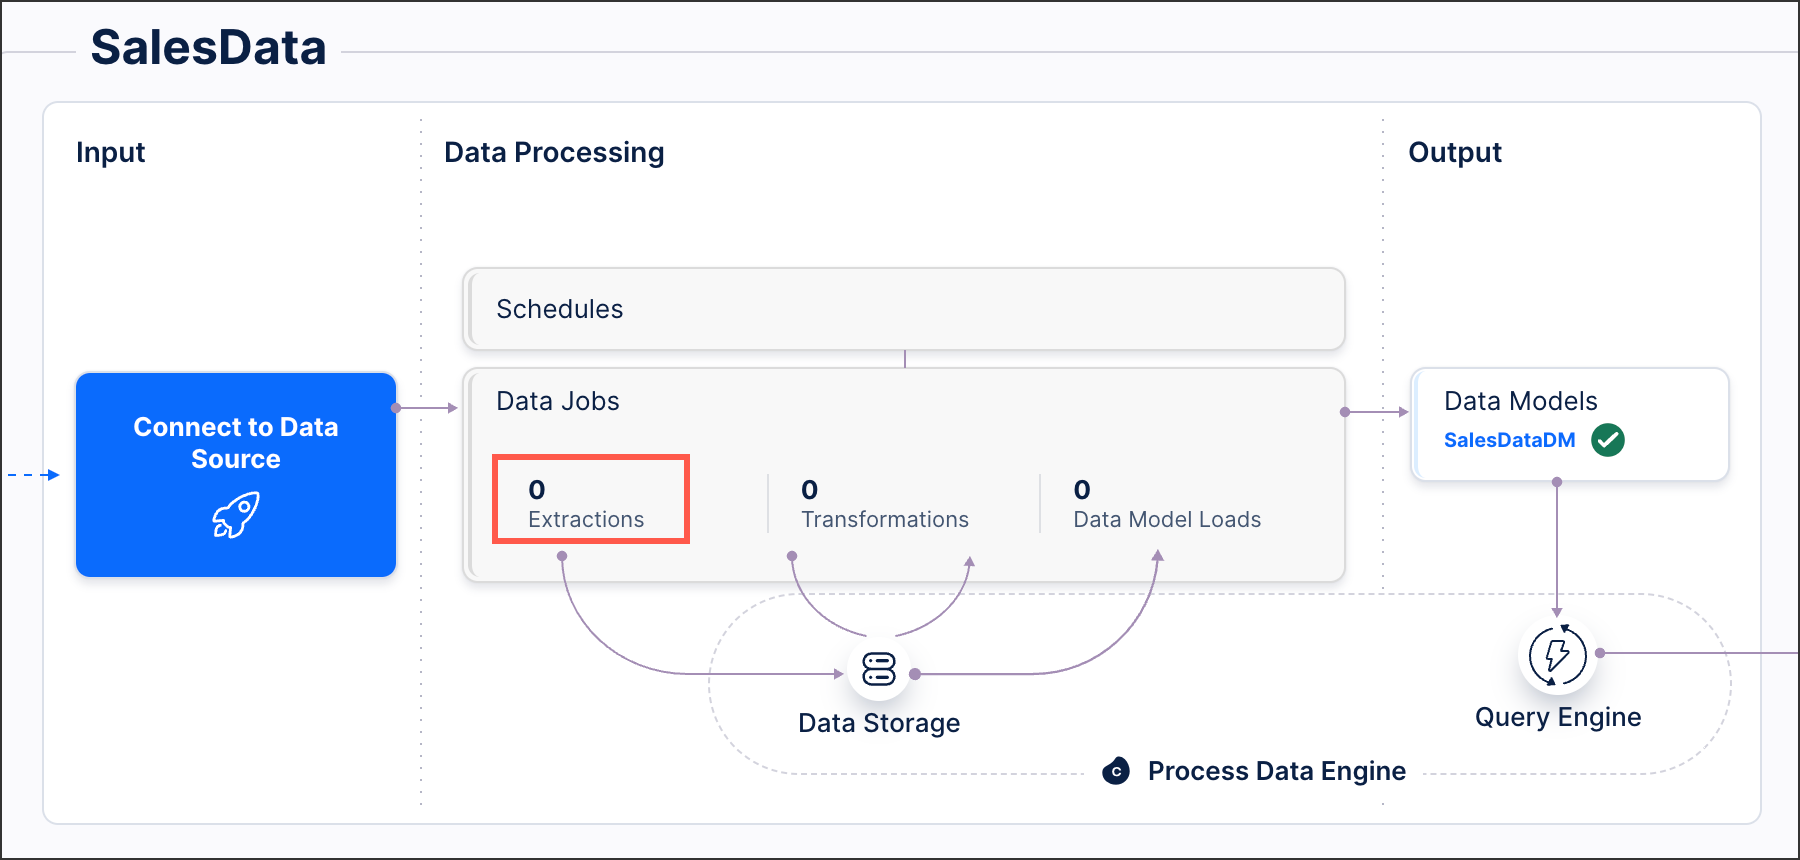
Click Add Data Job.
Add a name for the data job and then click Save.
Returning to your data pool diagram, you can now click the Global Data Connection:
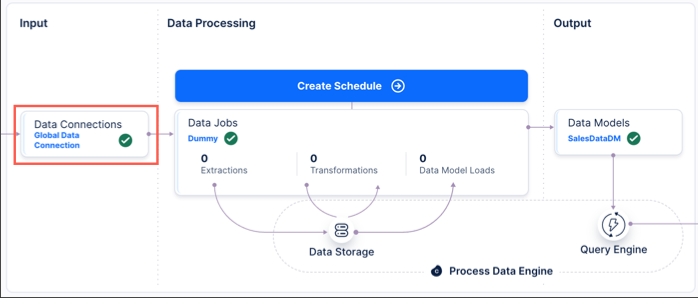
With the Global Data Connection available, you can now follow the steps outlined above: Exporting data connections.