Configuring settings for the object-centric Procurement Starter Kit
Use the General Settings view of the Procurement Starter Kit to configure variables such as the display currency.
Tip
After you publish the Starter Kit for the first time, changing the settings in the Use Case Analysis view in Studio doesn’t change the corresponding settings in Apps. After publishing, you’ll need to work with the Use Case Analysis view in the Apps area for the values of the settings to be applied for end users. It’s best to keep the two sets of variable values in sync so that your results in Studio match those in Apps.
Here’s how to get to the Use Case Analysis view:
In the Celonis navigation menu, select Studio.
In the Studio overview, find the Procurement Starter Kit in the space where you installed it, and click its title.
Select the Use Case Analysis view, and go to the use case tab you want.
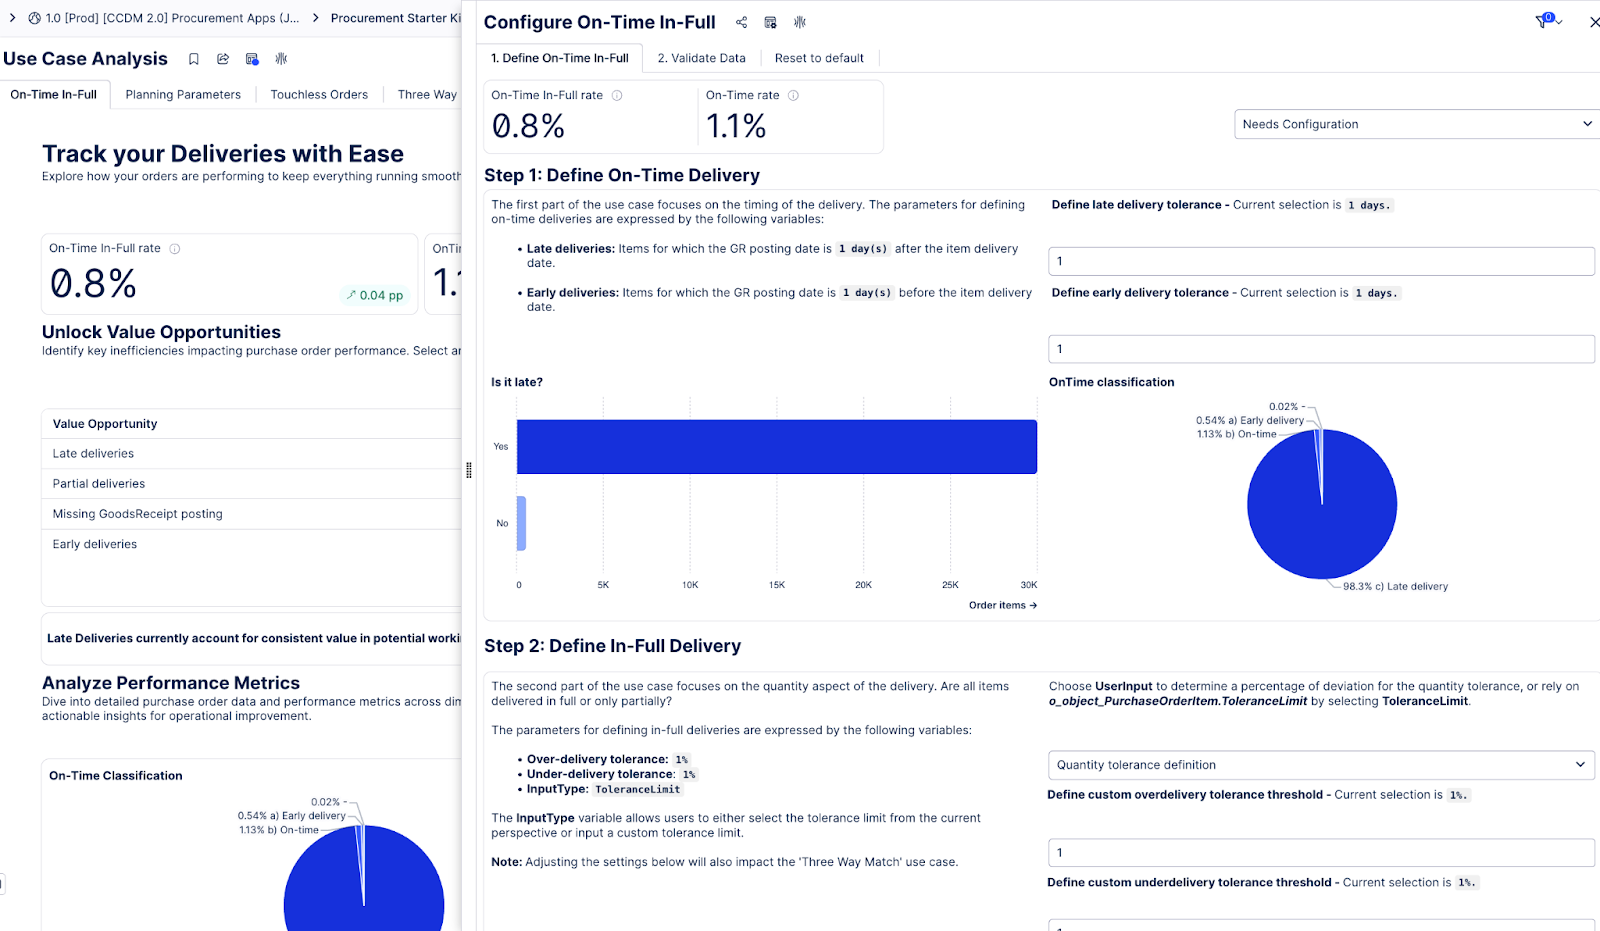
Click the Configure button.
Use the dropdowns to update the values of any variables that you need to. The Starter Kit uses the default value if you haven’t selected a value.
Validate the KPI by using the Validate data tab.
When you’ve finished configuring the settings and made any other setup changes that you want, use the Publish button at the top of the screen in your Studio space to publish a version of the Starter Kit.
If you want to change any variable values after publishing, you must do this in the General Settings or Use Case Analysis view for the Starter Kit in the Apps area. Make the same changes in the Studio package to keep them in sync.
Tip
When you’ve finished setup and the Starter Kit is in use by business users, to avoid accidental changes, consider limiting the availability of the Validation Cockpit. You could restrict these to a specific group of business users who are responsible for making adjustments to the variable values.