Editing views for the object-centric Shipped Not Invoiced app
The Shipped Not Invoiced app comes with a prebuilt set of views. Edit the app’s views in Studio if you need to:
Make any customizations and changes to suit your business process.
Change the look of the supplied views.
Include custom attributes or relationships that you added to the perspective that you’re using with the app.
The app doesn’t do anything automatically with custom items in a perspective. They won’t be surfaced in views unless they’re items we asked you to add during app setup. If you want to use your own custom items, you’ll need to edit the app’s views to include them. You don’t have to surface all (or any) of your custom items in the app’s views. If you don’t, it doesn’t cause a problem, the app just ignores them.
These views for the Shipped Not Invoiced app are directly accessible to users:
Action View - this is the main view that business users can use for their daily tasks.
User Guide - this is an onboarding view for business users to explore the app’s functions interactively.
Setup and Validation - this is a quickstart view for setup where you can validate the business logic. The parameters you set in this view are automatically changed in Settings and reflected in the Action View.
Value Framing - this is a view where you can identify value for the app’s use case.
Settings - this is a view where you can manage the values of the app's variables.
Tip
In the new Studio experience, we keep a history of comments and other updates to augmented attributes. If you want to display these in a view, edit the view to add the Activity history component from the Object-specific details group.
You’ll need Analyst permissions for Studio and for the relevant views and components to modify them. If you need training, check out the training track “Build Knowledge Models and Views” on the Celonis Academy.
If you make any edits to view components that involve the calculated attributes from the Knowledge Model, we’ll automatically update the calculated attributes in the Knowledge Model to match your edits. You can also adjust them directly in the Knowledge Model before or after editing the views, as explained in Validating KPIs for the object-centric Shipped Not Invoiced app.
Here’s how to edit the Shipped Not Invoiced app’s views:
In the Celonis navigation menu, select Studio.
In the Studio overview, find the Shipped Not Invoiced app in the space where you installed it, and click its tile.
Expand the package’s structure, then expand the folders to find and select the view you want to edit.
In your selected view, click Edit View to enter edit mode
Select any component of the view to go to the component editor. Here you can add and remove data fields shown in a table or chart, change sorting and display attributes, add action buttons, and other edits, as relevant for the component type. At the end of this topic, we tell you how to change the background colors for order values.
When you’ve finished editing a component, click the Save icon to save and exit.
When you’ve finished editing all the components you want to, click the Save icon to save the view, then click the Exit Edit Mode icon (the blue square with the X) to lock it again.
Tip
It’s also possible to edit views in the YAML editor if there’s something you can’t achieve in the visual editor. To view the YAML, click the View settings icon and select Edit View YAML.
When you’ve finished editing all the views you want to, publish a version of the app package. There's a Publish button at the top of all the screens in your Studio space.
Background colors for net order values
The Shipped Not Invoiced app uses different shades of blue as the background for orders depending on the net order value. Here’s how to change them for different colors in the Open Items table:
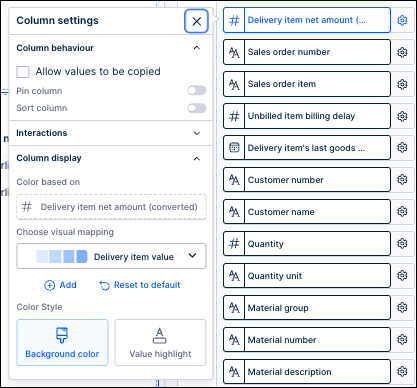
In the Open Items table, click the settings icon for the column for the delivery item value, and select Column Display.
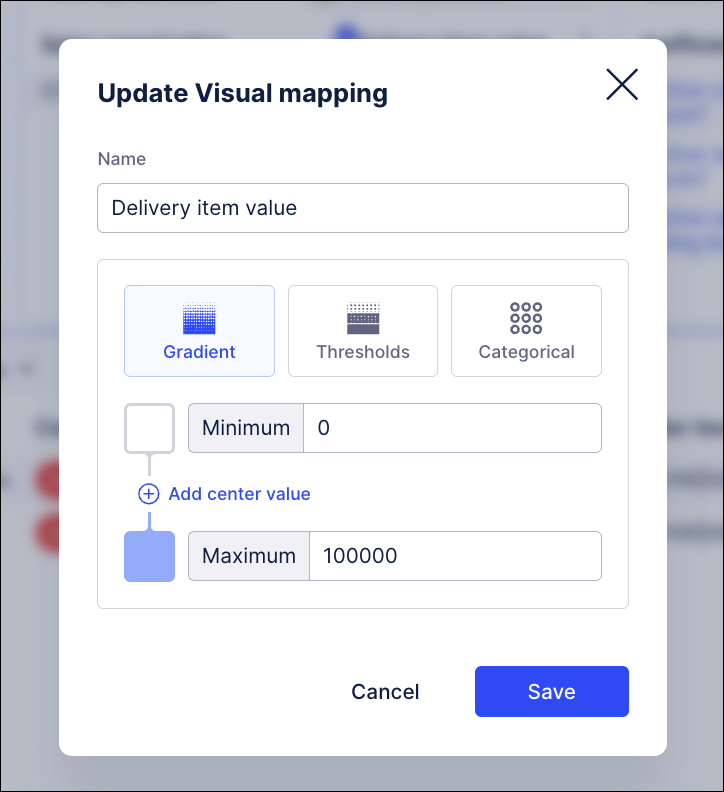
Select the Delivery item value visual mapping, and click Background color.
Set up your preferred visual mapping, then click Save.