Configuring augmented attributes for the case-centric Unshipped Orders app
In the Unshipped Orders app’s Knowledge Model “Knowledge Model”, configure any additional values you want for the status of the delivery. You only need to do this if there’s something important to add besides the supplied values.
The “Status” attribute for the status of the delivery is used as a way to track the actions taken on the app on that specific delivery. When you send an email about that delivery, the status changes from “New” to “In Progress”, and it is taken into account for the value tracking KPI in the Historical View. The default values that users can pick are “New”, “In Progress”, “Done” and “Rejected”. You can’t remove the existing values.
There are other augmented attributes like the “Comment” attribute, but these are not limited to a set of preconfigured values and can have any value.
You work with Knowledge Models in the visual editor in Studio, and any changes you make are applied when you publish a new version of the app. Here’s how to set up any new status values that you want to add:
In the Celonis navigation menu, select Studio.
Find the Unshipped Orders app in your Studio space navigation.
Expand the package’s structure using the arrow.
Go to the Knowledge Models folder and select “Knowledge Model”.
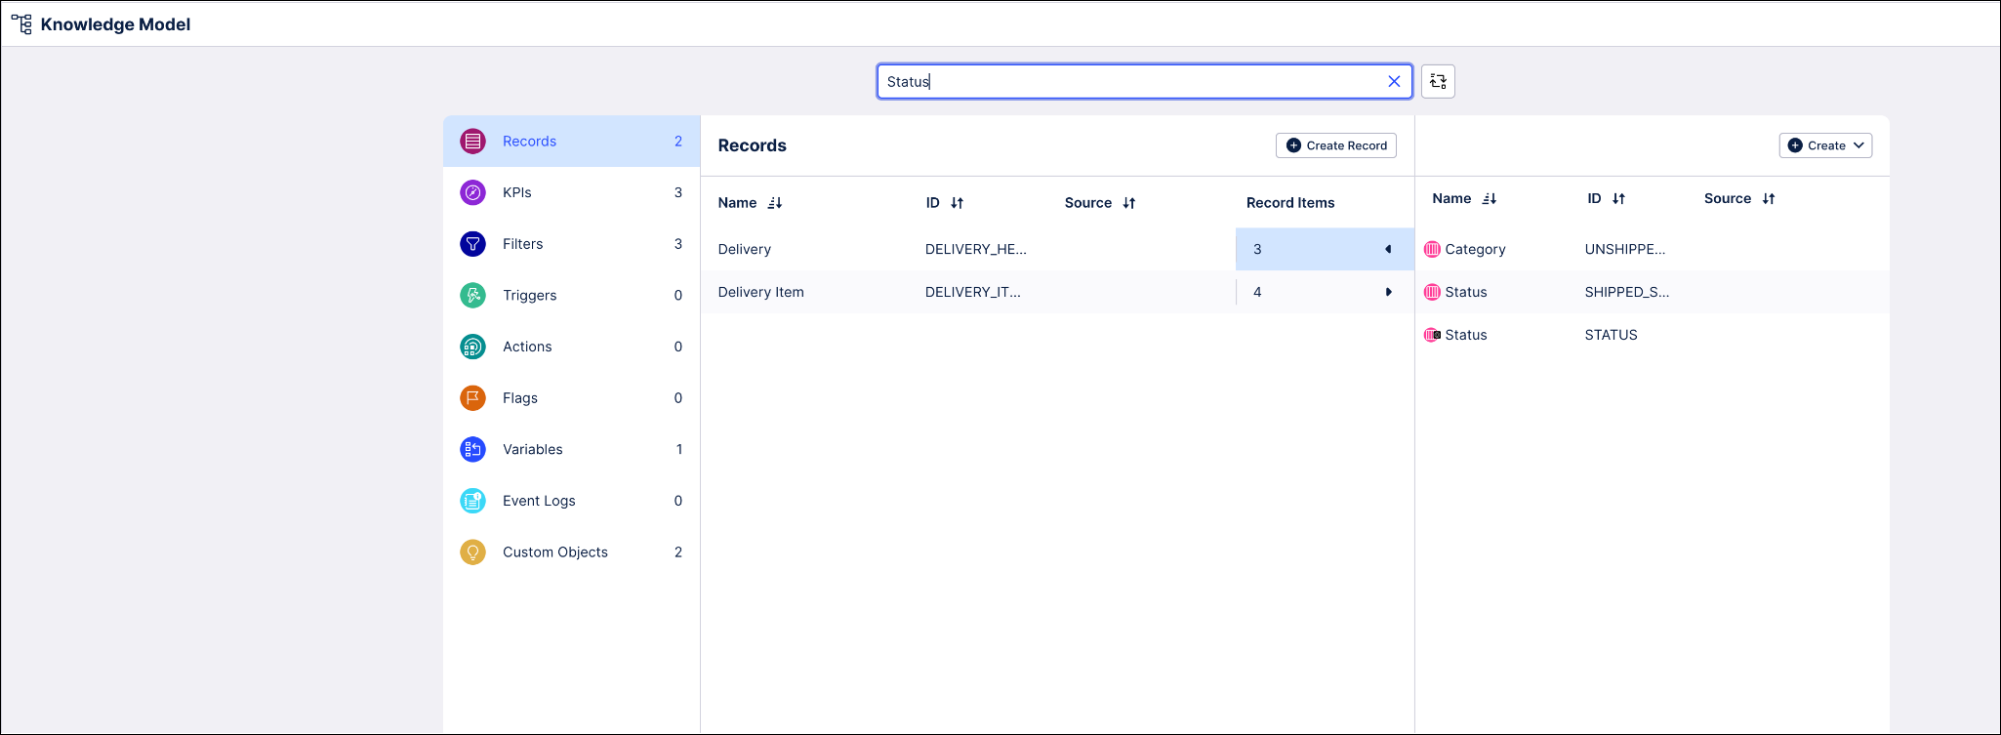
Select the Records section of the visual editor, and search for “STATUS” to find the relevant records.
Tip
You can hide auto-generated items in the Knowledge Model by clicking the “Hide auto-generated definitions” icon next to the search bar.
In the row for “Delivery”, click the arrow in the Record Items field to open the augmented attributes. Click the second attribute STATUS to edit it.
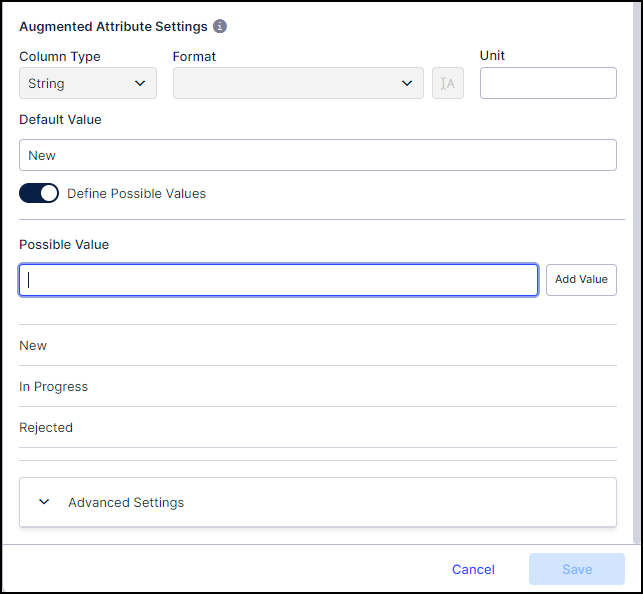
Scroll down to the Augmented Attribute Settings section, and enter each of your new status values in the Possible Value box, then click Add Value to add it to the list. Click Save to save the new values.
Optional: At the moment, your new status values will be displayed with the default “Queued” icon that’s used for all status values without their own icons. If you want them to have their own icons, you’ll need to replace the custom object that holds the display rule for unbilled status. Here’s how to do this:
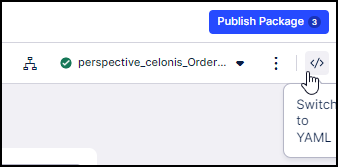
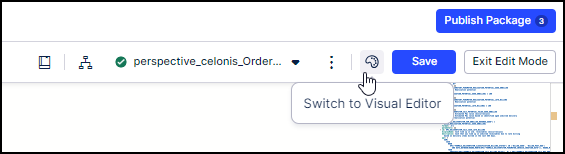
In the visual editor for “Knowledge Model Name”, click the Switch to YAML icon </> to view the YAML for the Knowledge Model.
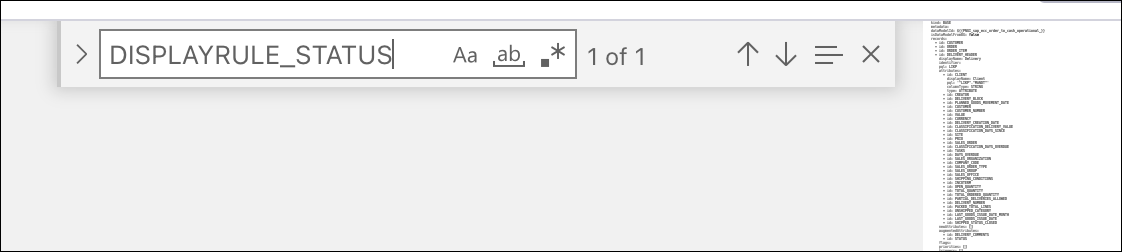
Click inside the YAML editor to access the editor’s own search function (instead of your browser search, which won’t work), then press Ctrl + F and search for the custom object DISPLAYRULE_STATUS.
Copy the whole of the custom object, then click Edit Mode.
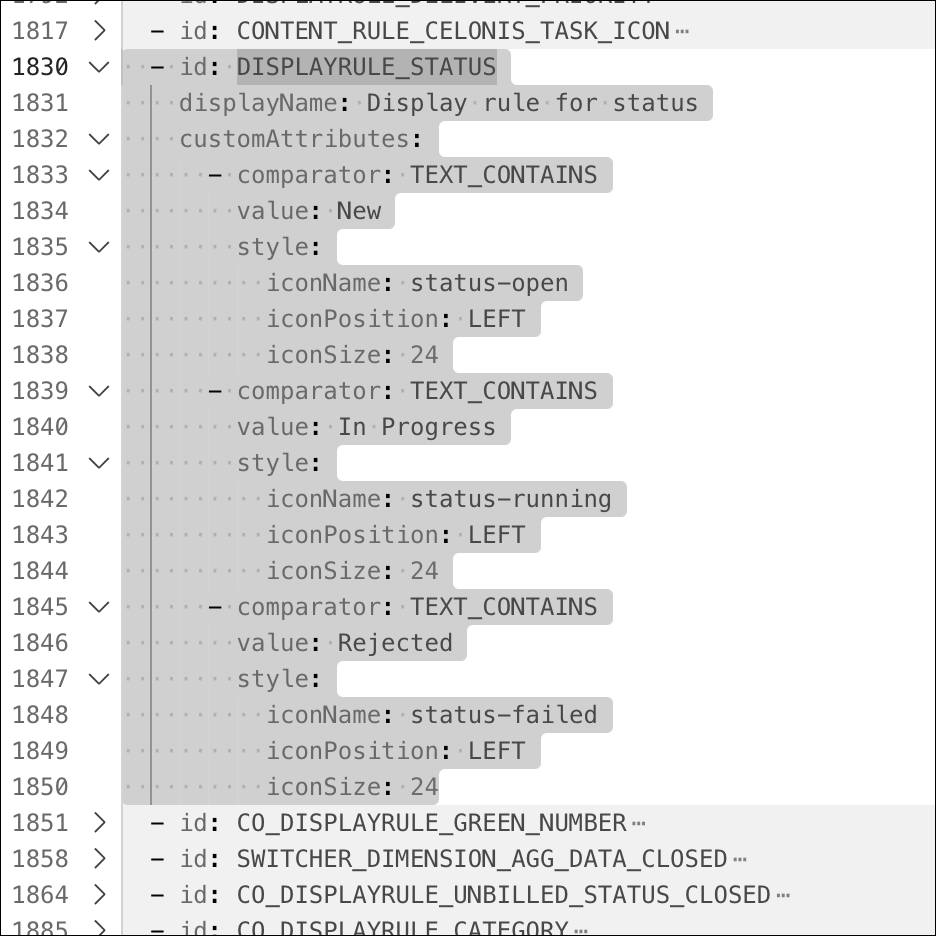
Paste the custom object into the customObjects section of the YAML. Change the ID to something different - for example DISPLAYRULE_STATUS_CUSTOM.
Add a custom attribute for each of your new status values, including a suitable icon for each of them. Click Save and Exit Edit Mode to finish, then click the palette icon to switch back to the visual editor.
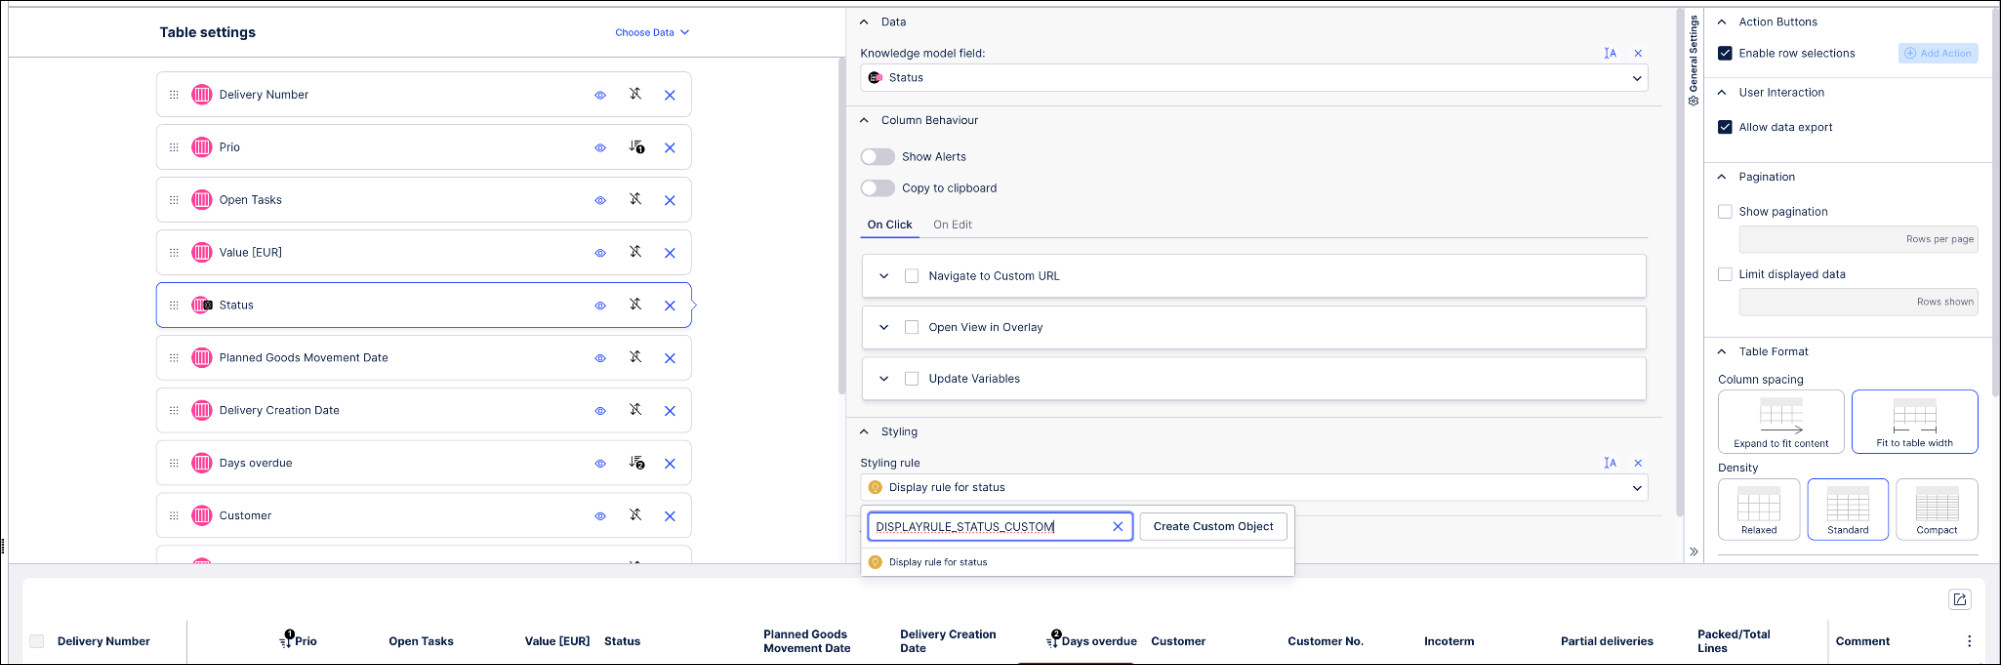
In each of the tables where a display rule for unbilled status is used, apply your new custom object instead of the preset custom object. Click the Edit Component button on the table to go to the component editor, then find the value setting in the table settings (here it’s “Status”). Specify your new custom object for the styling rule, and click Save.
Go to the Action View and check that your new values are available in the Status dropdowns for the items, and showing the icons you expect.
When you’ve completed and checked your changes, use the Publish Package button at the top of the screen in your Studio space to publish a new version of the app.