Query Data (Action Flow)
The Query Data Action Flow module allows you to query parts of your data model and provides the respective columns as output, which can be used in the next steps.
To query data from an augmented attribute, use the Get Rows module.
Make sure that you publish any Action Flows and Knowledge Models that you're using. You cannot run queries using Action Flows and Knowledge Models that are in draft mode.
Go to the edit mode.
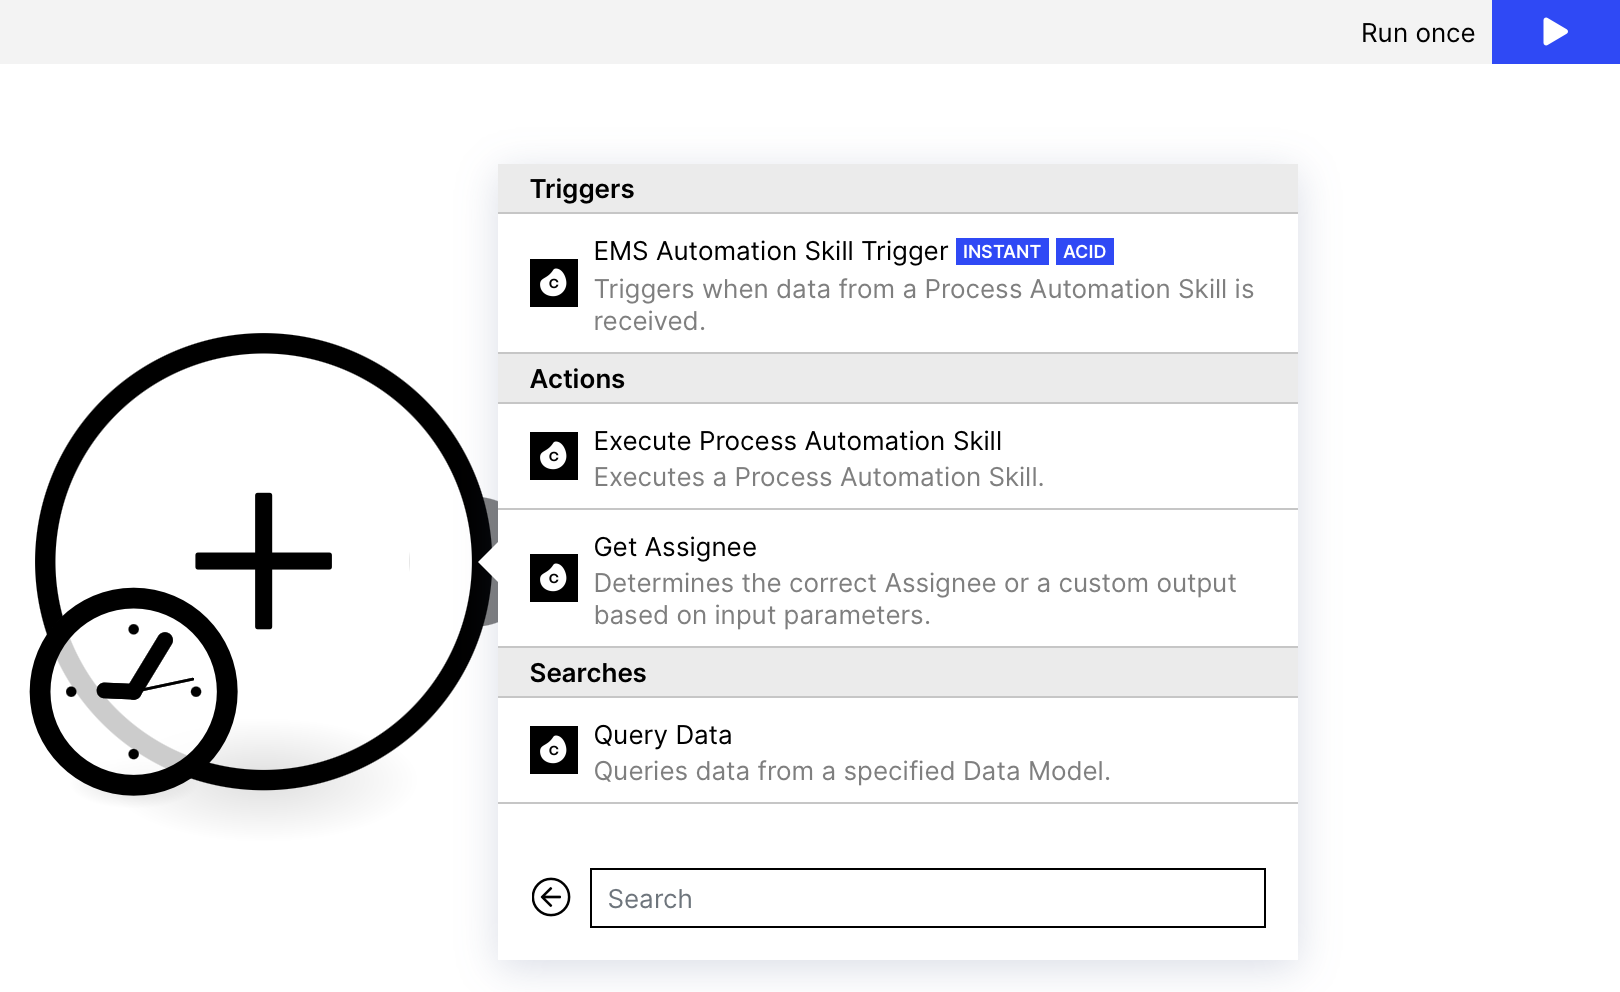
Click on the '+' icon to add a new action.
Search for Celonis.
Select Query Data.
Add a connection to the module using one of the following methods:
The Celonis User connection will reflect your existing data permissions and allow you to query data to which you already have access.
Note
You must have Data integration service permission to use this connection method. See Data Integration permissions.
Give your connection a name.
Click Save.
Celonis Application Key -This connection type will reflect the data permissions granted to the selected Application Key and allow you to query data to which you may not otherwise have access.
Give your connection a name.
In a separate window, create an application key and copy it. See Application keys.
Paste the application key and click Save.
Celonis OAuth Client Credentials this connection type will reflect the data permissions granted to the selected OAuth app and allow you to query data to which you may not otherwise have access.
Give your connection a name.
In a separate window, create the OAuth application application Client ID and Secret and copy it. See Registering your OAuth client in the Celonis Platform.
Paste the Client ID and Secret here and Save.
Select the Data Pool which contains your Data Model.
Choose your Data Model in the dropdown menu that appears after step 5.
Add the columns you wish to query. This can be done by writing a PQL expression. Each column has three fillable fields:
Column Name- the name that will be used when displaying that column's outputs.
Formula - the PQL query used to extract that column (e.g. "VBAK"."VKORG")
Column Sorting - defines the direction in which the output of this column will be returned. There are three discrete options from which you can choose.
None (default): No sorting will be applied when querying results.
Ascending: Results will be returned in ascending order.
Descending: Results will be returned in descending order.
Note
The sorting priority will be defined according to the order of columns in the columns array.
Tip
We recommend starting with a Studio Analysis from which you can then copy the PQL queries over to the Query Data action. When pasting PQL into the Query Data action, please use the 'paste without formatting' option (Ctrl+Shift+V).
Add data filtering. Click Create Filter.
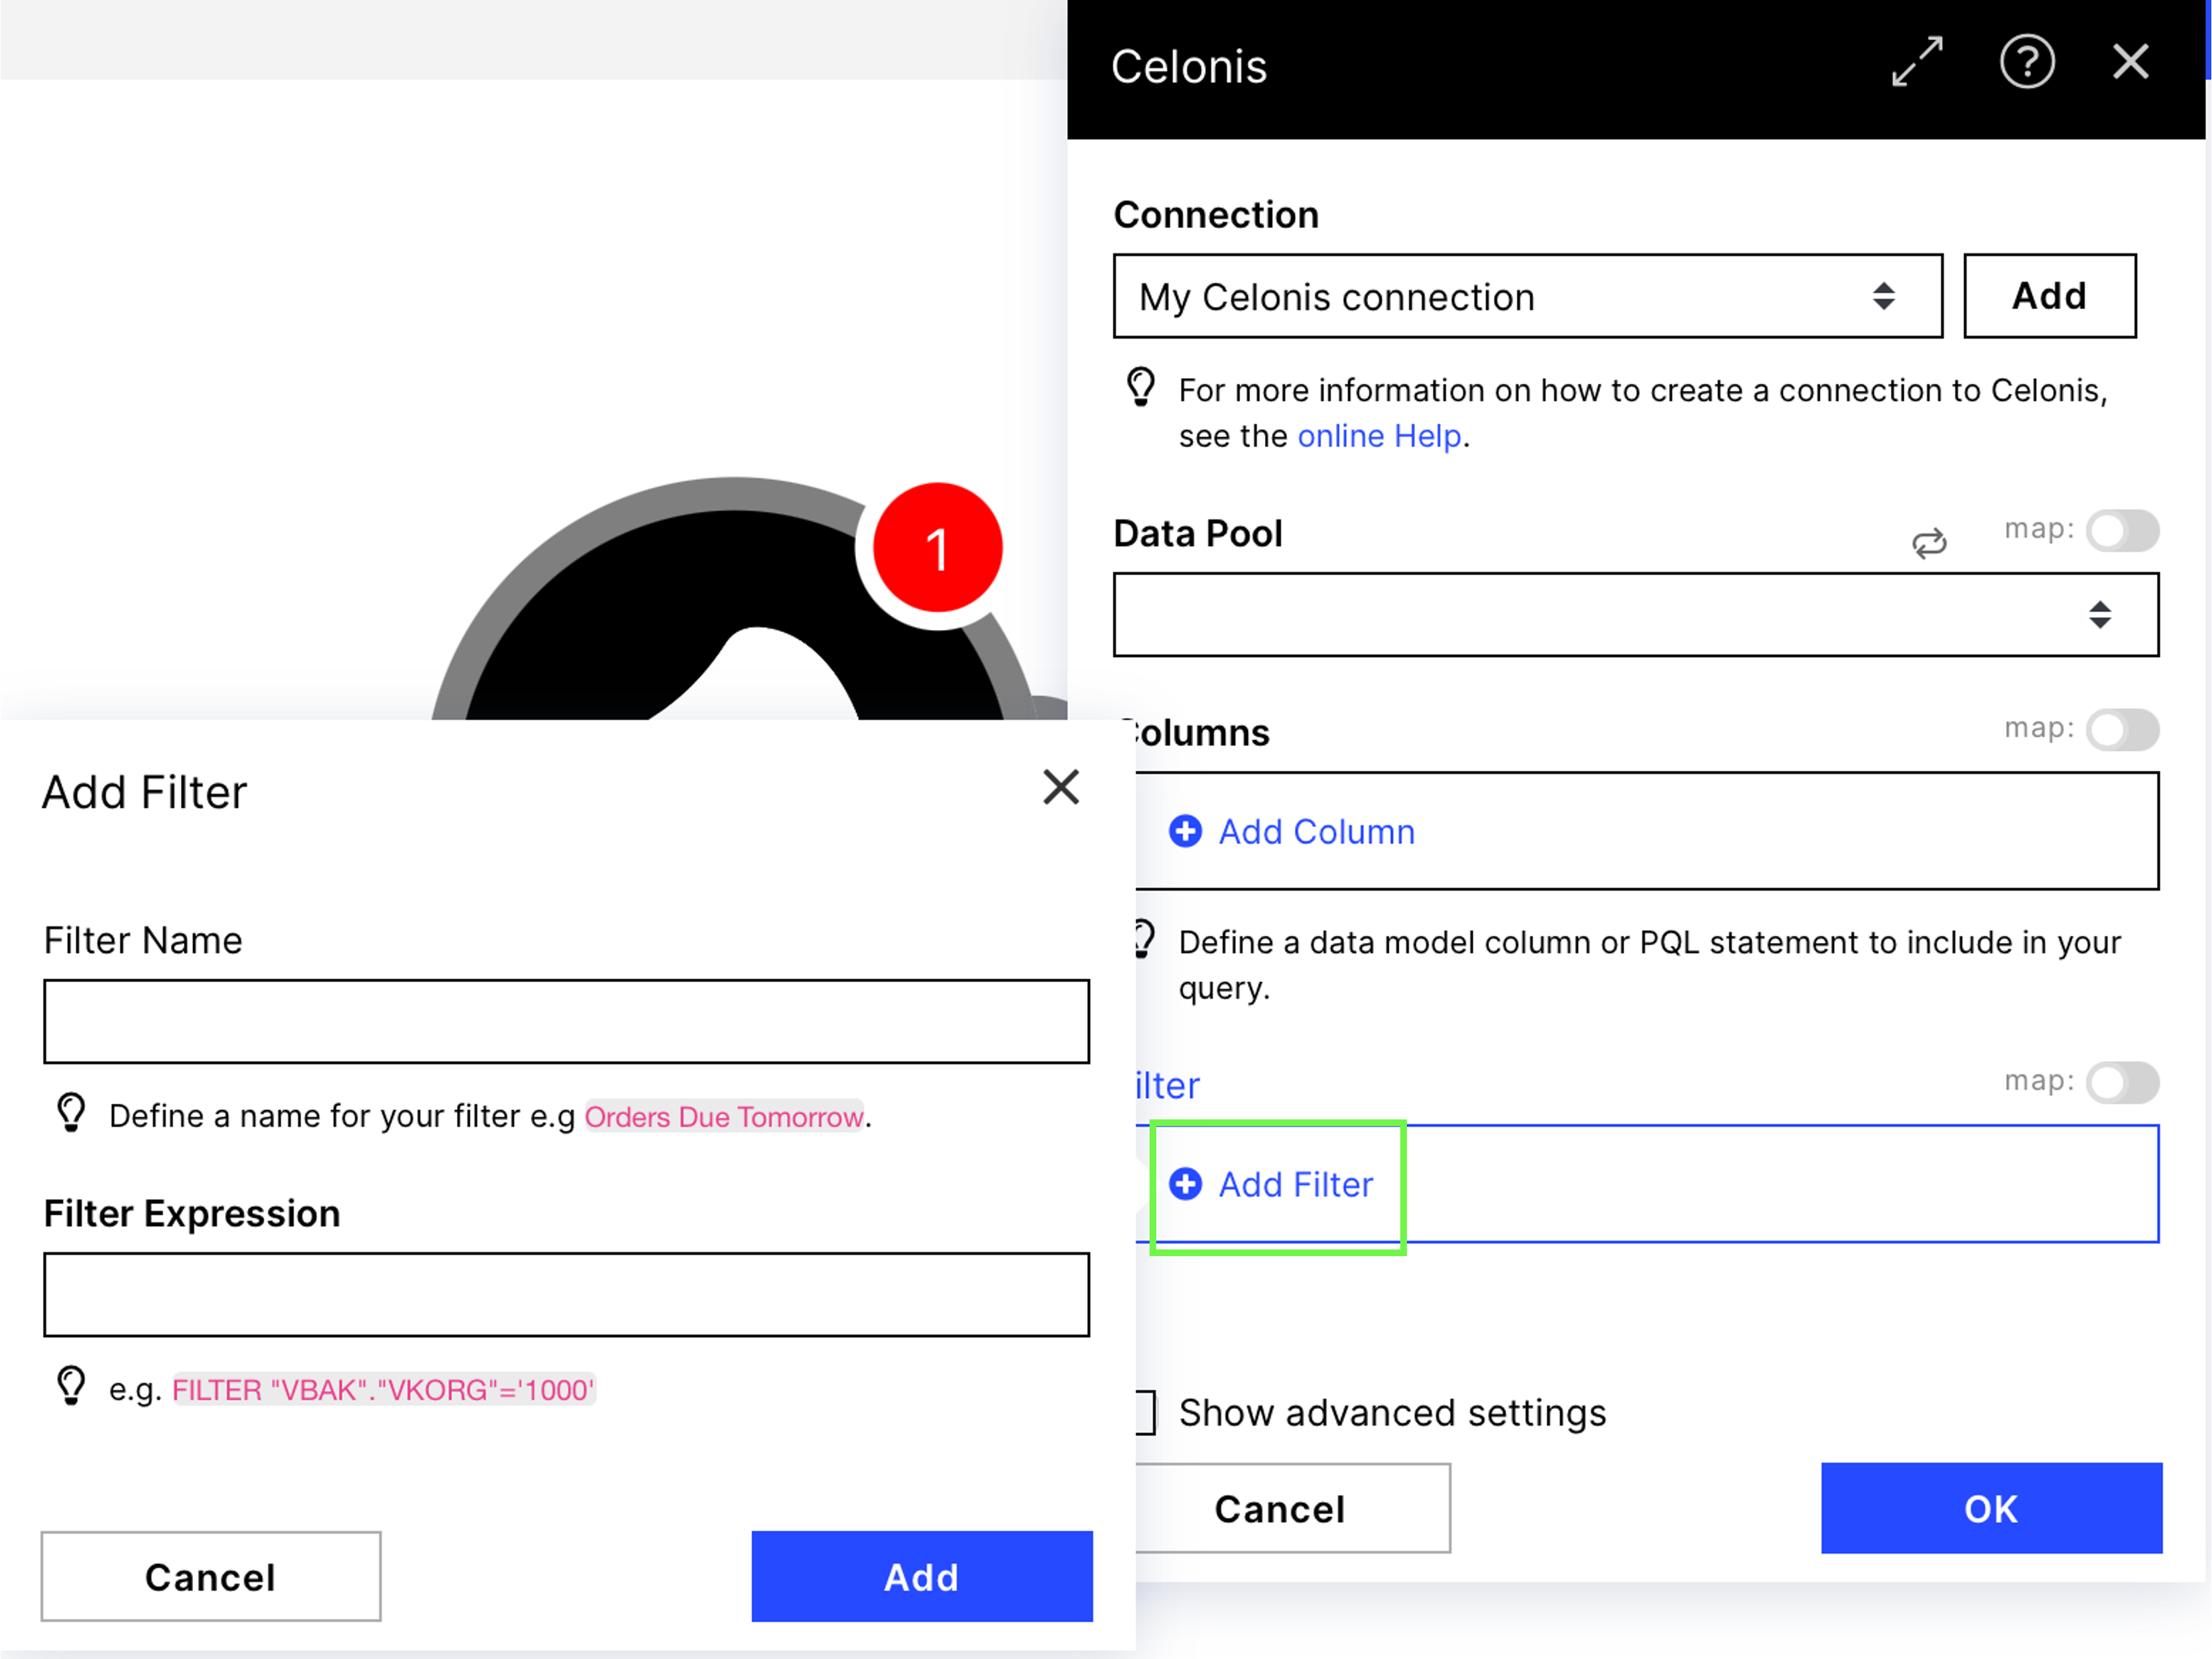
Choose a name, define the filter and add the filter to the setup
Repeat the process to add more filters.
(optional) Add Advanced Settings (see Advanced settings) or click OK to finish.
Deploy your changes to make the module operational.
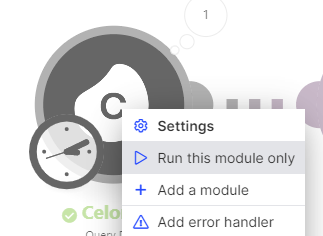
To make the queried columns available in subsequent actions, please run the module once.
You're all set to use your defined columns in subsequent actions. They will be listed just like parameters from other actions. In the example on the right, we're accessing our columns 'Sales Order' and 'Requested Delivery' (these were the alias we chose) to send a message in Slack.
If you tick the Show advanced settings box, you can additionally adjust the Row Limit property.
Property | Description |
|---|---|
Row Limit | The setting Row Limit allows you to adjust the number of rows to be queried. Per default, this is 50 per execution cycle. Important To avoid performance issues with Action Flows, the row limit in the Query Data module should not exceed 50000. |