Using the Extractor Builder
The Extractor Builder allows you to use and extend pre-built extractors or create your own custom extractors to connect to your source systems to the Celonis Platform. The extractor supports GET and POST requests to all REST and OData APIs that return a JSON or XML response, enabling you to continuously connect to a number of commonly used data sources.
The Celonis Platform provides a number of pre-built on-premise and cloud extractors, enabling you to use them directly or customize and extend them where required.
To use or extend a pre-built extractor from your data pool diagram:
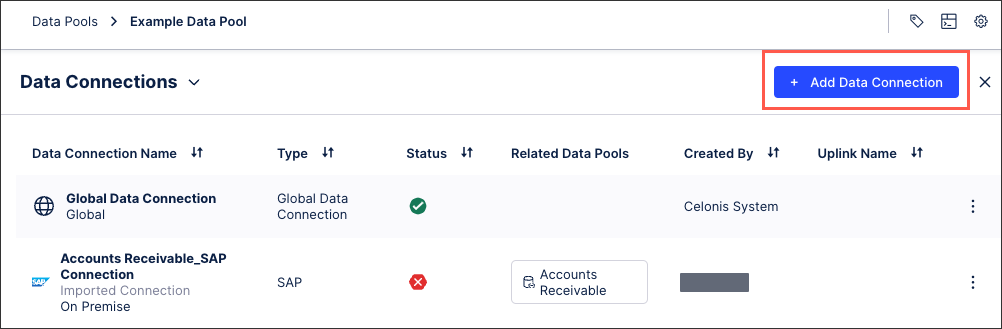
Click Data Connections
Click Add Data Connection - Connect to Data Source.
Either / or:
Select an existing extractor and follow the guided process.
To customize an extractor, click Custom - Build Custom Connector - Customize a Celonis Extractor.
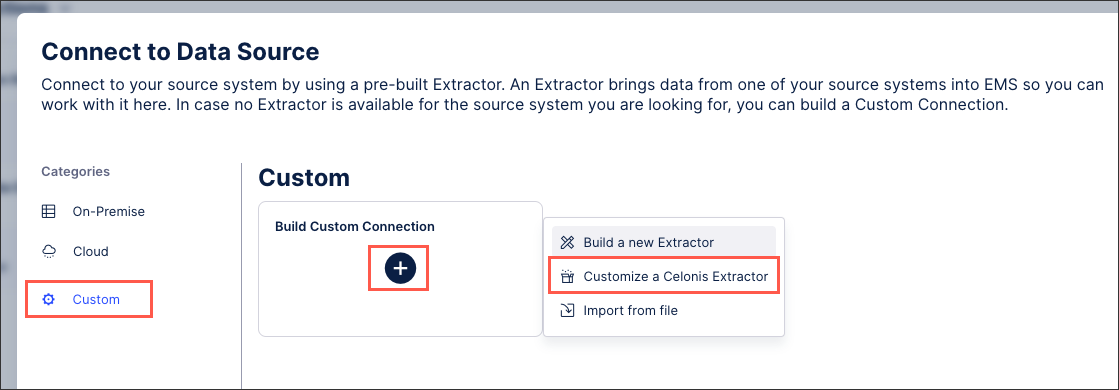
If customizing an extractor: You can then select from the available extractor and follow the guided process from there.
Depending on your extractor, you may need or want to provide the following configuration details: Extractor configuration details.
This video tutorial also provides a good overview:
If a pre-built extractor is not available for your source system, then you can create a custom extractor for it.
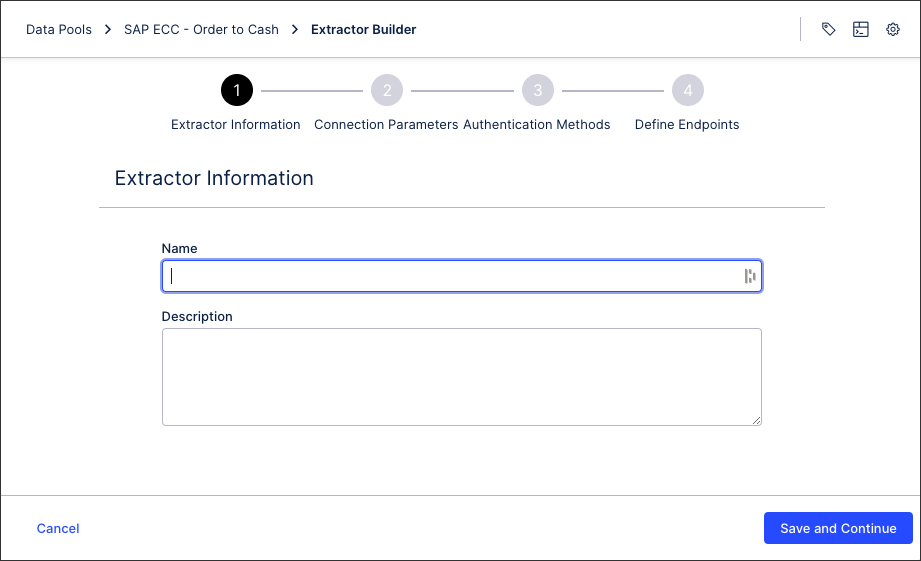
To create a custom extractor from your data pool diagram:
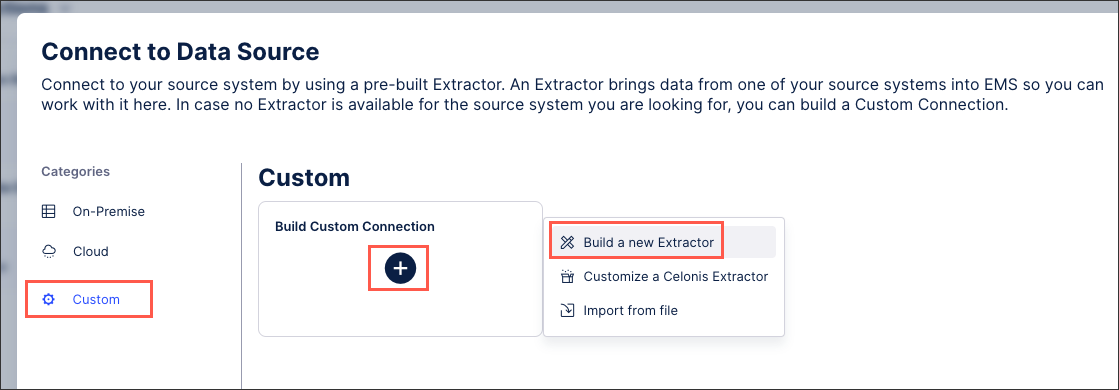
Click + Add Data Connection and select Connect to Data Source.
Click Custom - Build Custom Connector - Build a new Extractor.
Add an extractor name and an optional description and click Save and continue.
Configure your connection parameters and click Save and continue. For more information, see: Extractor builder parameters.
Configure your authentication methods and click Save and continue. For more information, see: Extractor builder authentication methods .
Define your connection endpoints. For more information, see: Extractor builder endpoints.
Click Finish.
You can also watch the following video tutorial:
You can also export the configurations of existing extractors created or customized using the extractor builder, giving you a JSON file that can then be imported back into the Celonis Platform. This enables you to efficiently copy existing extractors between data pools or teams, as well as creating back ups if required.
Exporting an existing extractor configuration
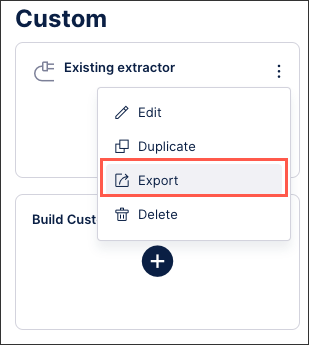
To export an existing extractor builder configuration from your data pool diagram:
Click Data Connections.
Click Add Data Connection - Connect to Data Source.
Scroll down to the custom extractors to the extractor configuration you want to export and click Options - Export.
The JSON file downloads and can then be imported back into the Celonis Platform.
Importing an existing extractor configuration
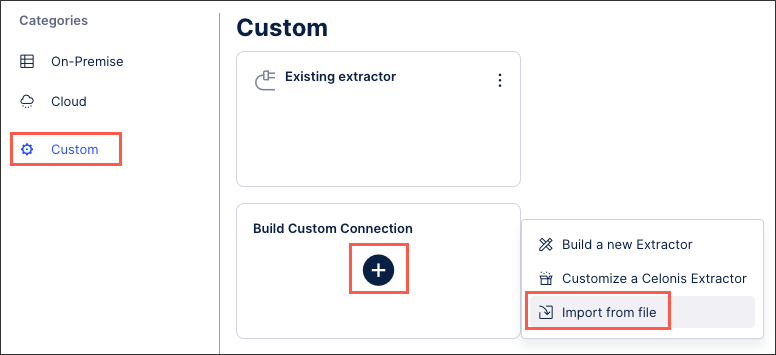
To import an existing extractor builder configuration JSON file from your data pool diagram:
Click Data Connections.
Click Add Data Connection - Connect to Data Source.
Click Custom - Build Custom Connector - Import from file.
Add an extractor name and either drag and drop the JSON file or select the file.
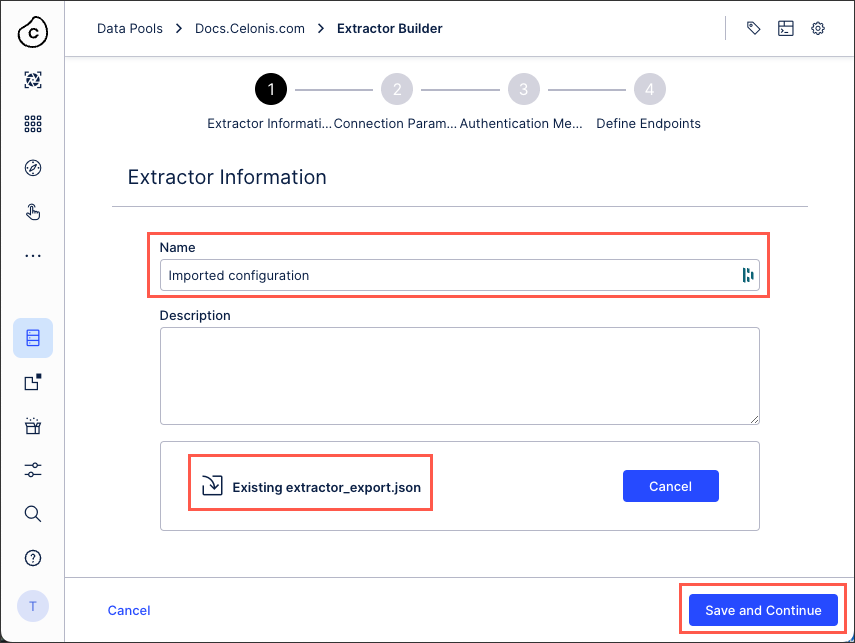
Click Save and Continue.
Follow the remainder of the extractor wizard, allowing you to either confirm or edit your extractor configuration details as below.
Extractor configuration details
Depending on your extractor, you may need or want to provide the following configuration details:
You can define the parameters that will be displayed in the user input fields of your data connection configuration. These parameters can then be used in your API requests, URLs, and headers, configured when defining your end points.
By default, the {Connection.API_URL} parameter will be created as a mandatory parameter and usually contains the host.
To add a new connection parameter, click Create New Connection Parameter.
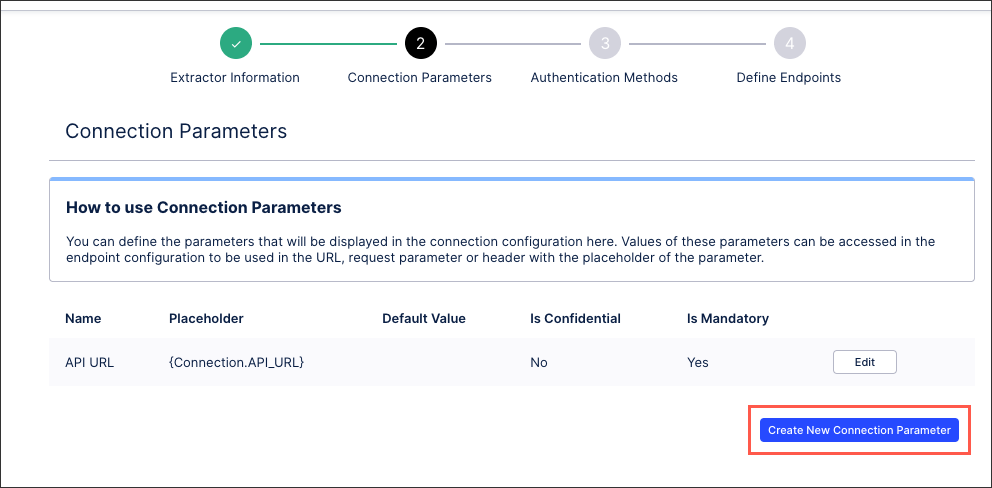 |
You can then configure the following connection parameter details:
Name: This is the label of the parameter in the connection form.
Placeholder: You will be able to access the value of this parameter by using this placeholder in your url, request parameter or header
Default value (optional): The default value of the parameter will be effective unless the value is explicitly changed in the connection form.
Confidential: When selected, the parameter will be stored as a secret and it will be displayed as a password input.
Mandatory: When selected, this parameter must be populated.
When connecting your source system to the Celonis platform, you have a number of authentication methods available to you. The method you choose should be based on your source system’s authentication options, so we recommend consulting their available API documentation before proceeding.
For more information, see: Extractor builder authentication methods.
When configuring your data connection you must define the API endpoints for your source system. This includes selecting your API type, configuring your requests, responses, and headers, and optionally managing your error handling.
For more information, see: Extractor builder endpoints.