Celonis Smart Sensor
The purpose of a Smart Sensor is to react automatically upon a specified data incident, also called Signal, which can be defined in one or several filter statements.
The Smart Sensor checks the Data Model for new Signals every time ...
... the respective Data Model (referenced in the Knowledge Model) is (re)loaded.
... changes to the Knowledge Model have been published.
... changes to the Skill using this Smart Sensor have been published.
... one of the referenced Augmentation Tables is updated. (can be due to usage of the Augmentation Table in the Filters or Record)
Celonis Smart Sensor
Celonis Smart Sensor scans the Data Model for new Signals meeting certain criteria and conditions.
To configure the Smart Sensor you need to:
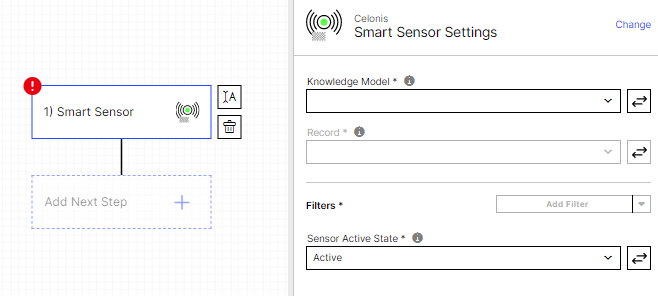
Select the Knowledge Model on which the Smart Sensor should look for new Signals,.
Select the Record to which the Smart Sensor is related.
Select one or several filter(s), See next section below for more details on adding filters.
Select the State of the Smart Sensor to be "Active" if you want it to constantly run in the background.
Click "Save".
Click on "Publish". On the "Publish" event the Smart Sensor will look for new Signals and will resolve existing Signals.
Note
When adding new filters or modifying existing filters via the Smart Sensor configuration, both the Skill and the respective Knowledge Model have to be published. The filters are stored in the Knowledge Model and publishing the Skill alone without the Knowledge Model, will not yet respect the changes of the filters.
 |
Filters based on PQL are used by the Smart Sensor to detect the right Signals. One or multiple filters can be added in the configuration of the Smart Sensor. In case multiple filters are added, those filters are connected by an "and" statement, meaning the Smart Sensor only detects those Signals for which all filters apply.
When adding a new filter to the Smart Sensor, one can either create a new filter or select one or several existing filters.
Creating a new filter:
Click on the "Add Filter" button and select "Create New Filter".
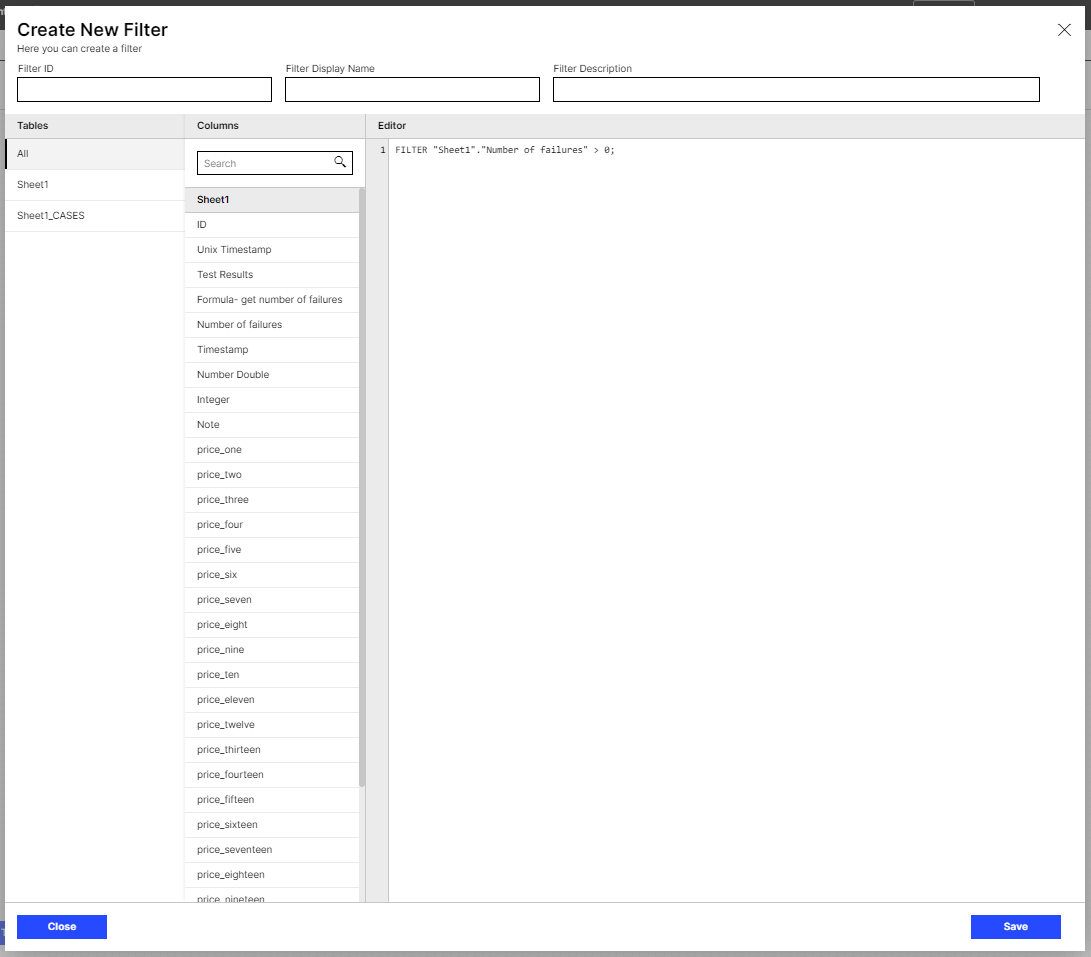
A PQL editor opens in a separate window. The user needs to define the "Filter ID" and the "Filter Display Name". The description can be filled optionally.
Only use alphanumeric character plus dash "-" and underscore "_" when defining the Filter ID.
A custom PQL formula can be edited and saved.
Each filter statement has to start with "FILTER".
After saving the new filter the user is automatically redirected to the Sensor configuration and sees that the freshly created filter is added to the selection of filters.
Adding existing filters to the Smart Sensor
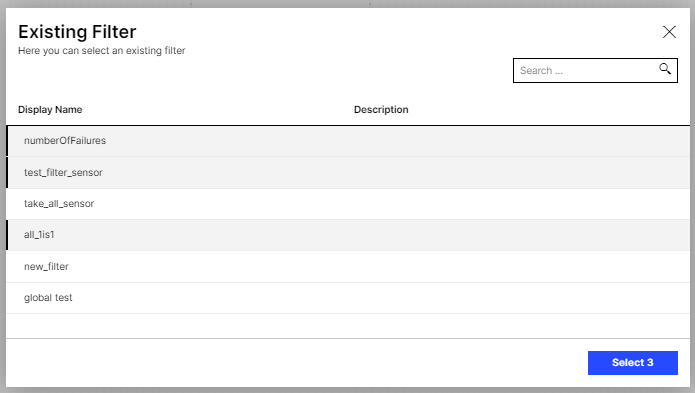
Click on the "Add Filter" button and select "Select Existing Filter".

Initially, this window shows existing filters which are selected already. Here the user can add further existing filters and confirm the selection by clicking on "Select".
After the user is automatically redirected to the Sensor configuration and sees the updated overview of selected filters.
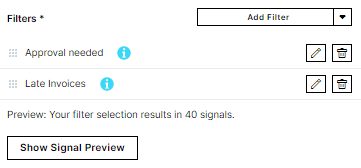
From the filter overview in the configuration of the Smart Sensor the user can also edit or remove selected filters.
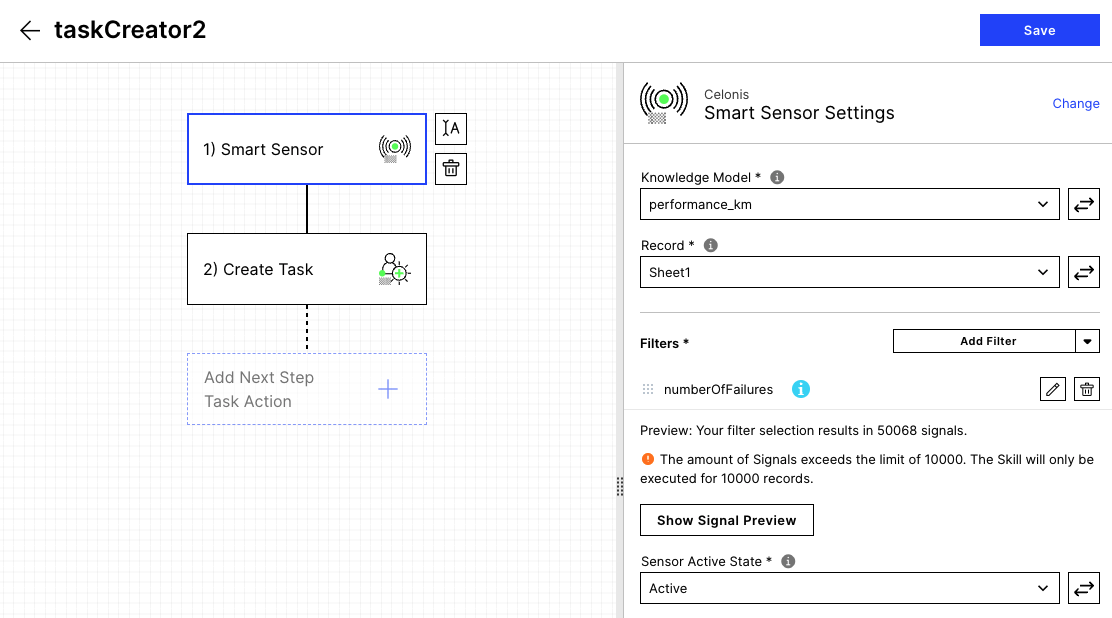
Additionally, a preview indicates the amount of Signals found in the Data Model based on the selection of filters.
Note
A Smart Sensor can only process a maximum of 10k signals at a time. See Limits to the Smart Sensor Executionbelow for more information.
Relation to Knowledge Model
These filters are stored in the respective Knowledge Model in the section "filters:". However, in order to configure the Smart Sensor a user does not have to edit filters within the Knowledge Model. As shown above those filters can be edited from the Smart Sensor configuration.
Note
Note: Changes made to these filters in the Knowledge Model may impact the Smart Sensor and vice versa. This means if a filter is edited in the Smart Sensor configuration it may have an impact on other usages of this particular filter (the same filter could be used in other Skills or Views as well).
 |
Example showing how filters are stored in the Knowledge Model:
filters:
  - id: INCONSISTENT_PAYMENT_TERMS_SENSOR_FILTER
    displayName: "Inconsistent Payment Terms for CC Sinolec US sensor filter"
    description: "detects inconsistent payment terms for a specific vendor"
        pql: FILTER "BSEG"."ZTERM"<>"EKKO"."ZTERM" AND "BSEG"."BUKRS" =''A004''
    global: false
    type: FILTER
Signal Preview Table
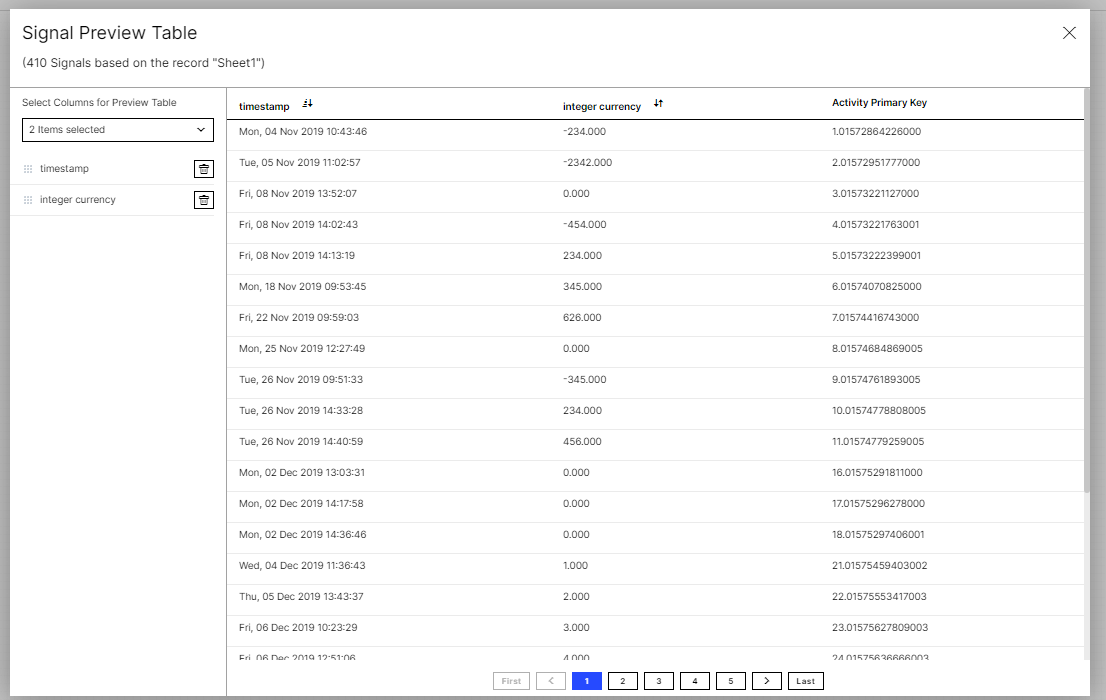
By clicking on the "Show Signal Preview" button, users can open a Signal Preview Table showing all records fulfilling the selected filter conditions of the Smart Sensor. This helps to verify the Sensor output (selection of all records) without the need to first execute the whole Skill. The impact of adding or modifying filter conditions can be studied right away in the Signal Preview Table.
In the Signal Preview Table the user can select record attributes which will be used as the columns of the table.
The order of the columns can be changed via drag-and-drop in the selection on the left side.
One column can be used for sorting to get a better overview.
The record identifier will be always displayed as the rightmost column and represents a unique value for each Signal.
 |
 |
Sensor Logs
Once a Skill with a Smart Sensor gets published, it will be executed (given that the Sensor is set to "Active"). As part of the Skill Logs, Skills using a Smart Sensor feature an additional section in the logs which is called "Sensor Logs".
There users can check each execution and also see if new Signals have been created or old Signals have been resolved.
 |
Smart Sensor Execution
As outlined in the quick-start a Smart Sensor searches for new signals that match its filter condition whenever one of the following three events occur:
The respective Data Model (referenced in the Knowledge Model) is (re)loaded,
Changes to the Knowledge Model are published, or,
Changes to the Skill using this Smart Sensor are published.
Limits to the Smart Sensor Execution
Each time a Smart Sensor is triggered it can process a maximum of 10k signals at once. Should the number of open signals exceed this limit, the signals will be processed in an ascending order, according to their record identifier. As soon as one signal is resolved, the next-in-line open signal will be created until all signals are created (all respective executions are triggered).
 |
Resetting a Smart Sensors Signals to apply a changed Skill configuration
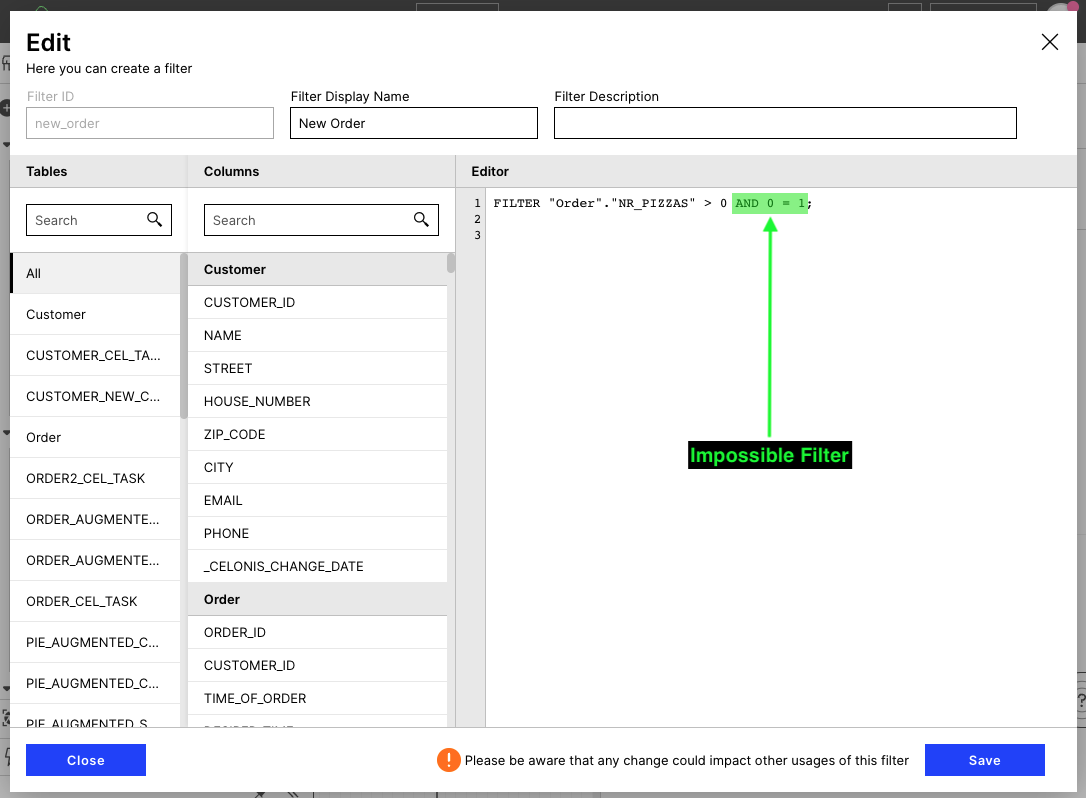
In general, a changed Skill configuration will only apply to future signals. However, you can reset signals by manually resetting your Skill. To do this adjust the filter condition of your Smart Sensor (see Celonis Smart Sensor) so that no signals are found anymore. A good way to do so is to add an impossible condition, such as appending "AND 0 = 1", to the PQL filter query. Following this, you have to save and publish both the Knowledge Model and Skill, resulting in the resolution of all open Tasks. After waiting at least a minute, you can go back into the Smart Sensor filter settings, remove the 'impossible filter' and save and publish again. Following this, all signals will be re-triggered.
 |
Note
Resetting your Smart Sensor will result in the loss of your task progress (status, comments, etc..).