Managing your system notifications
There are two types of notification:
Event notifications (formerly email notifications)
Banner notifications
Event notifications
System notification emails can be sent to selected admins when a critical change occurs in the team.
To enable system notifications, click Admin & Settings - Notifications.
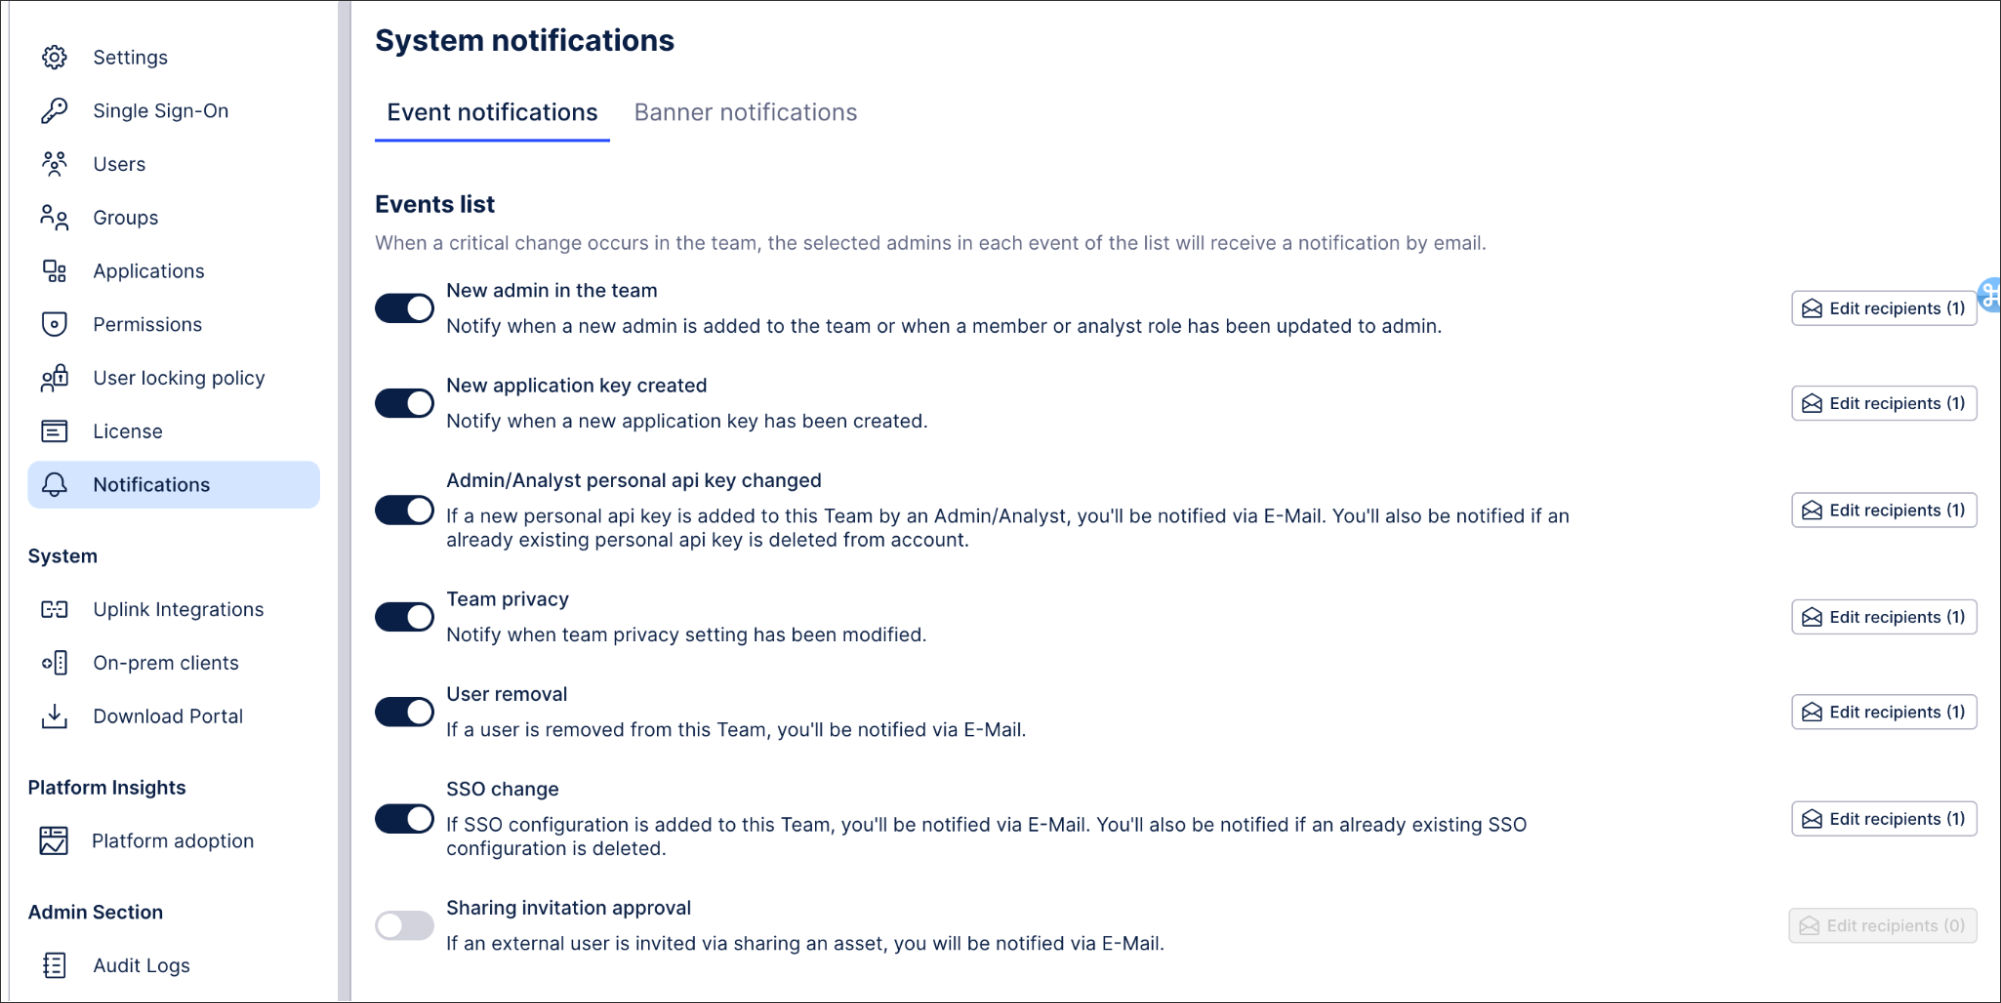 |
Then enable and configure the recipients for the events you want to be notified of.
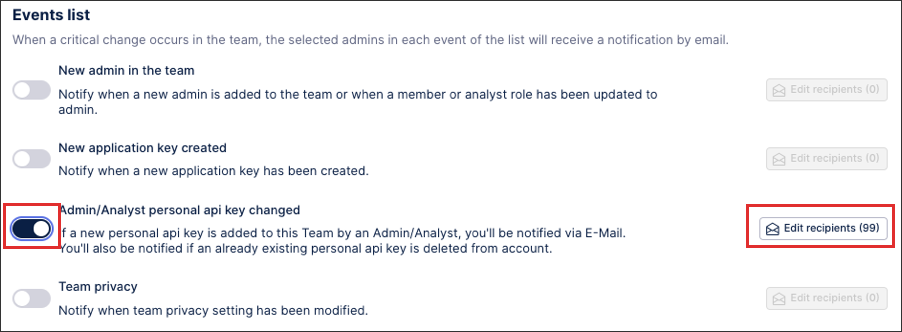 |
When enabling system notifications, the following events are available:
New admin: Notify when a new admin is added to the team or when a member or analyst role has been updated to admin. See: Permissions
New application key: Notify when a new application key has been created. See: Application keys
Admin / Analyst personal API key changed: If a new personal API key is added to your by an Admin/Analyst, you'll be notified via E-Mail. You'll also be notified if an already existing personal API key is deleted from account. See API keys
Team privacy: Notify when team privacy setting has been updated. See: Team privacy
User removal: If a user is removed from your team, you'll be notified via E-Mail. See: Managing existing users and User locking policy
SSO change: If SSO configuration is added to your team, you'll be notified via E-Mail. You'll also be notified if an already existing SSO configuration is deleted. See: Signing in and Account management
Banner notifications
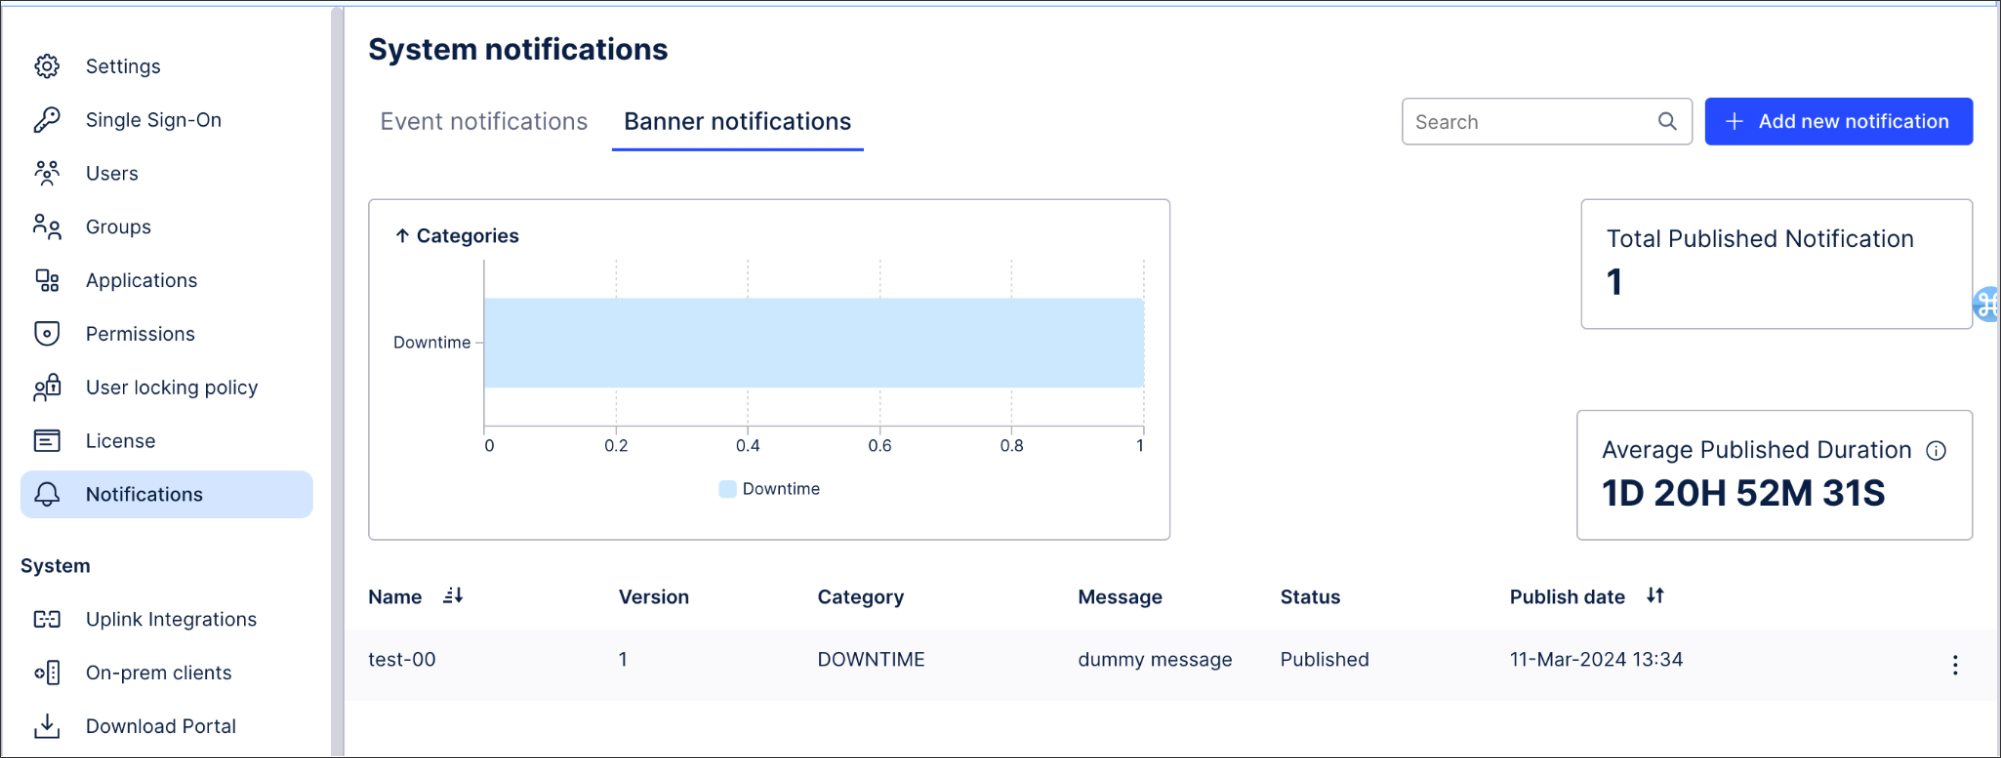
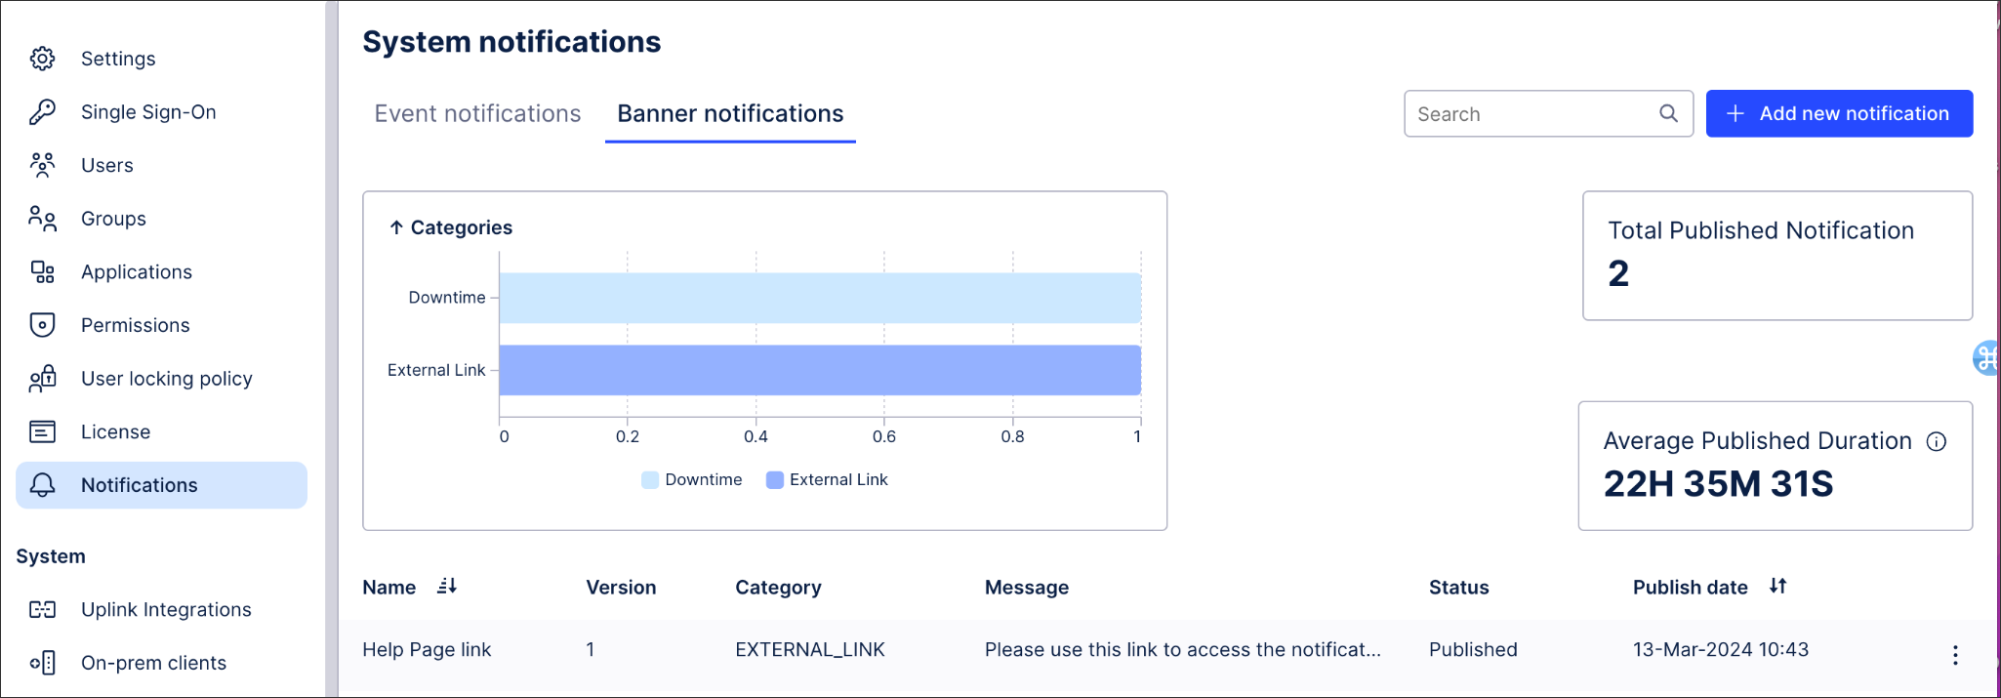
An administrator can set up banner notifications that appear on users' screens. This dashboard shows several key aspects:
Categories: As part of creating the notification it’s mandatory to add the notification category. This allows the dashboard to report on most frequently used categories and then counts the quantity of publish events for each notification.
Total published: This is simply a count of total notification where a publish event has occurred.
Average publish duration: This shows in Days, Hours, Minutes and Seconds the average duration for all published notifications.
 |
To add a new banner, click Add new notification and populate the template that appears.
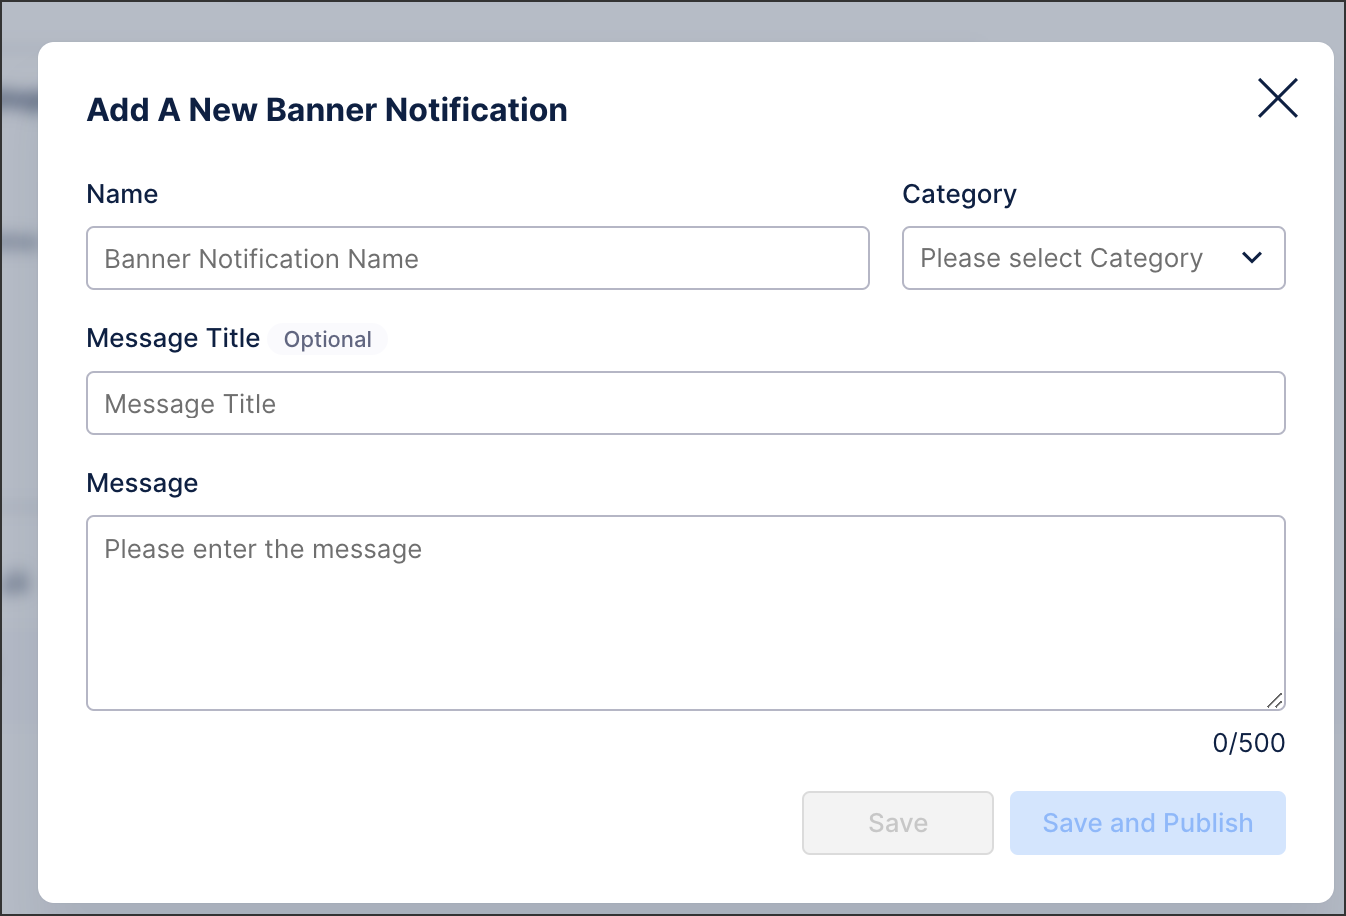 |
Once the template is complete and the save and publish button is clicked the user will be prompted with a secondary validation to confirm they want to publish the banner.
 |
The banner will then become visible to ALL users and remain present until the user clicks the X icon.
 |
Once the banner is published the dashboard will be updated and the new banner notification will appear as a line item showing a summary of the notification, such as status and publish date.
 |
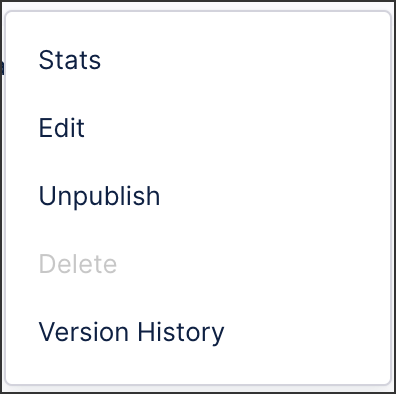
Using the three dot “burger menu” to the right of each notification it is possible to manage that notification in more detail with the following option.
 |
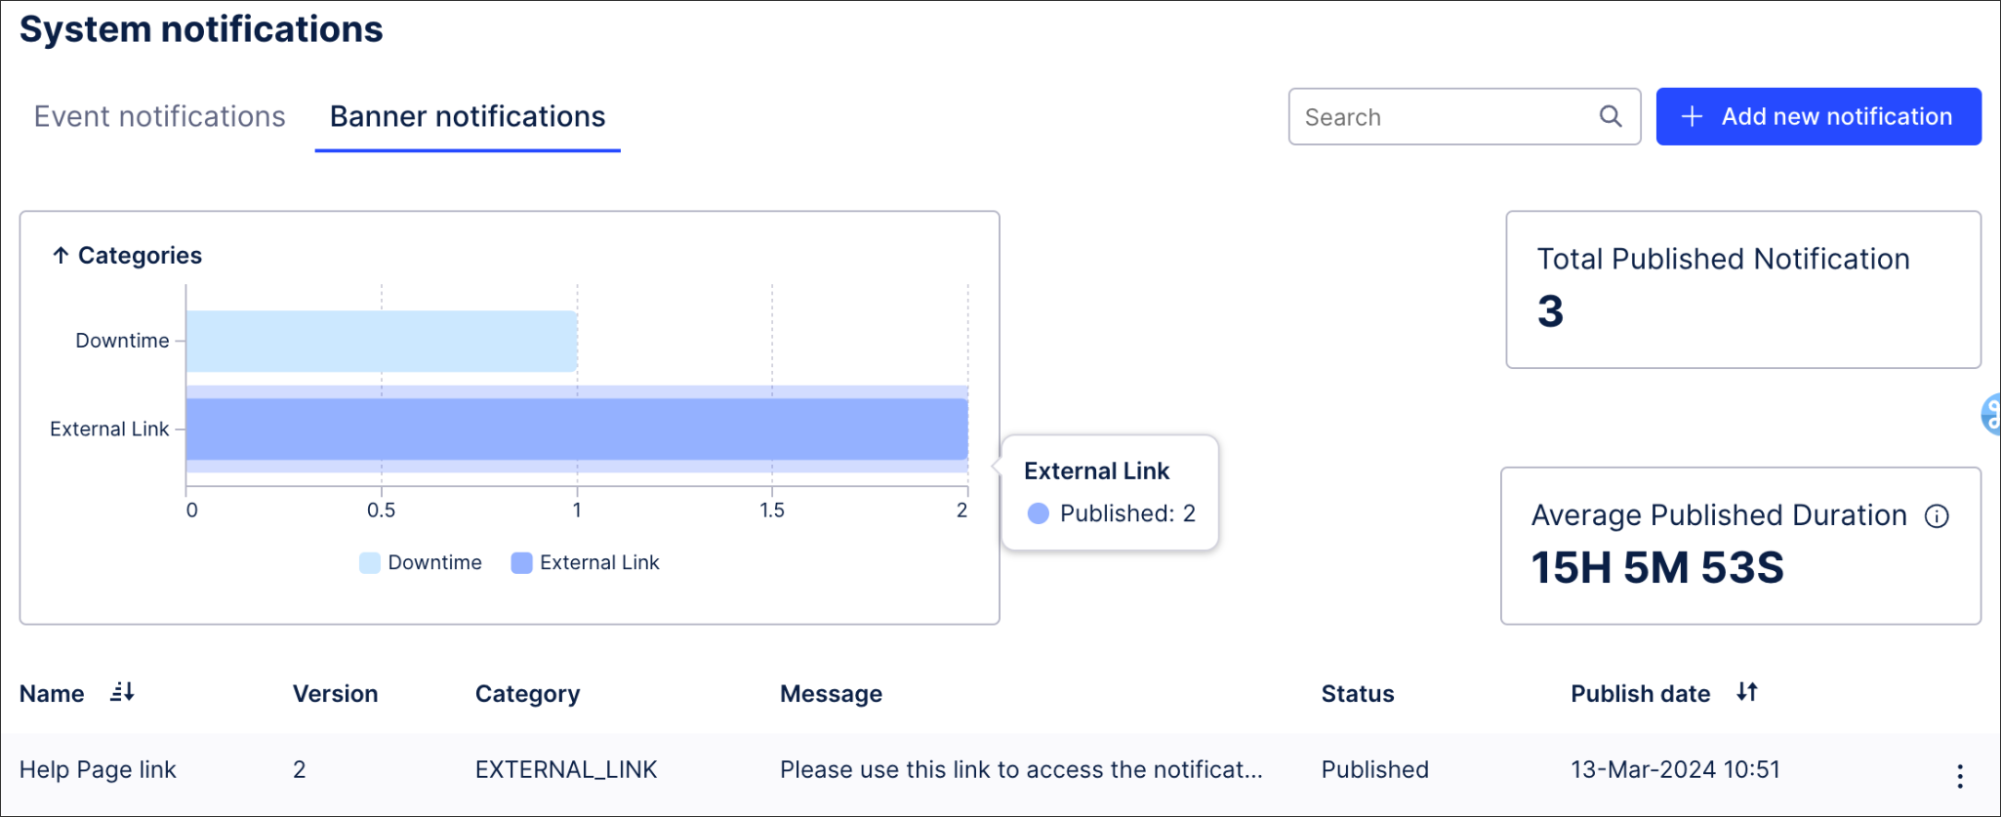
If you edit and re-published a banner, this will create a new version that will be shown on the dashboard count.
 |
You can find more detail by selecting Version History in the burger menu.
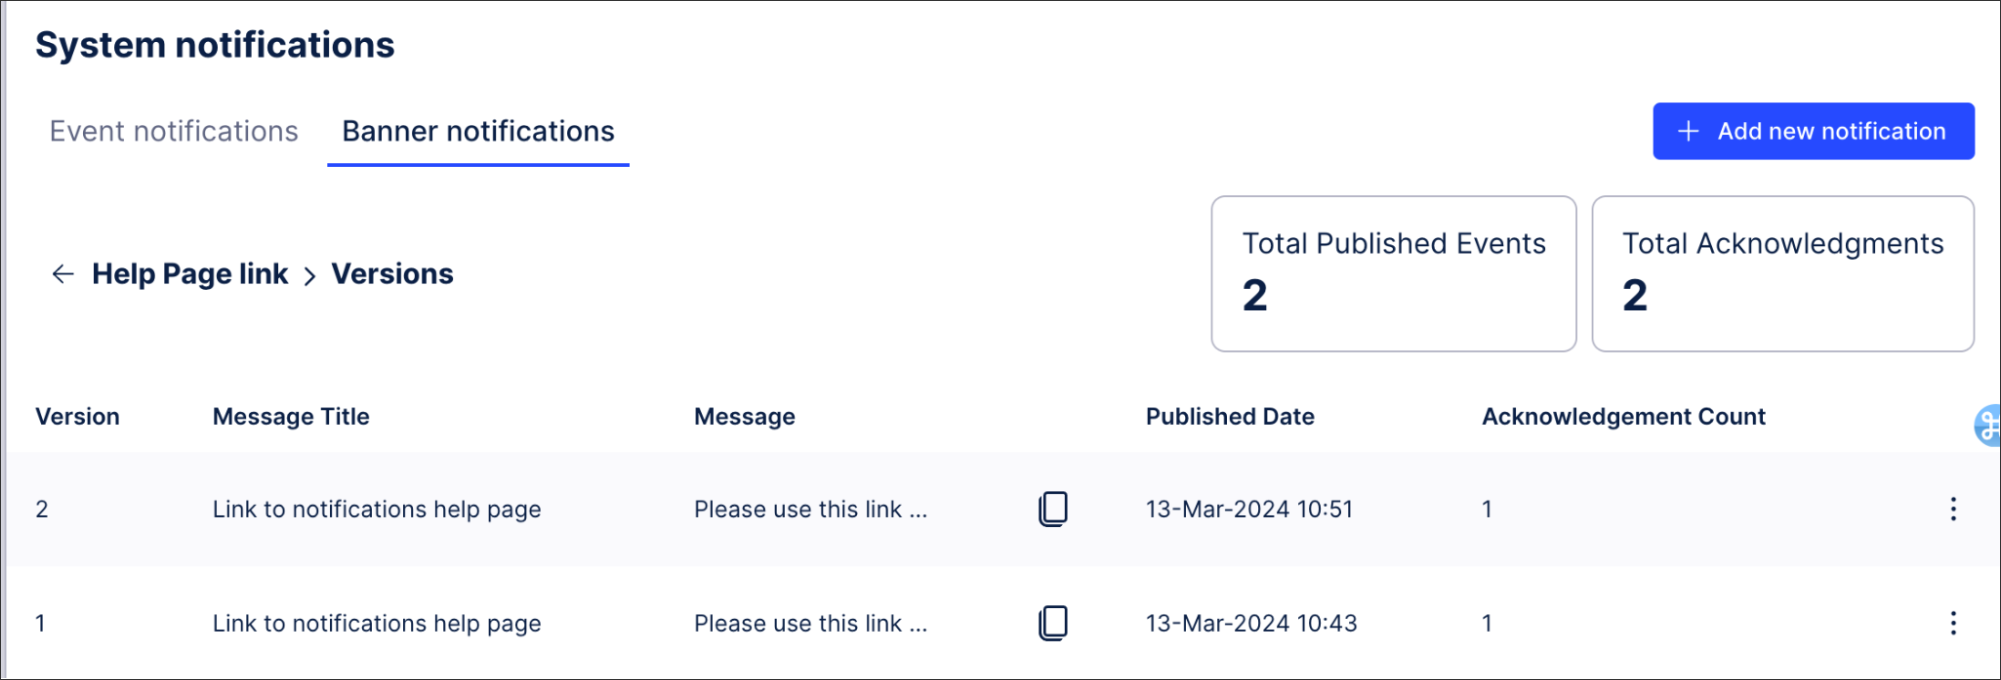 |
The version history also provides visibility of the number of acknowledgments each publish event receives (the number of users clicking X).
It also allows the admin to copy the notification if they want to re-use the same message in another notification, or to more easily edit the existing one.