Configuring legacy profile views
Note
Instead of using a profile view, the new Studio UI allows you to overlay a view within a view. This overlaid view can be configured for tables and buttons, allowing users to select data and the linked view is displayed as a modal or side panel.
For more information about the new Studio experience, see: Studio.
Legacy profile Views allow you to configure one linked View to open as an overlay or side modal within another View, triggered by a user clicking data in a table, list, or within the Process Explorer. The purpose of a legacy profile View is to show more specific content about specific cases, for example by clicking on the case ID and seeing more detail about that ID.
In this example, a profile view has been configured to allow the app user to click a row ID and see further information:
When configuring legacy profile views, you need to create the profile view itself (the one you want the user to see in more detail) and the main view (the one the profile view is linked from). These views must both use the same Knowledge Model.
Configuring the legacy profile View
To configure the legacy profile View:
Create a new legacy View and enter Edit Mode.
Click Settings and enable Profile View:

Select the record you want to be used for this profile View. This record must have an identifier set in the Knowledge Model. For more information about this, see: Records
In our example, we've used AP_RECORD_PurchaseOrder.
Configure the profile View components as required. In common use cases, profile Views often contain tables, KPI lists, comments, and attribute lists.
For an attribute list example (based on ORDERS in the Knowledge Model):
Add an attribute list to the layout and use a few attributes of the ORDERS record in that list.
Add the following variables to the view: row, id, input1, input2
Row
ID
input1
input2
Add a text box to the layout and add the following content:
Profile view for 'ORDERS':
Showing information of the OrderID = ${id}

The two inputs sent from main view to this profile view are:
First Input = ${input1}
Second Input = ${input2}

We have also access to the information of the row:
Customer Name: ${row['ORDERS.CUSTOMER_NAME']}<br/>
City: ${row['ORDERS.CITY']}
For an overview of available legacy View components, see: Legacy view components.
Click Save.
Configuring the legacy profile View with YAML
You can also configure the legacy profile View using the following YAML structure:
metadata:
 ...
 knowledgeObjectId: VBAK #Defines the KM object the Profile View is representing. When opening the Profile View it will show one result from the table.
 profileView: true #Defines that this View is a Profile View
variables:
- name: id #Represents the unique identifier of the one result you’re opening up. The variable can be used by ${id}
  type: string
Configuring the main legacy View for profile Views
After creating the legacy profile View, you can now create and configure the main View. You'll use this View to link to the Profile View using a table.
In this example, we are using the ORDERS record from a Knowledge Model:
Create a new legacy View and enter Edit Mode.
Add a legacy table component to the View.
Select the Attribute from which you'd like to open the Profile View:
With our ORDERS record example, we'll include the following:
ORDER_ID
CUSTOMER_NAME
CITY
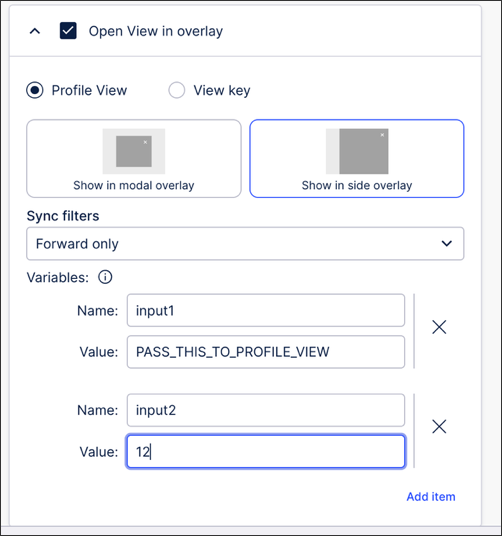
Create an On Click - Open View in overlay action.
In our example, we've then used sync filters to include the variables we created earlier.
Save and Publish the package.
Note
Unless the package containing both the profile View and the main View are published, the profile View will not open in preview mode.