Configuring augmented attributes for the object-centric Open Purchase Order Management app
In the Open Purchase Order Management app’s Knowledge Model “OCPM KM”, configure any additional values you want for the status, priorities and any other dimension that you want to use on the app views. You only need to do this if there’s something important to add besides the supplied values.
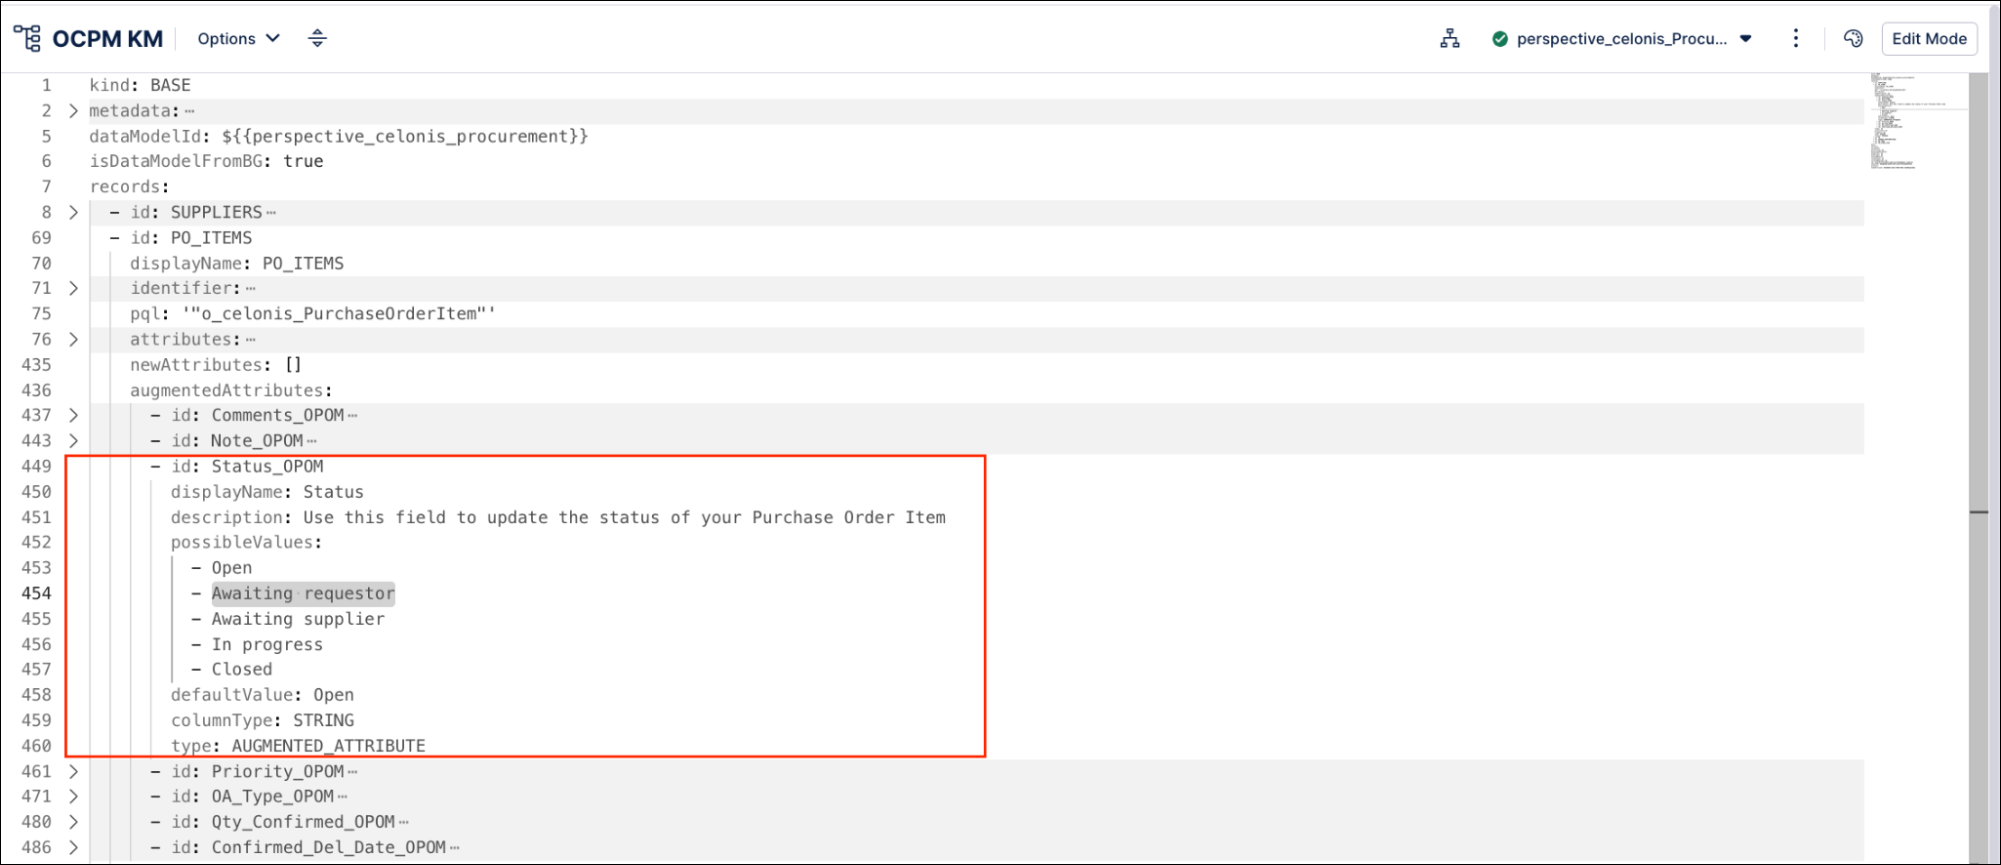
The default values that users can pick for the status of a purchase order are “Open", "In progress", "Awaiting requestor", “Awaiting supplier”, “In progress”, and “Closed”. You can’t remove the existing values.
You work with Knowledge Models in the visual editor in Studio, and any changes you make are applied when you publish a new version of the app.
Here’s how to set up any new status values that you want to add:
In the Celonis navigation menu, select Studio.
Find the Open Purchase Order Management app in your Studio space navigation.
Expand the package’s structure using the arrow.
Go to the Knowledge Models folder and select “OCPM KM”.
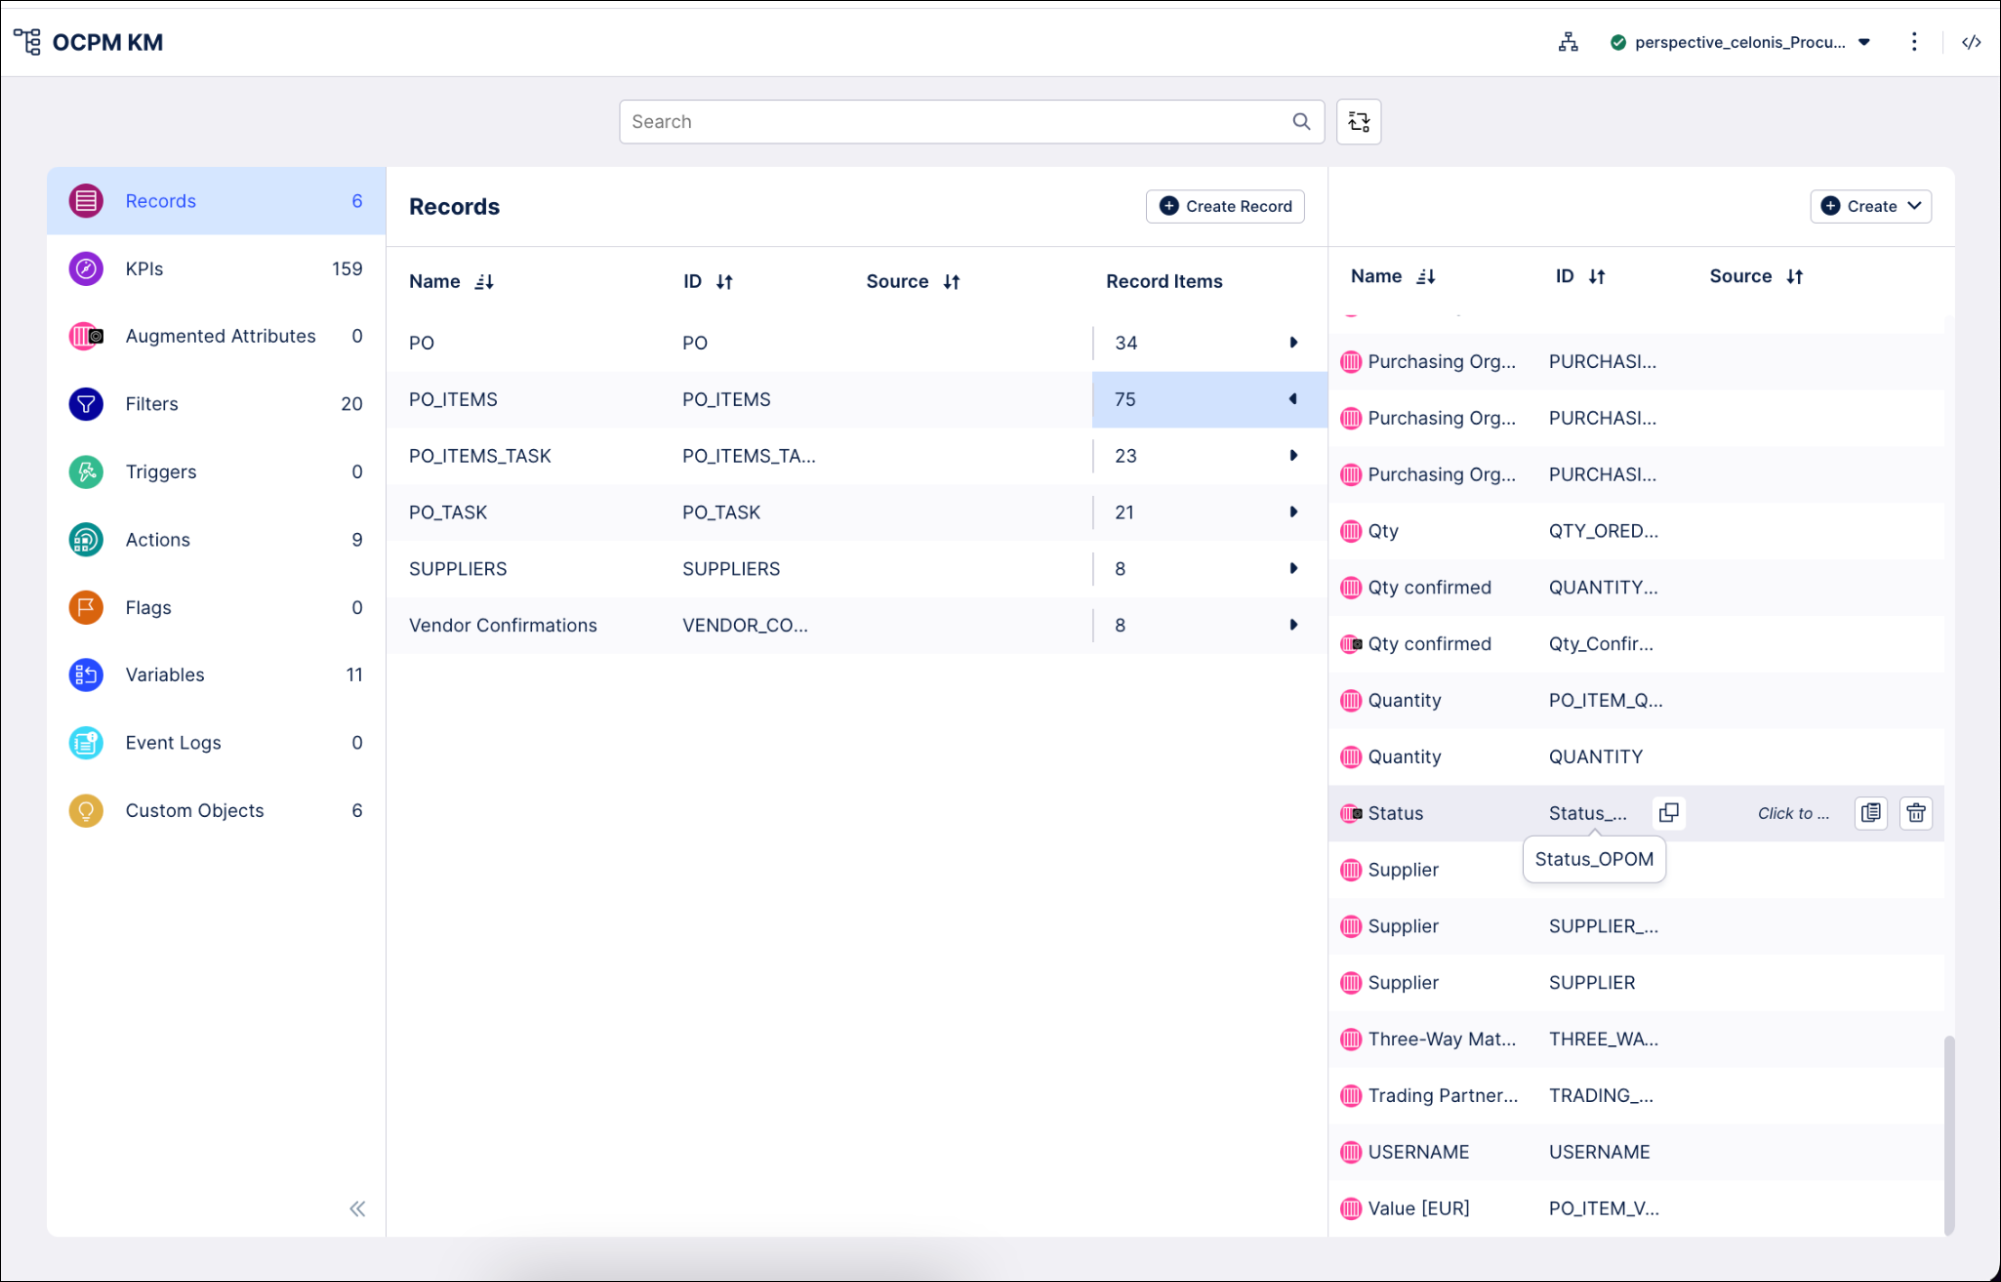
Select the Records section of the visual editor, and search for “PO_ITEMS” to find the relevant records.
Tip
You can hide auto-generated items in the Knowledge Model by clicking the “Hide auto-generated definitions” icon next to the search bar.
In the row for “PO_ITEMS”, click the arrow in the Record Items field to open the augmented attributes. Click the second attribute Status_OPOM to edit it.
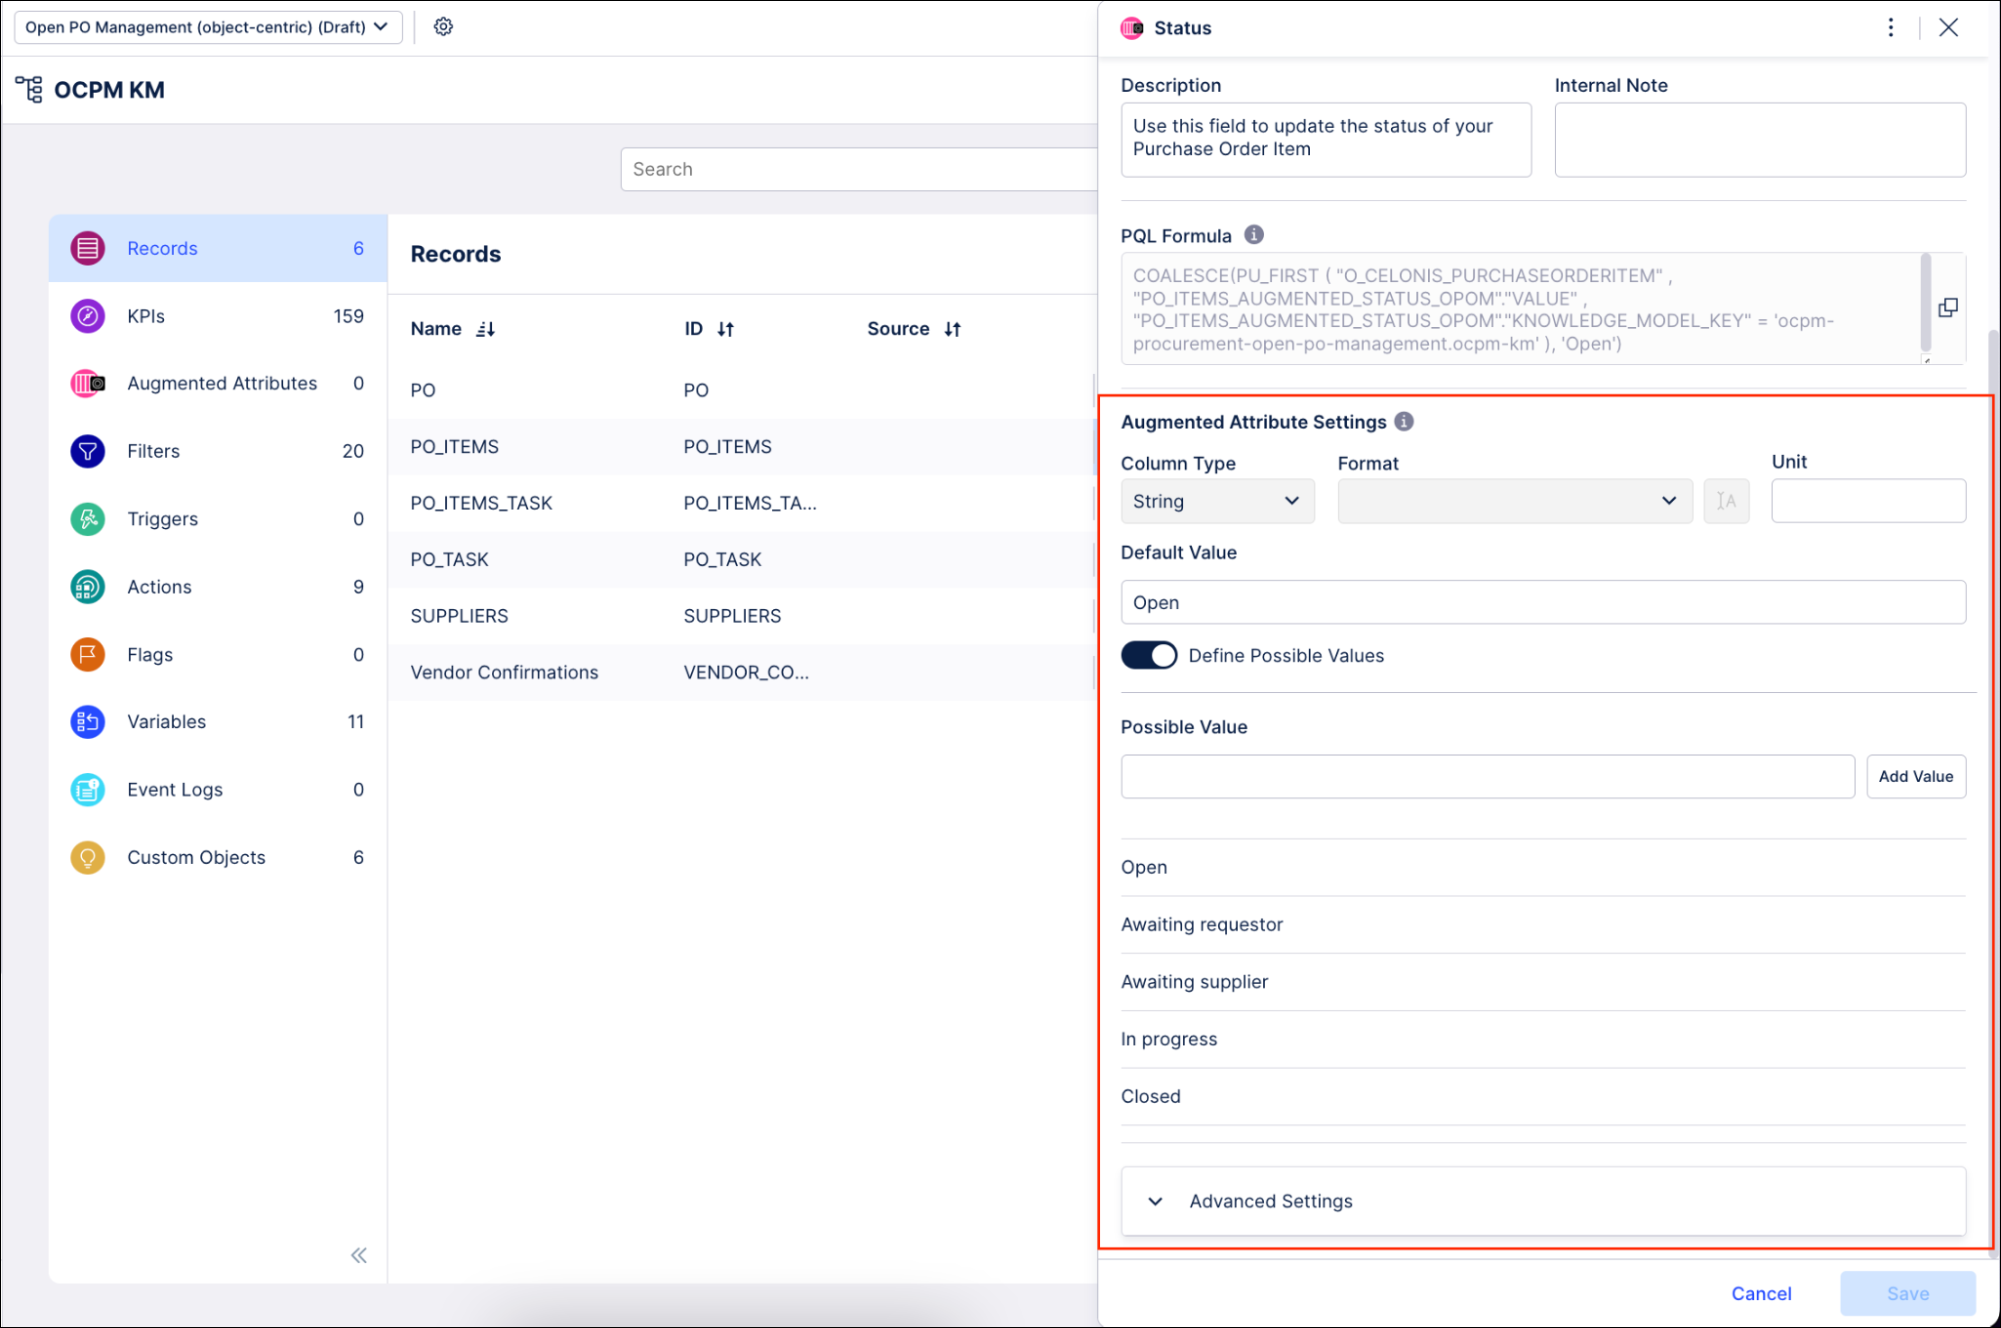
Scroll down to the Augmented Attribute Settings section, and enter each of your new status values in the Possible Value box, then click Add Value to add it to the list. Click Save to save the new values.
Still working in the Records section of the visual editor, search for “Priority_OPOM”. Repeat the last two steps to add each of your new status values to the Possible Value settings for the “Priority_OPOM” augmented attribute. Click Save to save your changes.
When you’ve completed and checked your changes, use the Publish Package button at the top of the screen in your Studio space to publish a new version of the app. When you publish, the augmented attributes are triggered, and any components using them are updated.