Selections in Analysis UI
Analysis - Maintenance only
Effective August 1st 2025, Analysis features can no longer be purchased as part of a Celonis Platform license. Celonis continues to maintain Analysis (by fixing bugs and ensuring that performance remains strong) but no further feature development will take place.
You can migrate your existing Analysis assets to our enhanced Studio Views, giving you access to our intuitive View creation capabilities. To learn how to migrate your existing Analysis to Studio Views, head to: Migrating Analysis to Views.
And for an overview of our enhanced Studio features, see: Studio feature availability matrix.
Selections can be made by directly interacting with any component.
Selection UI offers more advanced selection possibilities.
Selections can be made by the viewer.
Creating selections in the Analysis UI
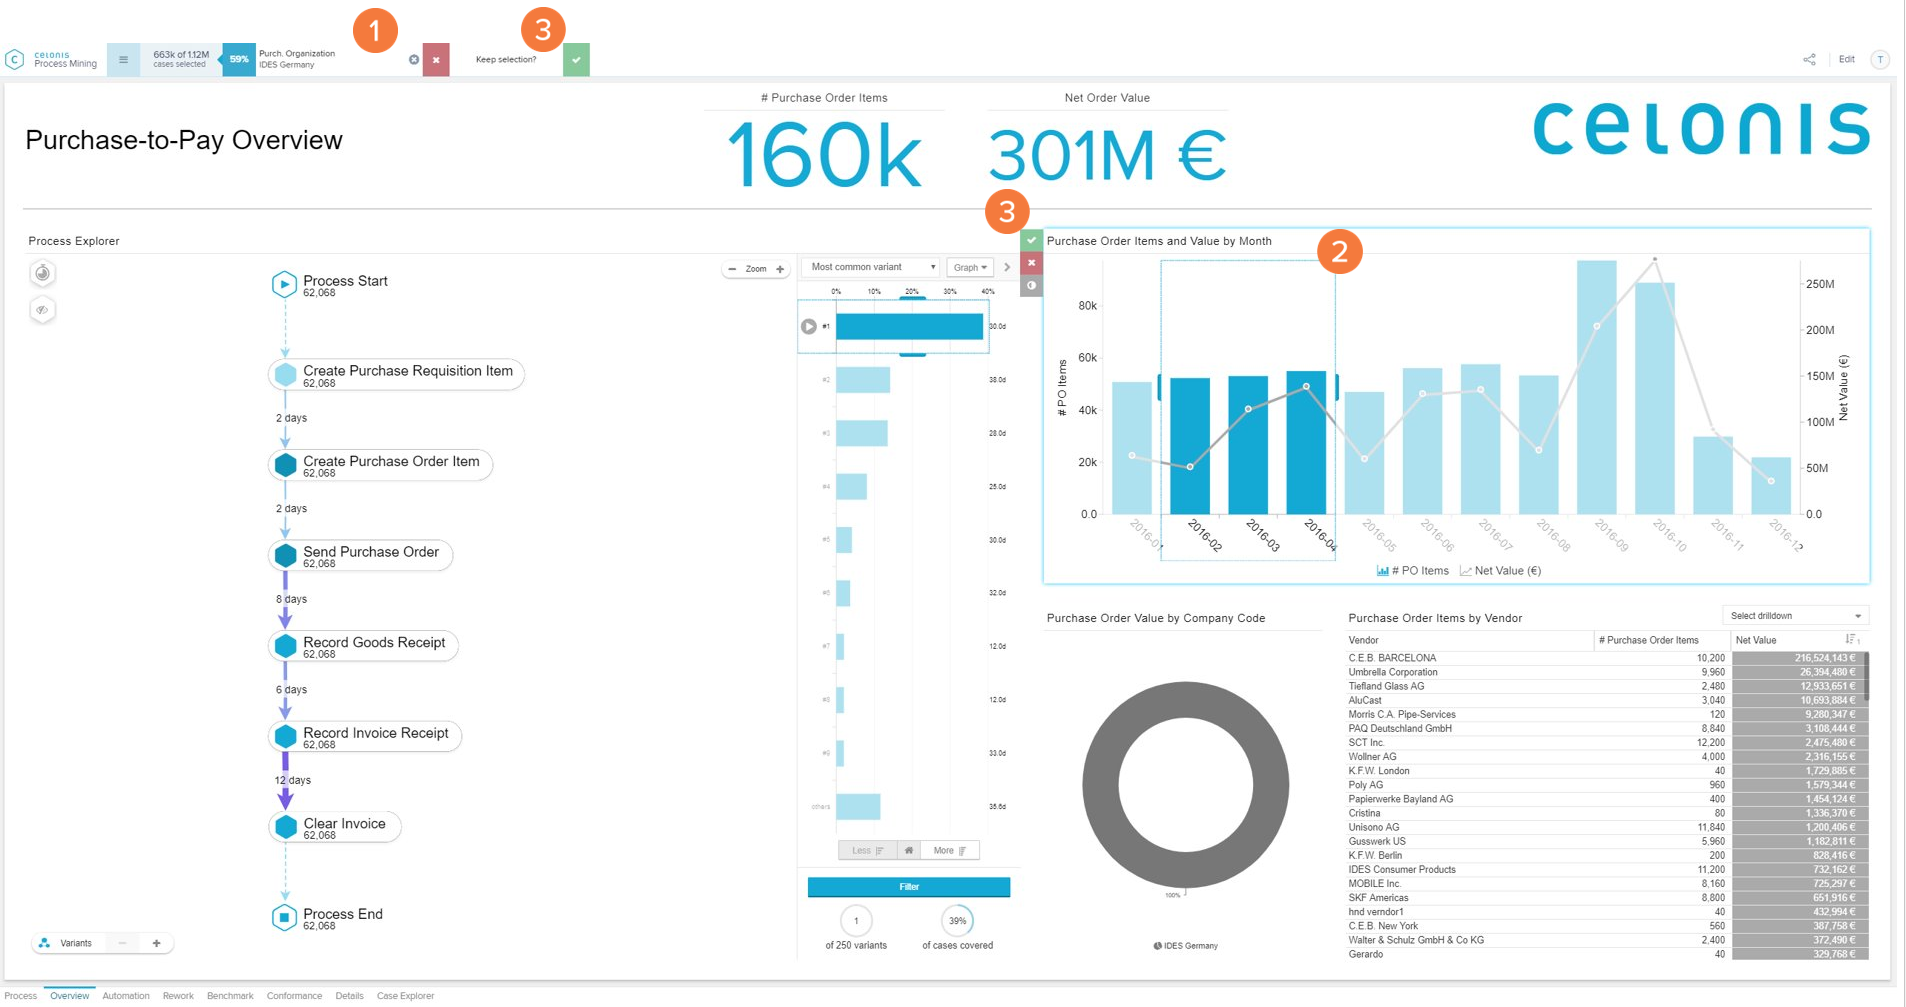
Active selections are collected at the top of the analysis and shown in tabs. Those can be removed with the cross at the very right and the quick settings of each selection can be opened with a click on the tab.
Click the element you want to select. Selections can be created from each component.
New selections on components are temporarily selected. They can be confirmed, canceled or inverted with the on-component buttons or the temporary selection in the selection bar.
Tip
Temporary selections can be used to preview how the selection would affect the analysis.
Selection UI
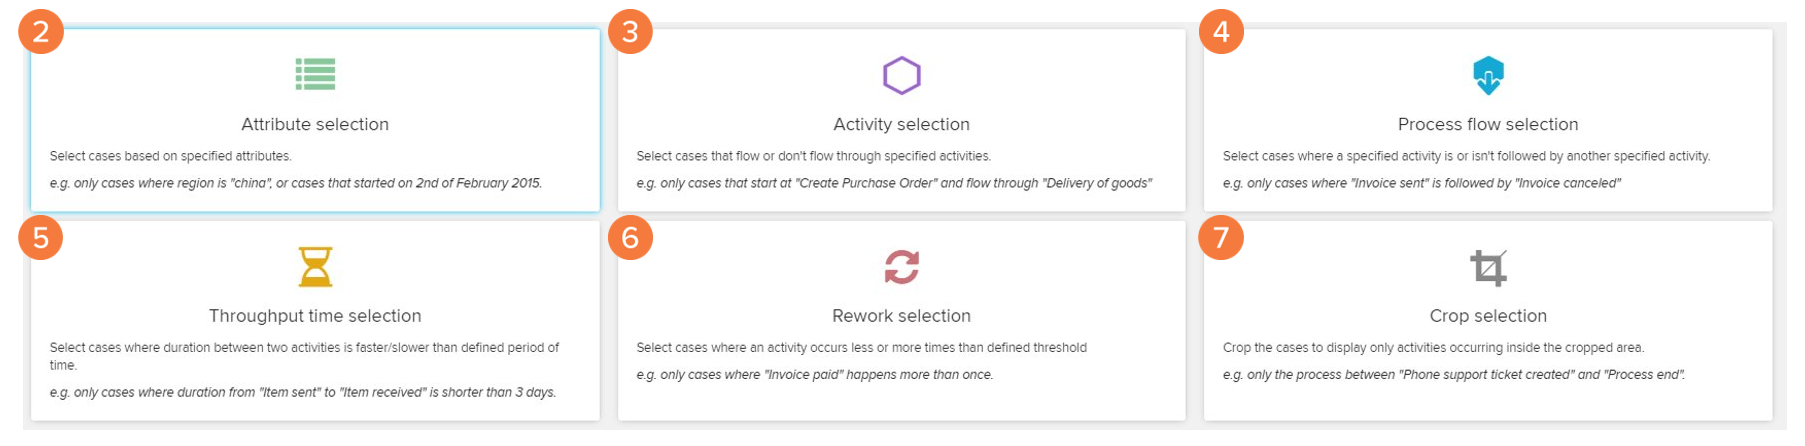
Open the selection UI to create selections with the help of a designated selection view. The selection UI has to be activated for viewers in the general settings.

Attribute selection allows you to select based on single values from the tables in your data model.
Activity selection allows you to select cases based on the activities they flow through, start, or end with.
The process flow selection allows you to select cases based on their process flow.
With the throughput time selection, you can select cases based on throughput times on single process flows.
Rework selections allow you to select cases based on the occurrence of single activities.
The crop selection will crop the process view in your analyses.
Attribute selection
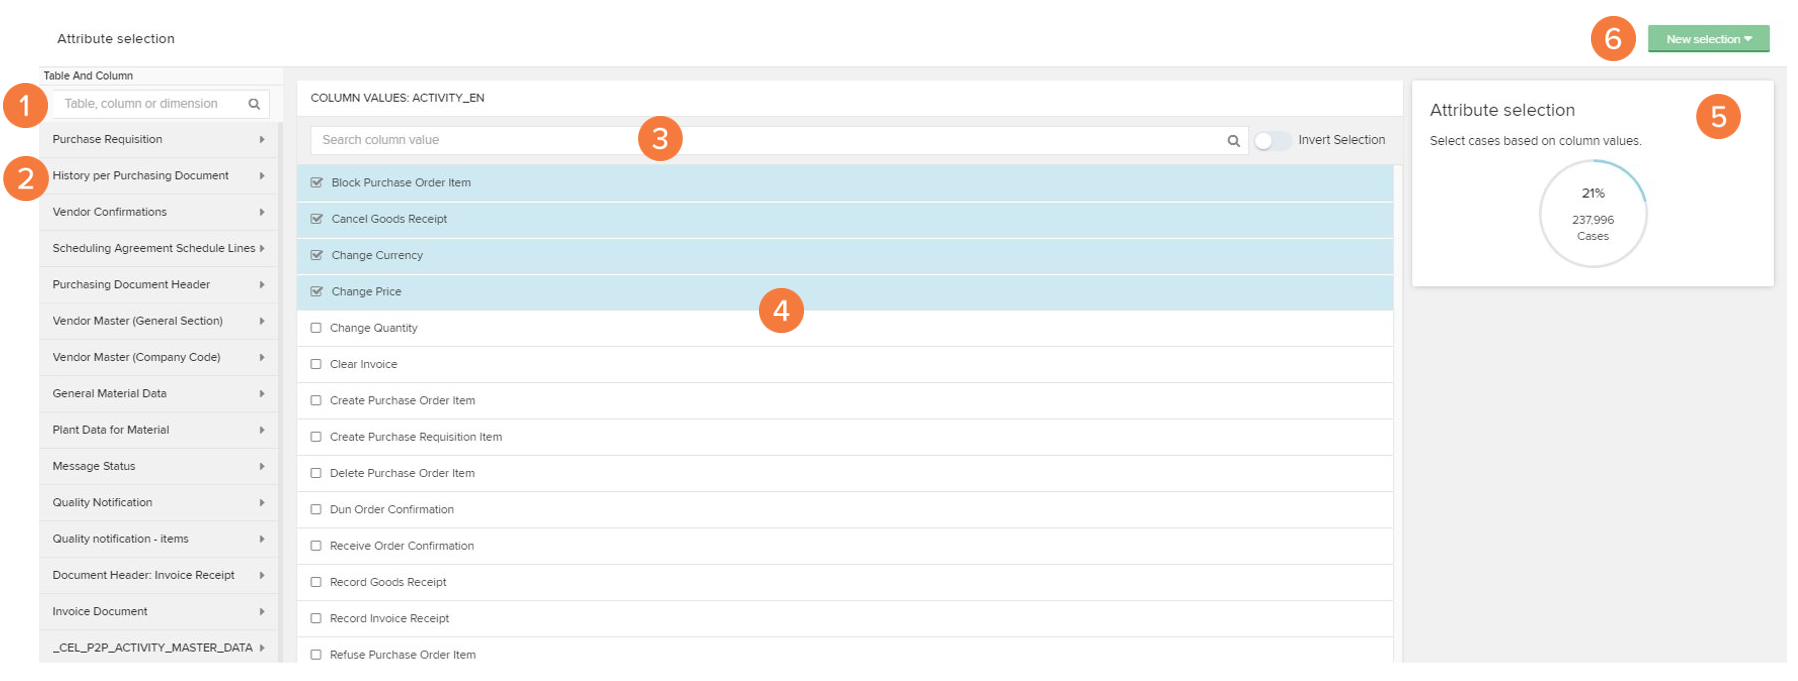
Search the data model tables.
Select the data model table and column you want to create a selection on.
Search the column's value.
Select and deselect the values in the list.
See the case coverage of your current selection.
Quickly change the selection type.
Activity selection
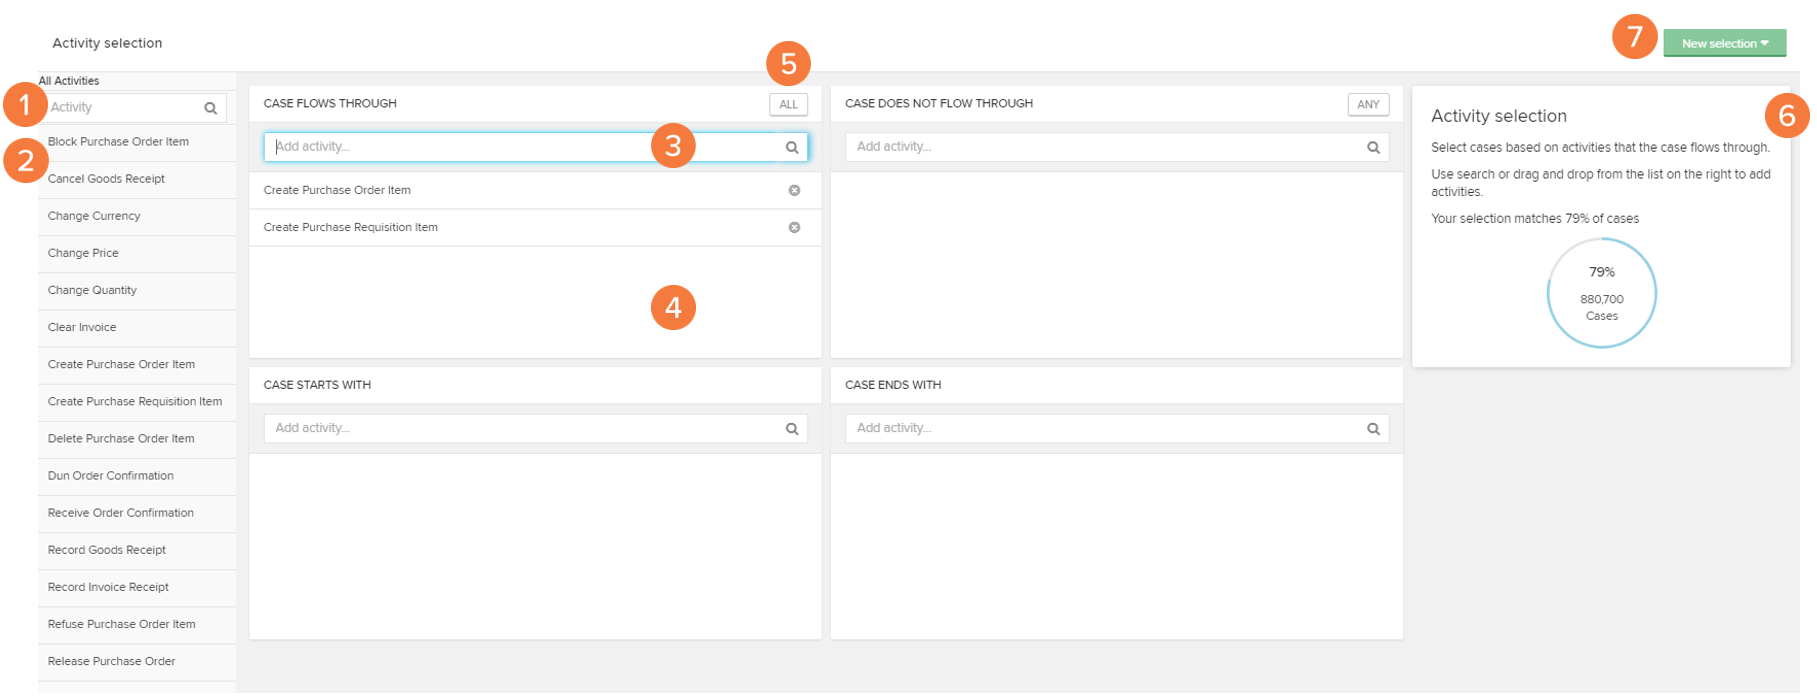
Search the available activities.
Drag and drop from the list of activities to one of the selection type's boxes (4).
Search the activities and add them directly to the selection boxes.
Drop the selected activities to the selected types fields.
Choose if the filter applies to all or any of the activities that you selected.
See the case coverage of your current selection.
Quickly change the selection type.
Process flow selection

Select from which activity the connection you want to filter on should start.
Select the activity to which the cases should flow.
Choose if the activities should follow each other directly, at any time, not directly or never.
See the case coverage of your current selection.
Quickly change the selection type.
Throughput time selection
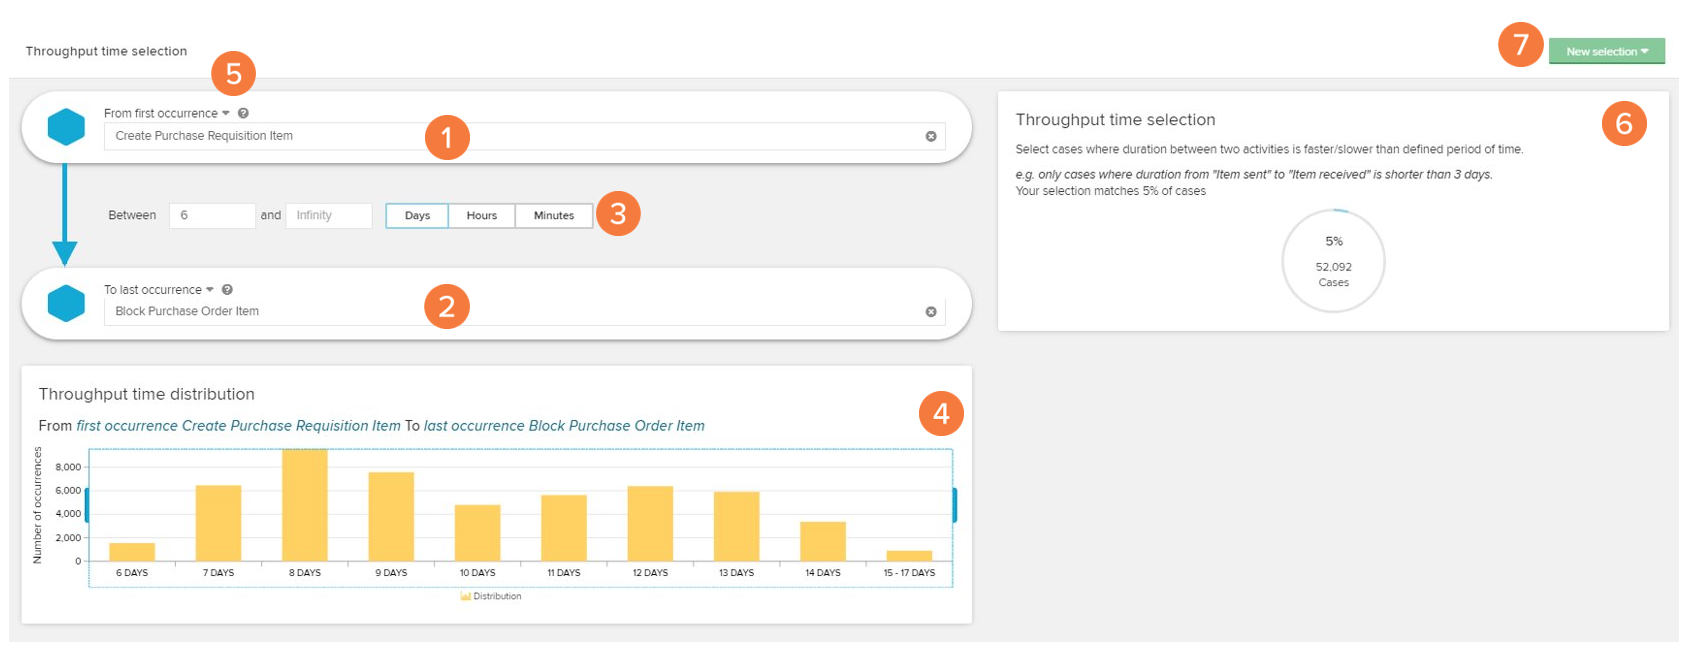
To filter on throughput times you can select the starting activity for the process flows you want to filter based on throughput time.
On the second input, you can set the target activity where the process flows should flow to.
You can select on which range of throughput times you want to filter the cases by putting in a start value, an end value of the range, and the time unit.
Alternatively, you can select the time range on the provided histogram below the flow selection.
For each of the two activities, you can select if you want to respect the first or last occurrence of the activities for the throughput time.
See the case coverage of your current selection.
Quickly change the selection type.
Rework selection
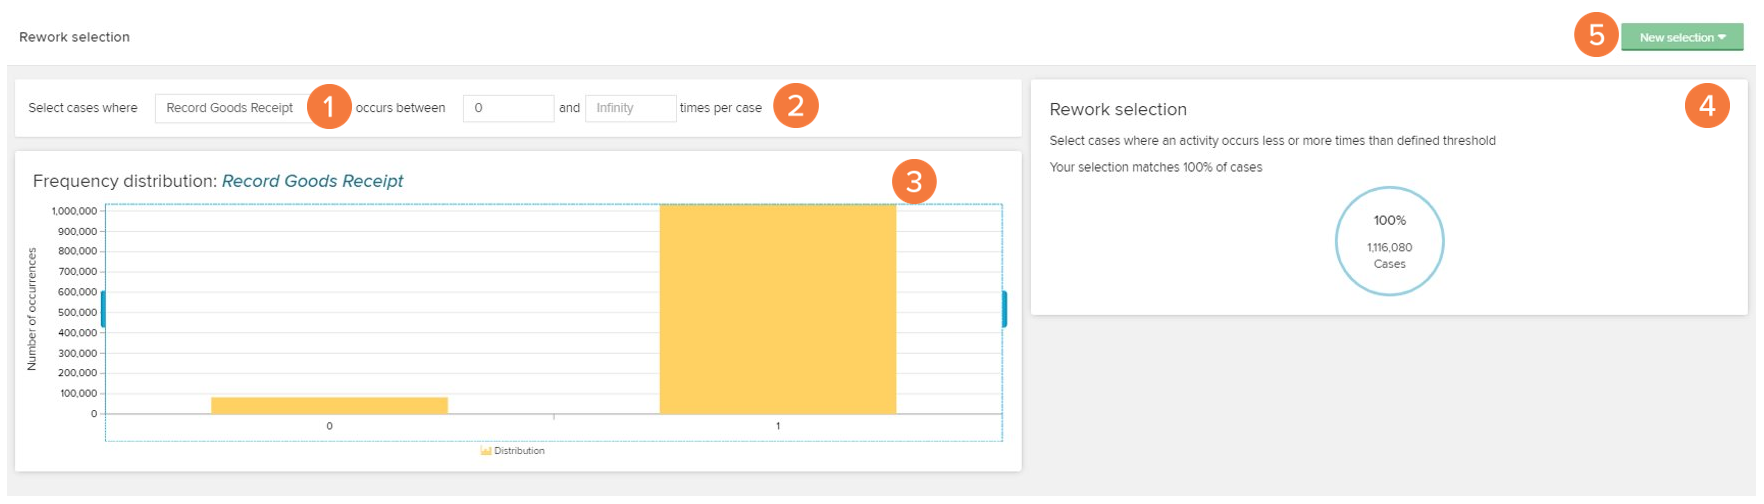
On the rework selection, you can select cases based on the number of occurrences of single activities. Therefore you can select in the first dropdown from the list of all available activities.
The following inputs allow you to set the range of occurrences you want to select.
This range of occurrences can also be selected on the histogram below.
See the case coverage of your current selection.
Quickly change the selection type.
Crop selection
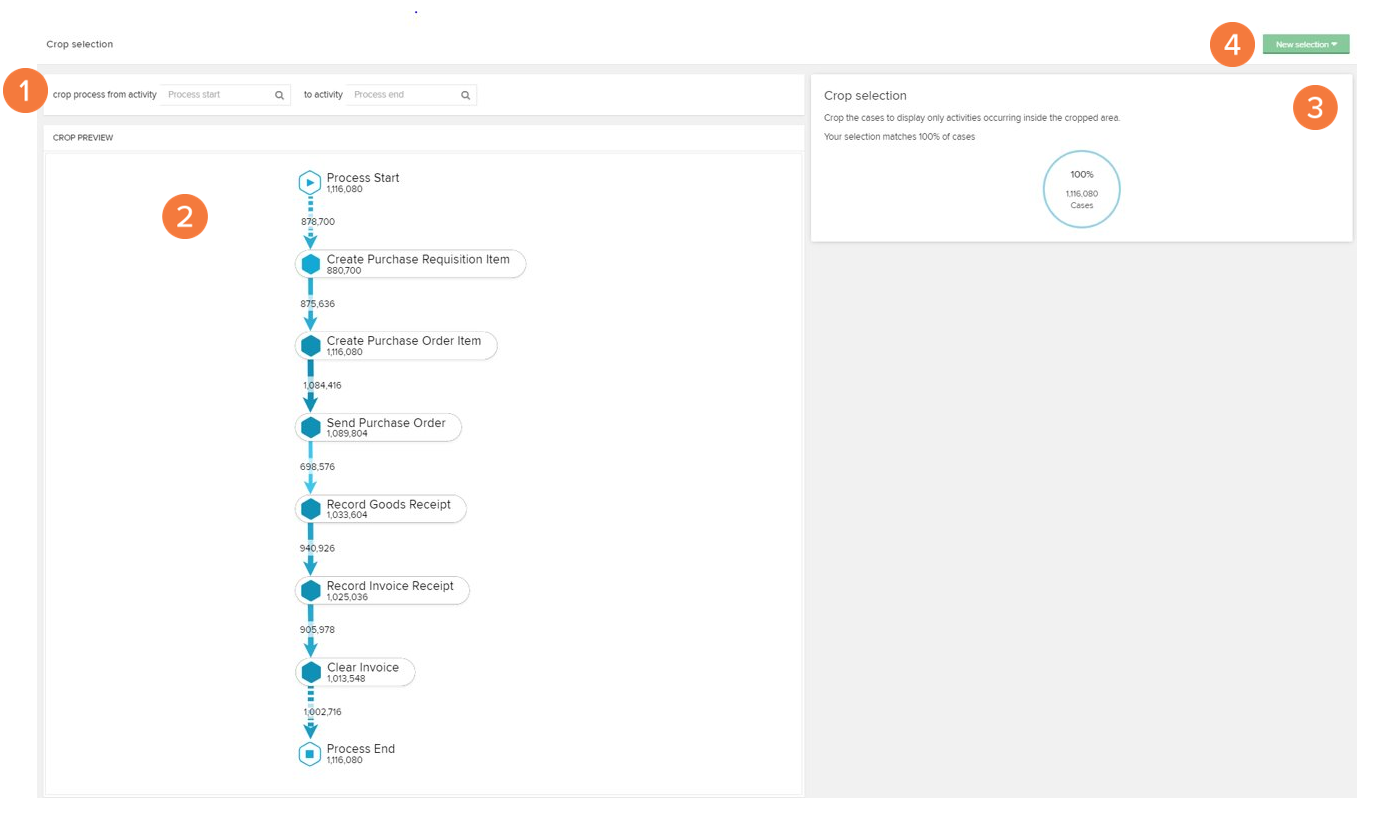
The cropping selection will crop the current process view to everything that is visible between two activities you can set in the two dropdowns available here.
The graph will preview the resulting view.
See the case coverage of your current selection.
Quickly change the selection type.