Create and Push CSV to Data Integration
Scale your data ingestion with the Celonis Data Push API. Instead of the standard line-by-line writing method, this approach leverages Webhooks to push large volumes of data as a single CSV. It’s a significantly faster solution for users looking to create custom, automated data connectors without the overhead of individual row processing.
While the standard method processes data row-by-row (which is slow for large datasets), this flow uses a batch-processing approach. Here is an expansion of how that flow functions across its two primary stages:
Data Collection via Webhook: The flow starts by acting as a listener. Instead of pulling data from a source at set intervals, it waits for data to be pushed to it.
The Entry Point: A Custom Webhook receives incoming data bundles.
Efficiency: The webhook is configured with a Maximum number of results (set to 300 in the example). This allows the flow to queue incoming items and process them in bulk rather than triggering the entire flow for every single record.
Continuous Logging: Because it uses a webhook, this setup effectively creates a "continuous Push API" that stays active and ready to ingest data as it's generated by external systems.
CSV Transformation and Data Push: Once the data is collected, the flow shifts from "receiving" to "uploading."
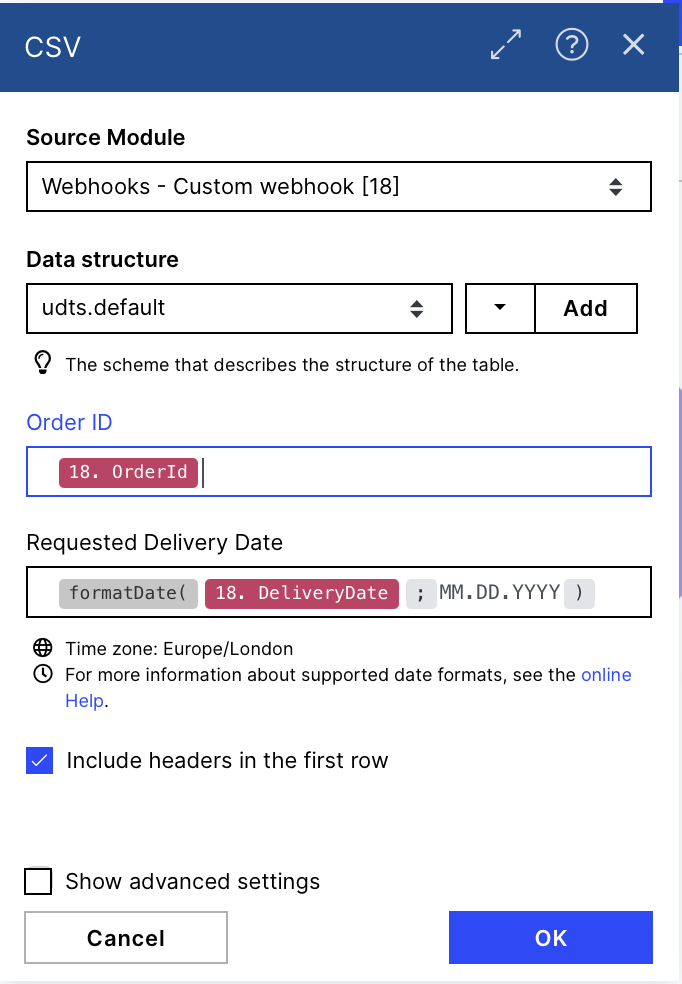
CSV Creation: The flow uses the CSV (Advanced) module to map the incoming webhook items into a structured CSV format. This is where you can apply logic like date formatting (dd.mm.yyyy) to ensure the data matches your Data Model requirements.
The Push Job: Instead of writing to a table directly, the flow interacts with the Celonis Data Push API through a three-step HTTP handshake:
Create Job: It tells the API to prepare for a new data upload (identifying the target table and Data Pool).
Push Chunks: It uploads the CSV file created in the previous step.
Execute Job: It commands the Data Integration service to finalize the upload and integrate the data into the model.
 |
Below you will find the step-by-step guide for configuring each module of the above Action Flow.
 |
Configuration:
Action Flows Module: Webhooks
Action: Custom webhook
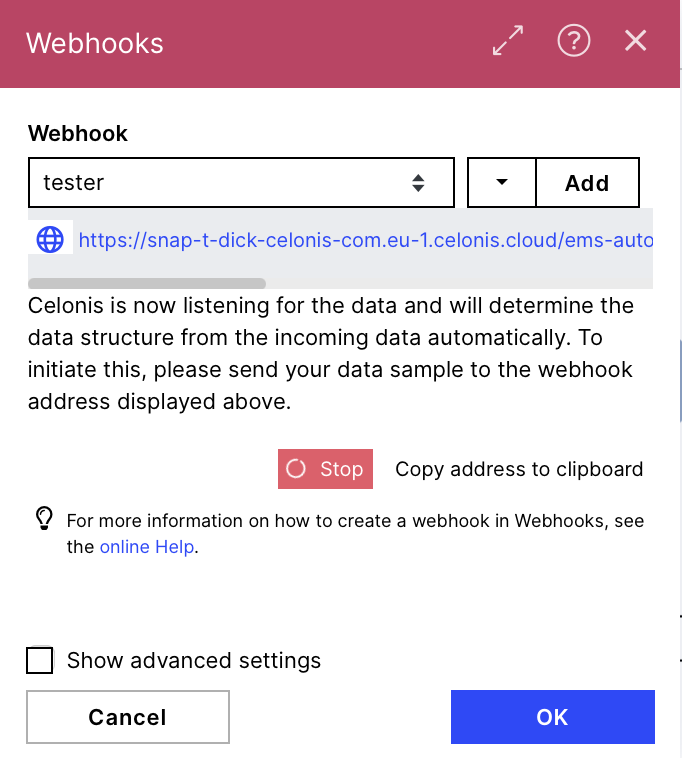
Webhook: Add a new Webhook and name it.
Optional: You have the possibility here to allow list desired IP addresses to make sure no one else can send data to your hook. In addition you can define a data structure and all incoming data bundles which won't have that structure are ignored.
Determine data structure: You can either send data from the source which will be sending the data later to enable the Webhook to determine the structure or build it by hand.
To do it by hand you copy the address, put it in another window but don't press directly enter. Add data in the following structure to the URL:
?variable1=text&variable2=028366&letzteVariable=12.12.2021
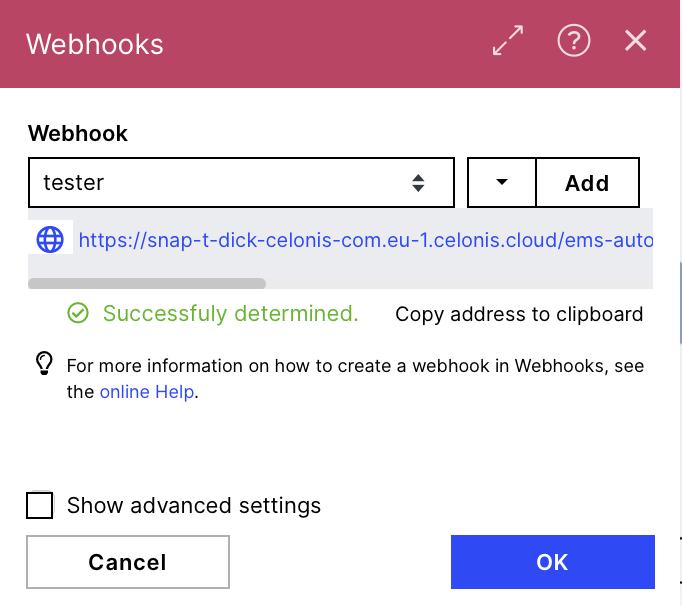
for this template we chose the following structure:
?OrderId=0145632053&DeliveryDate=12.03.2021
after pressing enter with the URL structured like that the Webhook should show the 'successfully determined' confirmation and you should be able to find the defined variables as item after the webhook. In the example we would find OrderId and Delivery Date.
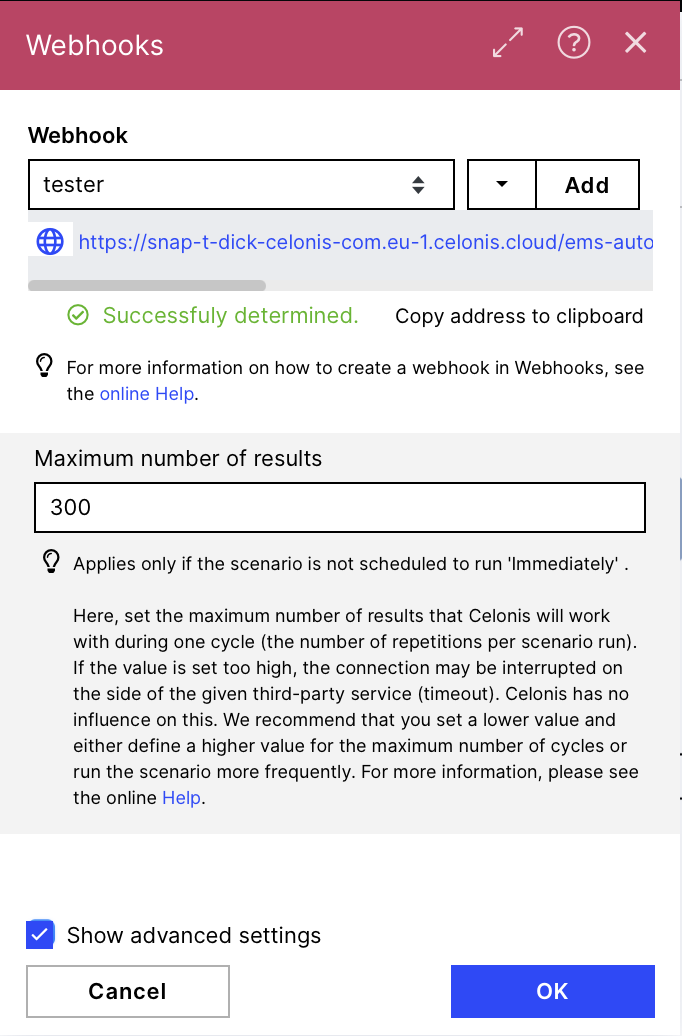
Advanced Setting - Maximum number of results: the default is 2, we chose 300 in this example. You should adapt it to the amount of line items you plan to send in the scheduling time we will set later. The line items which are more than the limit won't be lost but queued.
If you face any problems have a look at our Help Page or try our Academy course on Webhooks!
 |
 |
 |
We use the advanced module to create our CSV as we have the possibility here to adjust the data we just got from the webhook (e.g. format a date).
 |
Configuration:
Action Flows Module: CSV
Action: Create CSV (advanced)
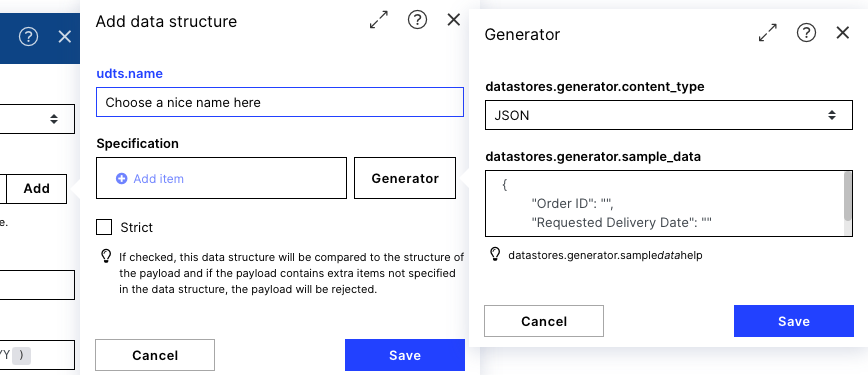
We do this by setting up our data structure in the CSV. We use the Generator and paste our JSON format in, this is especially relevant when having more complex data structures:
{
        "Order ID": "",
        "Requested Delivery Date": ""
}
If you have more / other Columns you can adjust the JSON quite easy, the generic format is:
{
"Column 1 Name": "",
"Column 2 Name": "",
"Column 3 Name": "",
"Last Column Name": ""
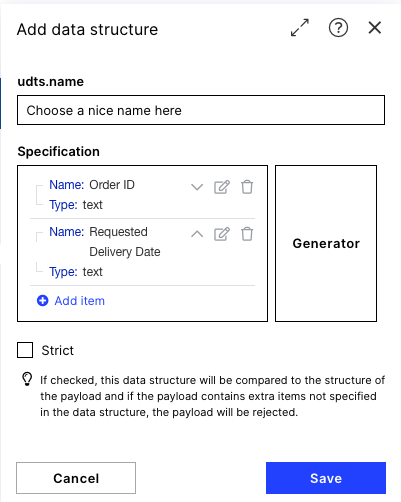
}Fill the new fields with the respective data form the Webhook module and adjust it if needed.
 |
 |
 |
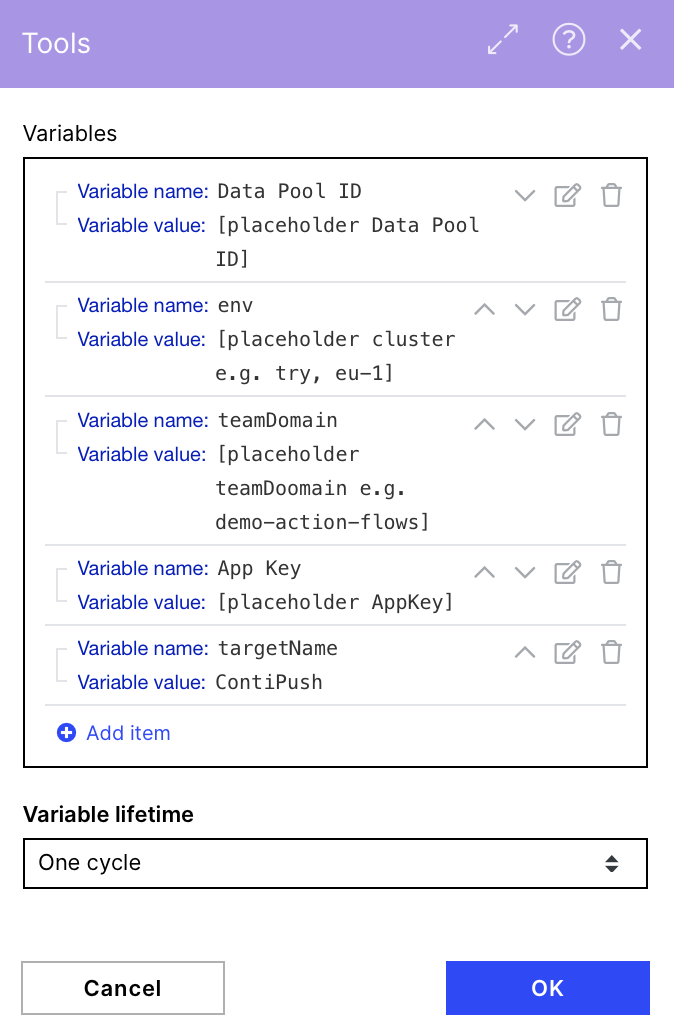
In order to make customizing the URL in the HTTP modules easier, we save our Data Pool ID, cluster, teamDomain and the App key we use as variables to reuse them and have a central point for maintenance.
 |
Configuration:
Action Flows Module: Tools
Action: Set multiple variables
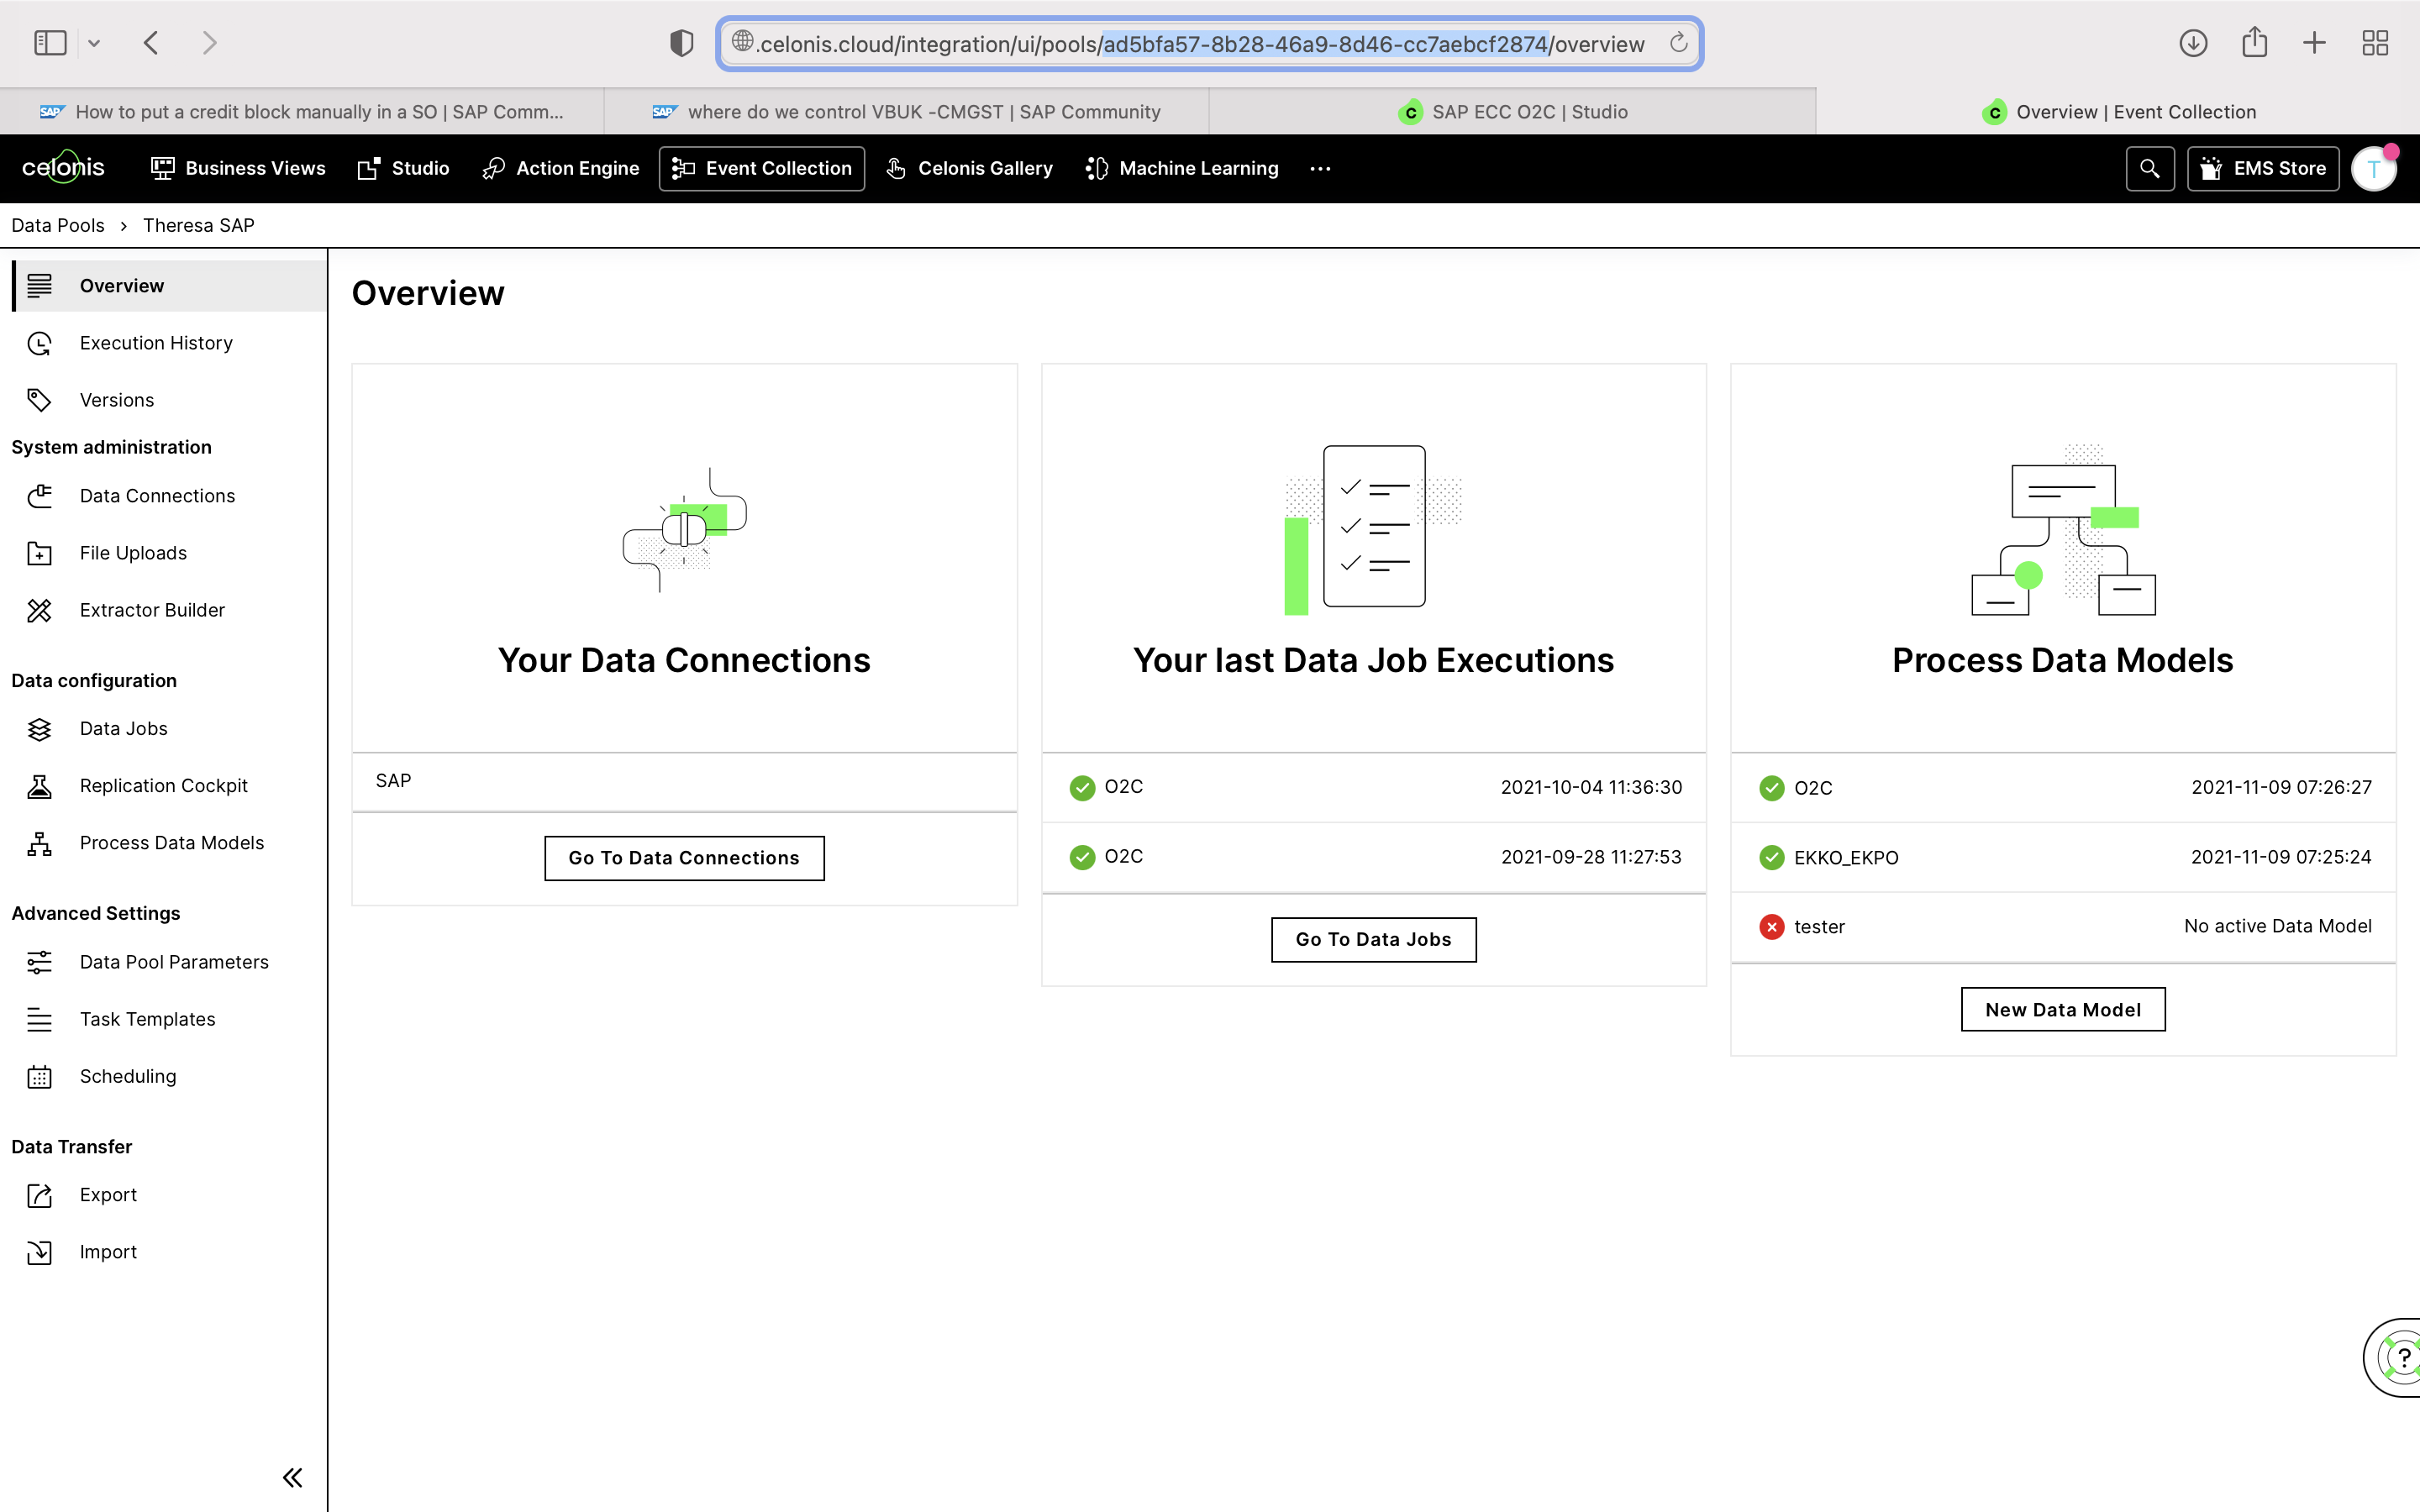
dataPoolId: Defined by user (this is the unique identifier for the data pool to which you want to push the CSV of data. You can locate the Data Pool ID from the URL when opening this specific Data Pool of your Celonis Platform team.
 |
env: your cluster e.g. try, eu-1...
teamDomain: your team domain e.g. demo-action-flows
teamDomain and env
For example: https://testteam.eu-1.celonis.cloud/*
use the teamDomain and env as variables
AppKey: e.g.: GjV6ODBvghgv6r76r0YzkyLTkxZwjbflqjwhebfljwhebfqjhebfwlV5TEVCcjMzAHBFK0F8TXdGBTlqBWFGkBJobEG2K3ZqTUyxL9RhnllsVPNk.
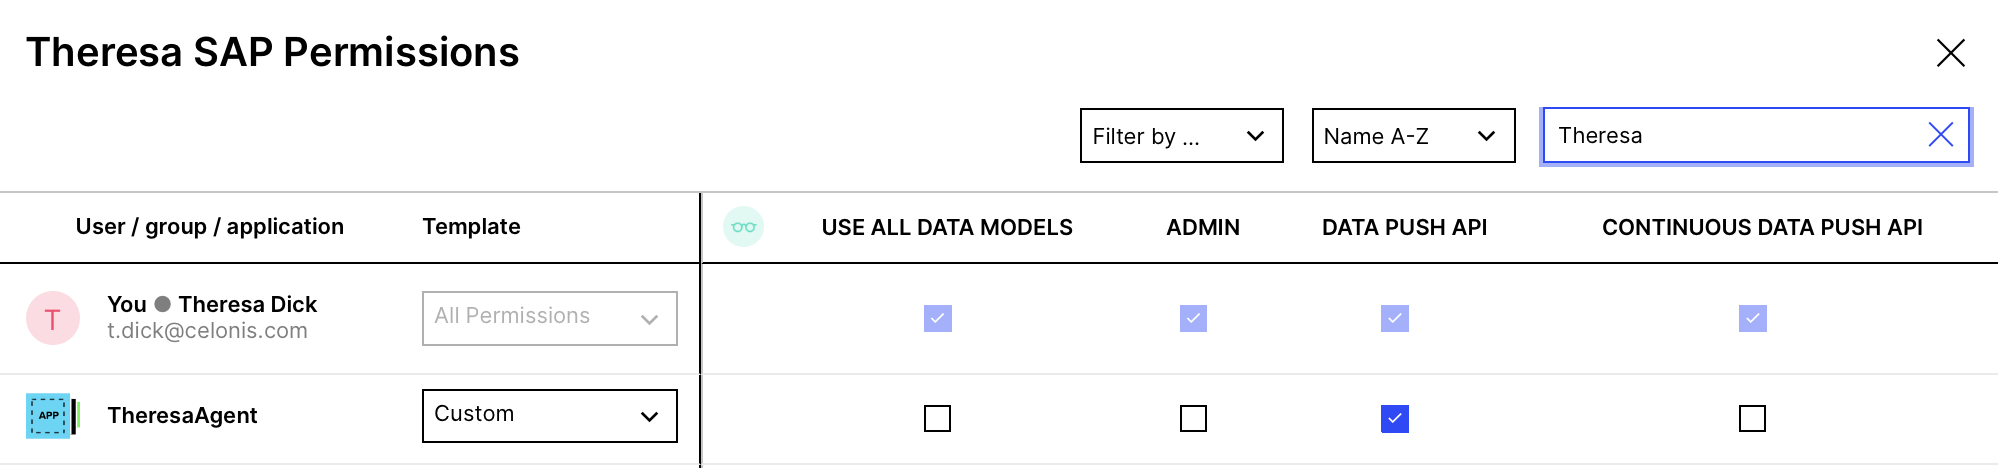
Make sure to grant the right permissions for the data pool to the App Key, see in the note on the right.
tableName: the name the Table should have in the Event collection (e.g. pushCSV)
 |
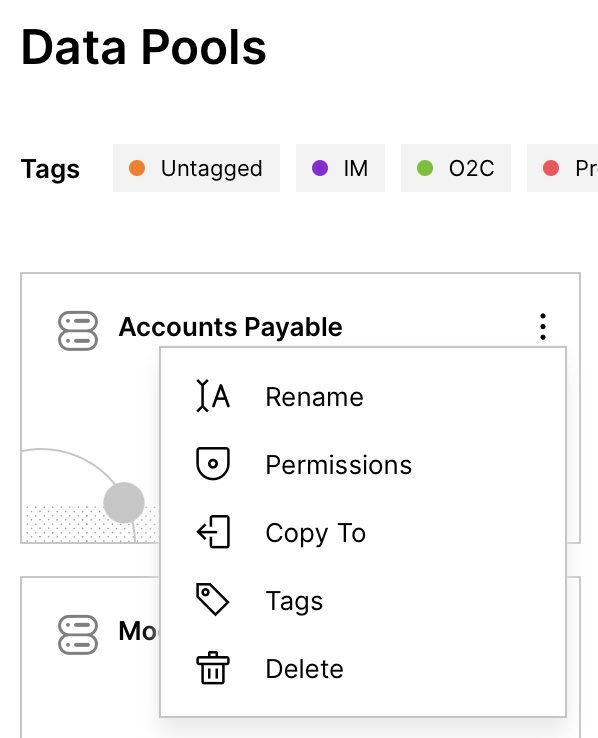
App Key Permissions
Make sure to have all rights on the specific data pool with that application key by navigating to Permissions of the Data Pool and ticking the Data Push API box:
 |
 |
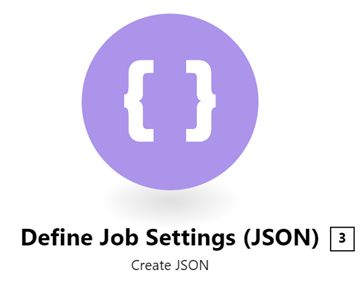
Once you have configured the CSV, you can begin defining the requirements for pushing the file to your chosen Celonis data model. To do so, we use the JSON module to set the required inputs for the Data Push API.
 |
Configuration:
Action Flows Module: JSON
Action: Create JSON
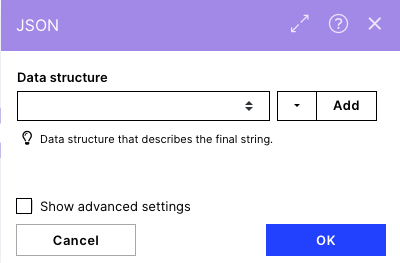
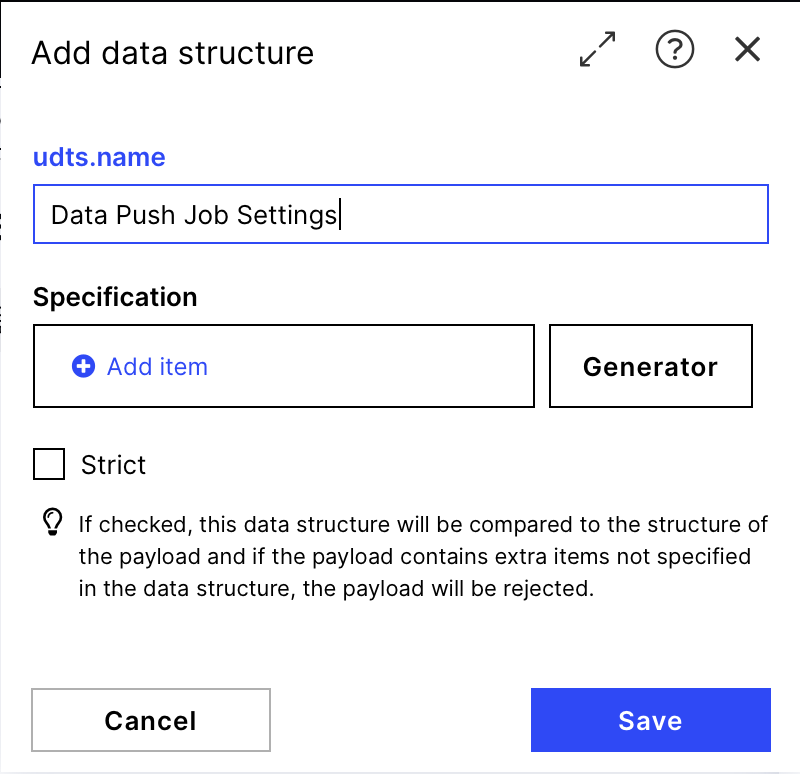
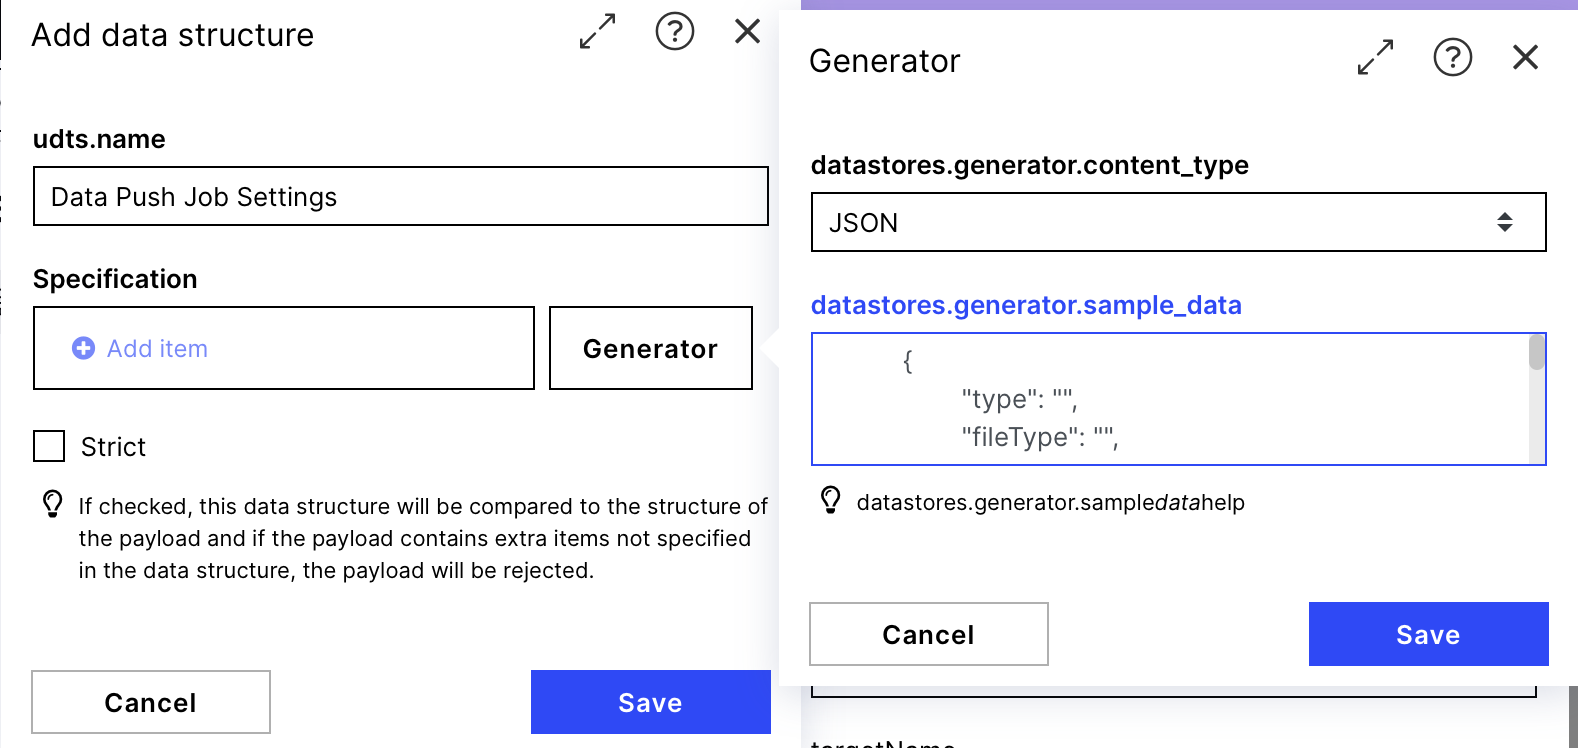
Data structure: Add a new data structure which will define the settings of the data push job.
Generator:
datastores.generator.content_type:JSON
datastores.generator.sample_data:
{
"type": "",
"fileType": "",
"dataPoolId": "",
"targetName": "",
"csvParsingOptions": {
"decimalSeparator": "",
"separatorSequence": "",
"lineEnding": "",
"dateFormat": ""
}
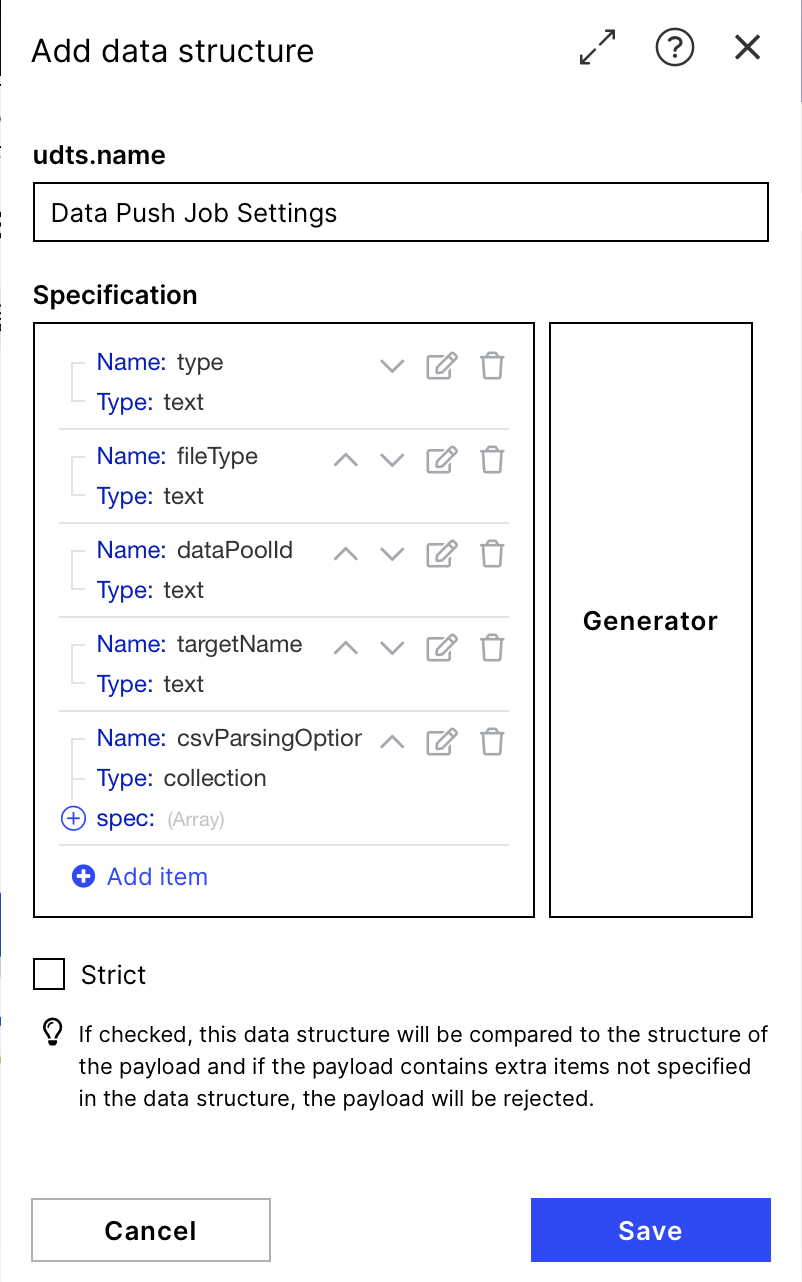
}After generating the data structure with the Generator by clicking the save button compare it to the structure provided in the screenshot on the right. If it looks the same you are good to go saving and filling the structure.
 |
 |
 |
 |
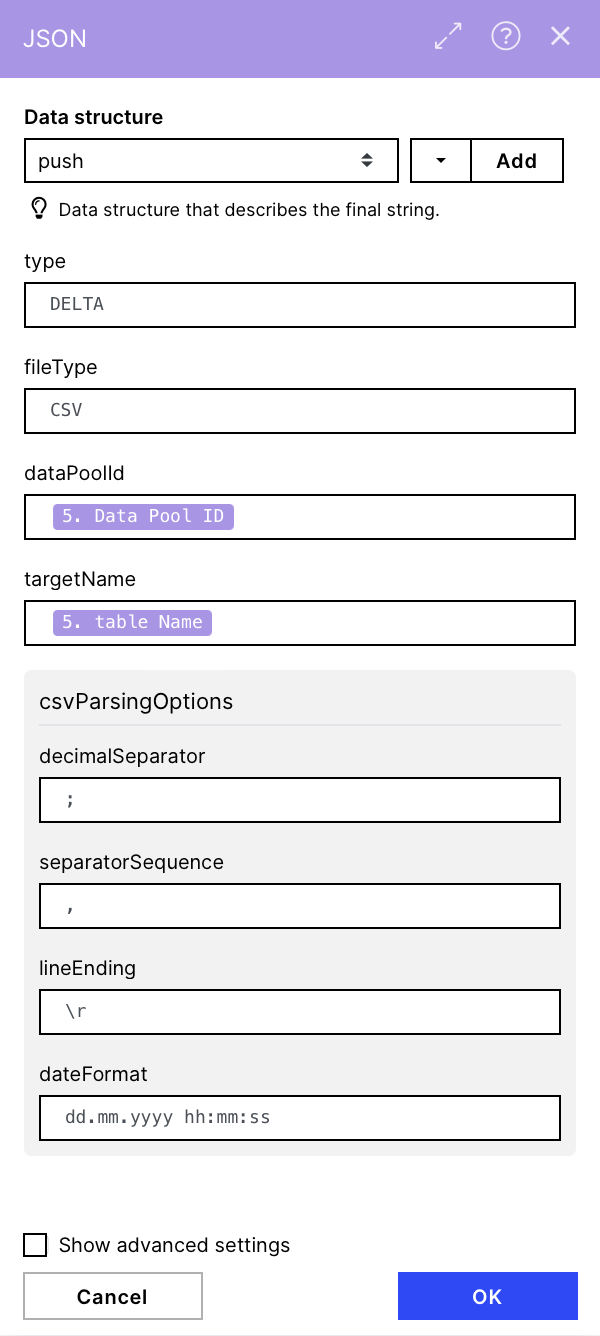
If the data structure was configured correctly, your "Create JSON" module should now look much like the screenshot on the right. You should provide the required inputs for the fields defined in your data structure. See below:
type: DELTA (or REPLACE)
fileType: CSV
targetName: the variable item tableName
dataPoolId:the variable item Data Pool ID
csvParsingOptions:
decimalSeparator : ;
separatorSequence: ,
lineEnding : \r
dateFormat: dd.mm.yyyy hh:mm:ss
 |
Warning
The following instructions of module 5 - 8 can be skipped as they are totally preconfigured. Please go on with step 9!! Nevertheless the documentation can support you if you face any problems or want to understand what is going on.
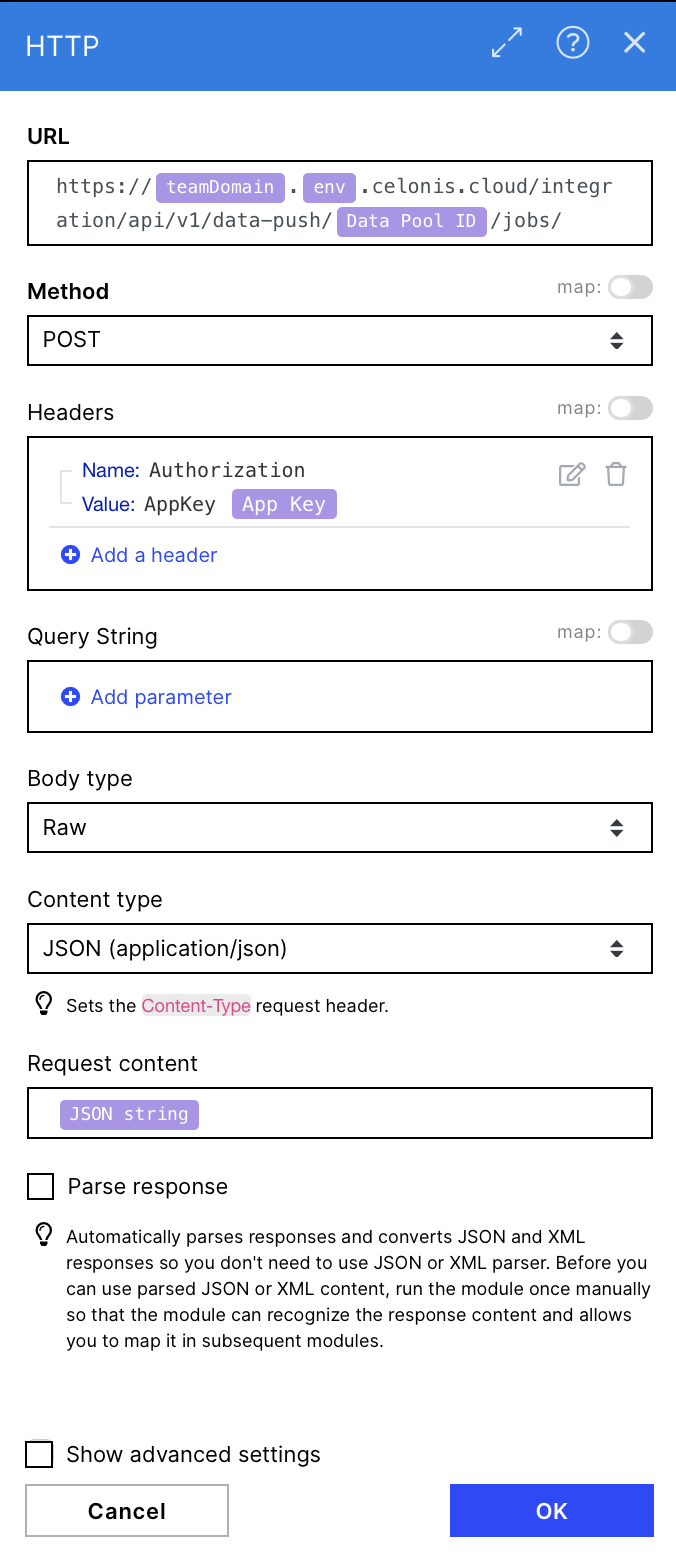
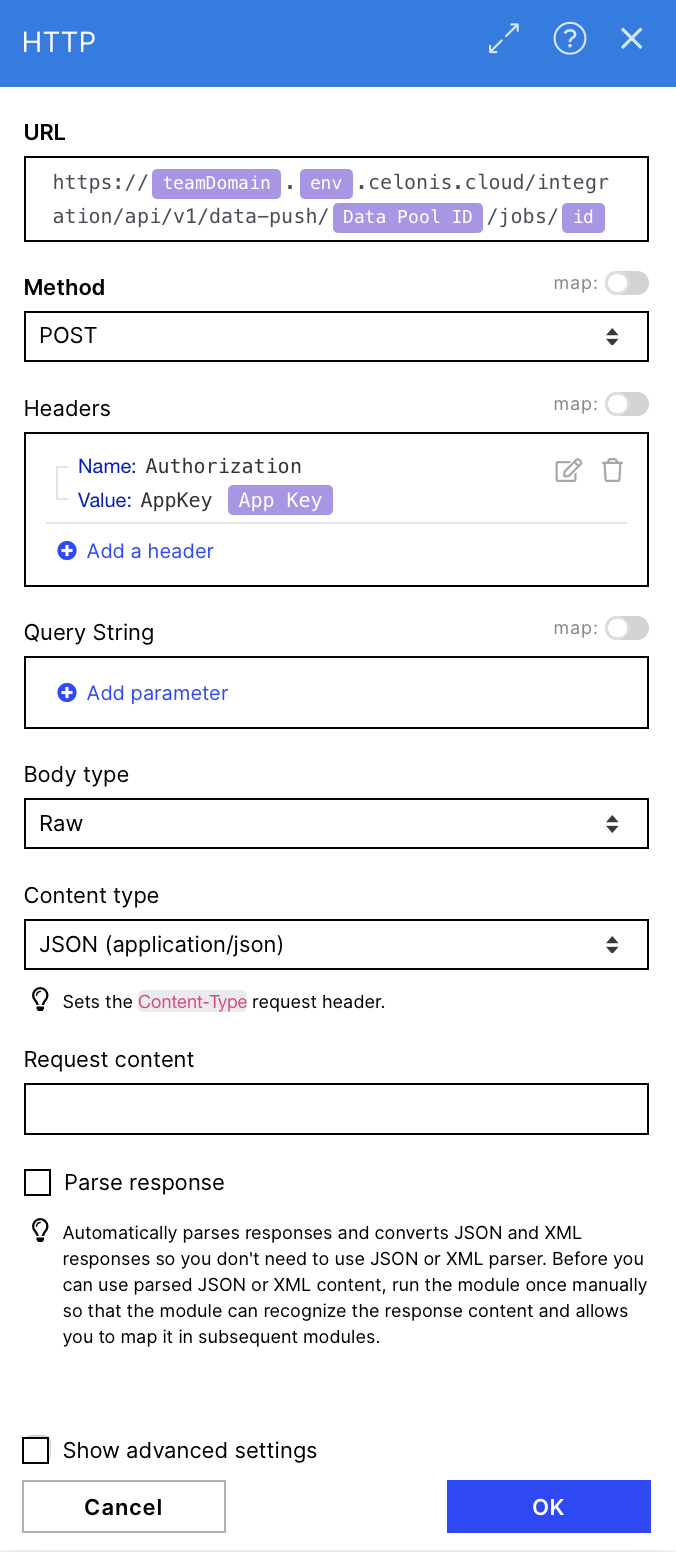
Now that you have configured the JSON string containing our job settings, we can create the data push job. For this, we will use the HTTP module and make use of the Celonis Data Push API. You can find the corresponding documentation here.
 |
Configuration:
Action Flows Module: HTTP
Action: Create Make a request
URL: https://{{21.teamDomain}}.{{21.env}}.celonis.cloud/integration/api/v1/data-push/{{21.`Data Pool ID`}}/jobs/
Method: POST
Headers: Create a header which contains an application key for accessing the relevant data pool
Name: Authorization
Value: AppKey {{21.`App Key`}}
Body type: Raw
Content type: JSON (application/json)
Request content: "JSON string" from module 3 (JSON)
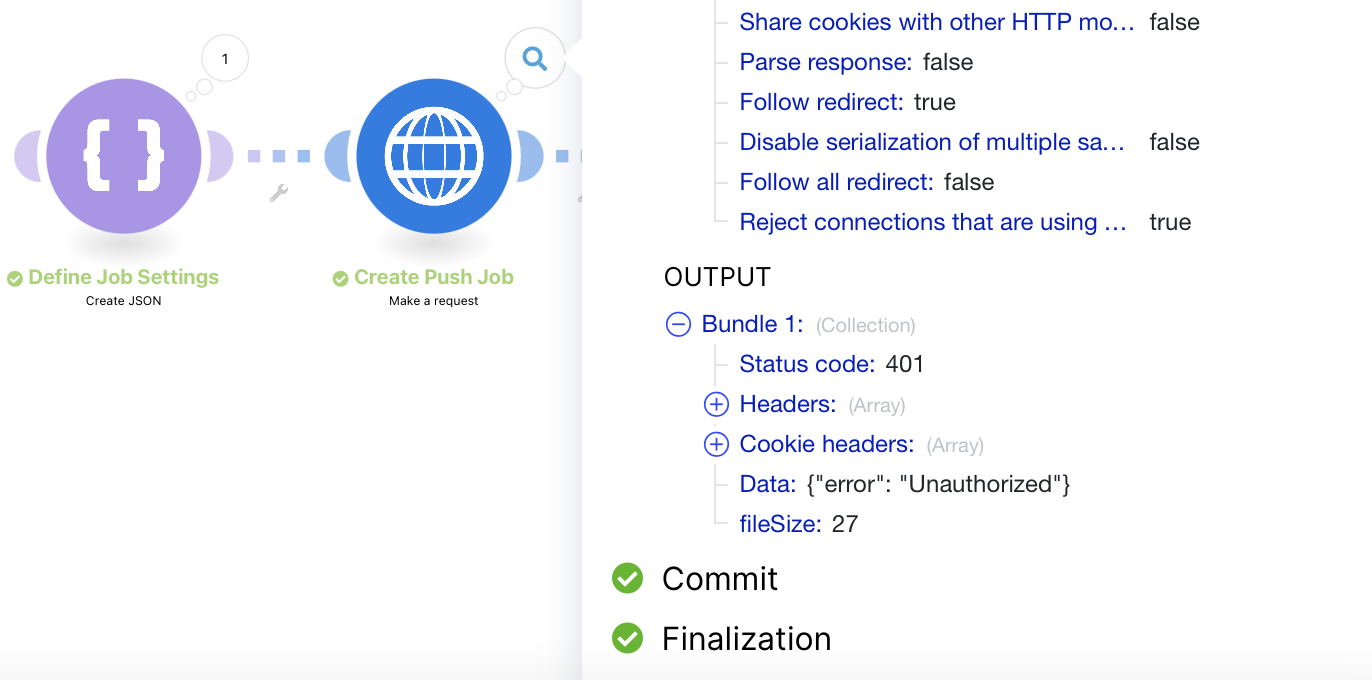
Warning
Make sure to check the Status codes of the HTTP modules! The green checkmarks just indicate that the module got a response, even if the response was, that you do not have the right permissions. To make sure that the module had the intended behaviour you have to take a look at those status codes. If you run the flow, you can find them by clicking on the bubble with the 1 on top of the module. There is a section called 'OUTPUT'.
The Status code 200 or 201 indicates that everything worked out. Status codes like 401 indicate a problem like being not authorised. When getting a 401, make sure you granted the right permissions to your Application Key (find instructions at the warning before).
 |
 |
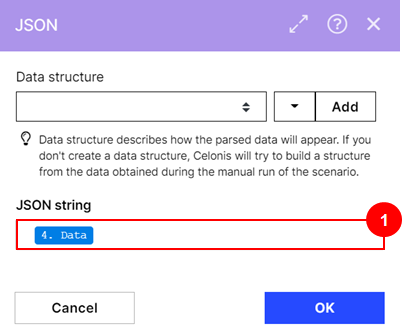
Next, you will parse the ID from the data output of the first HTTP module, so that it can be leveraged in the next step. We use the "Parse JSON" action for this step.
 |
Configuration:
Action Flows Module: JSON
Action: Parse JSON
(1) JSON String: "Data" from module 4 (HTTP)
 |
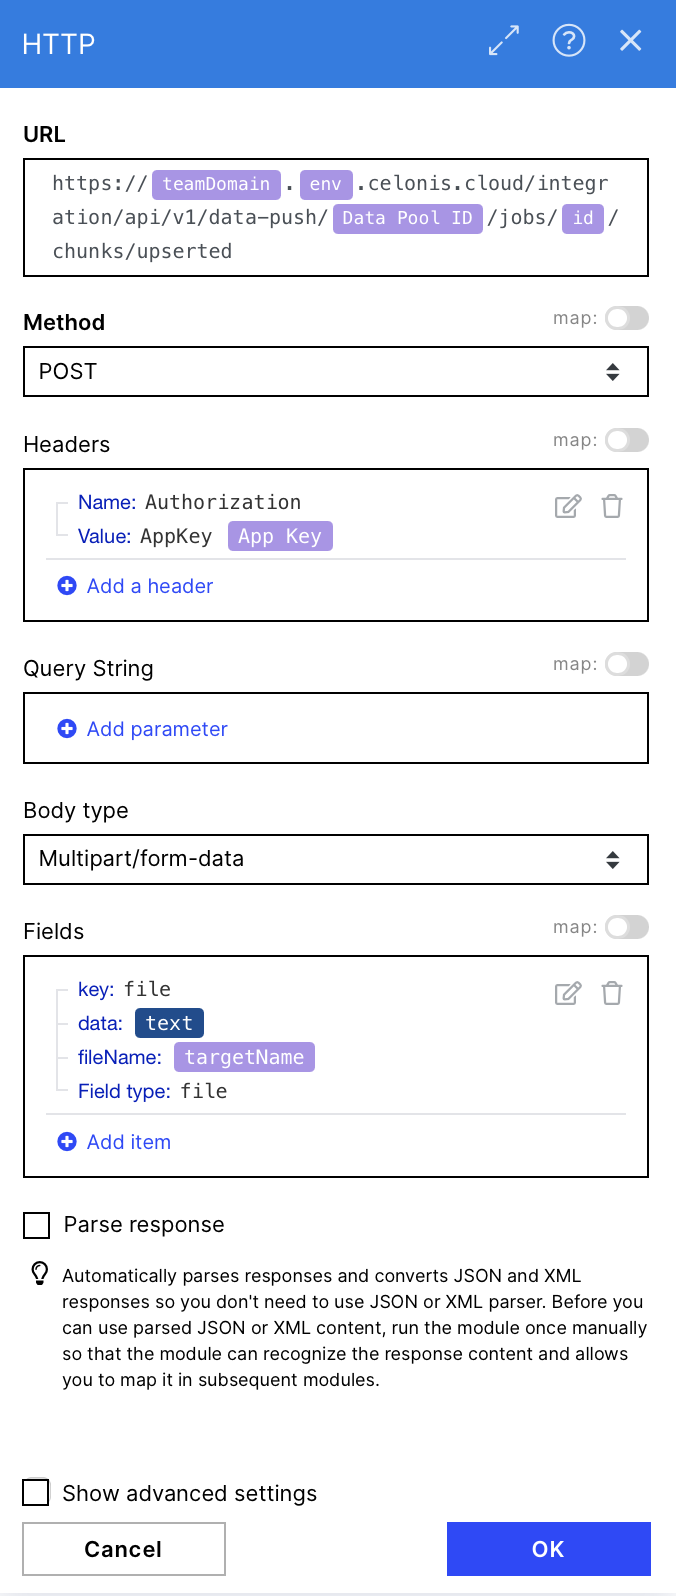
In this step, we push the CSV to the Celonis data model. Again, we use the HTTP module to make a request with the required configurations. See the screenshot on the right for reference.
 |
Configuration:
Action Flows Module: HTTP
Action: Make a request
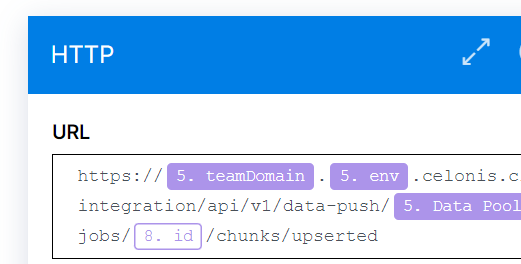
URL: https://{{21.teamDomain}}.{{21.env}}.celonis.cloud/integration/api/v1/data-push/{{21.`Data Pool ID`}}/jobs/{{5.id}}/chunks/upserted
id item
The id item is dynamic as it comes from the HTTP module that has created the PUSH job. The JSON 'answer' of that HTTP module is then parsed to get that job id which is used for the data push in the succeeding modules. The id might look 'empty' but as soon as you run the flow once it will be filled dynamically and you do not have to define or adjust anything here.
If you build this module from scratch you may need the flow up to module 6 (Parse JSON) once in order for its outputs to be available for use in module 7.
 |
Method:POST
Headers: Create a header which contains the application key used before for accessing the relevant data pool (same AppKey as in module 4)
Name:Authorization
Value: AppKey {{21.`App Key`}}
Body type: Multipart/form-data
Fields:
key: file (changing this, seems to cause an error)
data: "text" from module 2 (Create Advanced CSV)
fileName: "targetName" from module 3 (Create JSON)
Field type: file
 |
The final step is to confirm and execute the data push job. See the required configuration in the screenshot on the right.
 |
Configuration:
Action Flows Module: HTTP
Action: Make a request
URL: https://{{21.teamDomain}}.{{21.env}}.celonis.cloud/integration/api/v1/data-push/{{21.`Data Pool ID`}}/jobs/{{5.id}}
Method: POST
Headers: Create a header which contains the application key used before for accessing the relevant data pool (same AppKey as in module 4)
Name:Authorization
Value: AppKey {{21.`App Key`}}
Body type: Raw
Content type: JSON (application/json)
 |
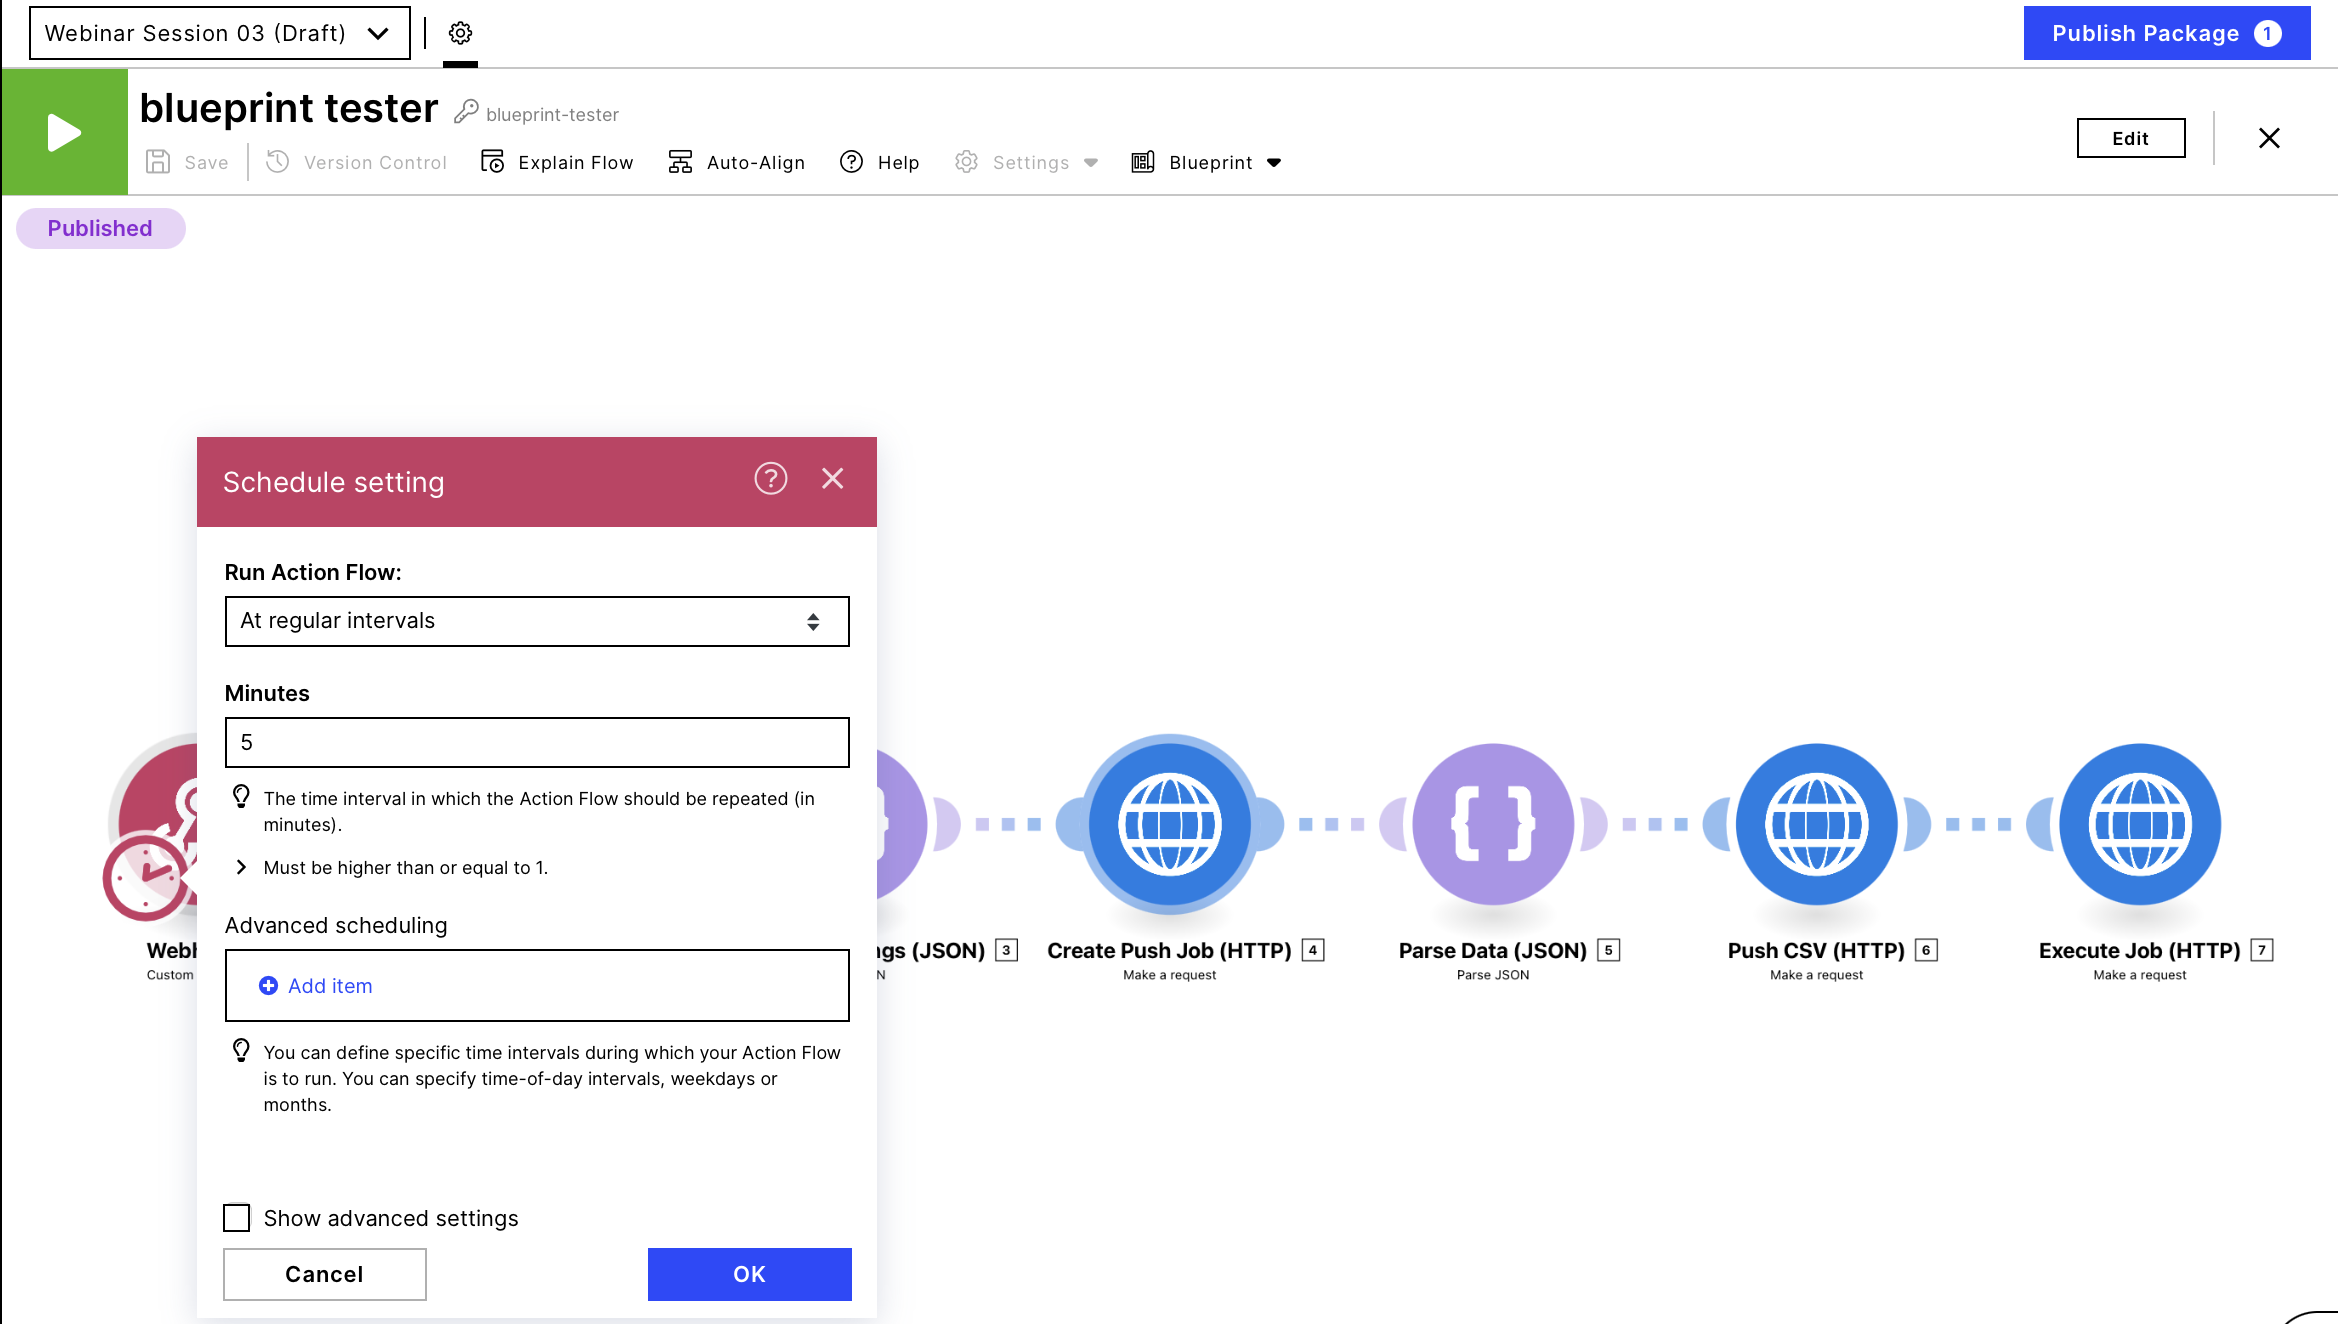
To make sure our Data Push API isn't overloaded we collect the data when sending it to the Webhook and push 300 lines every 5 minutes. Thus we have to schedule the Action Flow. To do so make sure to save first and then publish the Action Flow by clicking on the top right blue button called 'Publish Package'.
You are good to go when you have the purple chip with 'Published' beyond the green run once button.
By clicking on the clock symbol in this published mode you open up the schedule settings where you can define how often and on which time the message should be send.
Run Action Flow: At regular intervals
Minutes: 5 (default is 15)
 |
Save and Run the Action Flow. After a successful run you can check your results:
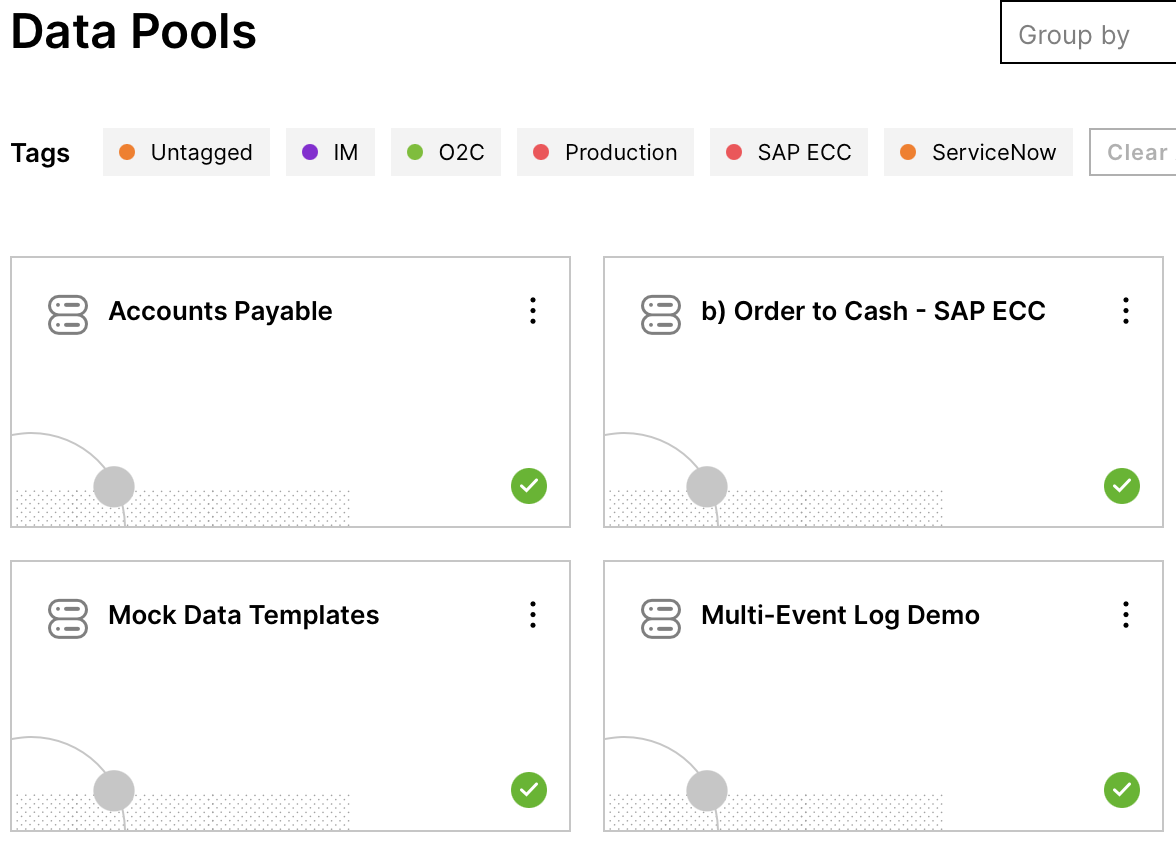
1. Navigate to Data Integration
 |
2. Choose the Data Pool you sent Data to (he one from which you got the ID before)
 |
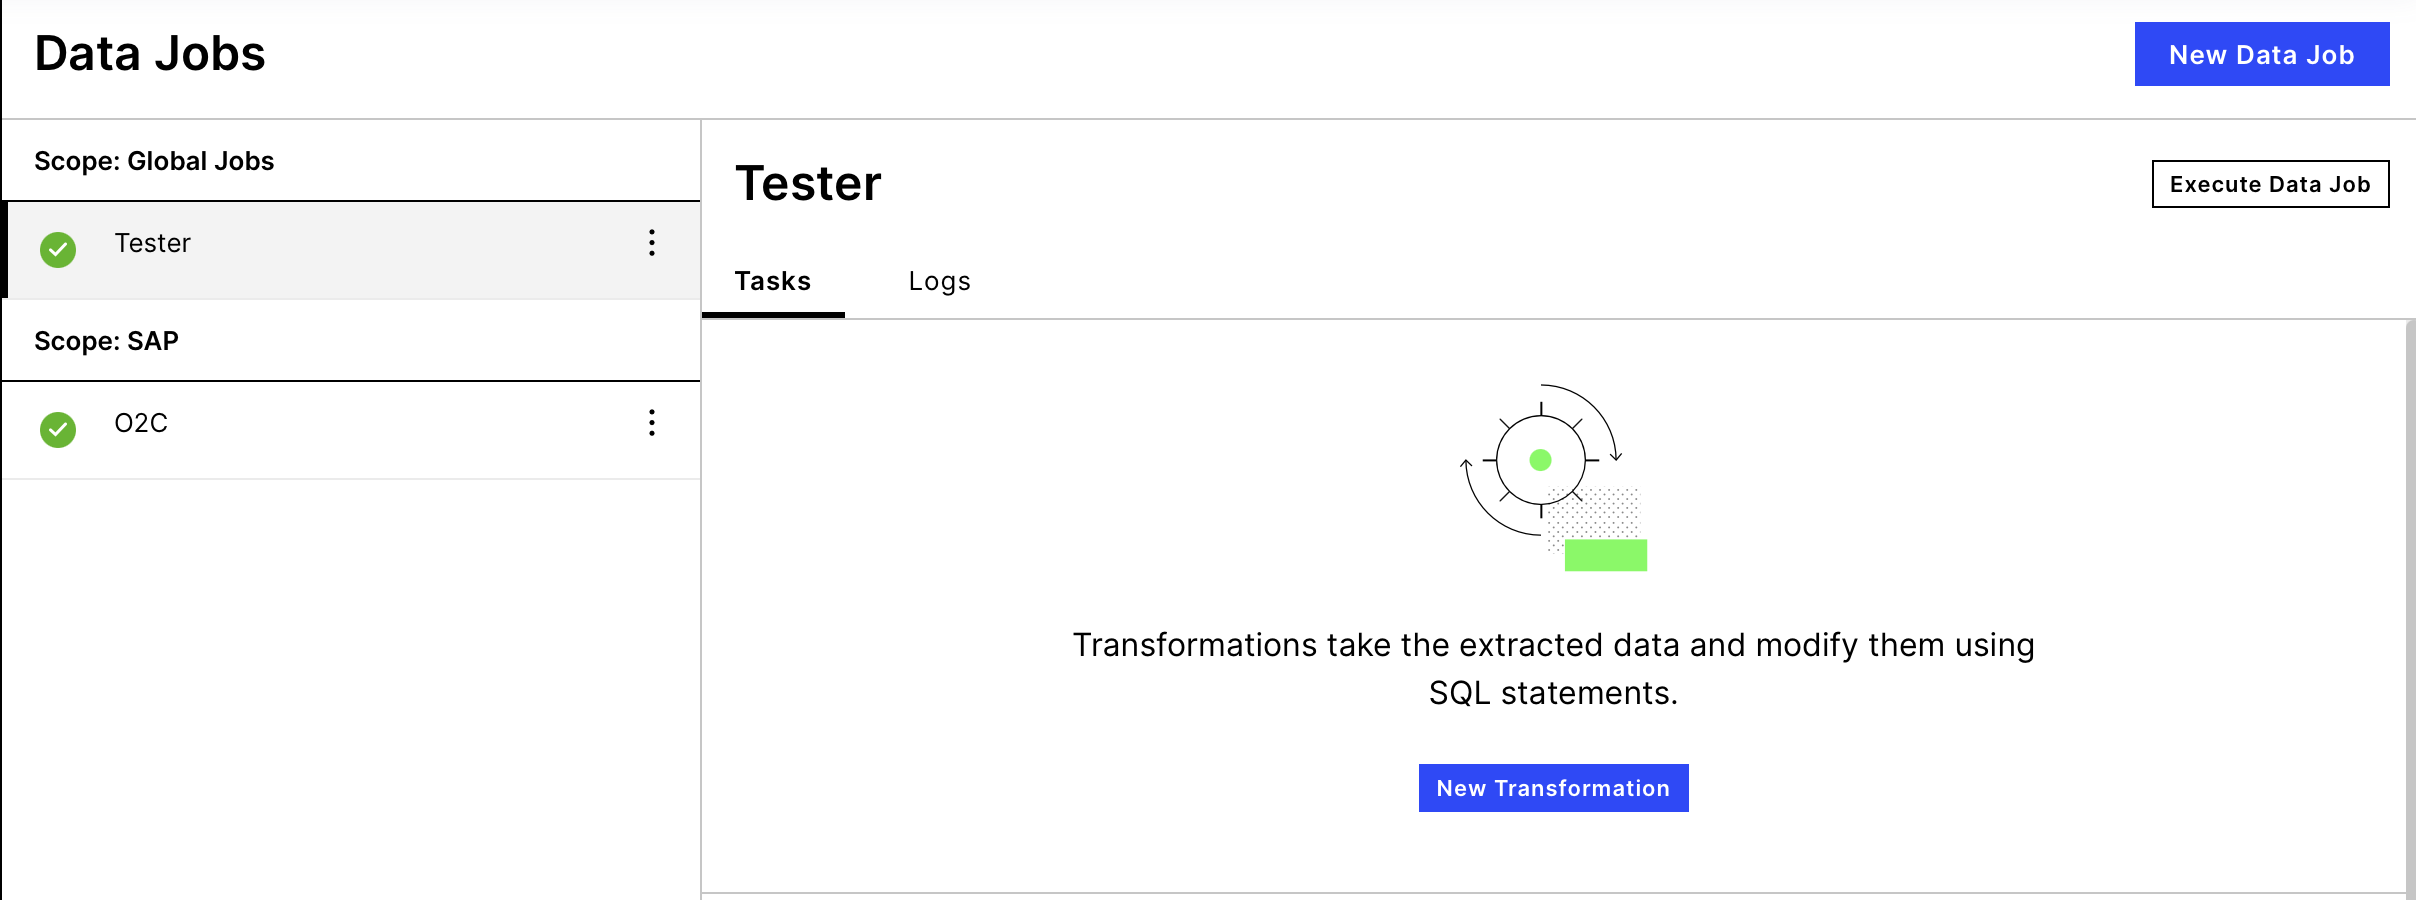
3. Click on Data Jobs in the side bar on the right
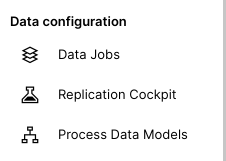 |
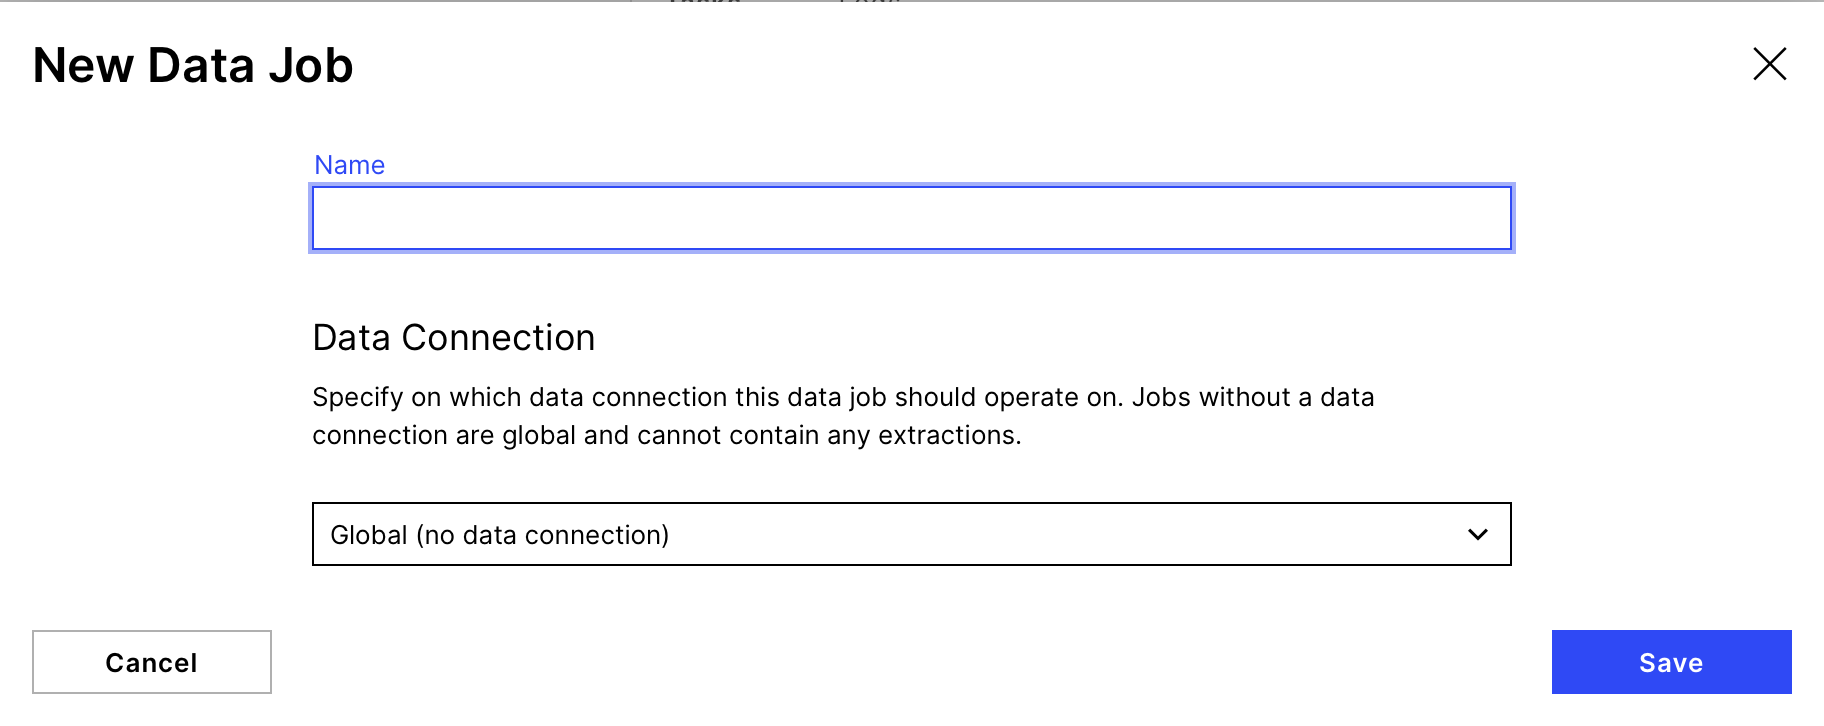
4. Create a New Data Job
 |
5. Make sure to choose "Global (no data connection)" as Data Connection
 |
6. Add a new Transformation within the new Data Job
 |
7. After choosing a name you should be able to see the sent table with the specified name in the Schema Explorer on the right. When unfolding the table you should be able to see the columns.
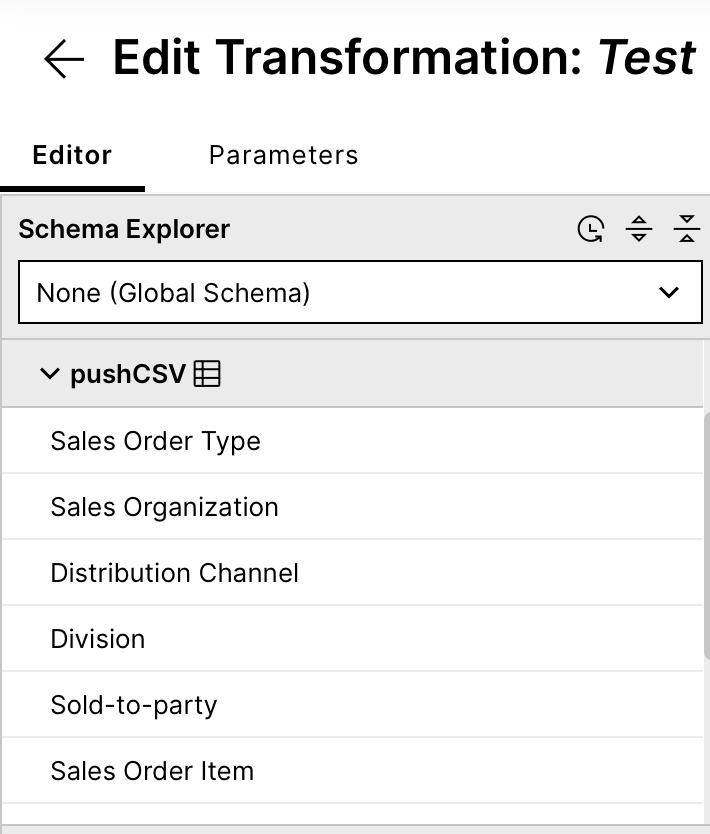 |
Note
When there is only one column with all headings inside, the column separator in module 3 (Define Job Settings) might have been chosen wrong.
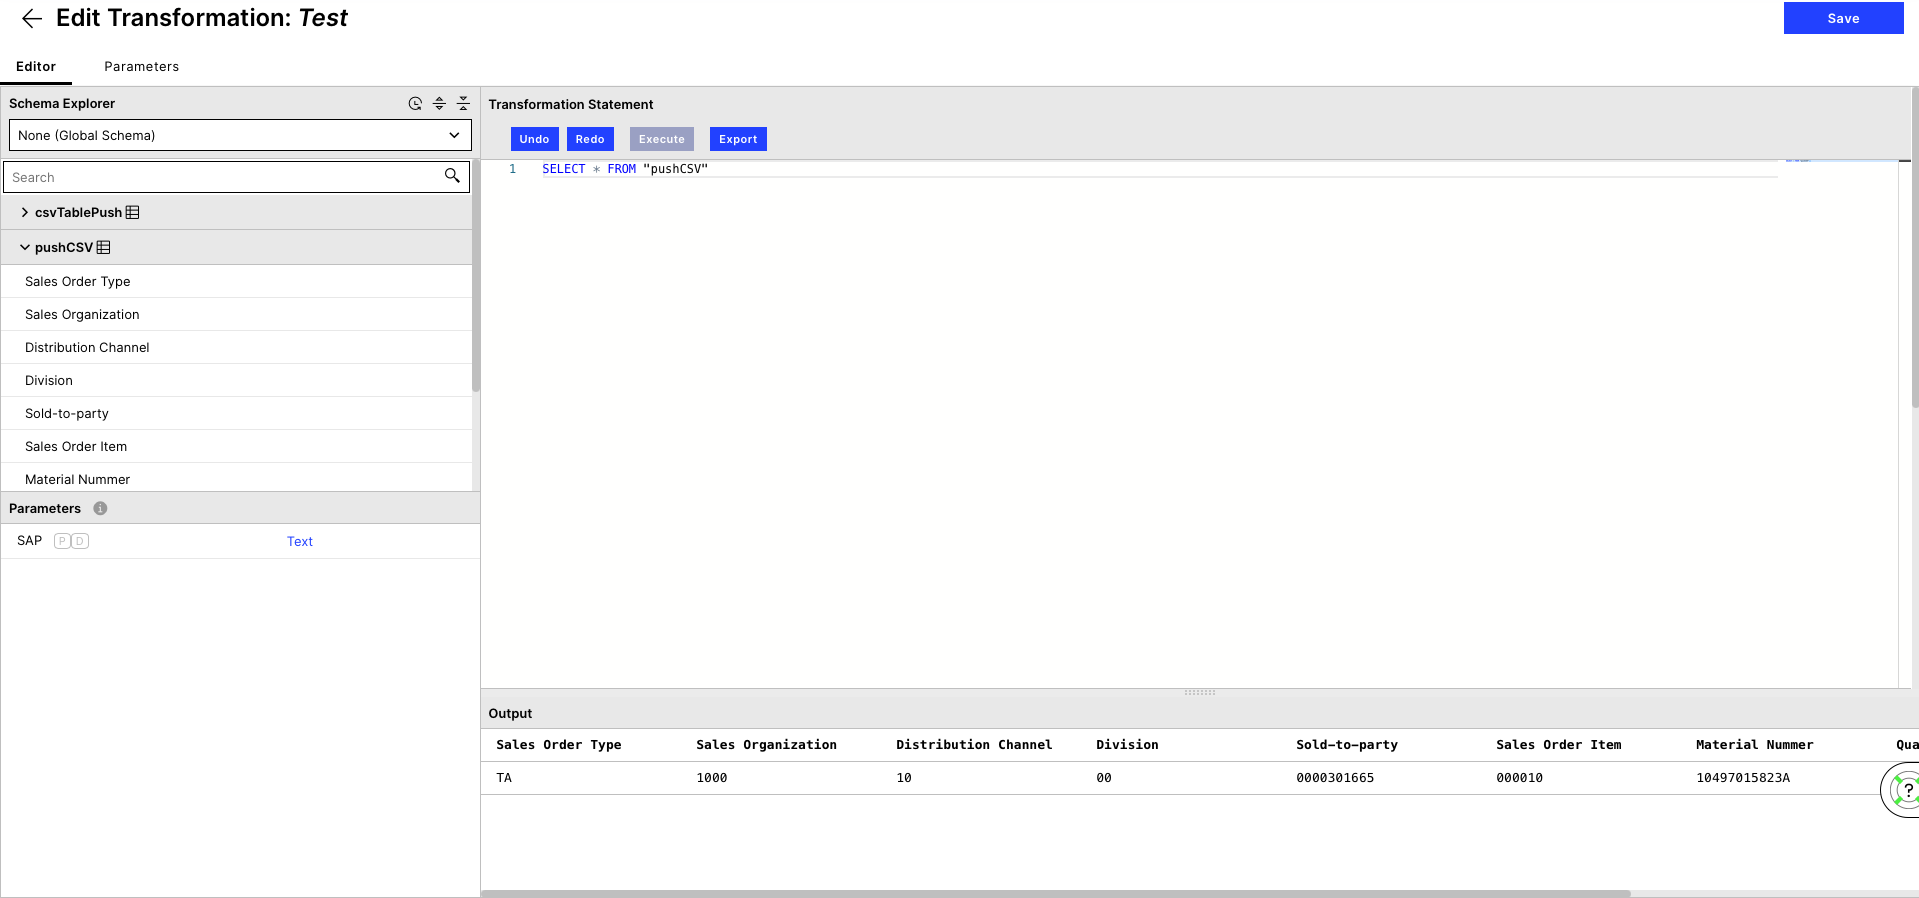
8. To have a look at the data type in SELECT*FROM ["name of your table"] (in our case that's "pushCSV"), mark it and click execute. You should now be able to see the table with your data at the bottom
 |