Installing the Platform Adoption Monitor App
The Platform Adoption Monitor app gives you insights into who is accessing and using your Celonis team and how this usage varies over time. The app uses public Celonis APIs to extract data every hour about team members logging in and users opening Studio apps and packages, and presents the statistics in a set of monitoring views.
For an overview of the Platform Adoption Monitor App, see: Platform Adoption Monitor app
Before installing the Platform Adoption Monitor app, ensure you have completed all necessary prerequisites.
Begin by establishing the connection between your Celonis team and the data extraction tools via the Marketplace.
To install and configure the connector from the Celonis Marketplace:
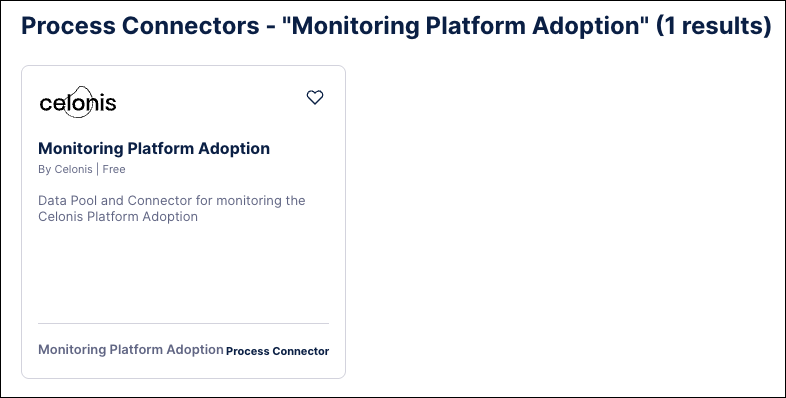
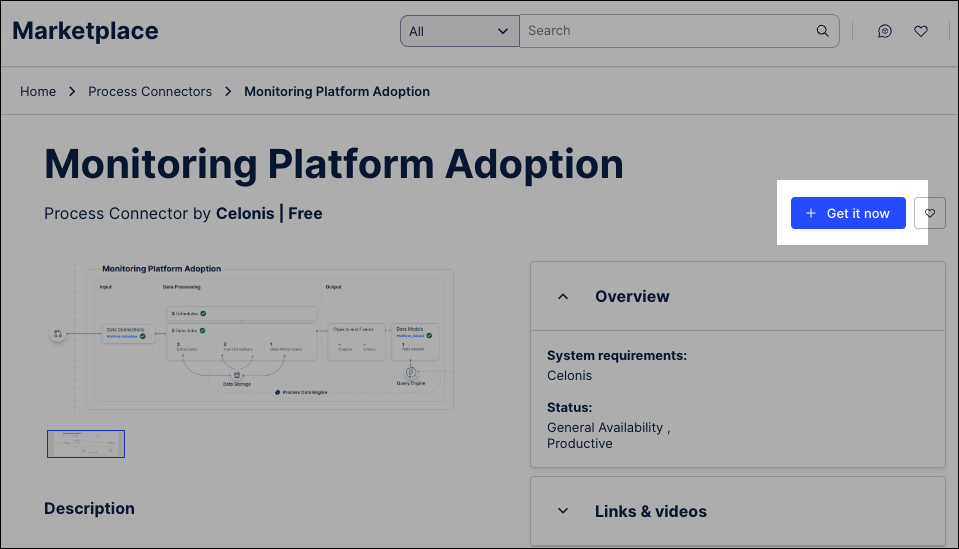
Search for 'Monitoring Platform Adoption' and select the process connector.
Click Get it now to install the connector. If you see Request Access instead, click this to request the connector.
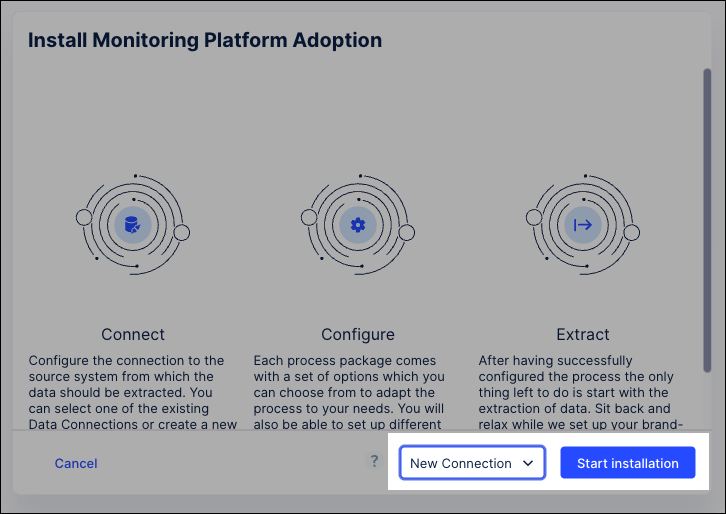
In the installation dialog, select New Connection, then click Start installation.
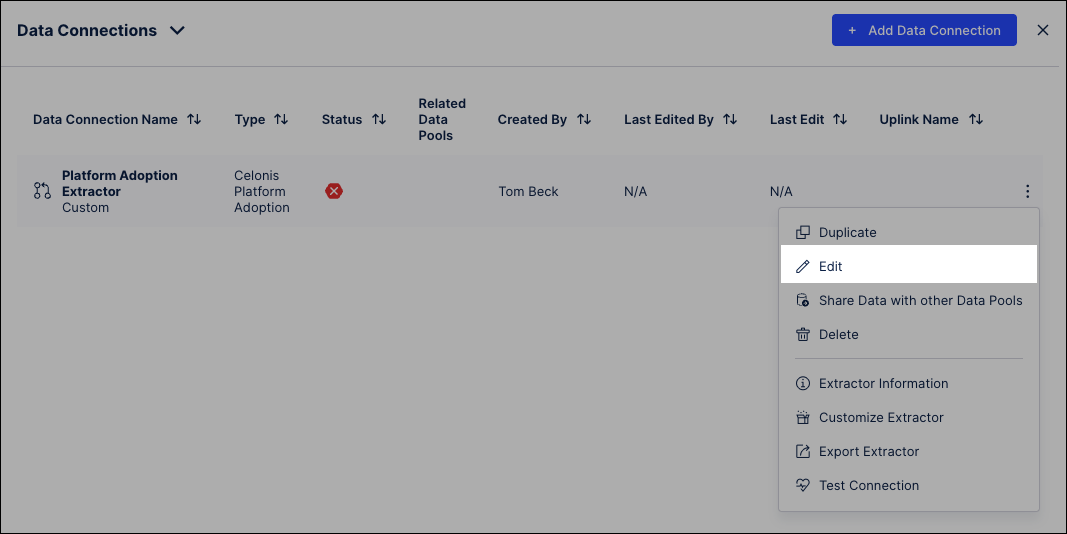
When the connector install is complete, you’ll be in the new data pool Monitoring Platform Adoption that the connector created.
In that data pool, select Data Connections. Find the data connection named “Platform Adoption Extractor”, and select Edit from its context menu (the three vertical dots).
Fill in the configuration for the Platform Adoption connection as follows:
Name: Platform Adoption Extractor
API URL: The URL of your Celonis team, for example
https://mycompany.eu-1.celonis.cloud. Don’t include a forward slash (/) at the end.AppKey: Leave this field blank.
OAuth2 (Client Credentials): Leave this radio button selected.
Client ID: Paste in the client ID for the OAuth client that you created in Prerequisites.
Client Secret: Paste in the secret for the OAuth client.
(under Advanced Settings) Socket Timeout (in seconds): 300
(under Advanced Settings) Pseudonymization Algorithm: SHA-1 (the default)
(under Advanced Settings) Number of parallel requests: 1
Click Test Connection to verify that the data connection works. If it doesn’t, check these things first:
The team URL is correct. Copy and paste it from your Celonis team, without the forward slash at the end.
The client ID and client secret are for the correct OAuth client.
You set the right permissions for the OAuth client in the Team permissions.
Click Save.
Once the connector is active, set up the timing for your data pulls to keep your adoption metrics current.
To configure your extraction schedules:
In the Monitoring Platform Adoption data pool, select Schedules.
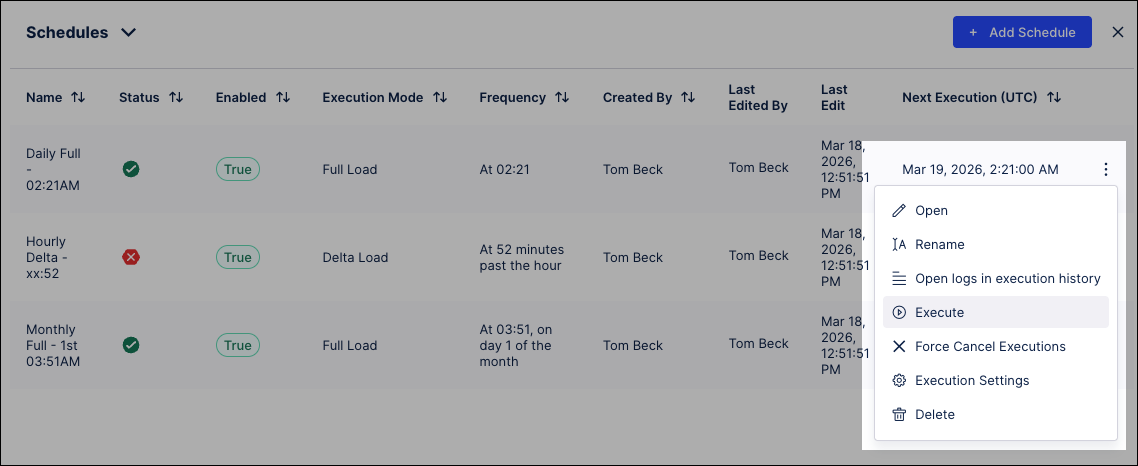
For the Daily Full schedule, click Options - Execute.
When the data extraction has been completed successfully, run the schedule Monthly Full by clicking Options - Execute.
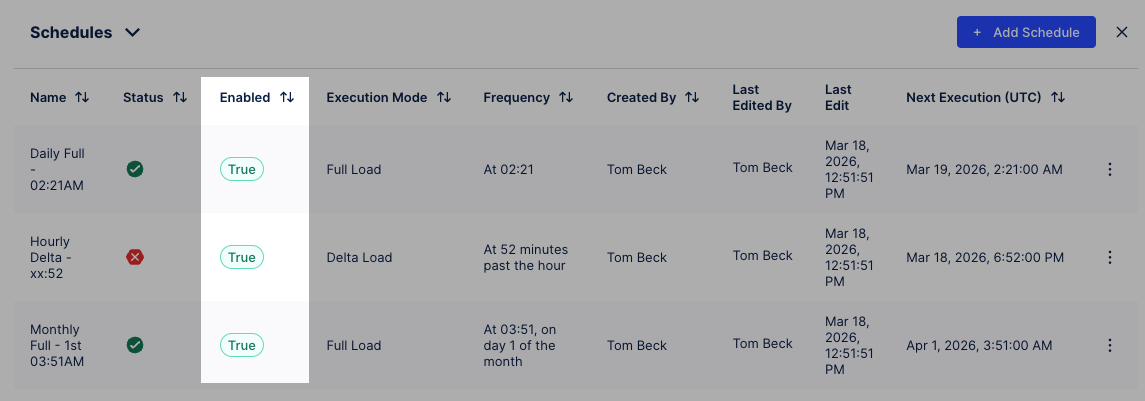
Before continuing to installing the app, ensure the Daily Full, Hourly Delta, and Monthly Full schedules are all set to Enabled:True.
Important
These schedules are required for the app to function properly, and disabling any will result in unexpected behavior.
With the data pipeline ready, finalize the setup by installing the app interface and configuring user privacy settings.
To install and configure the application from the Celonis Marketplace:
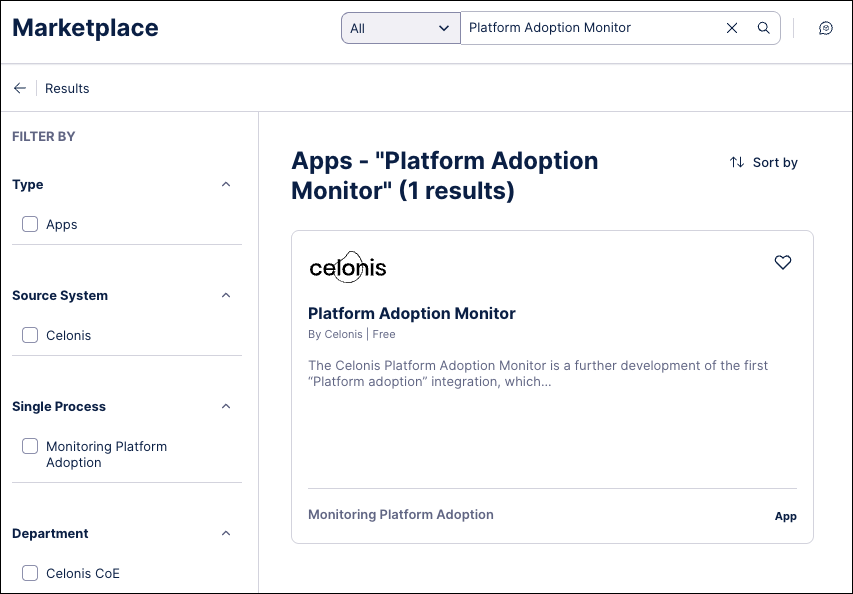
Search for 'Platform Adoption Monitor' and select the process connector.
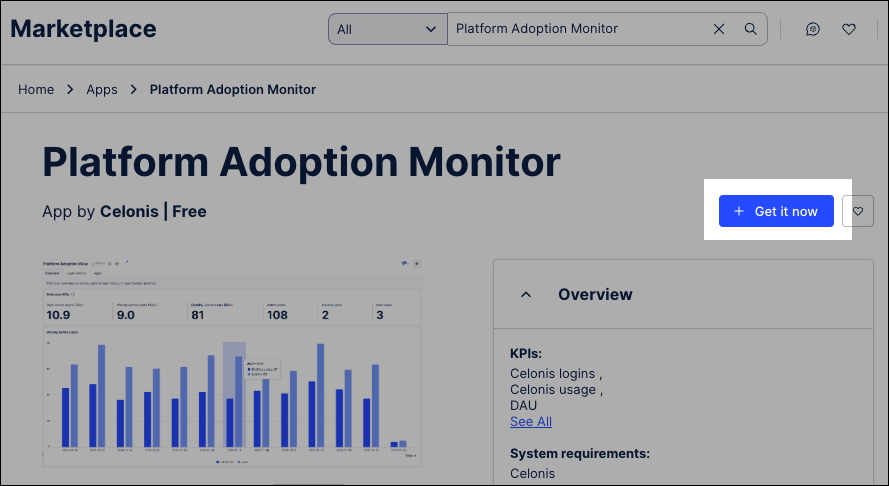
Click Get it now to install the connector. If you see Request Access instead, click this to request the connector.
Select an existing Studio space or create a new one .
The application is installed and the package opens in Studio.
From Platform Adoption Monitor’s context menu (the three vertical dots), select Settings, then go to the Variables tab.
From the context menu for the variable
platform_adoption, select Assign Data Model. Search or browse for thePlatform_Adoptiondata model and click to select it. Click Save to set the Data Model variable.In the package navigation, open the Admin Settings view, and verify or change the settings for the list of individual users:
User name display: The default setting is “id”, which replaces the user’s email address with a pseudonymized hash. The alternative settings are “email”, “name” or “name (email)”, which display human-readable identifiers.
Include Celonis employees: The default setting is “No”, which excludes Celonis employees (with the email domain
@celonis.com) from your statistics. The alternative setting is “Yes”, which includes them.
Important
The app pseudonymizes the identifiers for individual users by default. If this is a legal requirement or a company policy for you, make sure the User name display setting for the app is set to “id” (not “email”, “name” or “name (email)”). After deploying the app, make sure the setting is set to “id”, and set permissions to limit access to the Admin Settings view so the setting can’t be changed.
Set the permissions for the data model, app package, and views as you would for any other Celonis app. For detailed guidance, see Available permissions.
Click Deploy.
The Platform Adoption Monitor app is now available in your Apps area.
If you already had a data connection for the platform adoption dashboard, here’s how to migrate it to use OAuth client credentials instead of an application key:
From the Celonis navigation menu, go to Data > Data Integration.
Select the Monitoring Platform Adoption data pool from the list of data pools. In that data pool, select Data Connections.
Find the data connection named “Platform Adoption”, and select Edit from its context menu (the three vertical dots).
Select the radio button for OAuth2 (Client Credentials). You don’t need to delete the AppKey - it’s ignored when you’ve selected the OAuth2 (Client Credentials) option.
Under Client ID, paste in the client ID for the OAuth client that you created in Prerequisites.
Under Client Secret, paste in the secret for the OAuth client.
Click Test Connection to verify that the connection works. if it doesn’t, check these things first:
The team URL is correct. Copy and paste it from your Celonis team, without the forward slash at the end.
The client ID and client secret are for the correct OAuth client.
You set the right permissions for the OAuth client in the Team permissions.
Click Save .
Now install the Platform Adoption Monitor app from the Celonis Marketplace: Step 3: Installing and deploying the application