Configuring tasks and actions for the case-centric Unshipped Orders app
The Unshipped Orders app comes with skill templates to create tasks and carry out default actions. Customize these for how you want to use tasks and actions and integrate them into your users’ day-to-day activities. You can change or delete the default skills and add your own custom skills. At the end of these instructions, we’ve noted the most important things to check and configure if you’re using the supplied skills.
Here’s how to configure the app’s tasks and actions:
In the Celonis navigation menu, select Studio.
Find the Unshipped Orders app in your Studio space navigation.
Expand the package’s structure using the arrow.
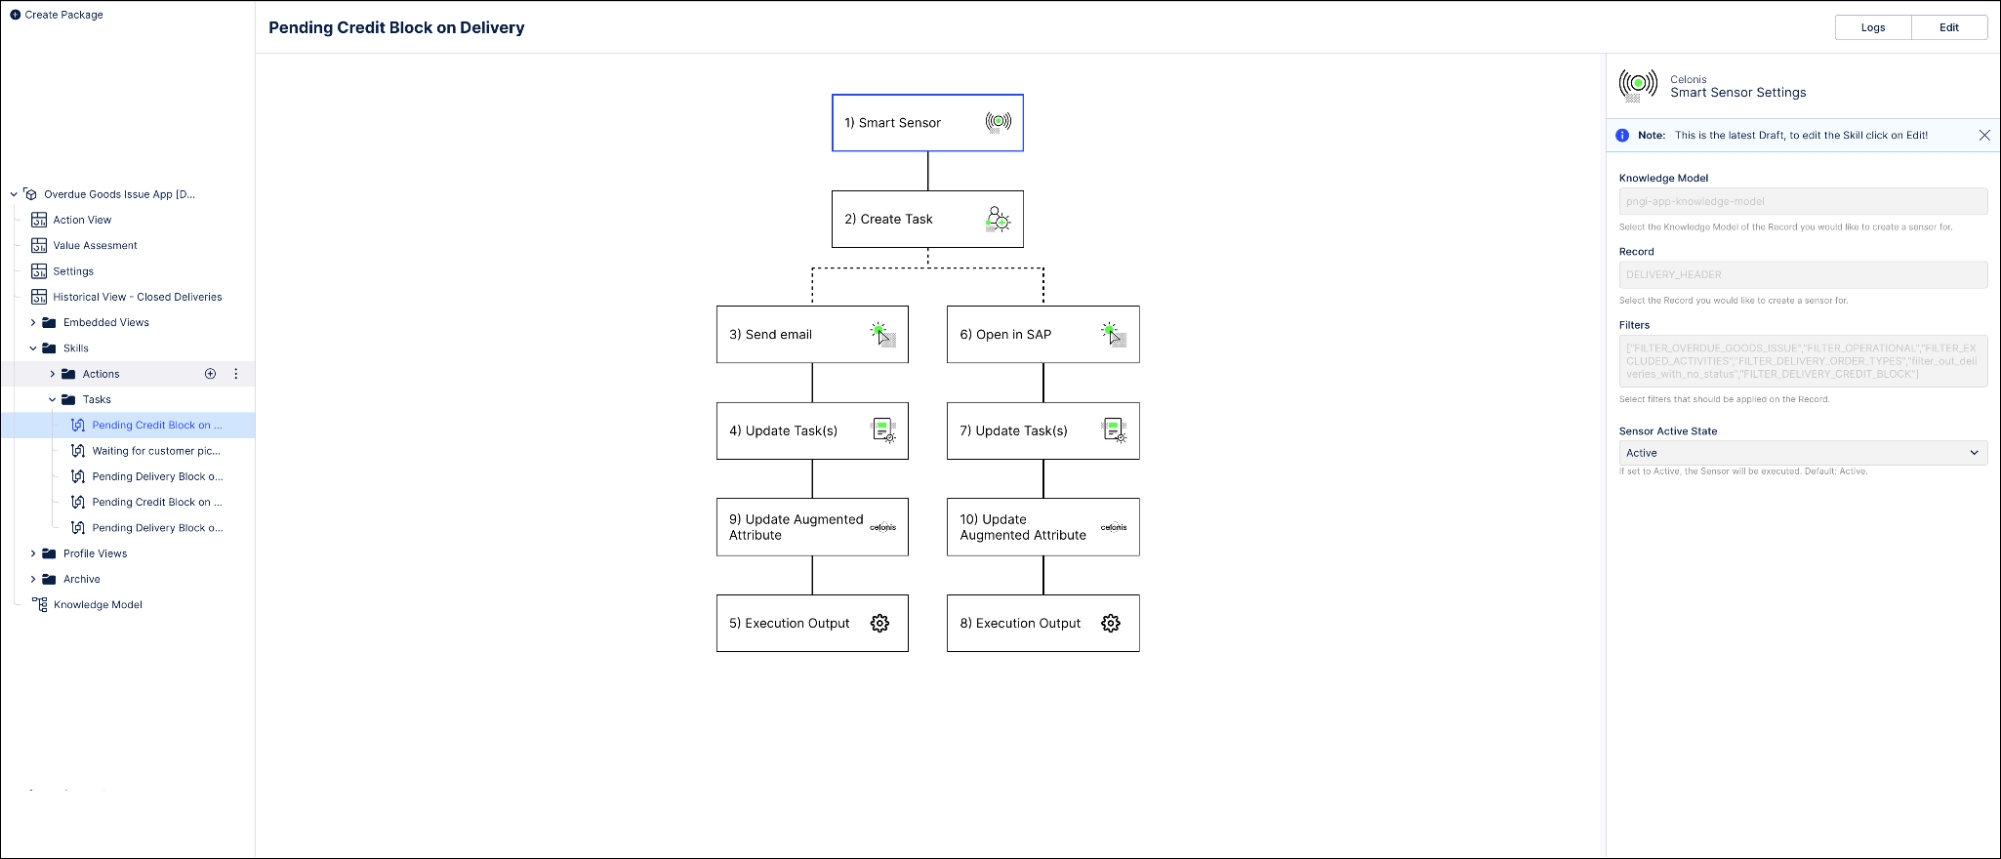
Expand the Skills folder and the Tasks and User Actions subfolders.
Select any of the listed actions to open it in the visual editor.
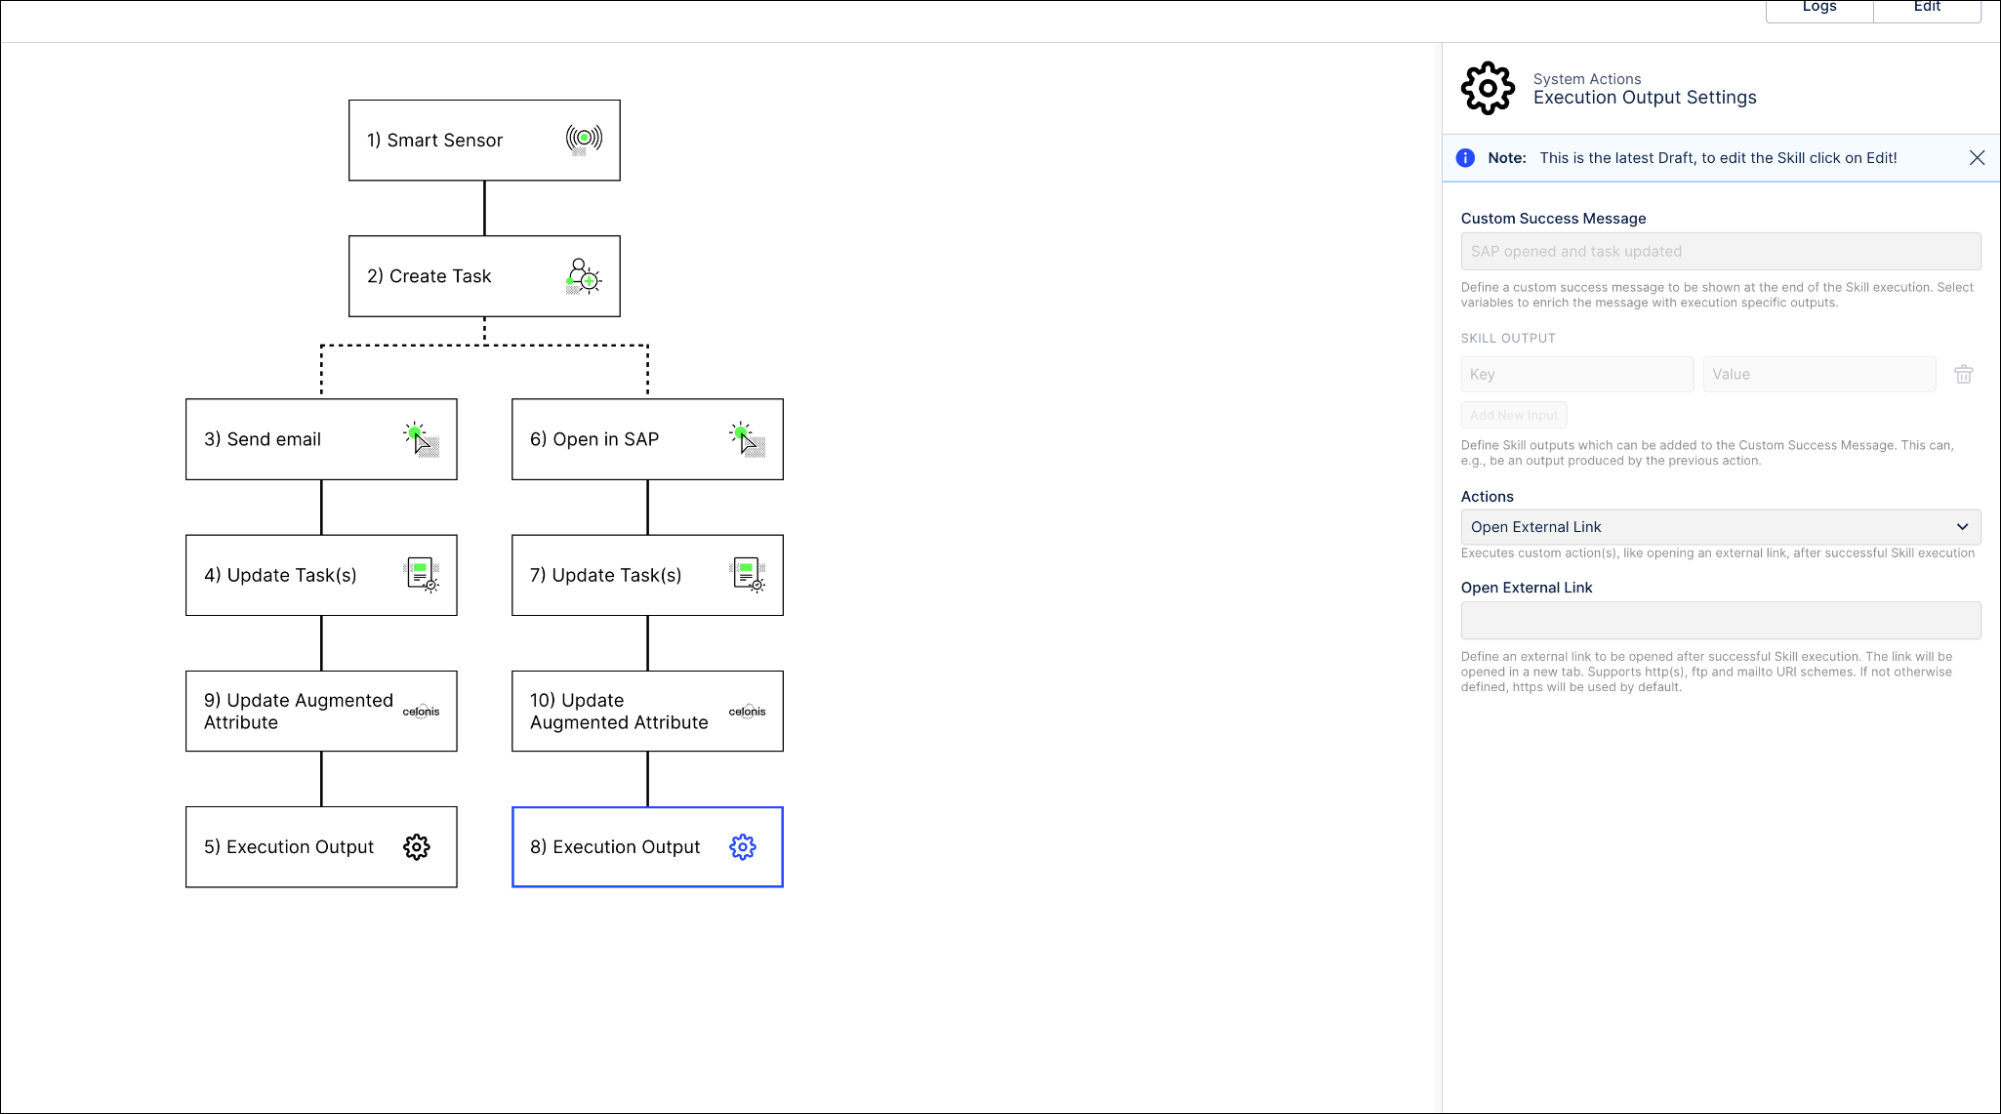
Click Edit to work with the skill template.
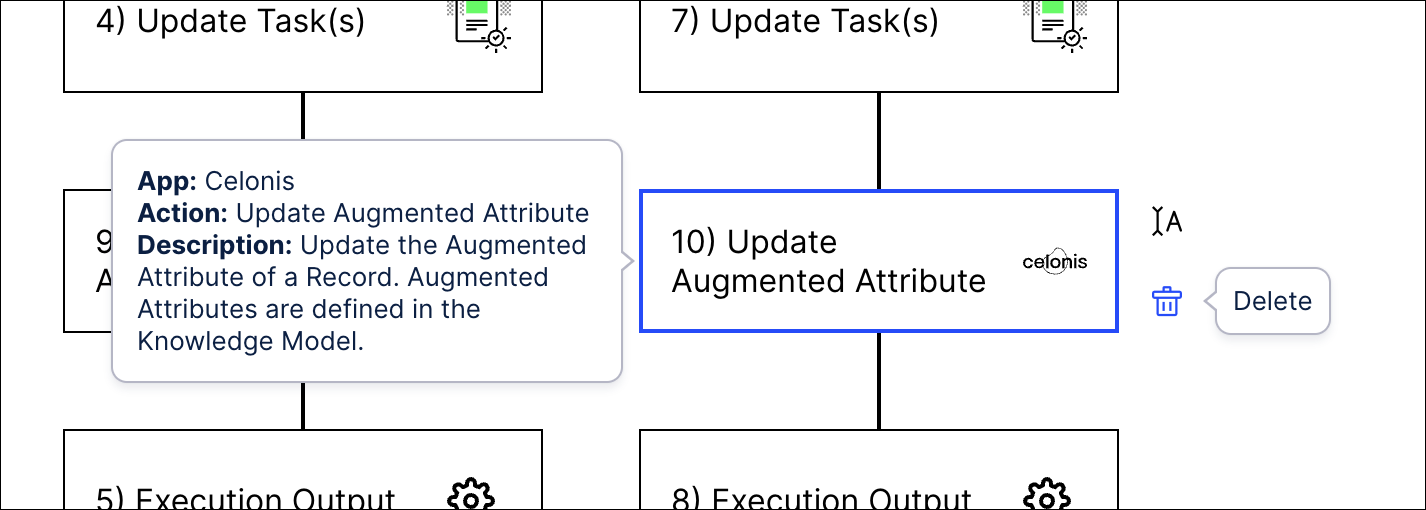
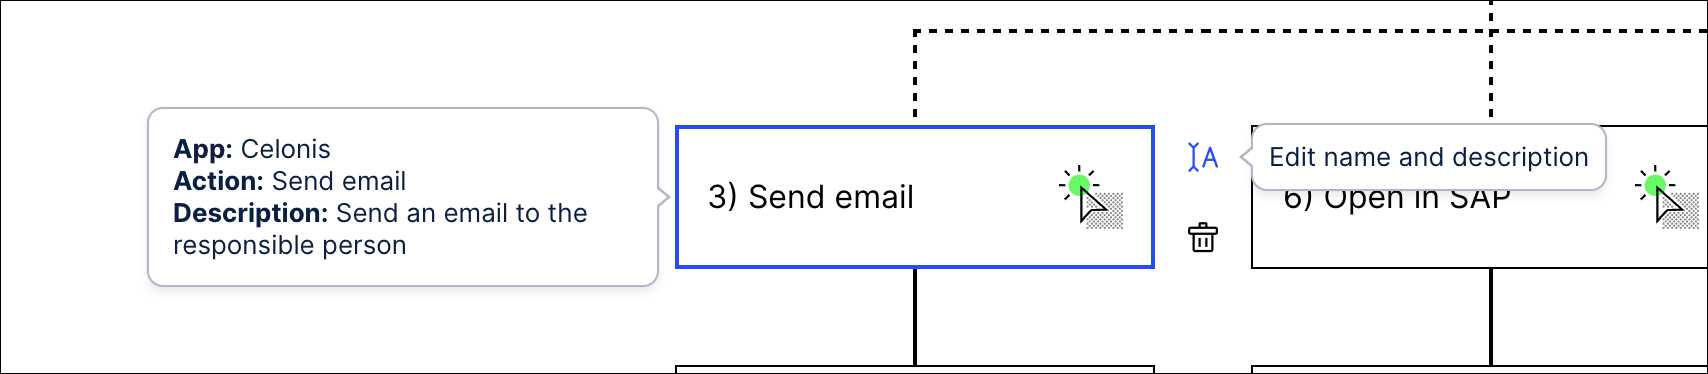
To change the name or description of an action, select the step and click the Edit name and description icon next to it.
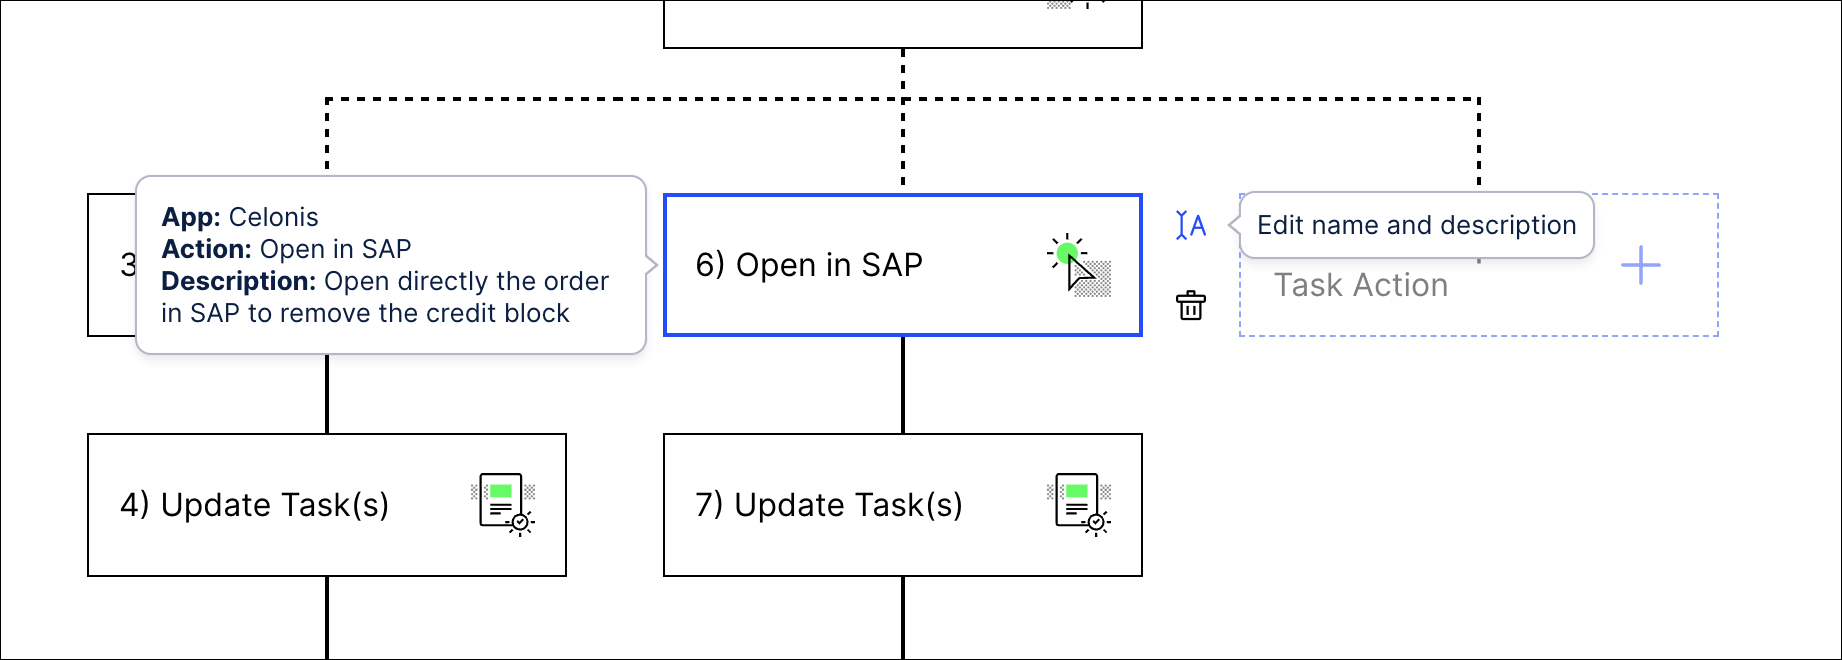
To remove a step in the skill template, select the step and click the Delete icon next to it.
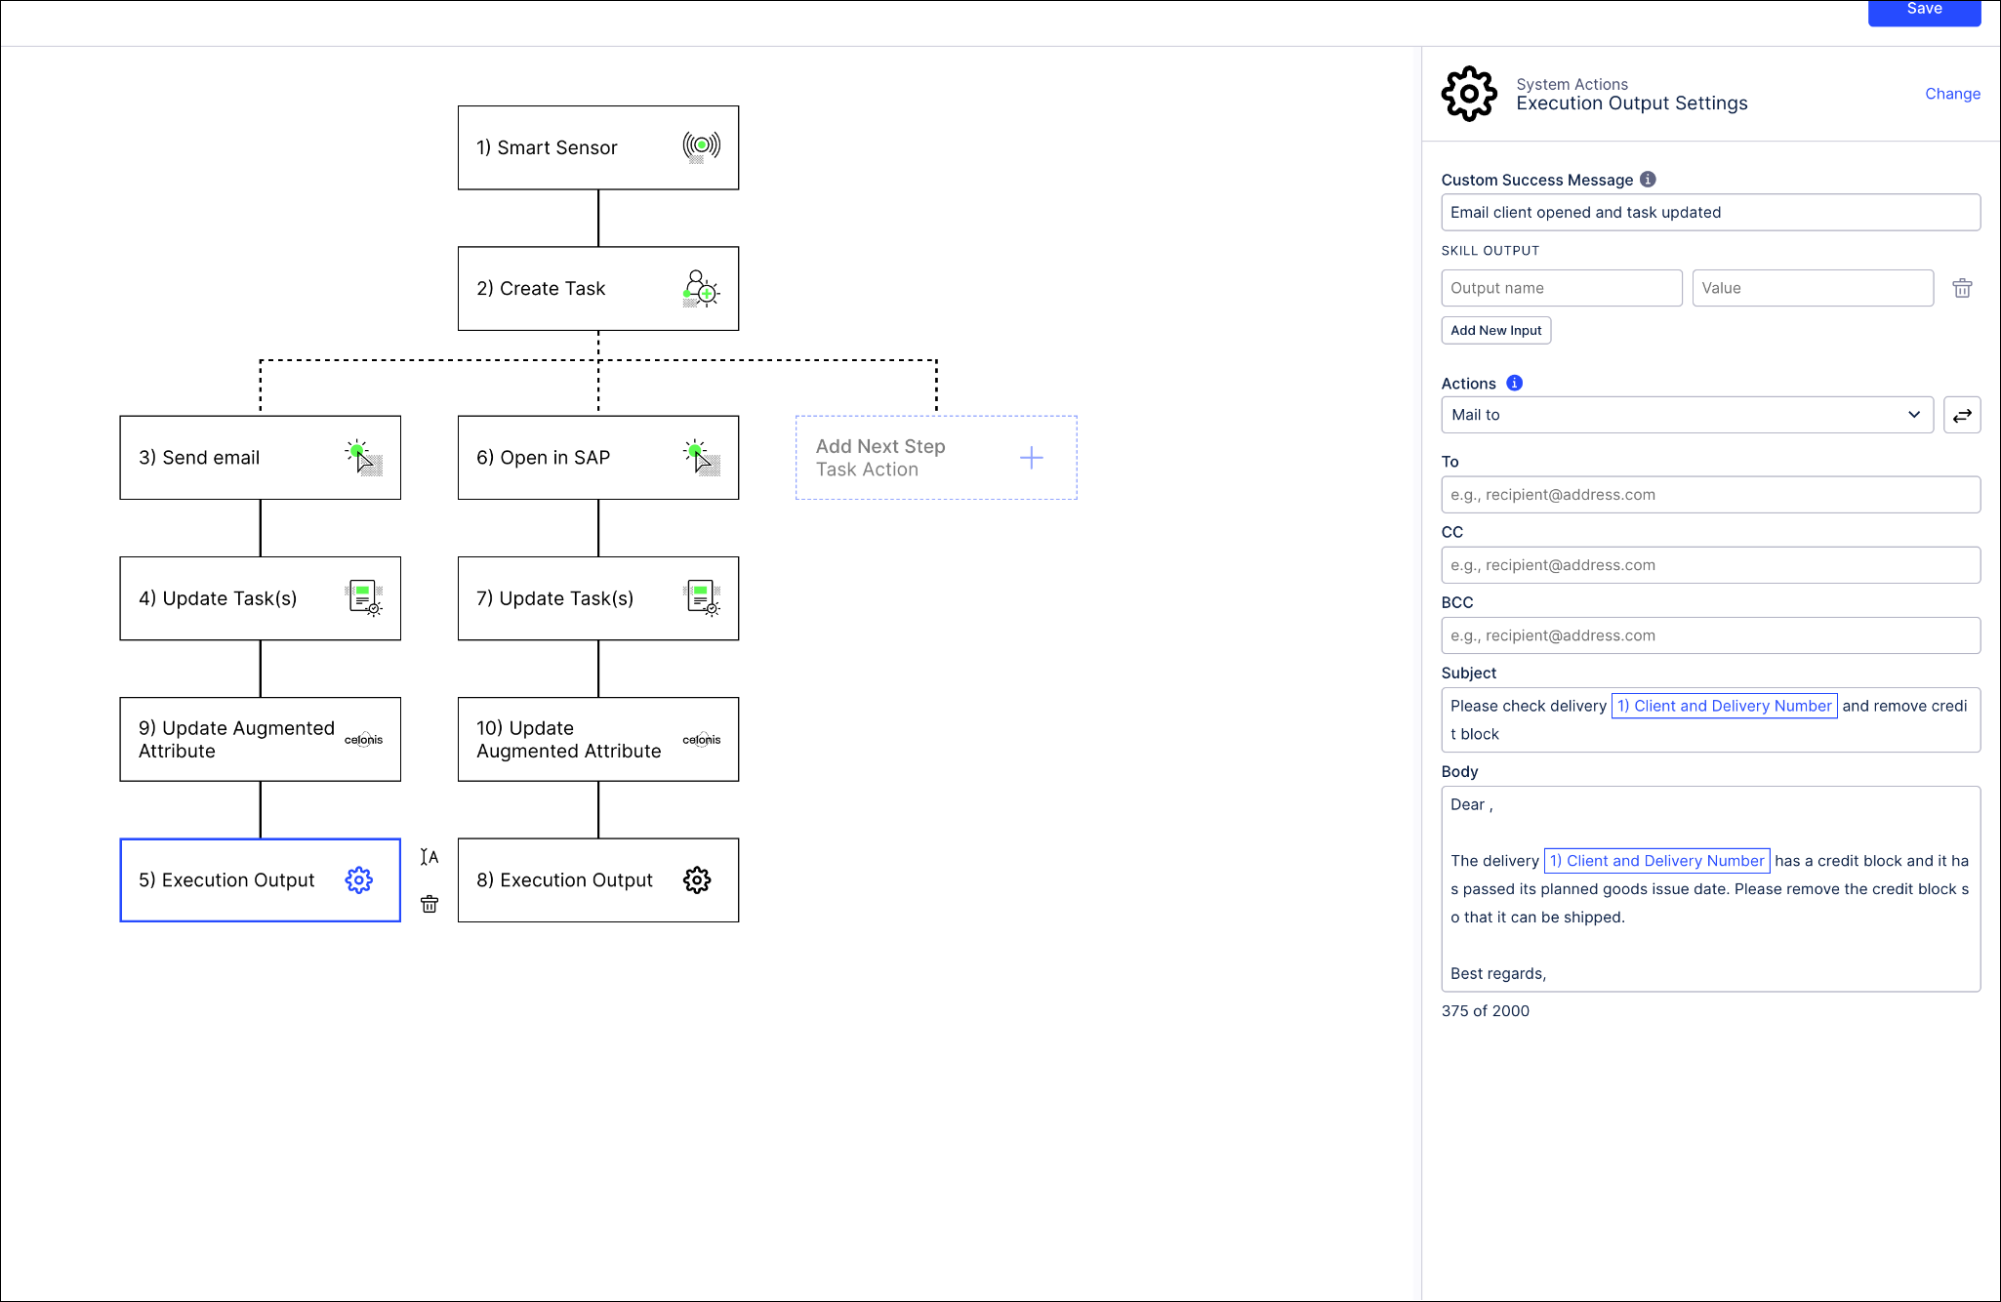
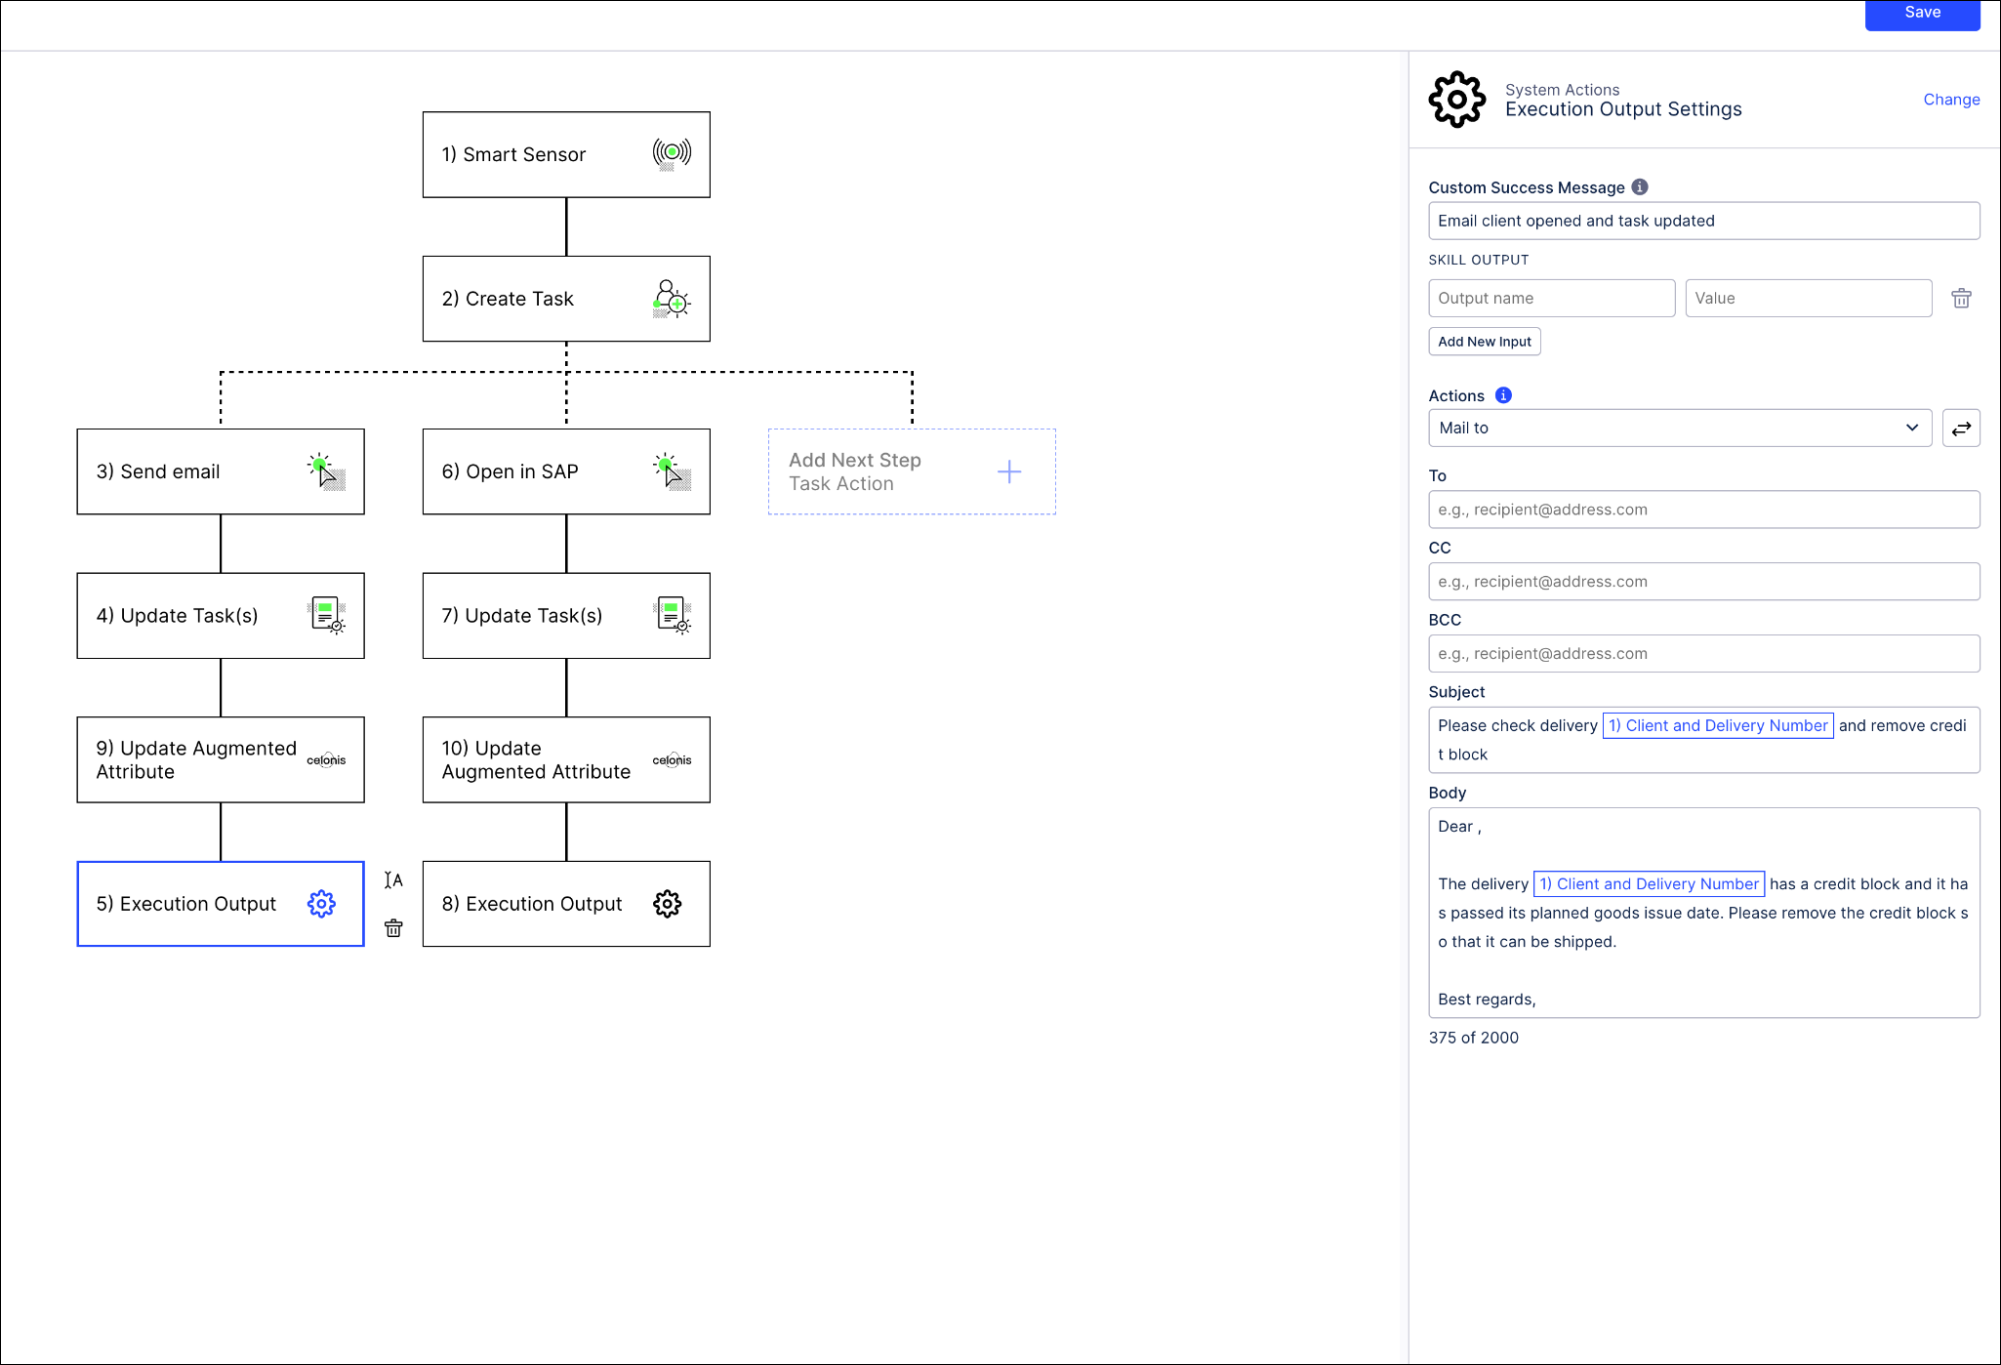
Click on a step to configure the action. Here we’re working with the step “Execution Output” to change an email template.
Click Save when you’ve finished configuring a skill.
When you’ve made all the customizations you want to the skills, use the Publish Package button at the top of the screen in your Studio space to publish a new version of the app.
Actions to configure
For the Unshipped Orders app, in the User Actions folder, you’ll need to configure the email template for the Send Email skill if you’re using it. Send Email is a default action on all sales order items. The skill opens a prepopulated email in the user’s email client for them to send. You can find the email template in the “Execution Output” step in each skill. Edit it according to your business needs.
If you add any other inefficiencies that have profile views, or if you want to add additional user actions, you can add and configure similar skills for those in the User Actions folder. If you don’t want to use the default user actions, you can delete them.
Tasks to configure
In the Tasks folder, you’ll need to configure actions for these skills if you’re using them:
Pending Credit Block on Order creates tasks for deliveries with an active credit block on the order level.
Pending Credit Block on Delivery creates tasks on sales order items with an active credit block.
Pending Delivery Block on Order creates tasks for deliveries with an active delivery block on the order level (all sales areas).
Pending Delivery Block on Delivery creates tasks for deliveries with an active delivery block on the delivery document level.
Waiting for customer pick-up creates tasks on deliveries that are overdue and are waiting for a customer pickup.
In each case, the tasks will be visible in the profile views of the affected deliveries. If a task is resolved on one delivery, it will be resolved on all deliveries affected by the same inefficiency.
For each of these skills, we’ve provided two default actions:
Open in source system opens the delivery or customer in the web GUI for your source system.
Email finance team opens a prepopulated email in the user’s email client for them to send.
You’ll need to configure each action for each skill if you’re going to use them. You can delete these actions if you don’t want them, in which case you don’t have to configure them. You can also add your own actions as well as these. For example, you could set up an Action Flow to remove billing blocks directly from the app. See Available SAP actions for a list of the possible actions.
To configure the Open in source system action, first activate the web GUI for your source system, if you haven't already. We’ve set this skill up with a template for an SAP system, so you can update the URL with the host and port for your SAP web GUI. If you’re using a different source system, work out the appropriate URLs with query strings to open the record you want in each situation.
Then in each of the skills in the Tasks folder, follow the instructions earlier in this topic to edit the “Execution Output” step in the “Open in source system” route to add your URL. You’ll need to do this for each of the three skills.
To configure the Send email action, in each of the skills in the Tasks folder, first configure the name of the action itself, depending on who’s going to get your prepopulated email. Select the “Send email” step and click the Edit name and description icon next to it.
Then select the “Execution Output” step in the "Send email" route, and edit it to customize the email template for your business needs. You’ll need to do this for each of the skills.