Creating a validation table for your annotations
The validation table for an Annotation Builder allows analysts to evaluate the accuracy of the annotations being generated. This table includes the original data, the AI-generated annotations (predicted categories, reasoning, etc.), and columns where analysts can add feedback directly into the table using either free text fields or drop-downs populated based on the options from the Choice outputs.
It is important to think in advance about how accurate your annotations need to be and how they will be used. For example, will they be reviewed by a human or is the process fully automated? So you may consider 95% accuracy as sufficient for a fully automated process. You can then iterate your prompt in the Annotation Builder configuration until you reach that level of accuracy.
Once your setup is complete, it is recommended that you validate your annotations with a business expert using the validation table. By extending the validation view you can make sense of the use case for these annotations, such as creating charts.
The accuracy of your annotations is calculated based on validated cases only. So for example, if you validate 100 cases and 90 are correct, then you have 90% accuracy. For this reason, it is important to label both correct and incorrect cases in the validation table instead of just labeling the correct annotations.
Follow the steps below to create your validation table and add comments directly into your annotations:
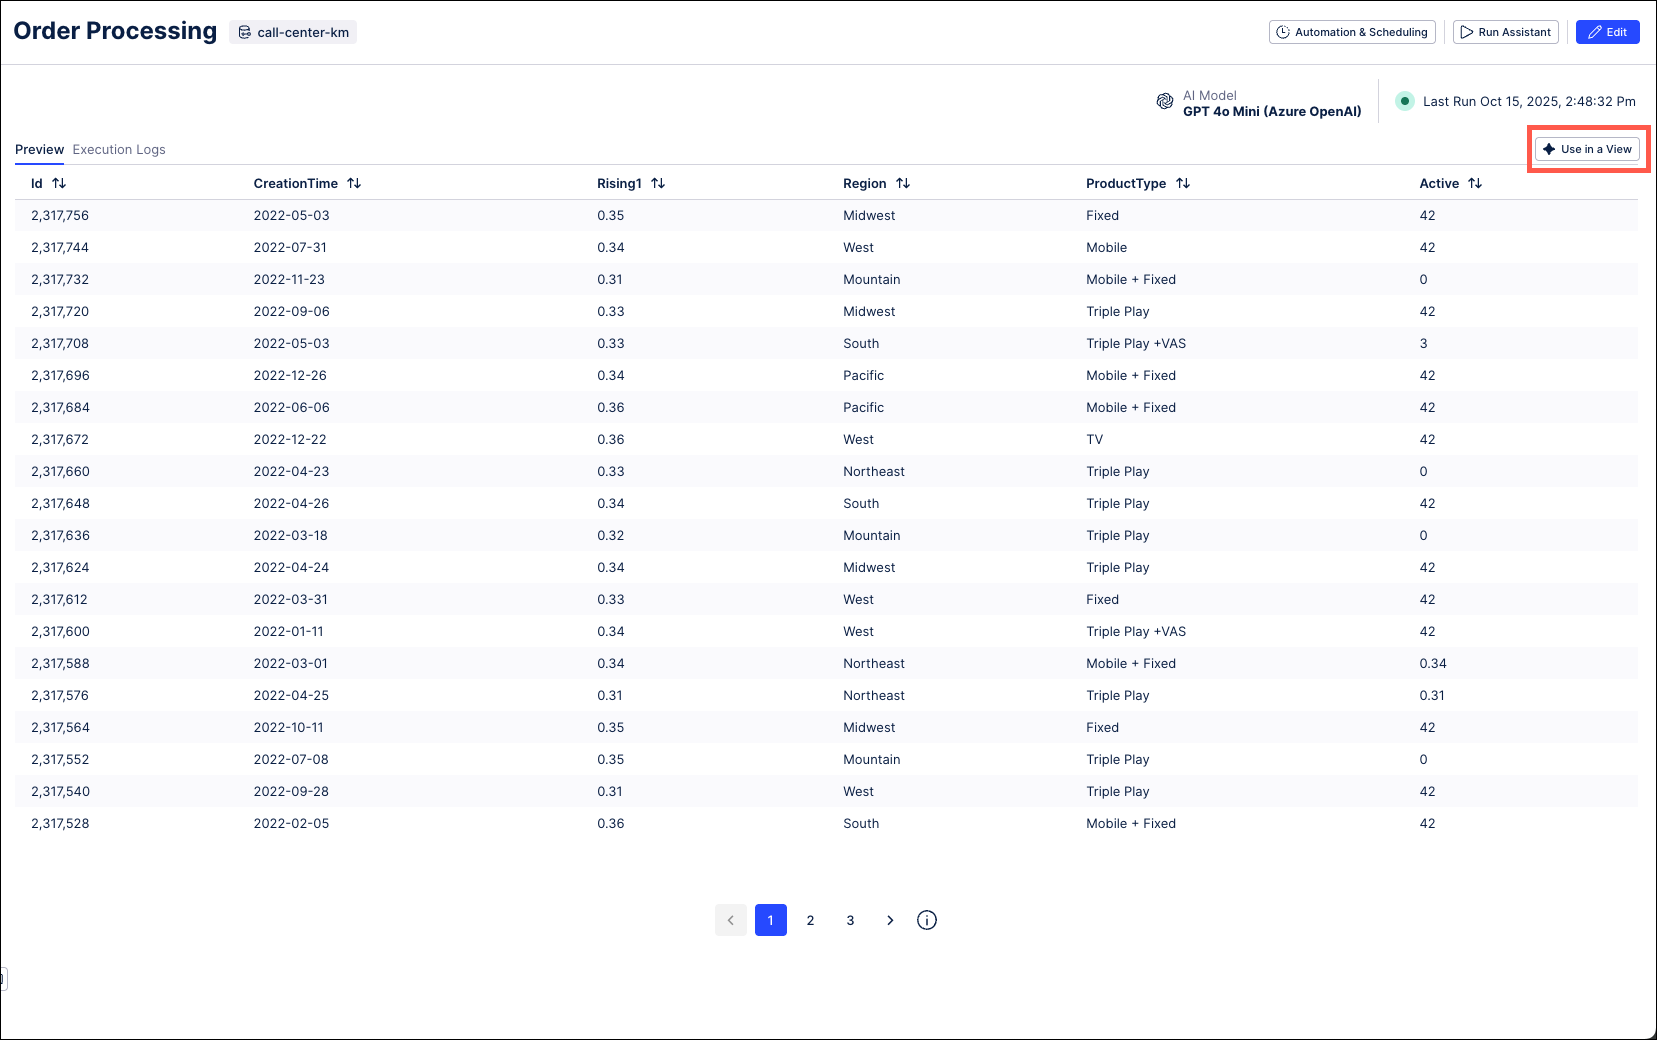
In the Annotation Builder, go to the Overview screen.
Click the Use in a View button in the upper right.
On the Use in a View screen, choose whether the validation table should be added as a new Studio View or embedded into an existing View.
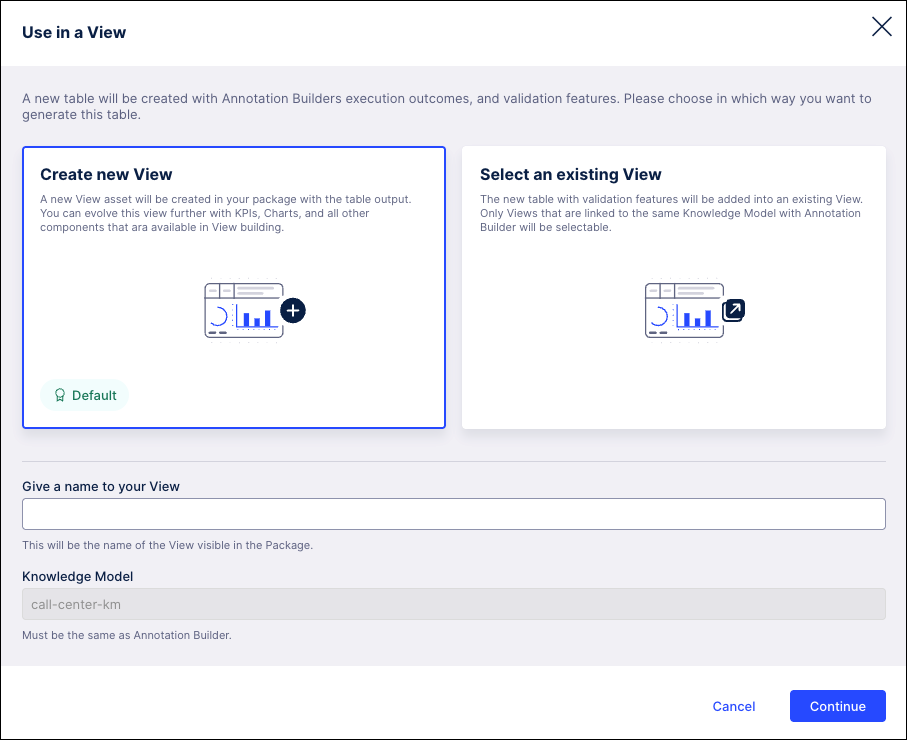
Click Continue. The validation table is generated and displayed in the location you selected.
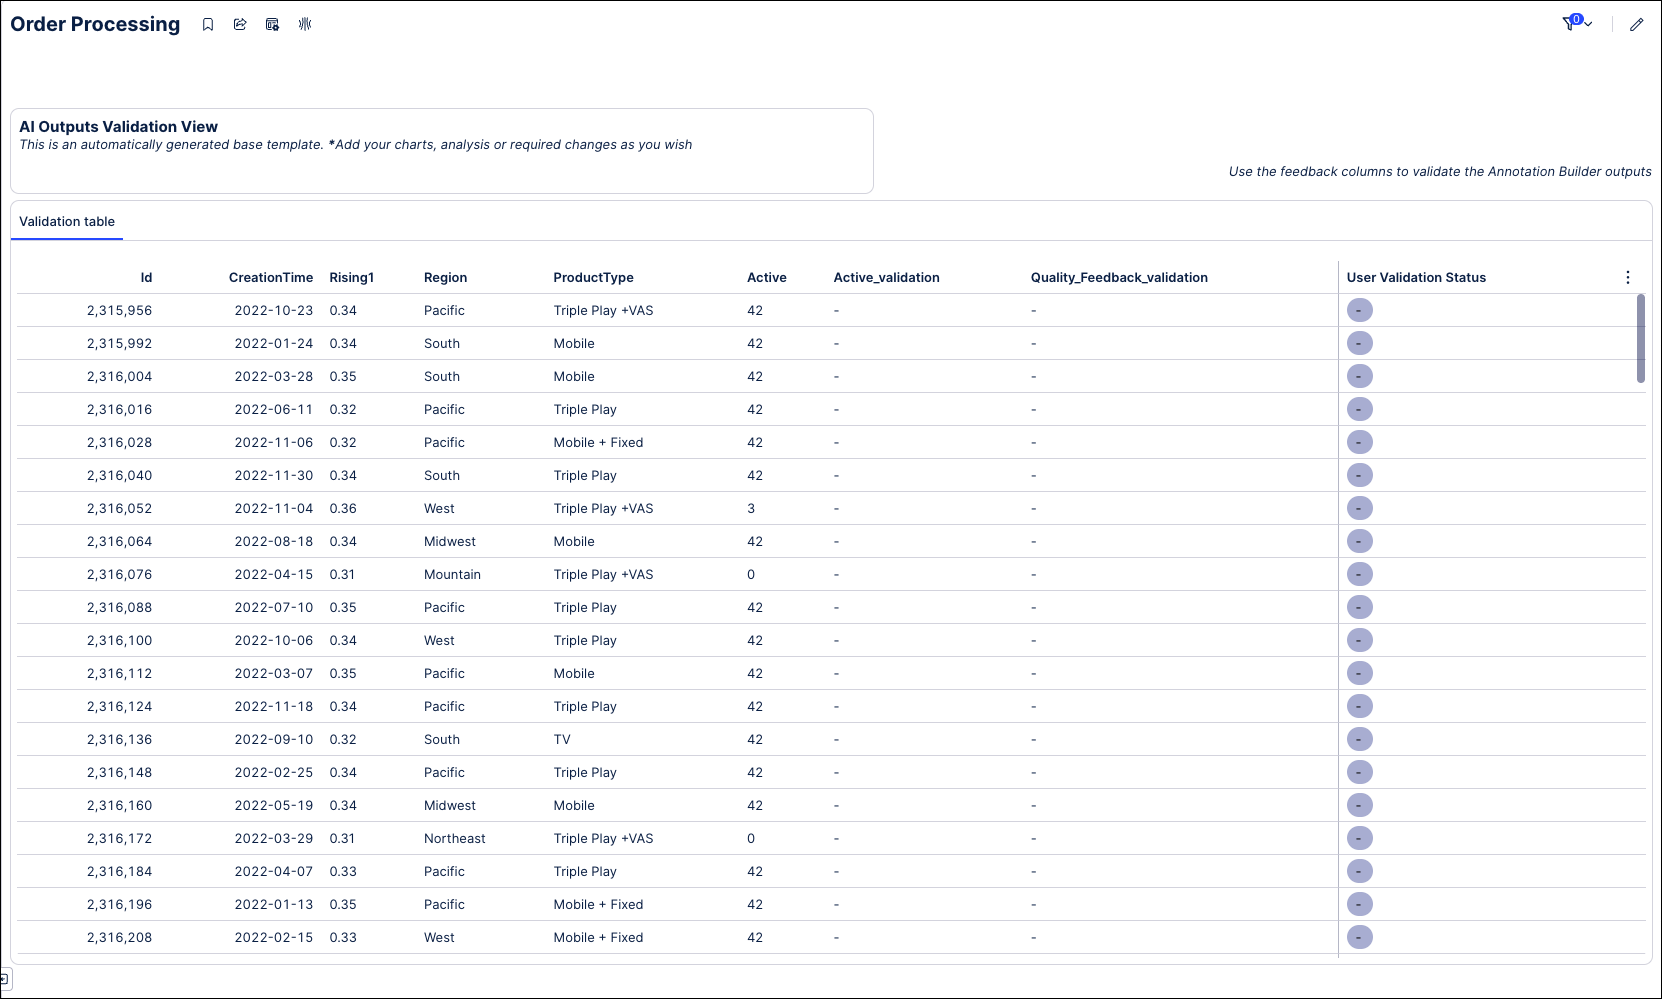
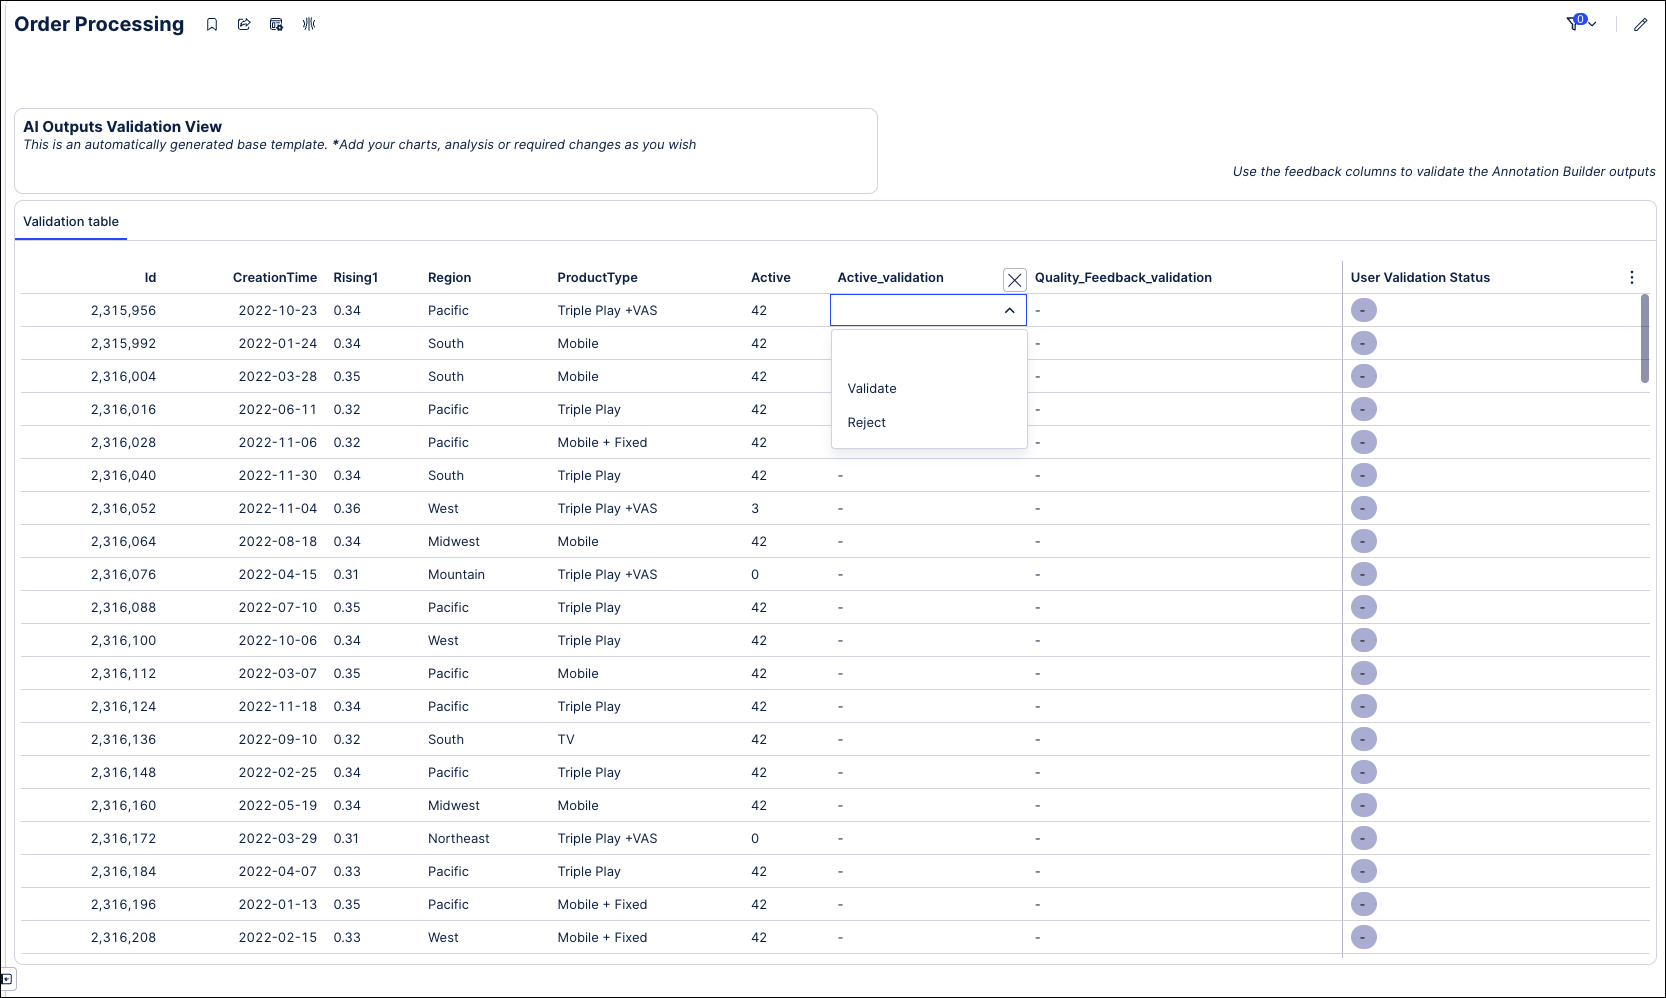
In the validation table, analysts can review the individual annotations, and enter comments directly in the table using text fields and drop-downs provided.
Note
If the analyst provides feedback in the validation table, the accuracy statistics for this Annotation Builder are updated automatically and displayed on the Annotation Builder overview screen.
Once feedback has been added, run the Annotation Builder again to generate new insights.
Repeat these steps until you reach the level of accuracy that you targeted.