Executing data jobs
After configuring your data jobs, they can then be executed. Executing data jobs is the process of running the extraction and transformation tasks contained within them, pulling the data from your source system and organizing it as designed. You can execute data jobs manually or based on an automated schedule, with both delta and full load executions possible.
Data job load variations
When executing your data jobs, you can choose between full and delta loads:
Full load: You extract and transform all of the table’s data. This is recommended when testing your data connection and data jobs and for the first time data is extracted from your source system.
Delta load: You extract and transform only new data that has been added to a table since the last load – rather than all of the table's data. Using delta loads reduces your execution time and allows you to extract and transform only new data. For more information about executing delta data model loads, see: Executing delta extractions.
You can manually execute your data job tasks at any time, allowing you to execute full or delta loads on demand.
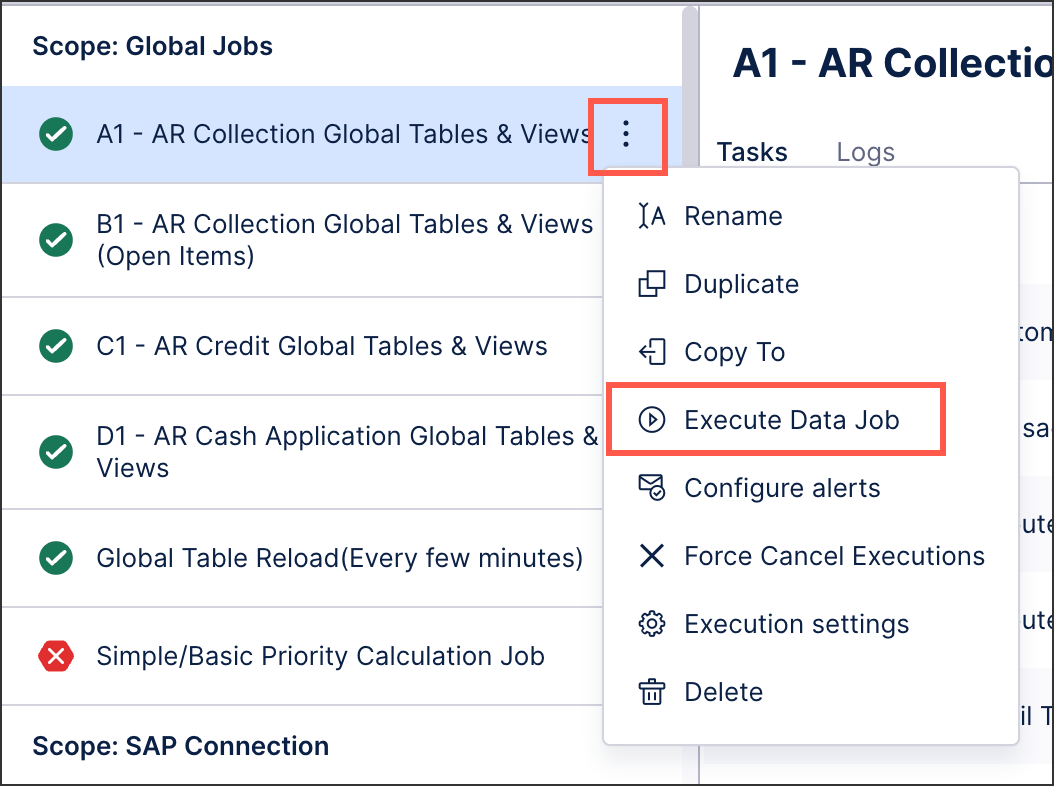
To manually execute your data jobs:
For each data job you want to execute, click Options - Execute Data Job.
Select the tables you want to extract, transform, and load into a data model. The options here depend on the task you are executing.
Select either delta or full load executions.
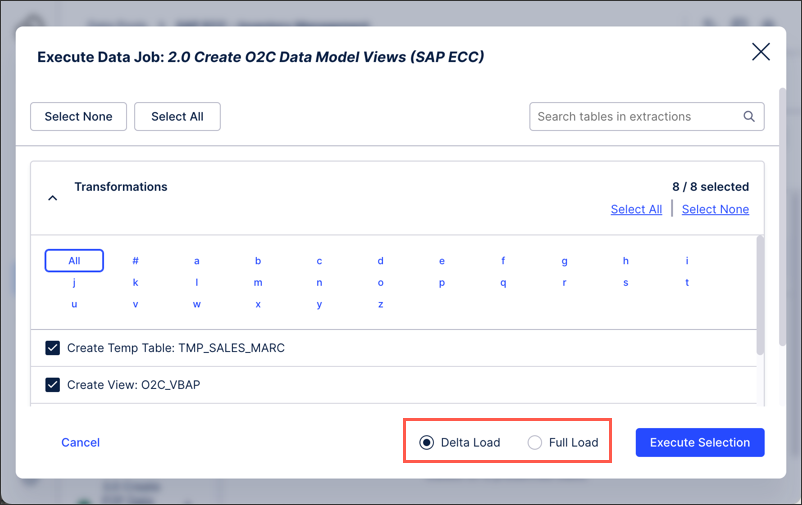
Click Execute Selection.
The execution runs and a your data job log screen is displayed, showing the current status of the execution.
Schedules are used to automatically execute data jobs on a predefined basis, allowing you to control the day, time of day, and repetition of your executions. By default, schedules run sequentially, meaning that they attempt to successfully execute each task before moving on to the next. If a task fails to execute, all remaining tasks are canceled.
For more information about scheduling data jobs, see: Scheduling the execution of data jobs.
Using RESTful APIs, you can both execute a data job and query the status of existing data jobs.
For more information, see: Executing data jobs using a RESTful API.
By default, data jobs run in sequential order, meaning that one must finish before the next is attempted. This order can be optimized however, allowing you to run multiple data jobs in parallel.
Based on historical extractions, an internal algorithm automatically calculates the optimal execution order based on the dependencies and relationships across all tasks. This means once a table has been extracted, the related transformations are then automatically started (while unrelated tables are being extracted).
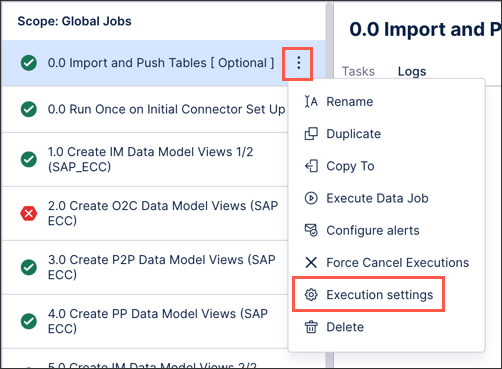
You can enable the optimized execution of data job tabs by clicking Options - Execution Settings:
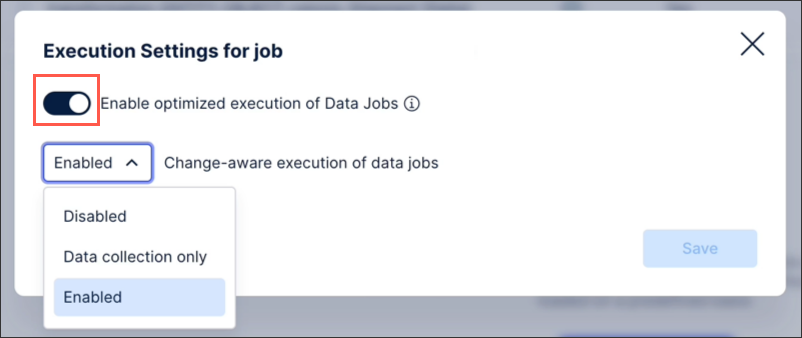
And then toggle Enable optimized execution of data jobs:
 |
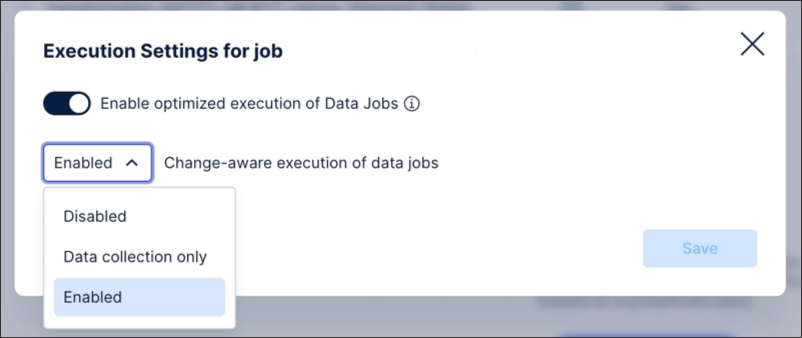
You can also enable change-aware executions of your data jobs via the execution settings menu. This setting automatically checks your data jobs and only runs transformations when there are underlying changes to the data, such as new data being extracted, or when there are changes to the data job configuration. If neither conditions are met, then the transformation is skipped and there are no updates to the data model.
You can enable change-aware executions by clicking Execution Settings and then choosing from Data collection only or fully Enabled:
 |
Change-aware executions can be enabled for both object-centric and case-centric data jobs, as well as for any data jobs included in scheduled executions. If enabled for schedules but not on a data job level, the schedule takes priority.
For more information about scheduling data jobs, see: Scheduling the execution of data jobs.
After configuring your data connection and data jobs, we recommend organizing your data job execution tasks in the following order:
 |
Stage 1: Start by manually executing a full load of a single table, allowing you to verify that your data connection is working and data is being extracted and transformed as required.
Stage 2: After verifying that your single table data job has executed successfully, you should then manually execute full loads of all tables within your data job. The steps provided in stage 1 should be followed for each table.
Stage 3: After verifying that all data jobs for your data connection have executed successfully, you should then configure your delta load schedules. This enables you to automatically execute your data jobs on a predefined basis.