Trigger Warning Email grouped by contact in Business View
Manual order confirmation requests can be tedious and prone to duplication. This automation solution allows you to trigger an Action Flow directly from a Business View. It automatically groups Purchase Orders by contact person, ensuring each contact receives a single, consolidated warning email instead of multiple individual notifications.
The following Action Flow automates the notification process through these three key stages:
Collect bundles: A Custom Webhook receives data bundles sent from a Skill. The flow is configured to "batch" these bundles to process multiple orders simultaneously.
Query purchase data: The system retrieves detailed information (such as Purchasing Document Dates) from the Data Model for all Purchase Orders received via the Webhook.
Consolidate and send: The Text Aggregator groups the orders by the contact's email address and generates an HTML table. Finally, the Email Module sends one comprehensive report to each contact person.
 |
Below you will find the step-by-step guide for configuring each module of the above Action Flow.
Use Skill Trigger instead
If you want to send one email for each selected row of the table in the Business View you can (and should) use the Skill Trigger module in combination with the Execute Action Flow action in Skills. Set it up as described in this documentation. We only need the Webhook version when we do not want to send a mail for each table row but one for several table rows (so when we need to aggregate the data within the Action Flow).
Advantage of the Skill Trigger version: You will trigger the mail immediately when executing in the Business View. The Webhook version can have a delay of up to 2 Minutes.
 |
 |
We set up a Custom Webhook to connect a Skill with this Action Flow to be able to trigger the Acton Flow once for several Bundles sent by the Skill.
 |
Configuration:
Action Flows Module: Webhooks
Action: Custom Webhook
Webhook: Add a new Webhook and name it.
Optional: You can also allow list desired IP addresses to make sure no one else can send data to your hook. In addition, you can define a data structure and all incoming data bundles which won't have that structure are ignored.
Save
Be sure to save the Action Flow before heading to Skills.
Below you will find the step-by-step guide for configuring each action of the skill you need to trigger the Action Flow once for several bundles.
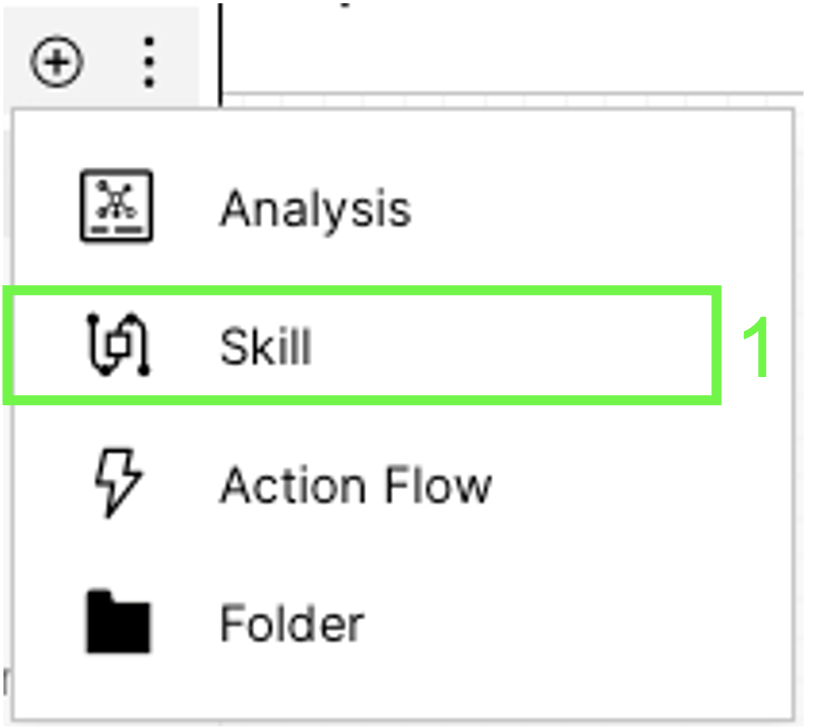
1. Select the Skill option.
 |
2. Select Manual Sensor.
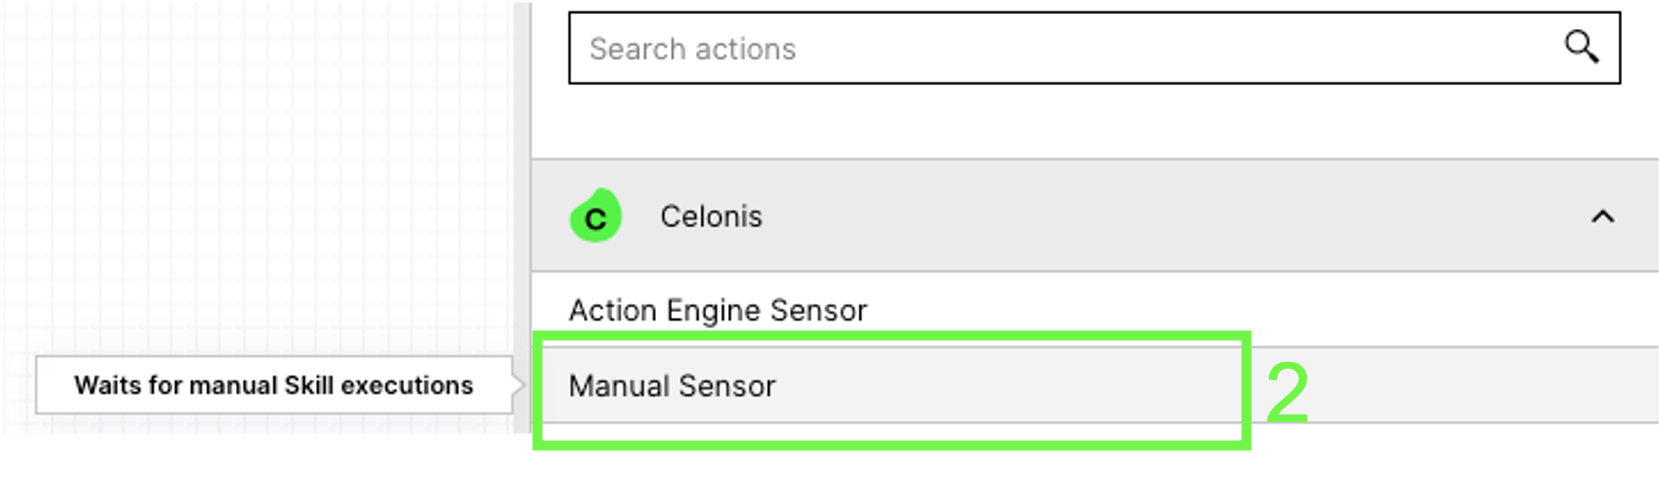 |
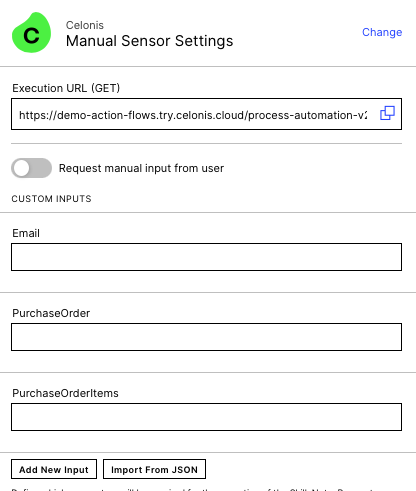
3. Click the Add New Input button to transfer some data from the Action Flow to the Skill at a later time.
 |
4. Choose a name for the input to come by the Business View and define the format.
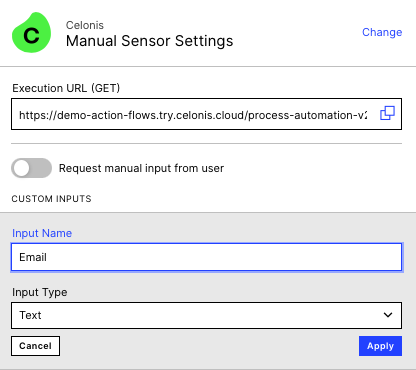 |
-------------------------------------------------
 |
5. Add the 'Webhook Request' action as a next step.
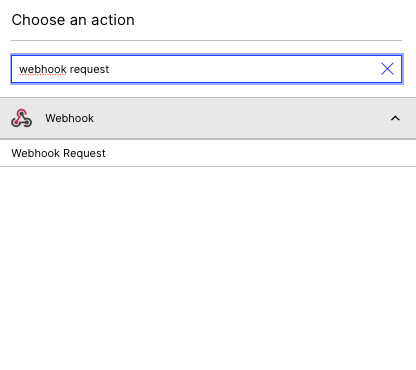 |
6. Enter the following Webhook settings:
Method: POST
URL: Paste the URL of the Webhook module in the Action Flow.
Data (JSON Format): The inputs to be transferred to the Action Flow in JSON format.
{
"PO":"${b1["PurchaseOrder"]}",
"Email":"${b1["Email"]}",
"POItem":"${b1["PurchaseOrderItems"]}"
}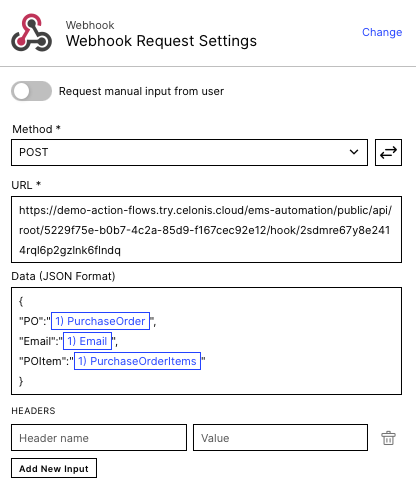 |
Save
Be sure to save the Skill before heading to Action Flows.
Below you will find the step-by-step guide for configuring each module of the above Action Flow.
|
Configuration:
Action Flows Module: Webhooks
Action: Custom Webhook
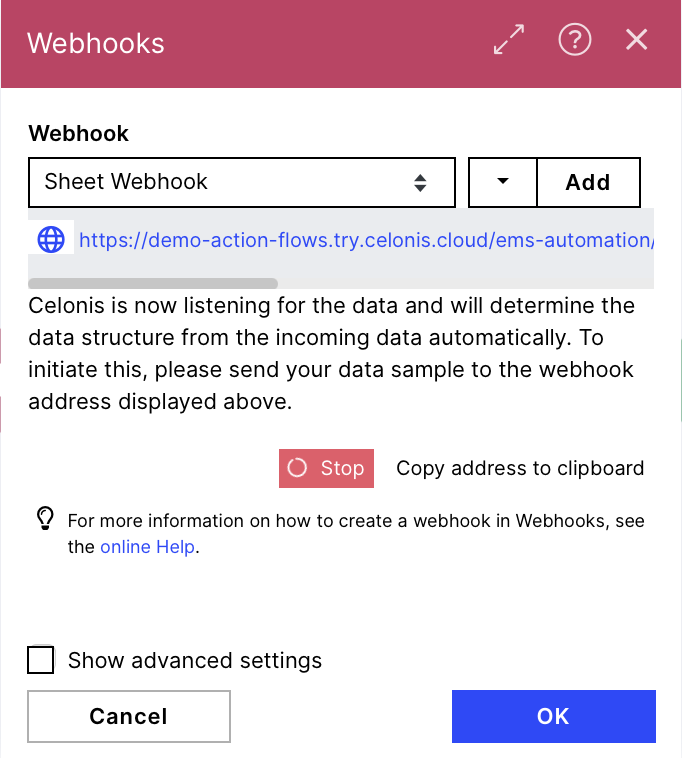
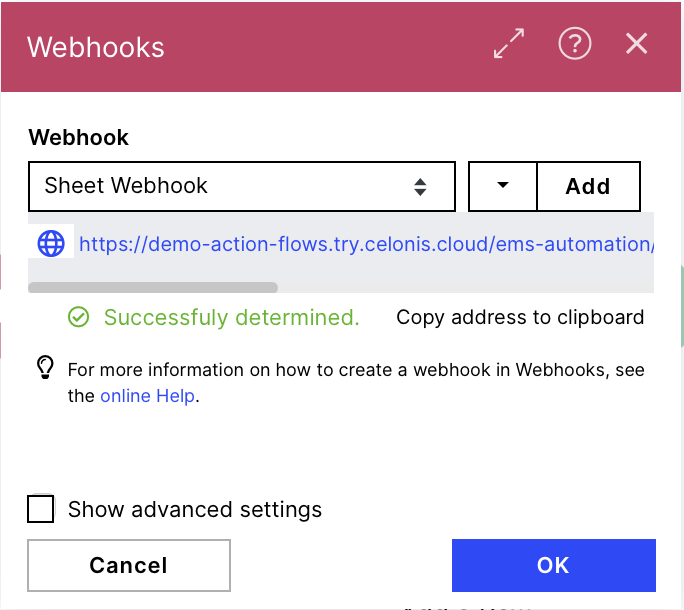
Determine data structure: To connect the Skill webhook to the Action Flow and show the webhook what kind of data will be sent you can test the Skill. You have to provide example data for the inputs from the Business View when testing or trigger the Business View directly. The webhook will determine the data structure. The Webhook should show the 'successfully determined' confirmation and you should be able to find the defined variables as item after the webhook. In the example we would find Order Id, Requested Delivery Date and Customer.
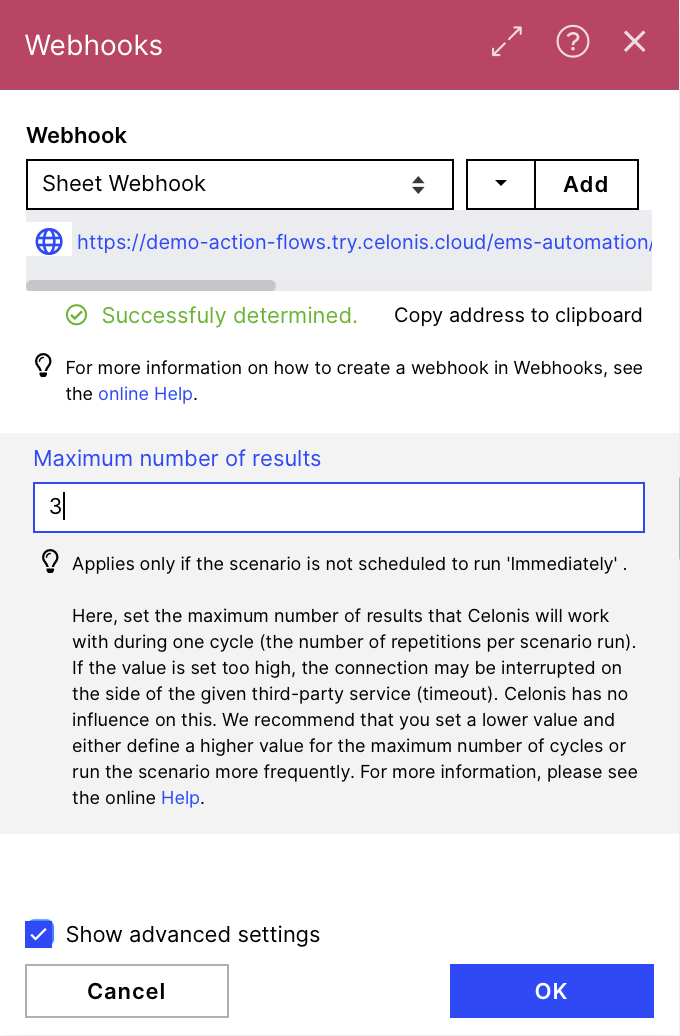
IMPORTANT
Advanced Setting - Maximum number of results: The default value is 2, but you can choose the maximum amount of bundles you want to include in one Action Flow run in one period (e.g. every 2 minutes). The time period will be defined later.
 |
 |
 |
After receiving data from the Webhook we use this to query more data for the specific Purchase Orders like the Purchasing Document Date.
 |
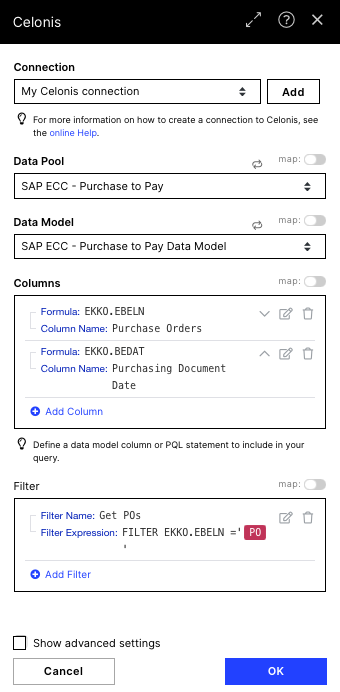
Configuration:
Action Flows Module: Celonis
Action: Query Data
Connection: Set up a User- or AppKey Connection
Data Pool: Choose your P2P Data Pool
Data Model: Choose your P2P Data model
Columns:
required:
EKKO.EBELN
optional:
EKKO.BEDAT
Filter: We filter on the Purchase Orders we got by the Webhook.
Note
You may have to run the Flow once (triggered by the skill) to get the output items of Query Data in the following module
 |
In this module we combine the data from the webhook and the query data module and build the body of a HTML table to sent in the following mail module. In addition we group here by the contact to just sent one mail with all the Purchase Order we want to warn them about.
 |
Configuration:
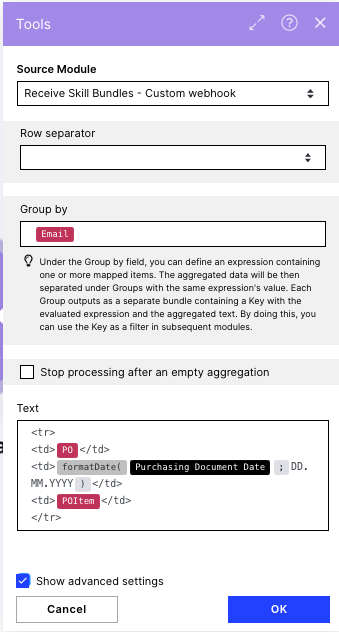
Action Flows Module: Tools
Action: Text aggregator
Source Module: choose the Webhook as Source module (NOT QUERY DATA)
Group by (advanced settings): Email (to send one email per contact)
To build up an html table you have to define a structure with table rows (<tr>) and table cells (<td>) which will later be included in a table structure to get the right format. Here you have the chance to format dates as we show it with the Delivery Dates.
Add for each column you want to have in your resulting table the structure <td> data of the column </td>.
Text:
<tr>
<td>{{7.PO}}</td>
<td>{{formatDate(2.`Purchasing Document Date`; "DD.MM.YYYY")}}</td>
<td>{{7.POItem}}</td>
</tr>
Without grouping
If you do not want to group the POs by the email you have to select Stop processing after an empty aggregation to not send empty mails when the webhook doesn't receive anything.
Why? The text aggregator doesn't notice that there is no input within the field called 'Text' as we always have the table structure there(<tr><td>...). If you group by email and the webhook didn't receive any data the text aggregator tries to group by the mail and realizes that there is no data for that. So when not using the Group by field we have to tell the text aggregator module in another way that there were no input for the table. Thus we need to tick the 'Stop processing after an empty aggregation'.
 |
 |
Configuration:
Action Flows Module: Email
Action: Send an Email
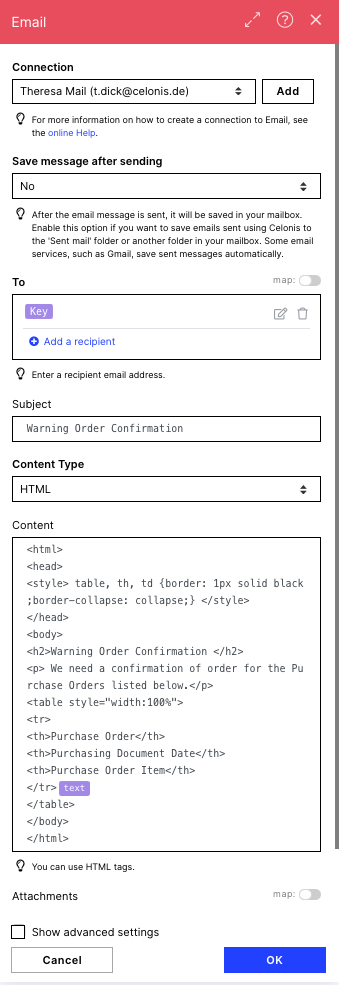
The screenshot below shows how this module has been configured with our demo data.
To: Take the 'Key' item of the previous modules (we grouped by email)
Subject: Define the subject of the mail
Content Type: HTML
Content:
<html>

<head>

<style> table, th, td {border: 1px solid black;border-collapse: collapse;} </style>

</head>

<body>

<h2> Warning Order Confirmation </h2>

<p> We need a confirmation of order for the Purchase Orders listed below.</p>

<table style="width:100%">

<tr>

<th>Purchase Order</th>

<th>Purchasing Document Date</th>

<th>Purchase Order Item</th>

</tr>

{{10.text}}

</table>

</body>

</html>
HTML Tables
Find more information on how to send HTML tables in a mail and how to adapt the HTML code to your needs in this template.
 |
To make sure to collect all bundles selected in the Business View we schedule the Webhook to get triggered every second minute. This is also the maximum delay time of the mail sent (if the webhook just triggered when triggering the skill). To do so make sure to save first and then publish the Action Flow by clicking on the top right blue button called 'Publish Package'.
You are good to go when you have the purple chip with 'Published' beyond the green run once button.
By clicking on the clock symbol in this published mode you open up the schedule settings where you can define how often and on which time the message should be send.
Run Action Flow: At regular intervals
Minutes: 2 (default is 15)
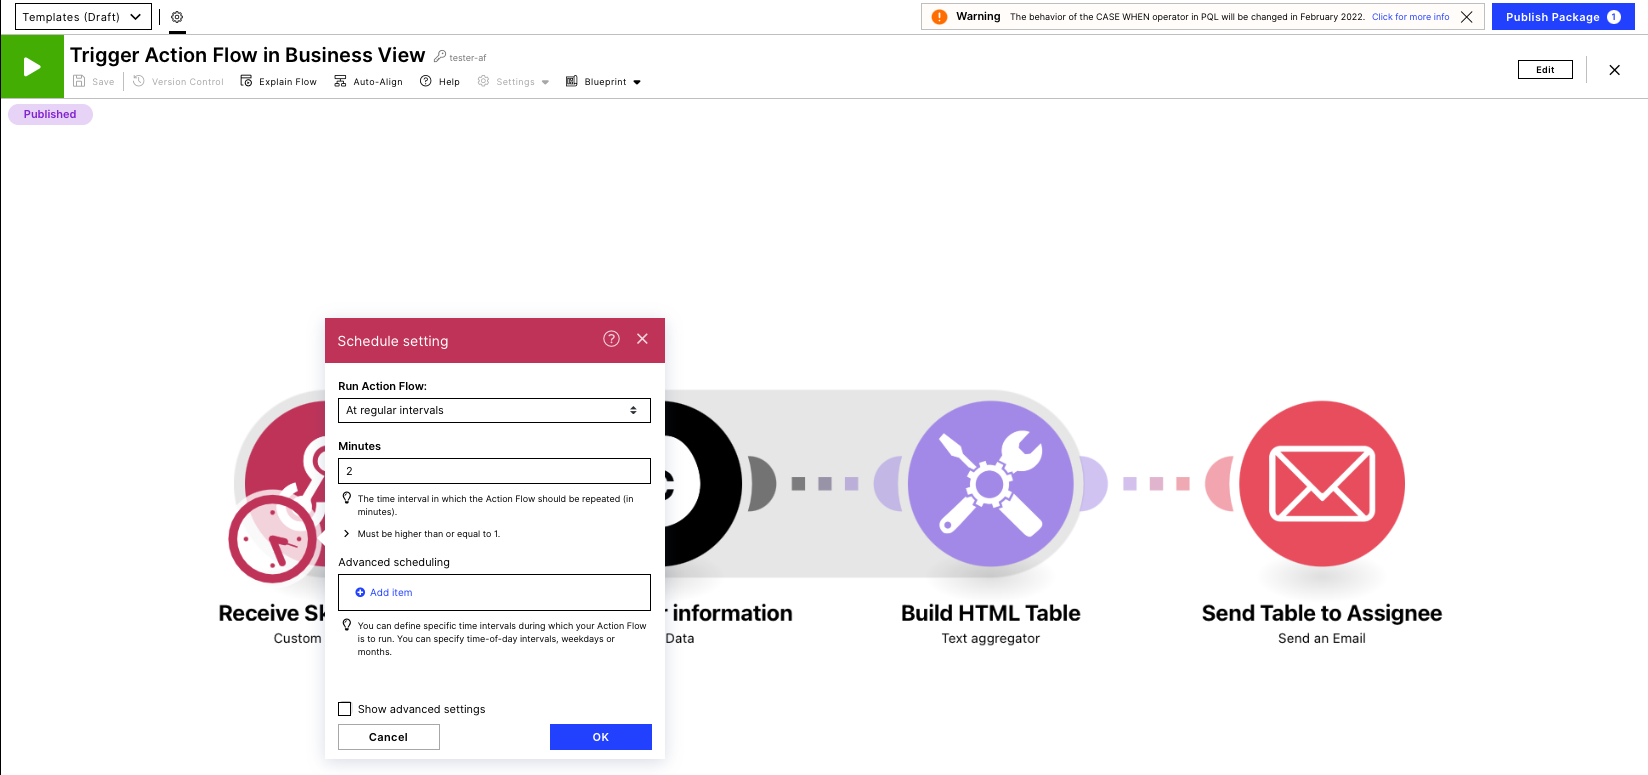 |