Configuring the Celonis Platform Adoption extractor
The Celonis Platform Adoption (CPA) extractor allows you to extract usage data from your Celonis Platform team, including usage logs, login histories, and user information. This extractor uses OAuth2 authentication, requiring you to set up an OAuth client in your Celonis Platform team. You can find a step-by-step guide to setting up an OAuth client in this topic.
If you previously configured this extractor using App Key authentication, we recommend transitioning to OAuth2. For more information, see: Transitioning from AppKey to OAuth2 authentication
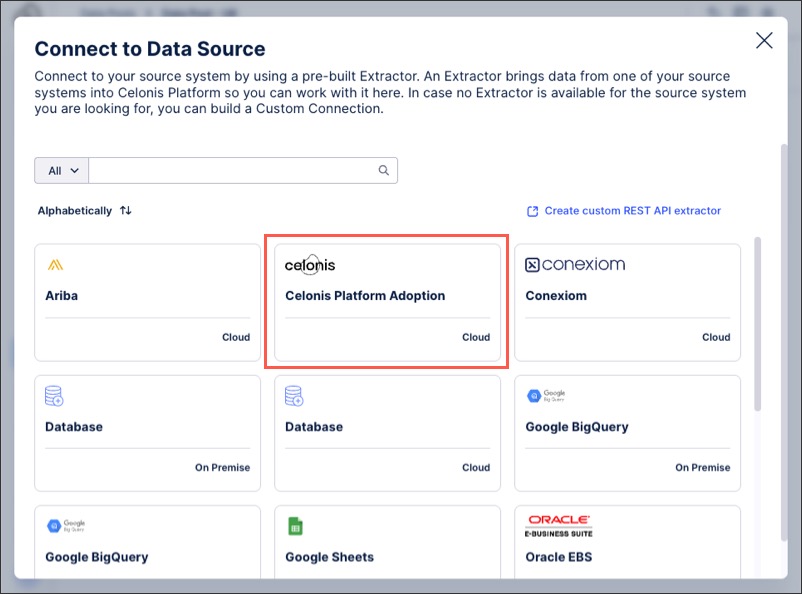 |
Before configuring the CPA extractor, you need to complete the following prerequisites:
To track user login history and Studio usage, you first need to enable both services:
Click Admin & Settings - Platform Adoption.
Enable Login History.
Click Studio - Set up tracking service.
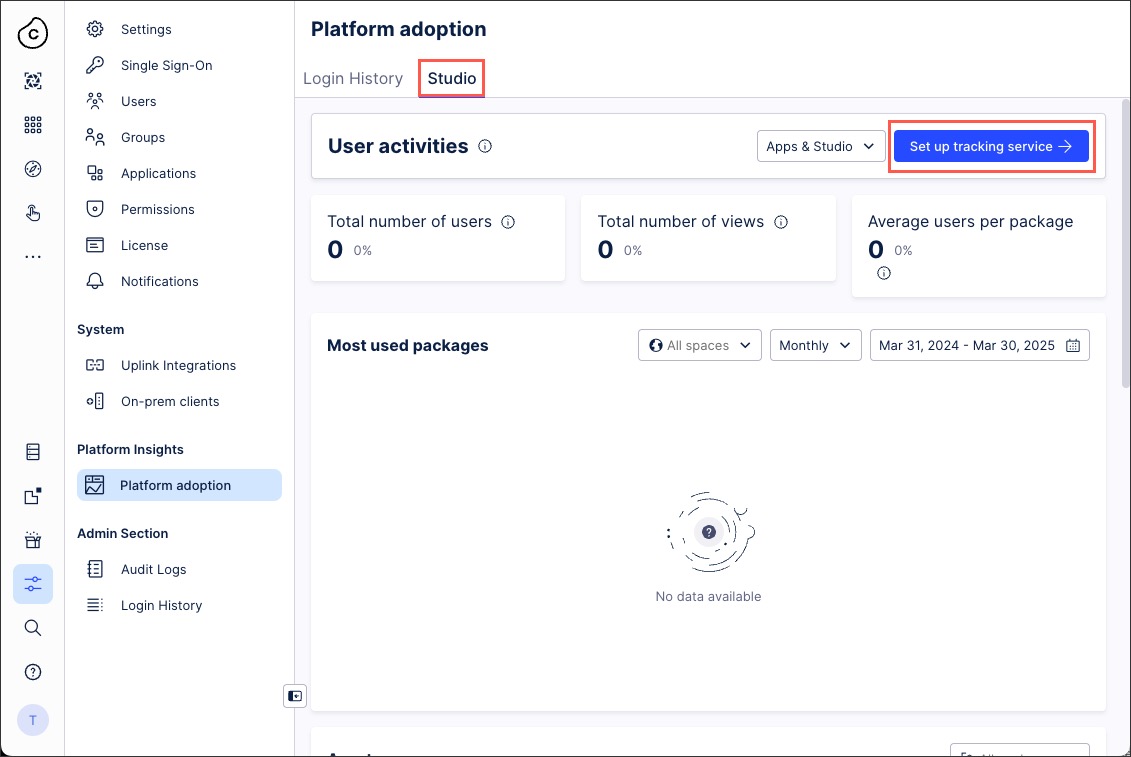
Enable Studio.
Click Close.
Your Celonis Platform team login history and Studio usage statistics are now recorded.
Before configuring the CPA extractor, you need to configure an OAuth client in your Celonis Platform team. This OAuth client can then be assigned permissions to access the Celonis public APIs required by the CPA extractor.
To create an OAuth client and assign it permissions:
Click Admin & Settings - Applications.
Click Add New Application - OAuth Client.
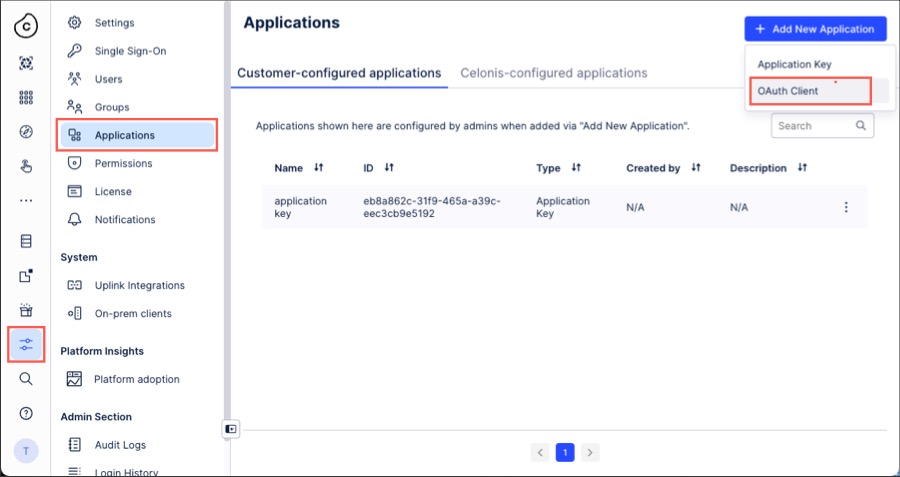
Configure the client using the following options:
Name: An internal reference for the client.
Description: An optional and internal description.
Grant Type: This defaults to Client Credentials and can't be changed.
Authentication Methods: Select 'client secret basic'.
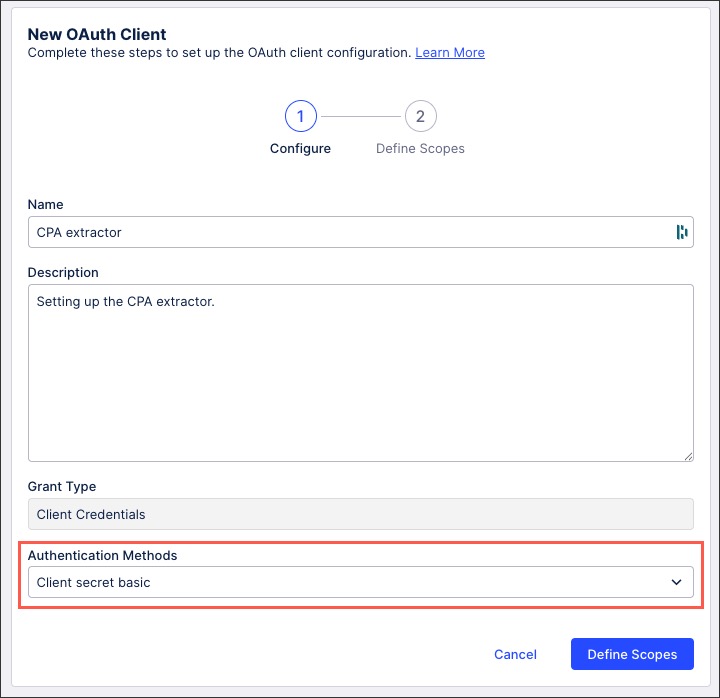
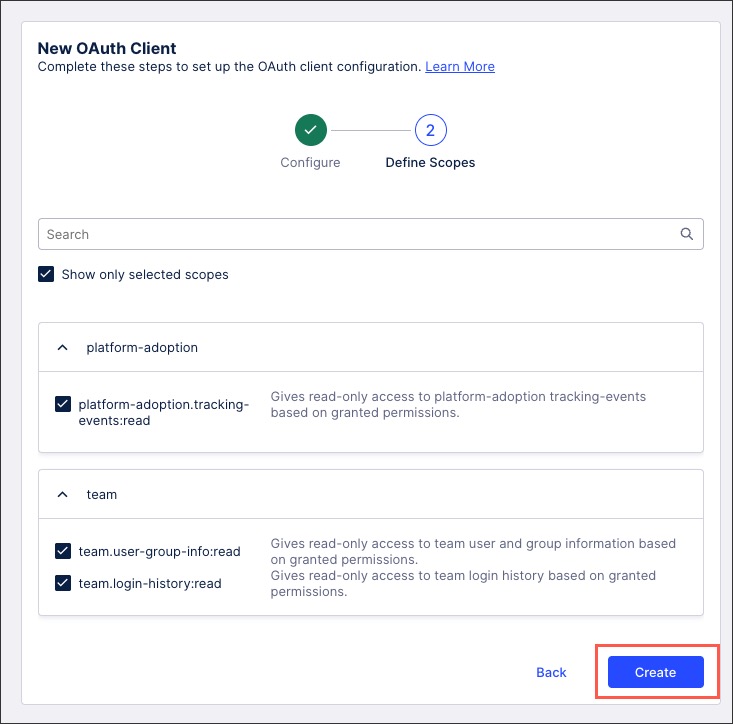
Click Define Scopes and then select the following scopes:
Platform-adoption.tracking-events:read
team.user-group-info:read
team.login-history:read
Click Create.
The OAuth client is created and available to assign permissions to.
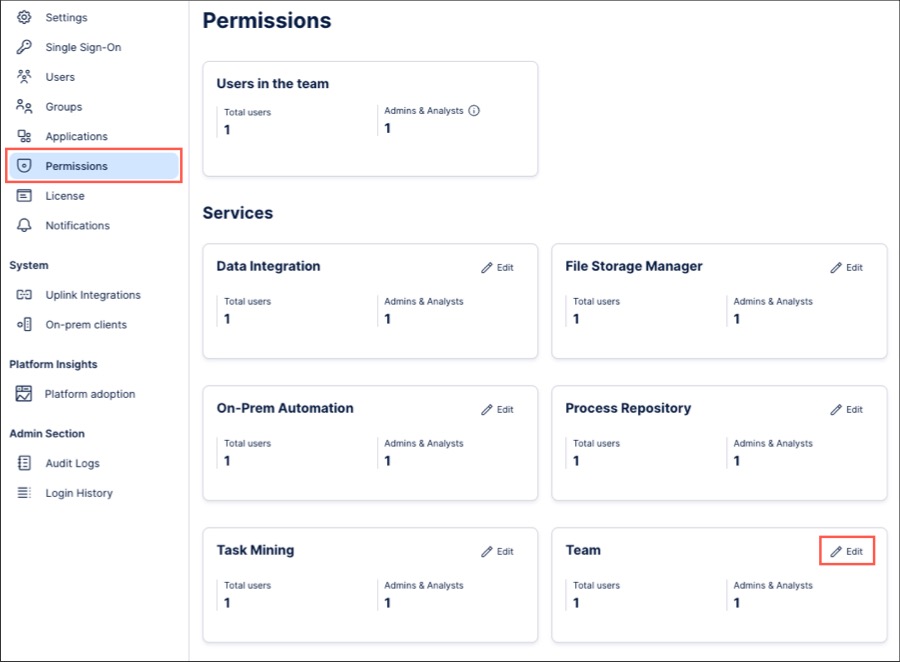
Click Permissions and then edit Team permissions:
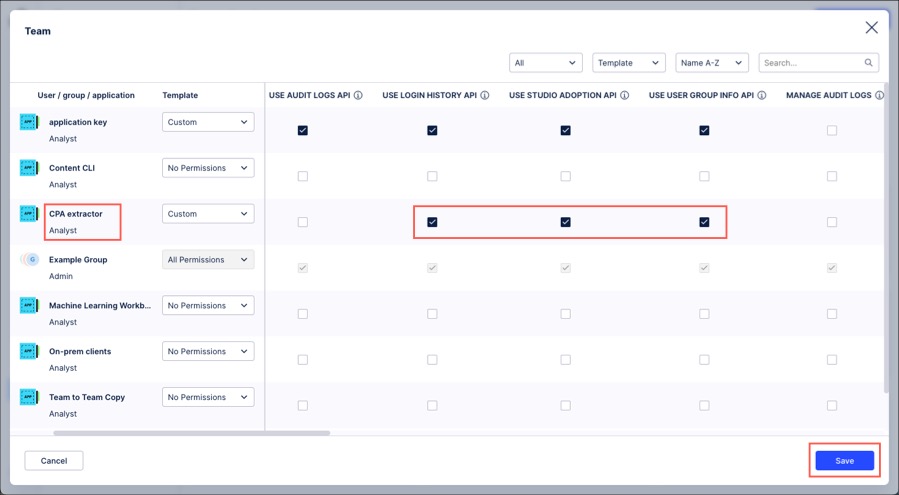
Assign your recently created extractor the following permissions:
Use Login History API
Use Studio Adoption API
Use User Group Info API
Click Save.
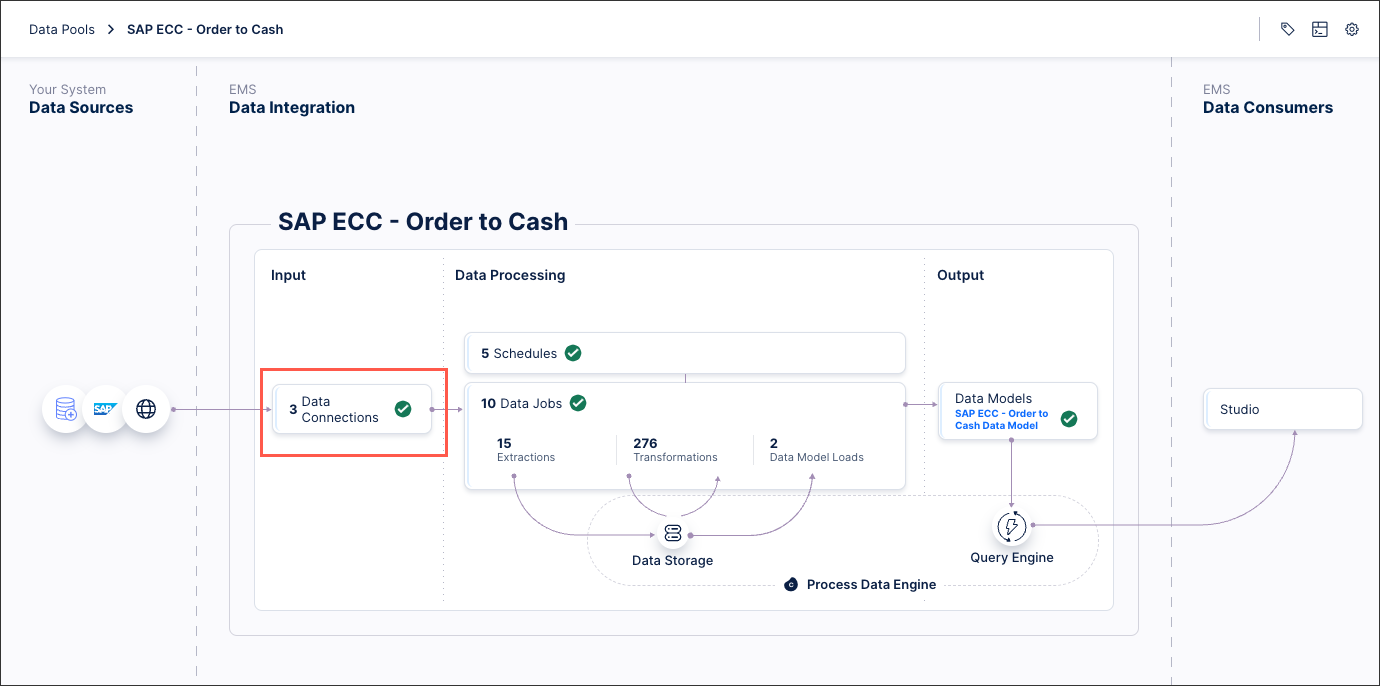
With access to your OAuth authentication credentials, you can configure the CPA extractor from your data pool diagram:
Click Data Connections.
Click Add Data Connection and select Connect to Data Source.
Select Celonis Platform Adoption.

Configure the following details:
Name: An internal reference for this data connection.
API URL: Use your Celonis Platform team URL in the following format. Don't include the forward slash (/) at the end:
https://(TEAM).(REGION).celonis.cloud
AppKey: Leave this field blank.
Client ID: Enter the client ID provided when configuring your OAuth client.
Client Secret: Enter the client secret provided when configuring your OAuth client.
Click Test Connection and correct any issues highlighted.
Click Save.
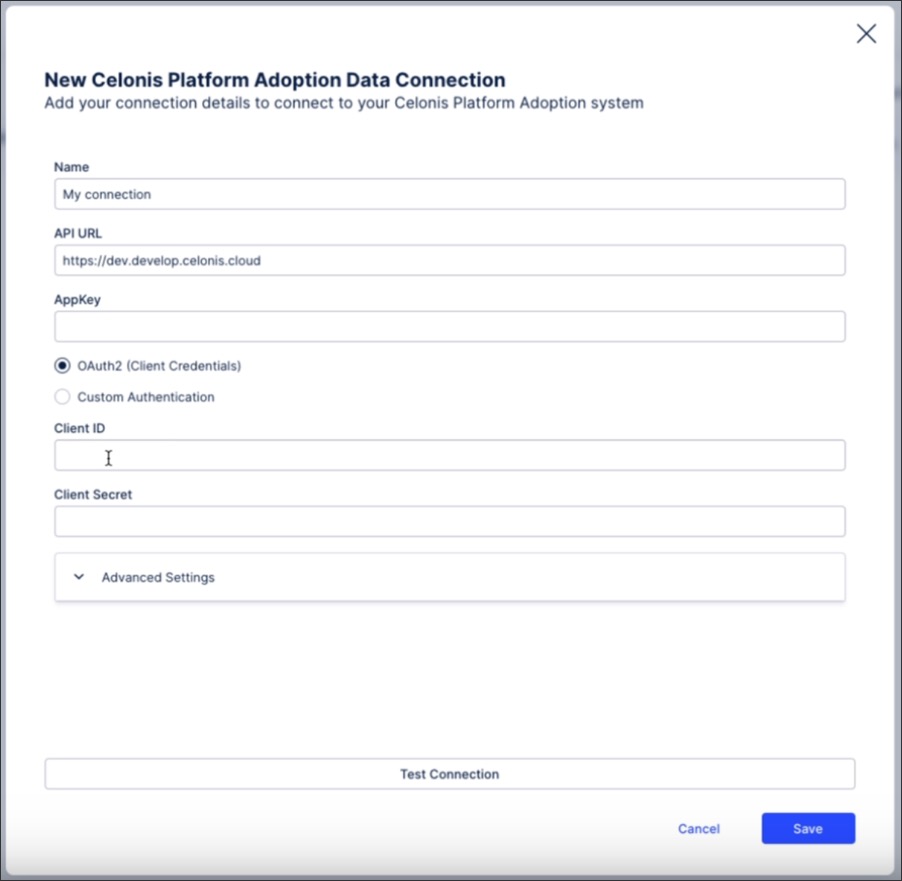
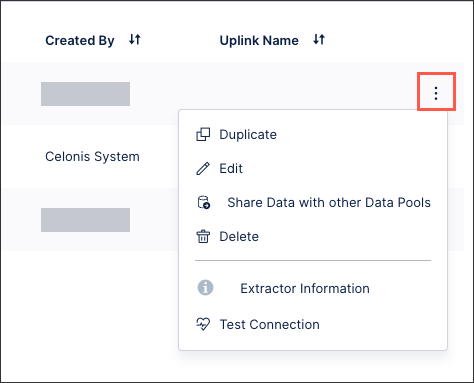
The Celonis Platform Adoption extractor is now established. You can manage this connection at any time by clicking options:
If you have previously configured this extractor using AppKey authentication, we recommend transitioning this to OAuth2 authentication.
To transition to OAuth 2:
Create an OAuth client in your Celonis Platform team, providing you with a client ID and client secret. See: Configuring an OAuth client and assign it permissions.
Click Data Integration - Data Connections and open your existing Celonis Platform Adoption connection.
Click OAuth2 (client credentials) and enter your client ID and client secret from step 1.
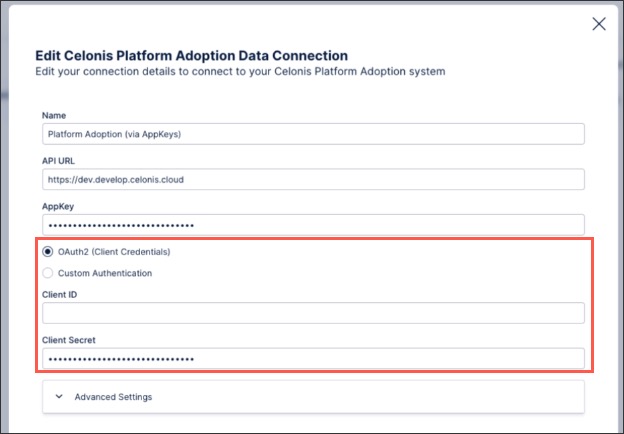
Click Test Connection and correct any issues highlighted.
Click Save.
Your Celonis Platform Adoption extractor now uses OAuth 2 authentication and continues to run as previously configured.