Assignment Rules
Streamline task delegation by automatically matching specific data inputs with the correct assignees. Assignment Rules replace manual PQL statements with an intuitive lookup system, ensuring cases reach the right users or email recipients instantly.
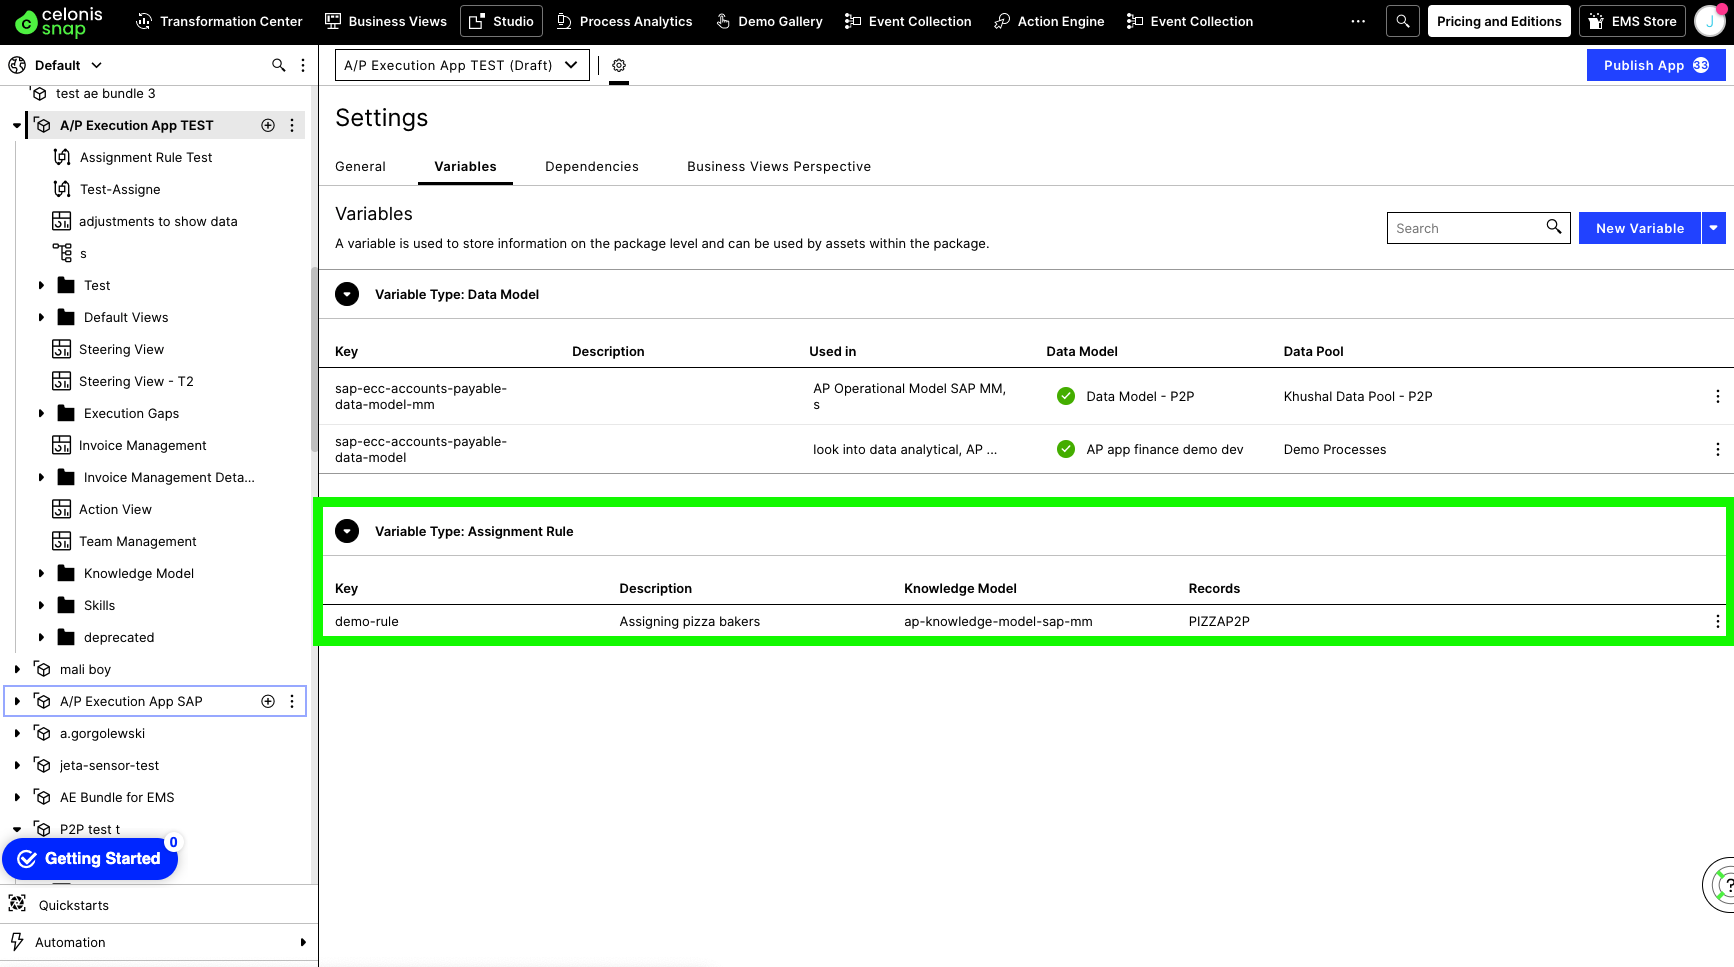
To view your assignment rules:
Go to the package settings.
See the Variables tab for:
The Assignment Rule variable type.
An overview of the Assignment Rules for the respective package.
Note
Assignment Rules are by default activated for every team using Knowledge Models. If you cannot see Assignment Rules in your package settings, please contact Celonis support. Remember to mention your team URL.
Navigate to Celonis Studio.
Hover over the name of the package you want to enable Assignment Rules for and click the three vertical dots.
Select "Settings" from the dropdown.
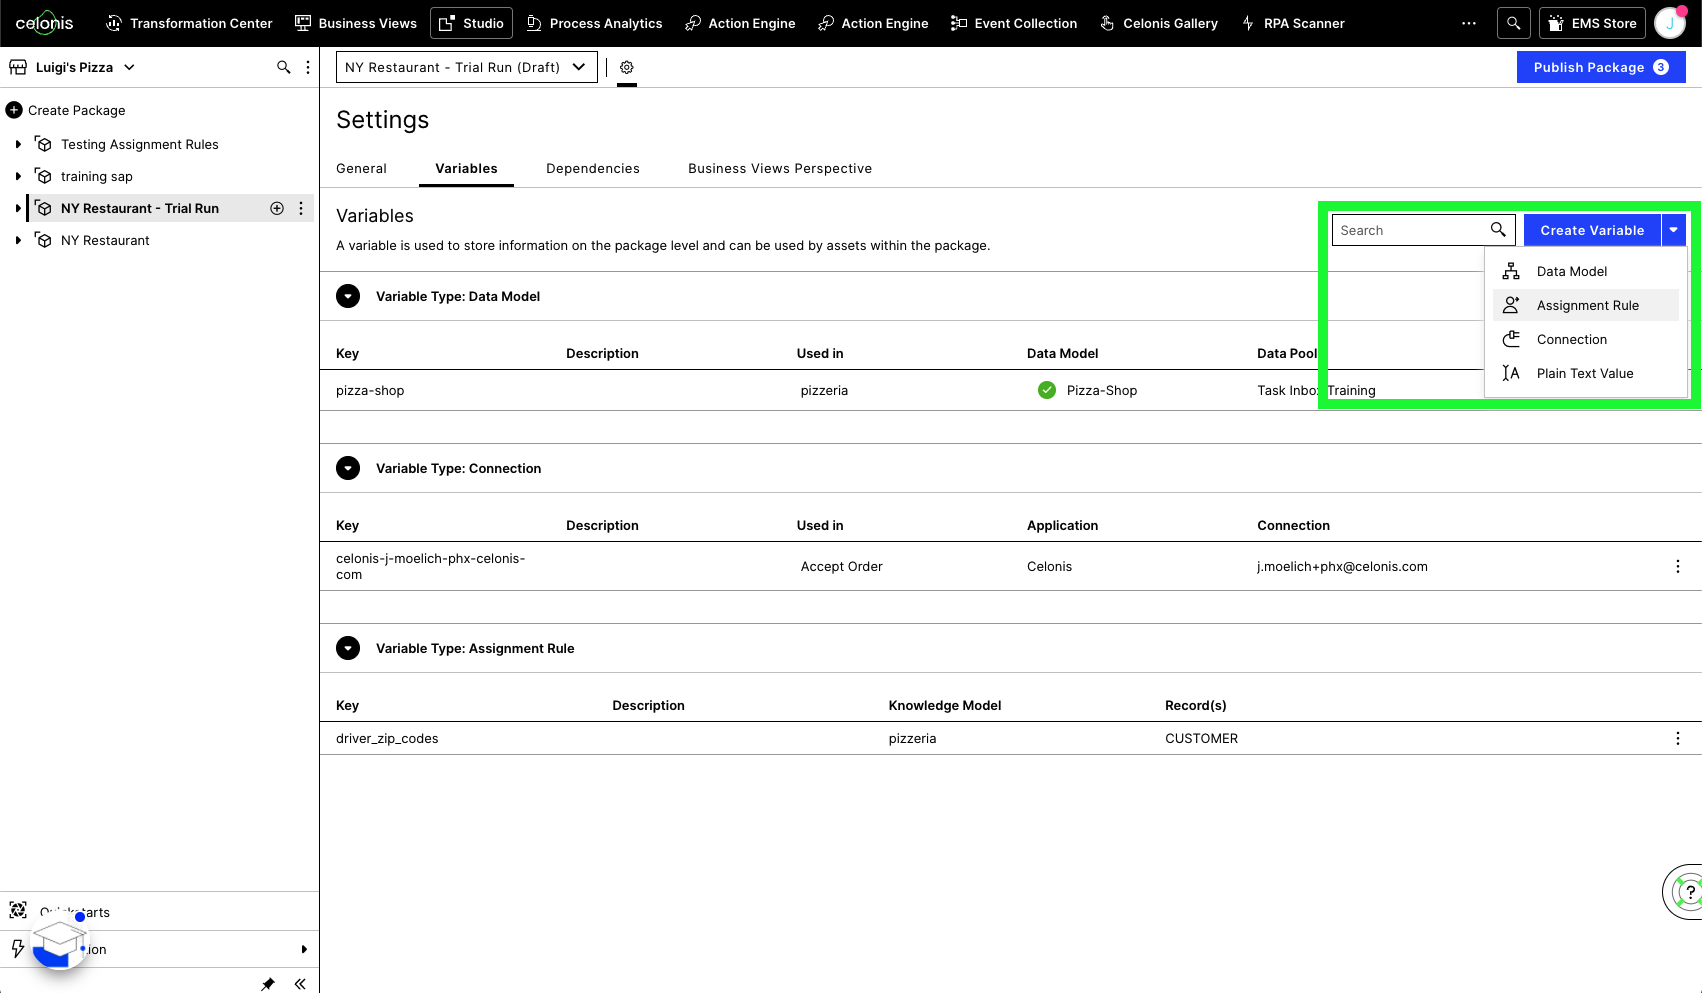
Navigate to "Variables" in the settings window.
Click "Create New Variable" and select "Assignment Rule".
 |
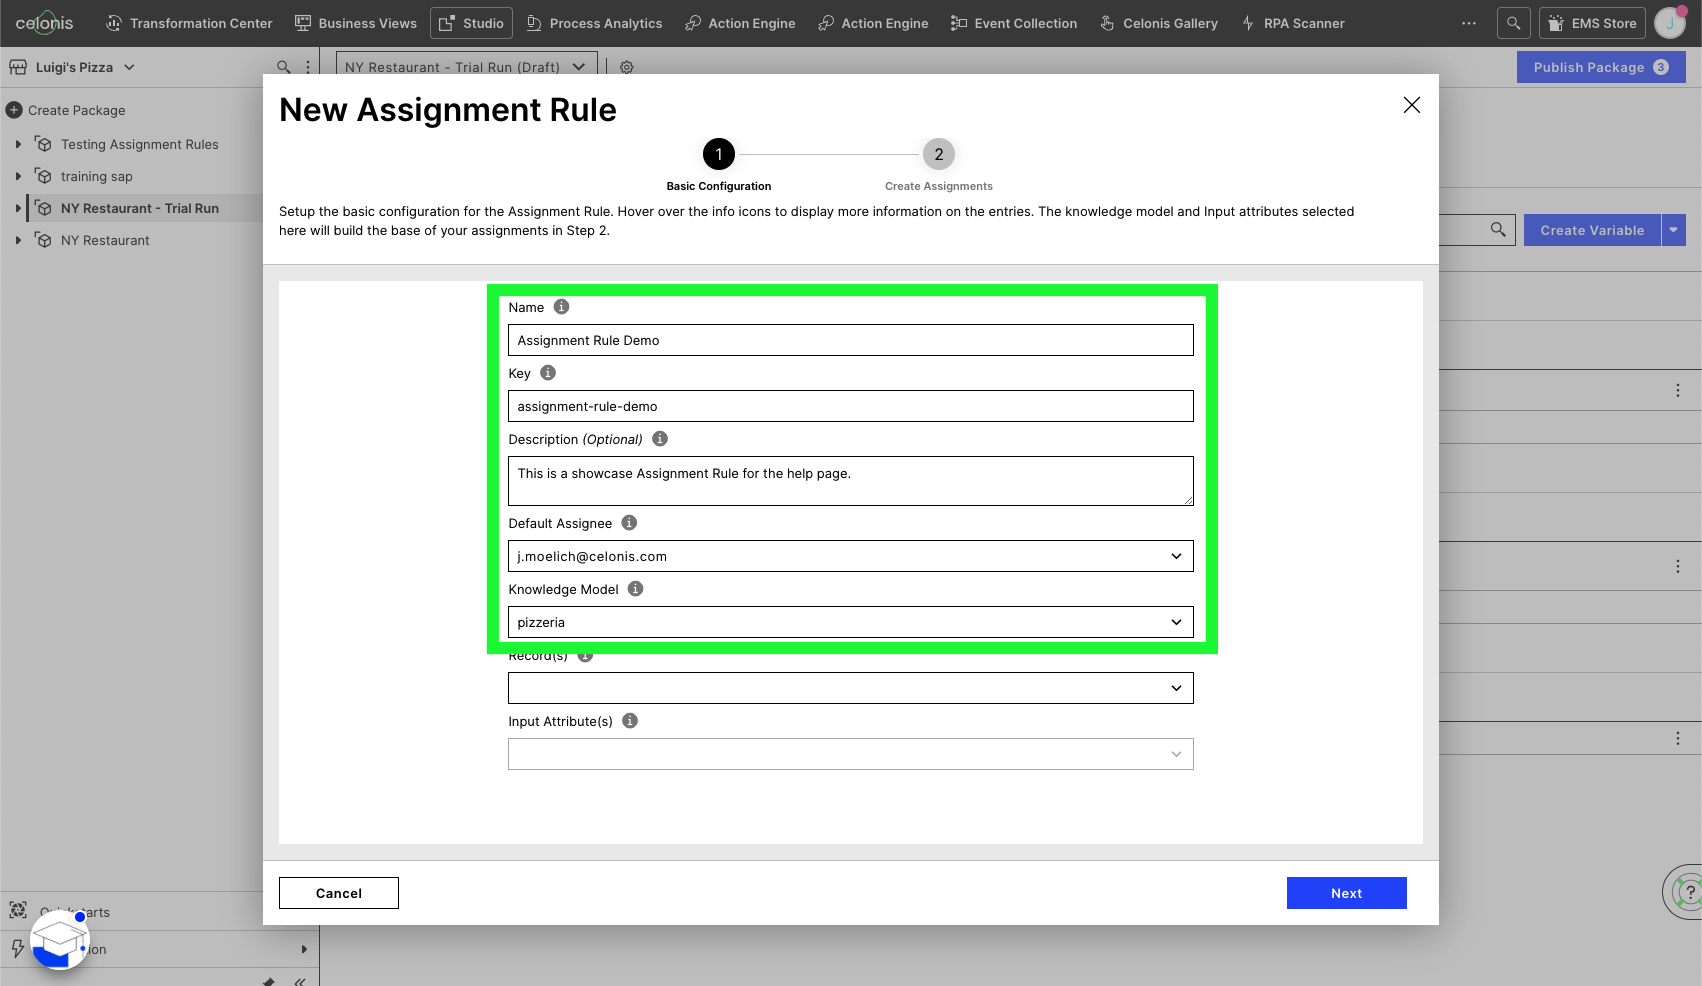
Create a Key for your Assignment Rule
Optionally, add a Description to your Assignment Rule; a description can be helpful when revisiting your rule in the future.
Define a Default Assignee. This assignee can be either a custom output or one of the existing users. The default assignee is used for every combination of input attributes that have not been assigned explicitly to a different output.
Select the Knowledge Model of the input attributes.
Note
Only published Knowledge Models can be selected here. See Version Control for more information on knowledge model publishing.
 |
After the previous selection of a knowledge model, the Record field becomes available.
Click the Records dropdown and select one (or more) record you want to use as a basis for your input attributes.
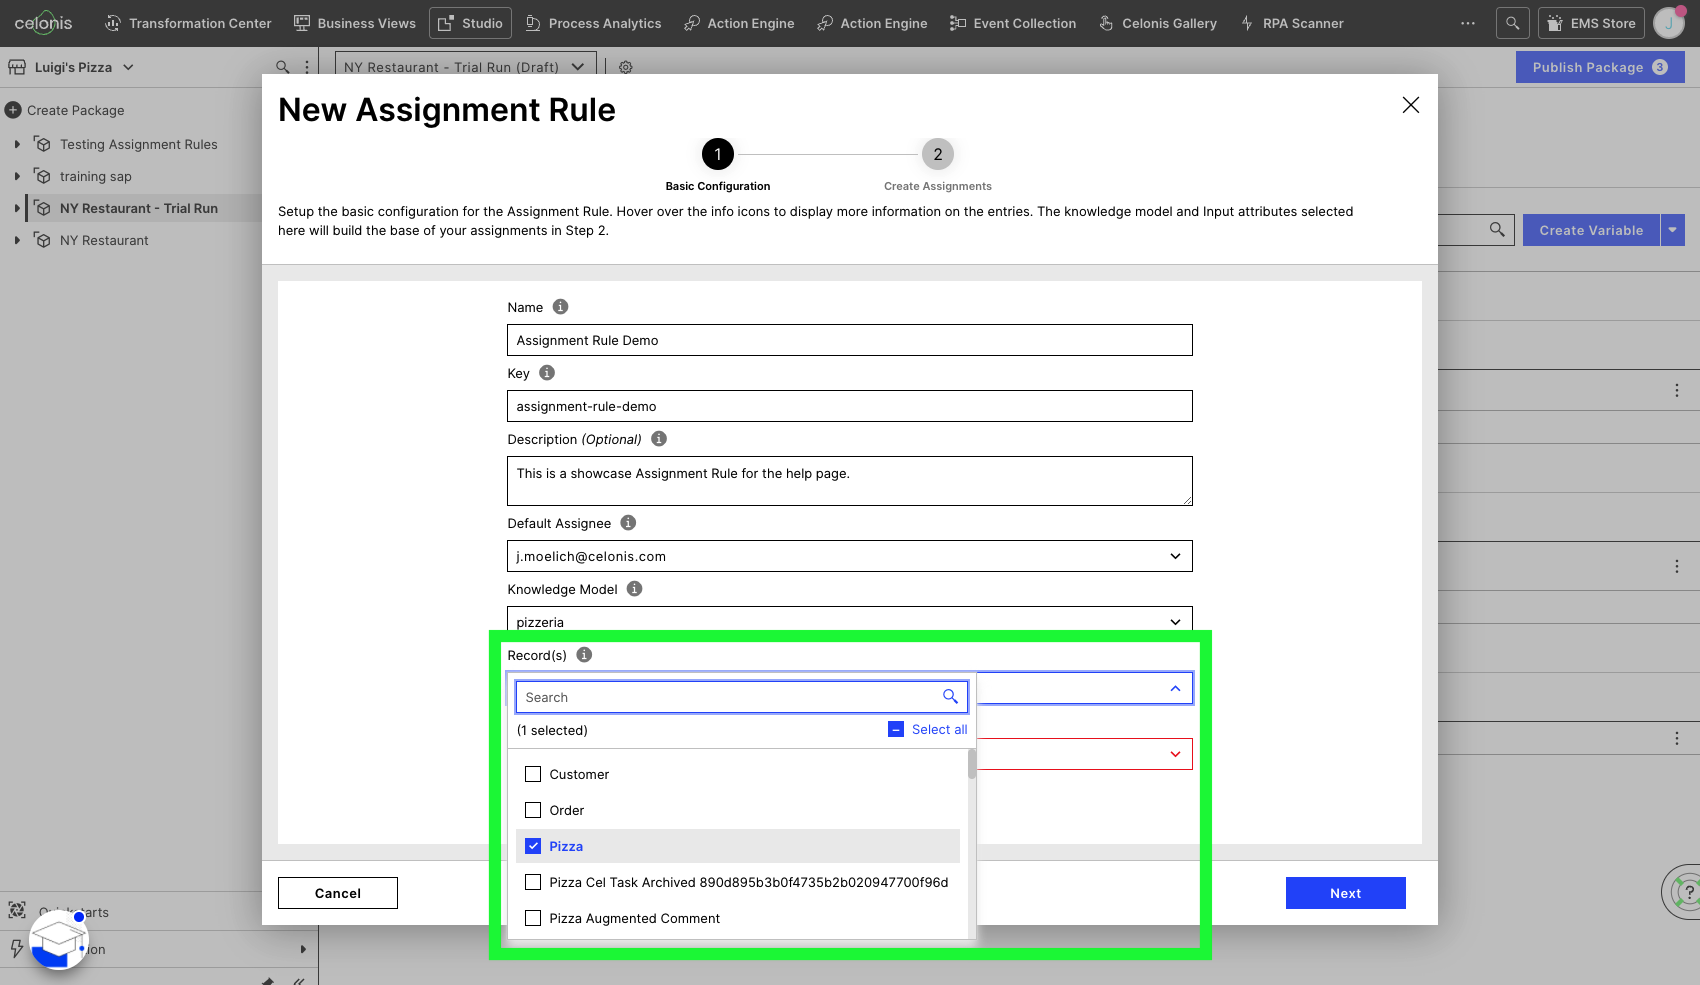
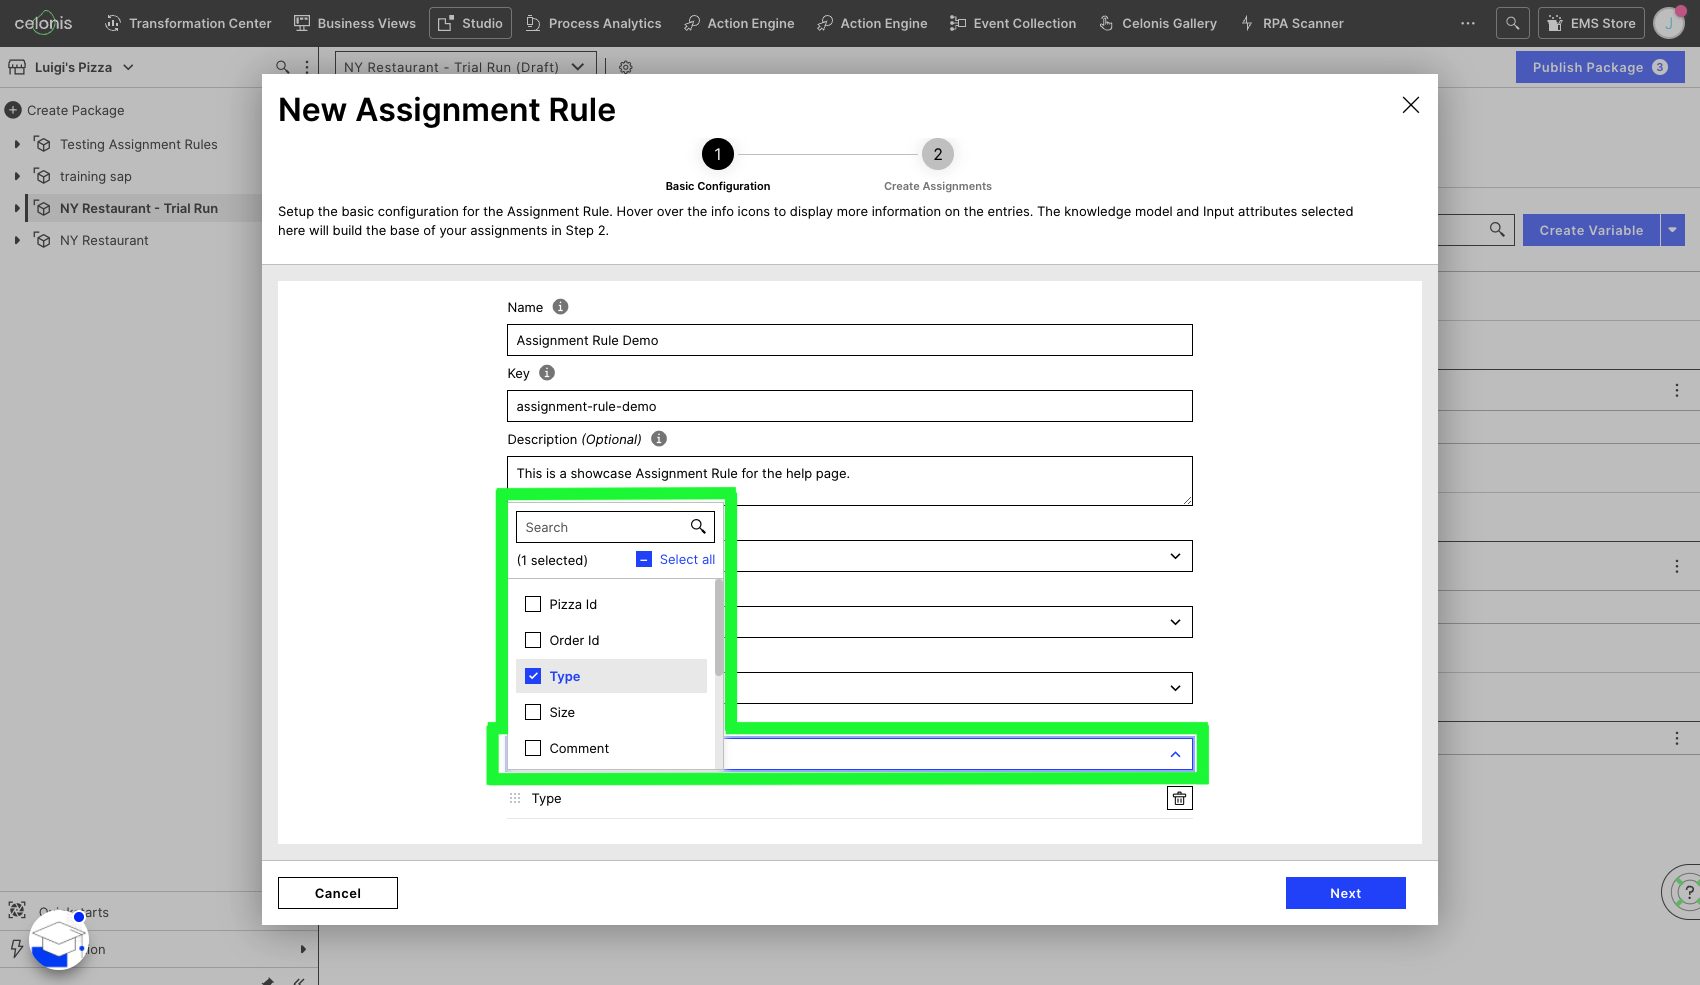
Select one or more Input Attributes you want to use for this Assignment Rule from the dropdown.
Once an input attribute is selected, the table on the right of the dropdown will appear. It displays all distinct combinations existing in your data for the selected input attributes.
Knowledge Model Records
A Record is the definition of a core item that Celonis tracks in its process mining analysis (e.g. invoice, sales order, purchase order, etc.). For more information on Records see Knowledge Model Records.
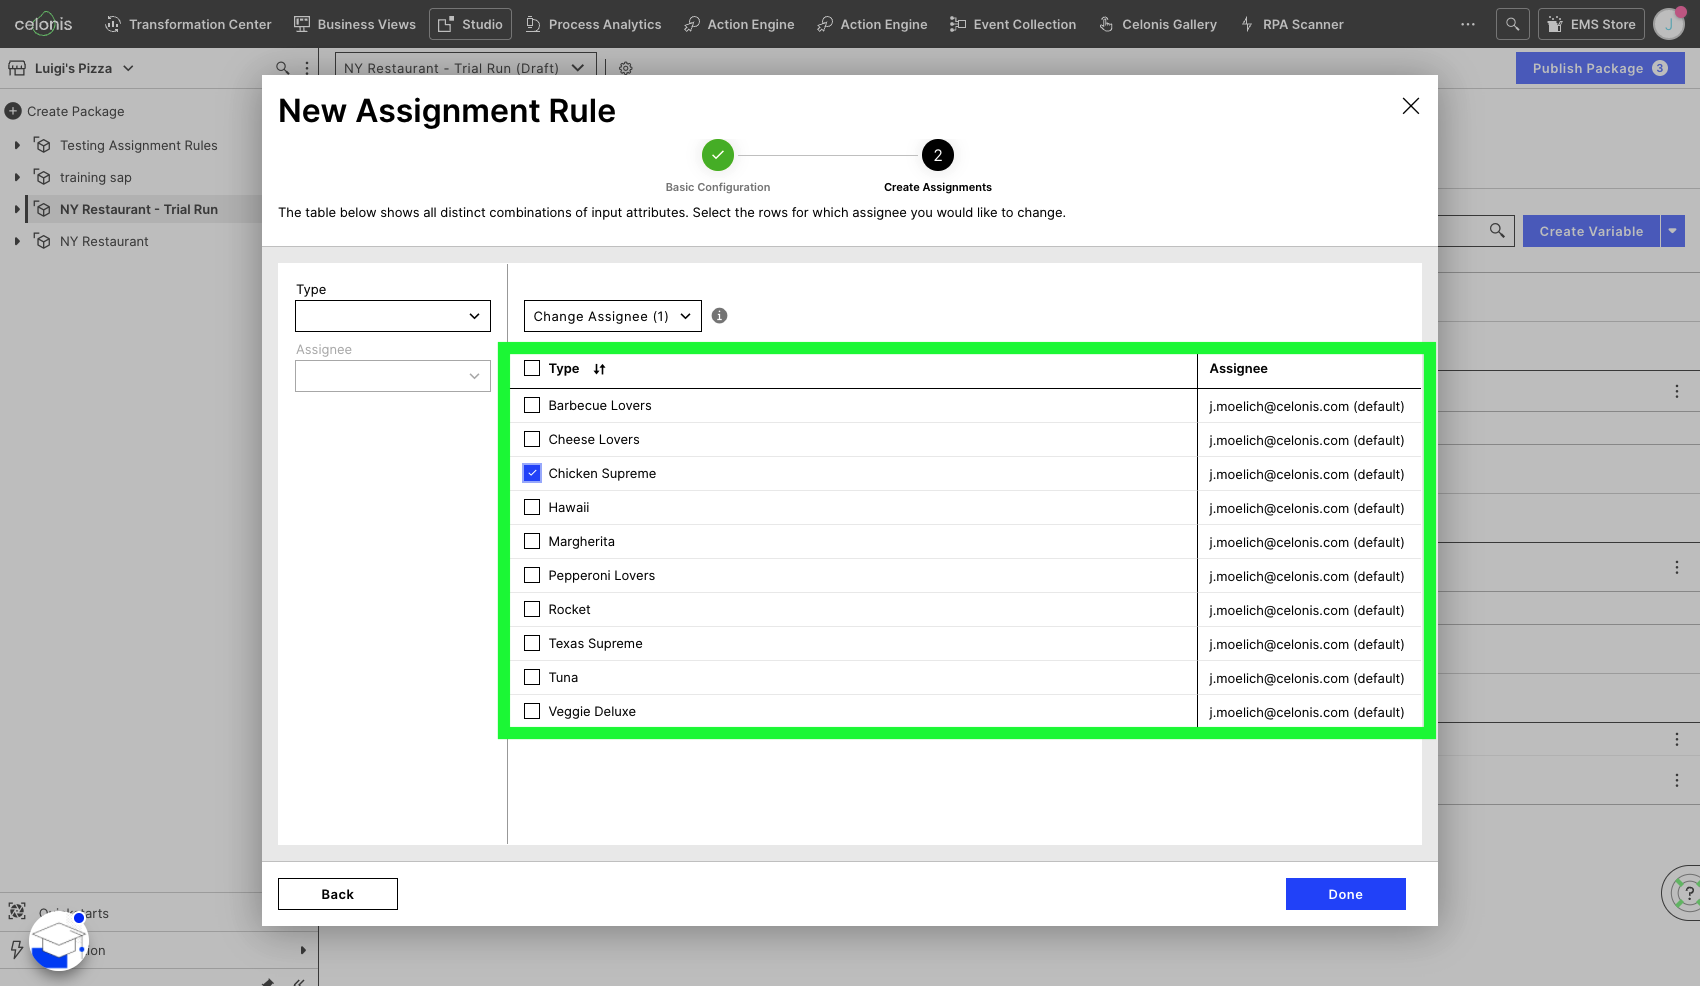
After completing all previous steps, you can create assignees for the individual (and distinct) Input Attributes.
On default, the Assignee column in this table will always display our previously created default assignee (see step 2).
Above the table, you will find a dropdown menu for each of your input attributes. You can use these to filter for specific combinations you wish to assign.
 |
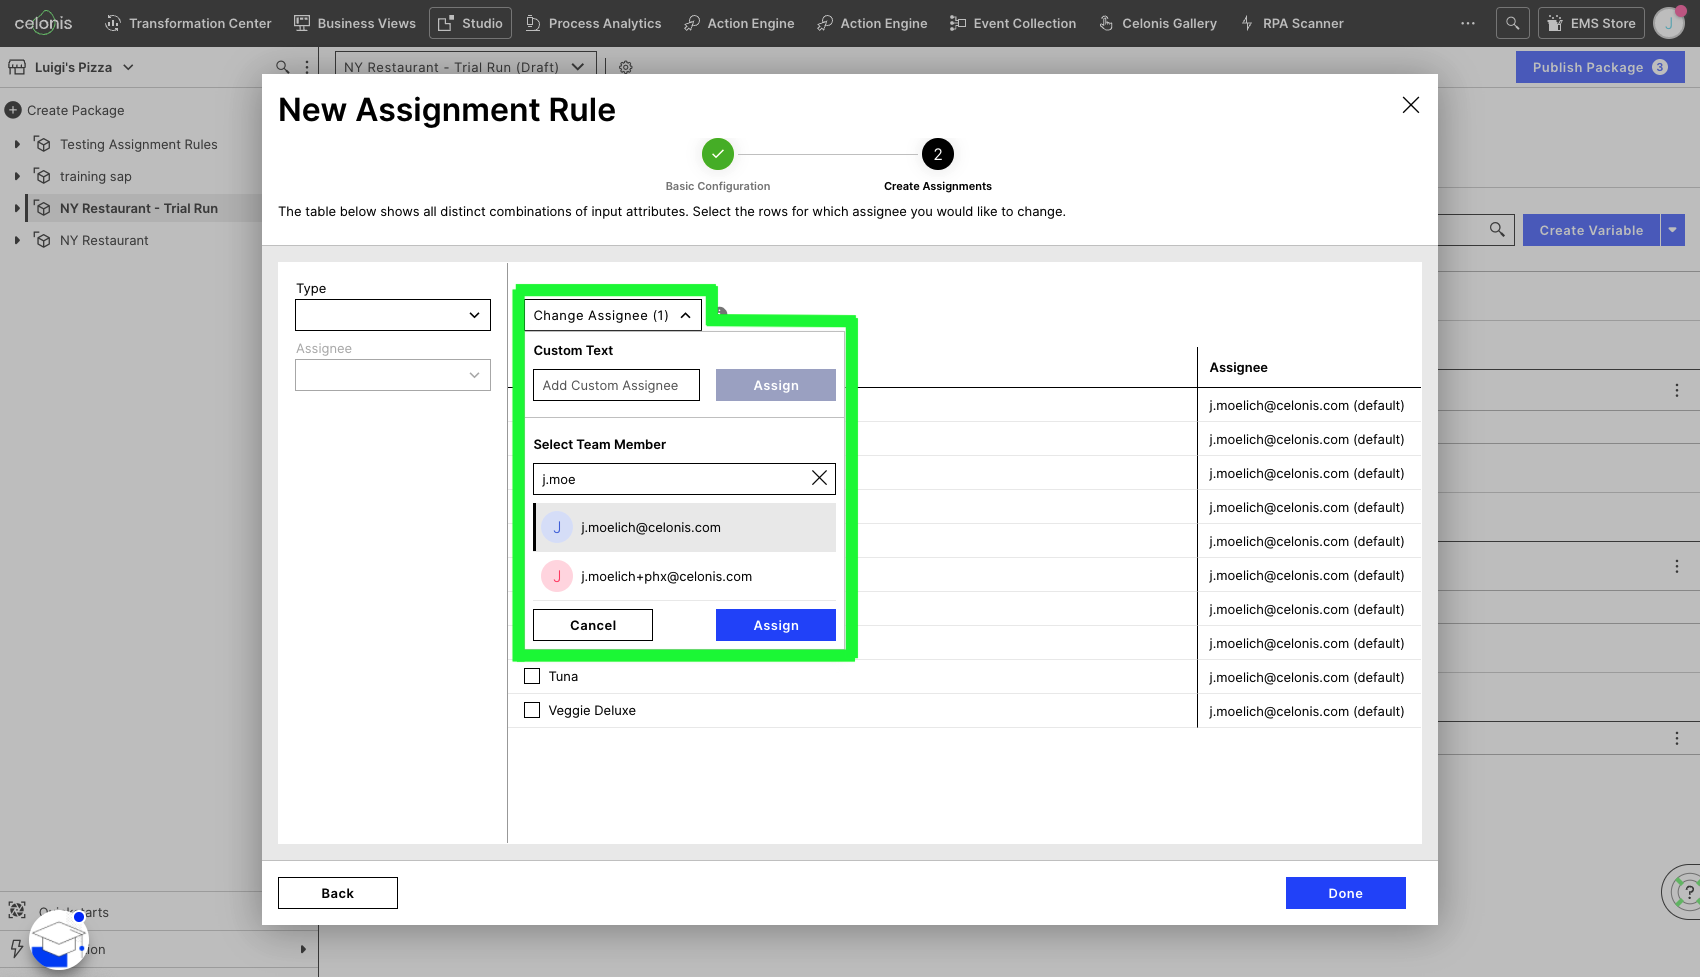
After filtering the input attributes to your desire, you can select one or multiple rows using the checkbox on the very left of each row.
Once one or more rows are selected, the Change Assignee button becomes available.
To create an assignment for the selected instances, click Change Assignee. This will present you with the option to either use a free-text custom assignee (e.g. email) or assign it to an existing user.
Click Save once you are happy with your assignments!
 |
Note
By default, an Assignment Rule will be used on zero Skills. To start using your newly-created Assignment Rule, see Applying Assignment Rules in Skills.