Microsoft Dynamics 365 (Action Flow)
Important
Any references to third-party products or services do not constitute Celonis Product Documentation nor do they create any contractual obligations. This material is for informational purposes only and is subject to change without notice.
Celonis does not warrant the availability, accuracy, reliability, completeness, or usefulness of any information regarding the subject of third-party services or systems.
The Microsoft Dynamics 365 modules enable you to monitor events and create, update, search, retrieve, or delete vendor invoices and vendor invoice items in your Microsoft Dynamics 365 account.
To start working with the Microsoft Dynamics 365 module, make sure you have the following:
A Microsoft account — you can create one at account.microsoft.com/account
Azure Active Directory account — you can create one at azure.microsoft.com/en-us/free
Azure Active Directory Tenant – see How to get an Azure Active Directory Tenant
A Microsoft Dynamics 365 F&O apps subscription – see MS Dynamics 365 pricing
A Microsoft Dynamics 365 CRM apps subscription. See Microsoft Dynamics 365 pricing.
To connect your Microsoft Dynamics 365 app, you must obtain the client credentials and Tenant ID from the MS Azure Portal and insert them into Create a connection dialog with your Host URL.
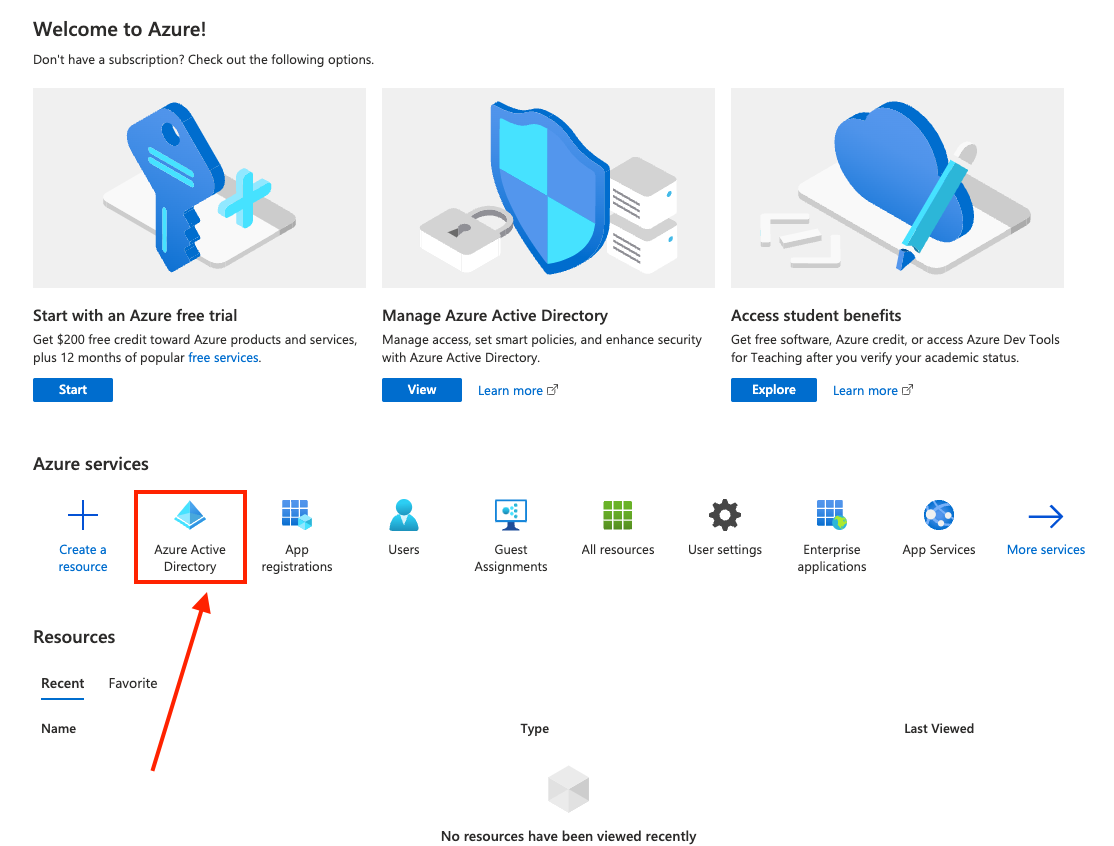
Log in to MS Azure Portal.
Navigate to the Azure Active Directory service (
 ).
).
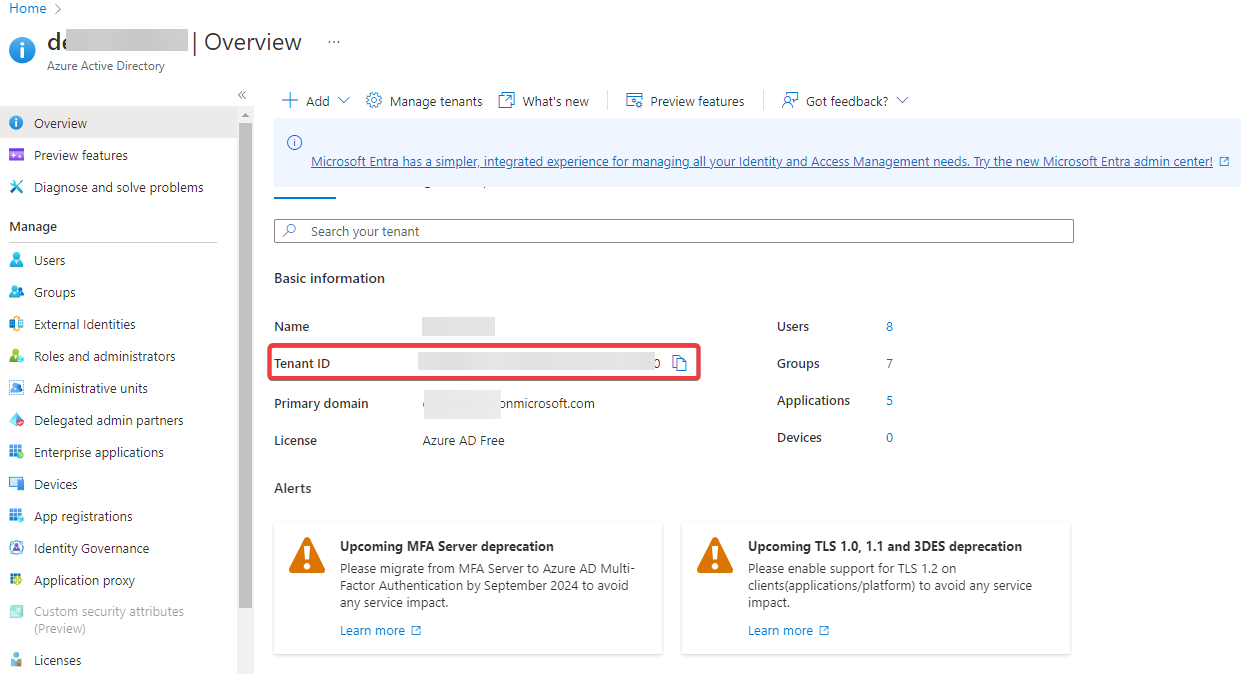
Copy the Tenant ID to a safe place.
Click Applications > New Registration and enter the following details and click Register.
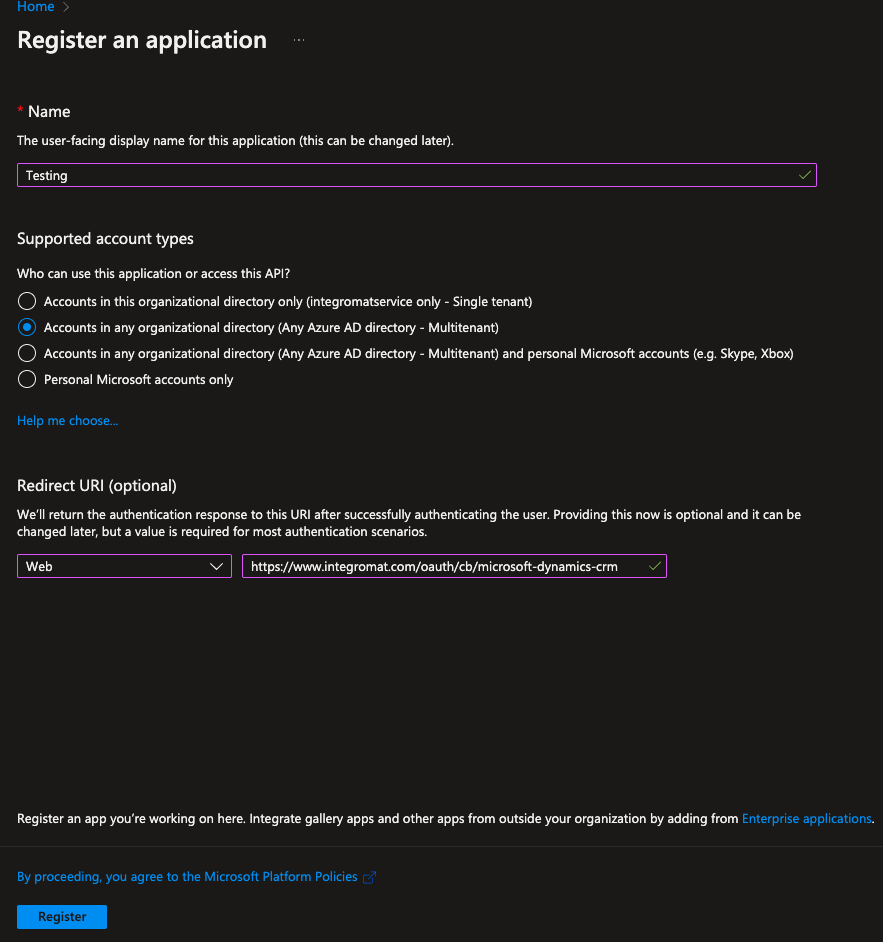
Name
Enter a name for the app.
Supported account types
Select the account type based on your preferences. If you are selecting the multitenant option,Accounts in any organizational directory (<your service> - Single tenant) , then the user establishing the connection will have to:
use the Tenant ID during the connection creation
be in the same Tenant ID
Redirect URI (Optional)
Select the following options:
Platform: Web
Redirect URI:
https://www.integromat.com/oauth/cb/microsoft-dynamics-365-crm
The Client ID and Tenant ID details appear on the app screen. To add a client secret, click Add a certificate or secret.
Note
The Tenant ID is mandatory for single-tenant apps and optional for multi-tenant apps.

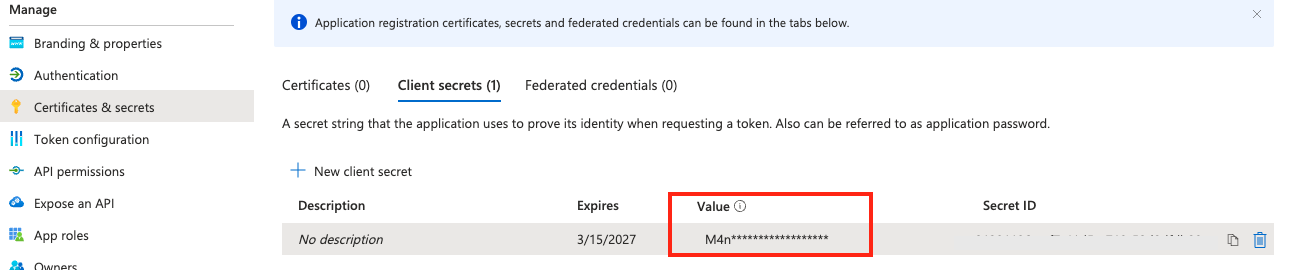
Click New client secret, enter a description, select the expiry period for the client secret, and click Add.
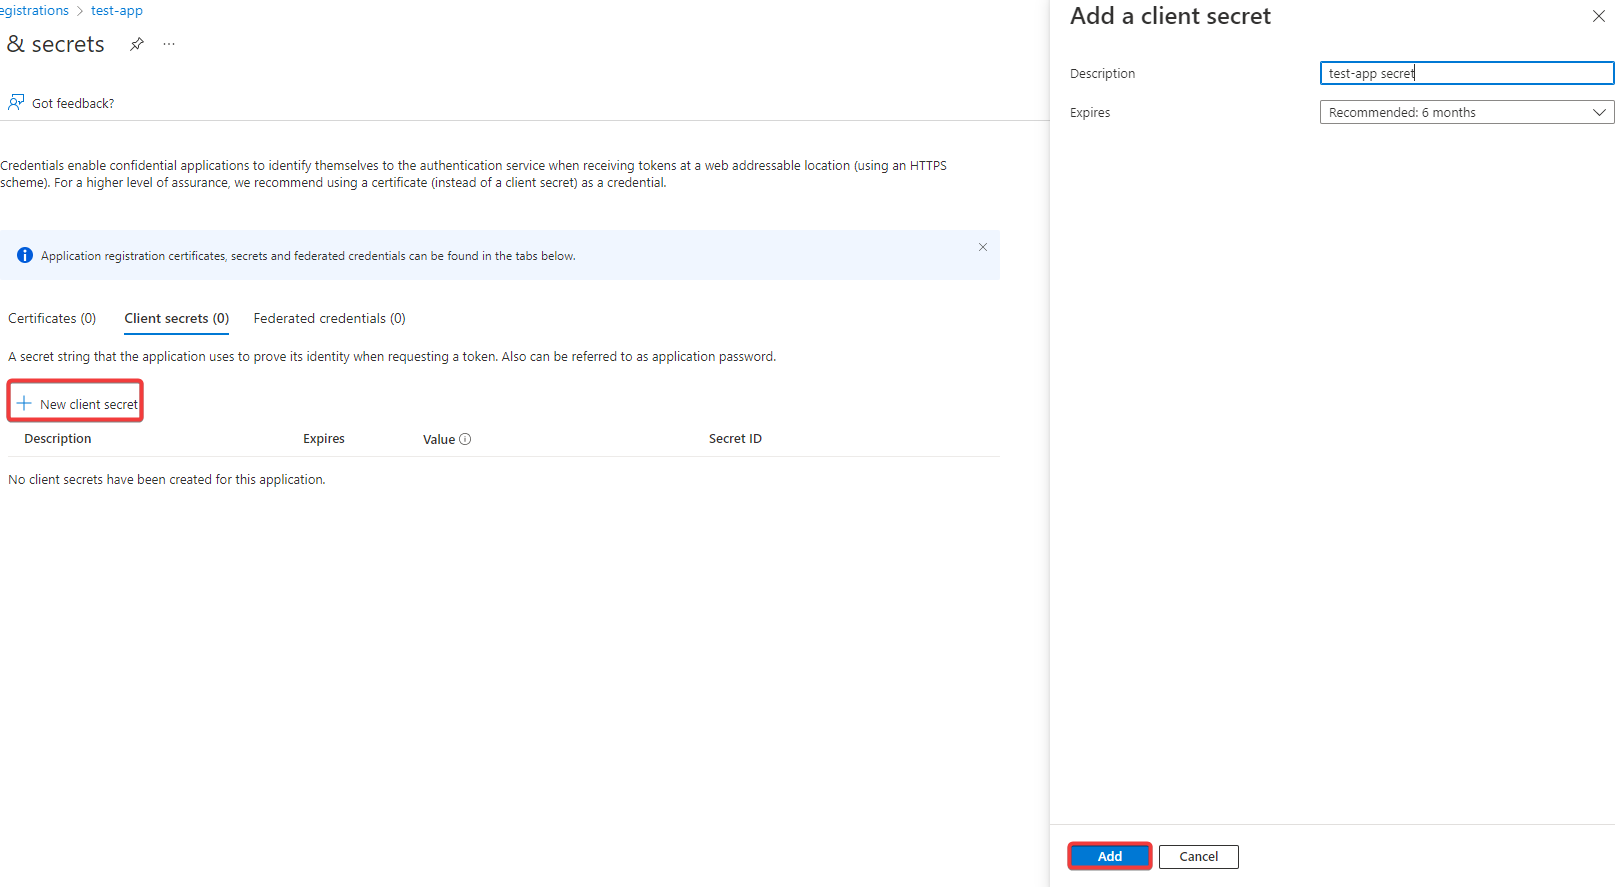
Copy the value to use as a Client Secret to a safe place.
Click API Permissions > Dynamics CRM , select permission, click Add Permission and click Grant Admin consent for.
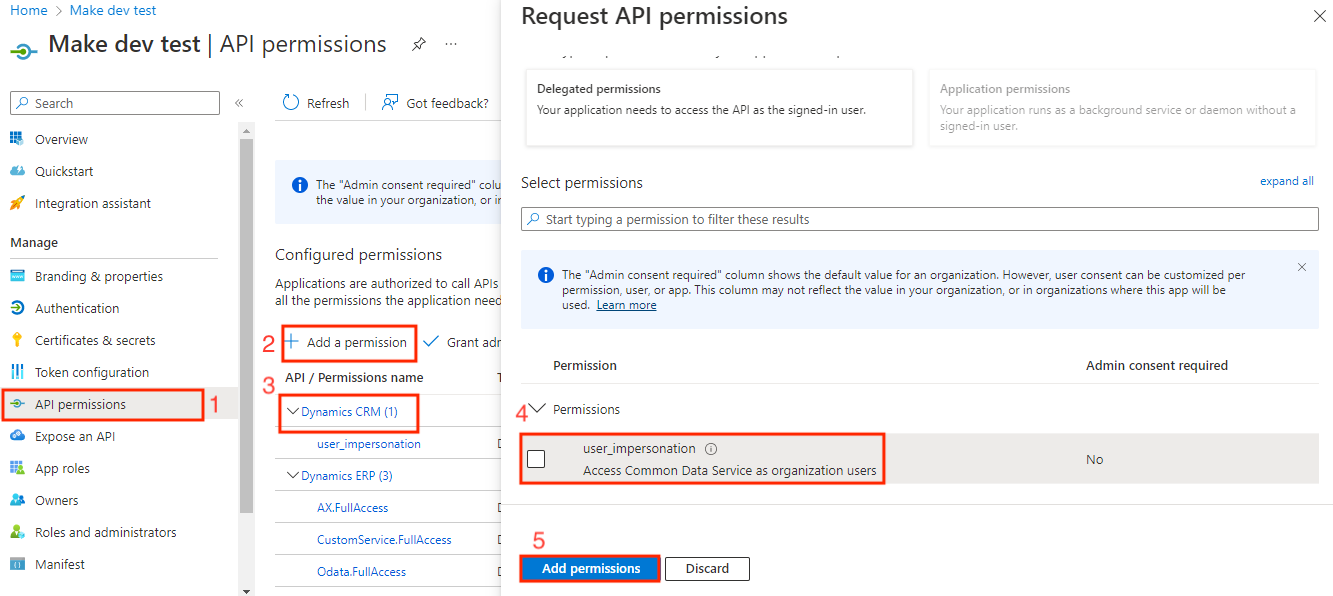
You now have all the permission to connect to the app.
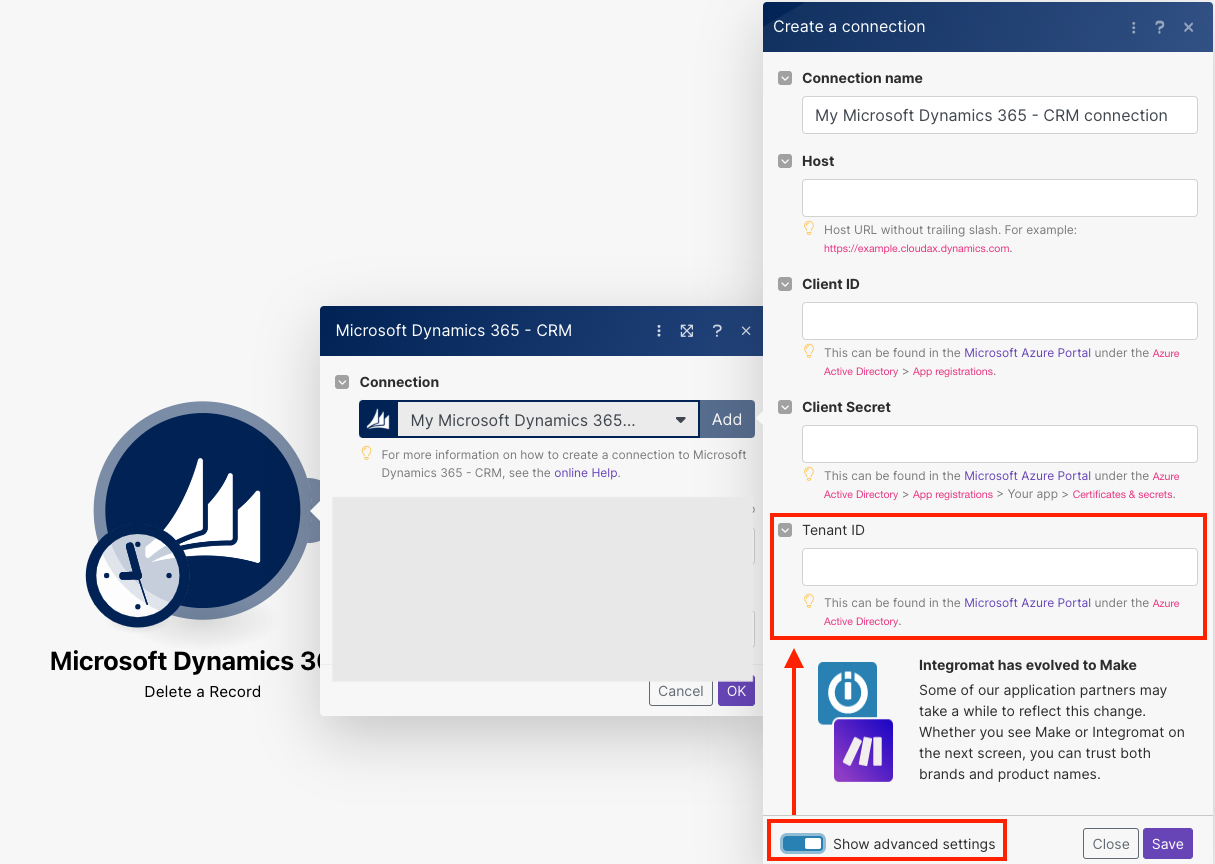
Log in to your Celonis platform account, add a Microsoft Dynamics 365 module Action Flow, and click the Add button next to the Connection field.
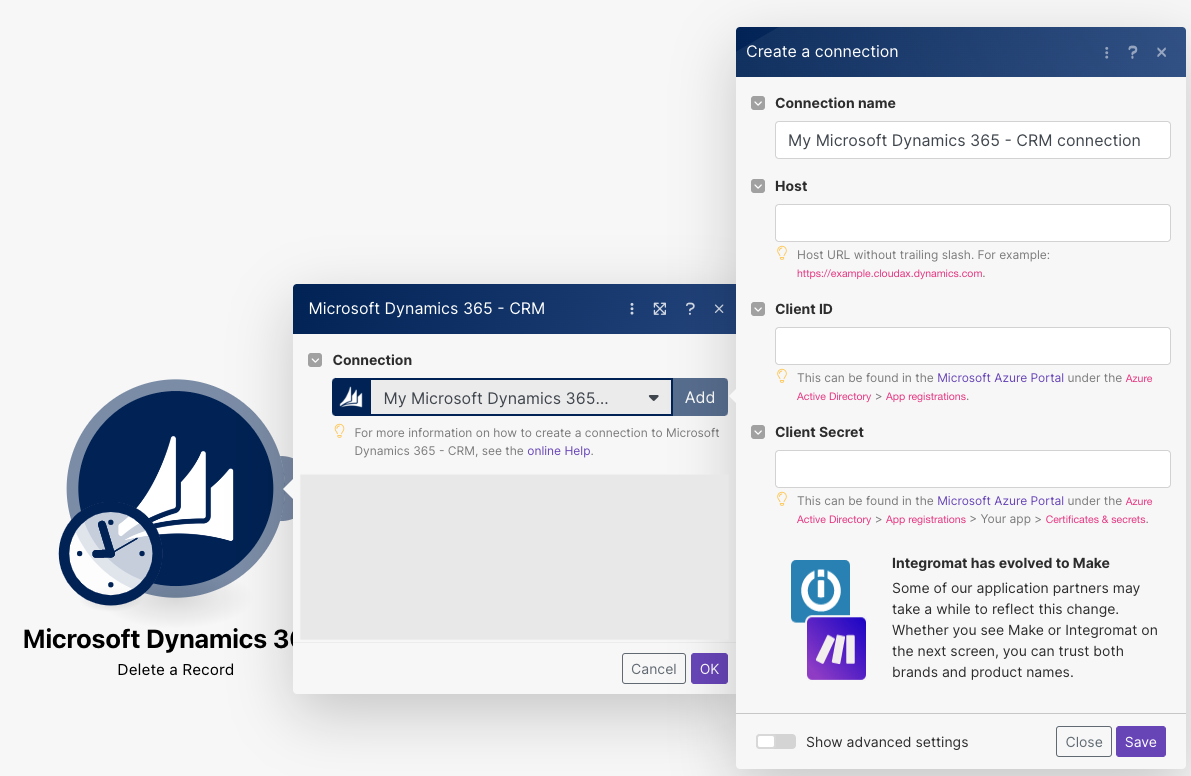
Enter the following details and click Save.
Connection name
Optional: Enter the name of your connection.
Host
Enter the Host URL without trailing slash " / " and including HTTPS,
https://<example>.cloudax.dynamics.com.Tenant ID
Optional: Click Show Advanced Settings and enter the Tenant ID you have copied in step 3.
Note
The Tenant ID is mandatory for single-tenant and optional for multi-tenant apps.
Client ID
Enter the Client ID copied in step 5.
Client Secret
Enter the secret value copied in step 7.
Confirm the dialog by clicking the Accept button.
You have successfully established the connection. You can now edit Action Flow, add more Microsoft Dynamics 365 modules, and reauthorize your connection if required.
Note
If the Status Code Error: 401 error displays, the Host URL could be inserted with the trailing slash (remove the slash at the end of the URL), or there can be another mistake in the Create a connection dialog field.
Using the following modules, you can search, create, update, list, retrieve, and delete vendor invoices and invoice items.
Retrieves vendor invoices by filter settings.
Connection | Establish a connection to your Microsoft Dynamics 365 account. |
Type of Filter | Select whether to use an in-built simple filter or a custom filter based on the Open Data query. |
Simple Filter | Select the name of the field (property) and the value you want to filter returned results by. You can build the filter query using the AND/OR operators. |
Custom Filter | Enter the OData query. For more details, please see the OData documentation. |
Order By | Set the sort order of the result by selecting the property and direction you want to sort the results by. |
Limit | Set the maximum number of vendor invoices Celonis platform will return during one execution cycle. |
Keyword Query Language
Use Keyword Query Language (KQL) search syntax to build your search queries in Microsoft modules. For more information, see Microsoft Graph help.
Creates a new vendor invoice.
It is necessary to create a vendor invoice in order to create a vendor invoice item.
Required fields:
Connection | Establish a connection to your Microsoft Dynamics 365 account. |
Data Area ID | Select the company or enter the ID of the company that created the invoice. |
Currency | Enter the currency code. Use the Search button to determine the exact currency code. |
Invoice Account | Select the invoice account that is associated with the vendor for the purchase order, if the invoice is associated with a purchase order. If the invoice is not associated with a purchase order, enter the vendor account for the invoice. |
Invoice Number | Enter the desired invoice number. |
Retrieves post details.
Connection | Establish a connection to your Microsoft Dynamics 365 account. |
Data Area ID | Enter (map) the ID of the company that created the invoice you want to retrieve details for. |
Invoice Header Reference | Enter the header reference of the invoice you want to retrieve details for. |
Updates an existing vendor invoice.
Connection | Establish a connection to your Microsoft Dynamics 365 account. |
Data Area ID | Enter (map) the ID of the company that created the invoice you want to update. |
Invoice Header Reference | Enter the header reference of the invoice you want to update. |
Please find the descriptions of the fields in the Create a vendor invoice module description.
Deletes an existing vendor invoice.
Connection | Establish a connection to your Microsoft Dynamics 365 account. |
Data Area ID | Enter (map) the ID of the company that created the invoice you want to delete. |
Invoice Header Reference | Enter the header reference of the invoice you want to delete. |
Retrieves items for a specified vendor invoice.
Connection | Establish a connection to your Microsoft Dynamics 365 account. |
Invoice Header Reference | Enter the header reference of the invoice you want to list items for. |
Limit | Set the maximum limit of vendor invoice items Celonis platform will return during one execution cycle. |
Creates a vendor invoice item and attaches it to the specified vendor invoice.
Connection | Establish a connection to your Microsoft Dynamics 365 account. |
Invoice Header Reference | Enter the header reference of the vendor invoice that you want to attach the vendor invoice item to. |
Item Number | Enter the item number. Ideally, the item number should be identical to the product number. |
Procurement Category | Enter the name of the procurement category. |
Updates a vendor invoice item.
Connection | Establish a connection to your Microsoft Dynamics 365 account. |
Data Area ID | Enter (map) the ID of the company that created the invoice you want to update. |
Invoice Header Reference | Enter the header reference of the vendor invoice that contains the vendor invoice item you want to update. |
Invoice Item Line Number | Enter (map) the number of the invoice item line which you want to update. |
Deletes a vendor invoice item.
Connection | Establish a connection to your Microsoft Dynamics 365 account. |
Data Area ID | Enter (map) the ID of the company that created the invoice containing the item you want to delete. |
Invoice Header Reference | Enter the header reference of the invoice item you want to delete. |
Invoice Item Line Number | Enter (map) the number of the invoice item line which you want to delete. |
Watch Events
Triggers when a predefined business event occurs.
The webhook URL needs to be generated in Celonis platform and then added to MS D365's integration settings. To set up receiving webhook from MS Dynamics 365, you need to follow these five main steps:
1. Add the Watch Events module to your Celonis platform scenario.
2. Generate and copy the webhook URL.
1. Log in to MS Azure Portal.
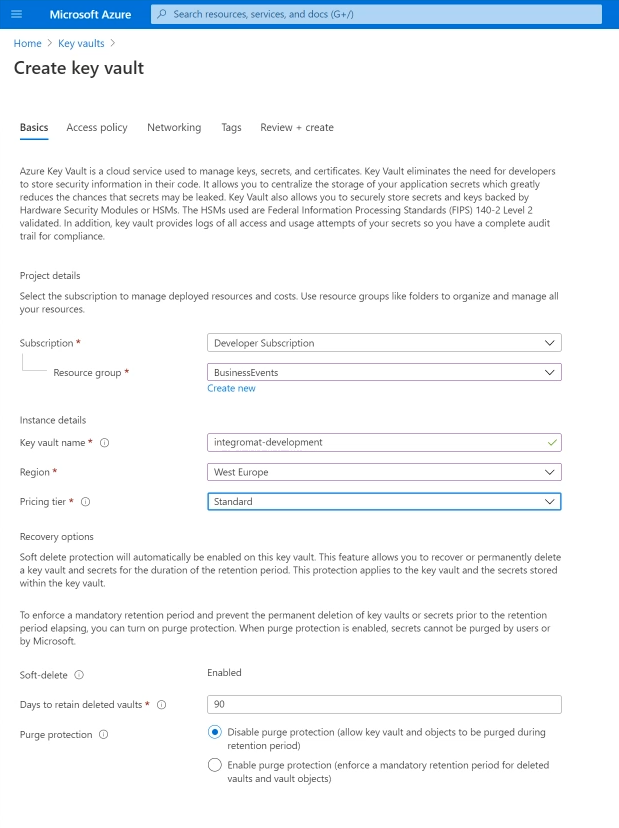
2. Navigate to Key vaults and click the Create key vault button.
3. On the Basics tab, select the BusinessEvents in the Resource group field, fill all required fields and click the Next: Access policy button ( ).
).
On the Access policy tab click the +Add Access Policy link.
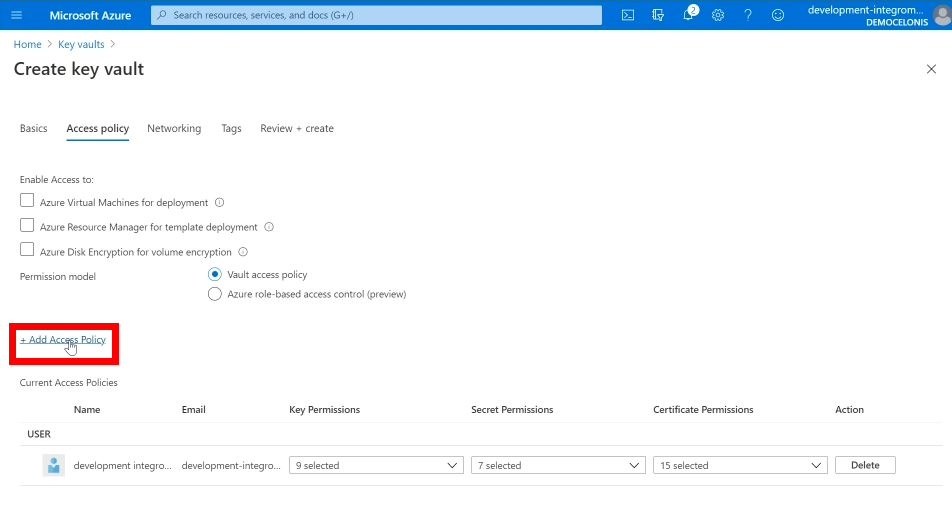
In the Add access policy dialog, set the access policy as follows and the configuration by clicking Add button:
Configure from the template (optional) | Select the Key, Secret & Certificate Management option. |
Key permissions | Select all permissions and uncheck the Decrypt option. |
Secret permissions | Select all permissions. |
Certificate permissions | Select all permissions. |
Select principal | Select the application you have created before. |
Proceed to the Review + create tab and click Create.
1. Once the Key Vault is created, navigate to Key Vault resource > Secrets, click +Generate/Import.
2. Fill the following fields:
Upload option | Manual. |
Name | Enter the desired name for the webhook. |
Value | Enter the webhook URL you have generated in the Generating a Webhook URL section. |

Creating an HTTPS Endpoint
1. Log in to your Dynamics 365 Finance and Operation environment.
2. Navigate to System administration > Business events > Business events catalog.
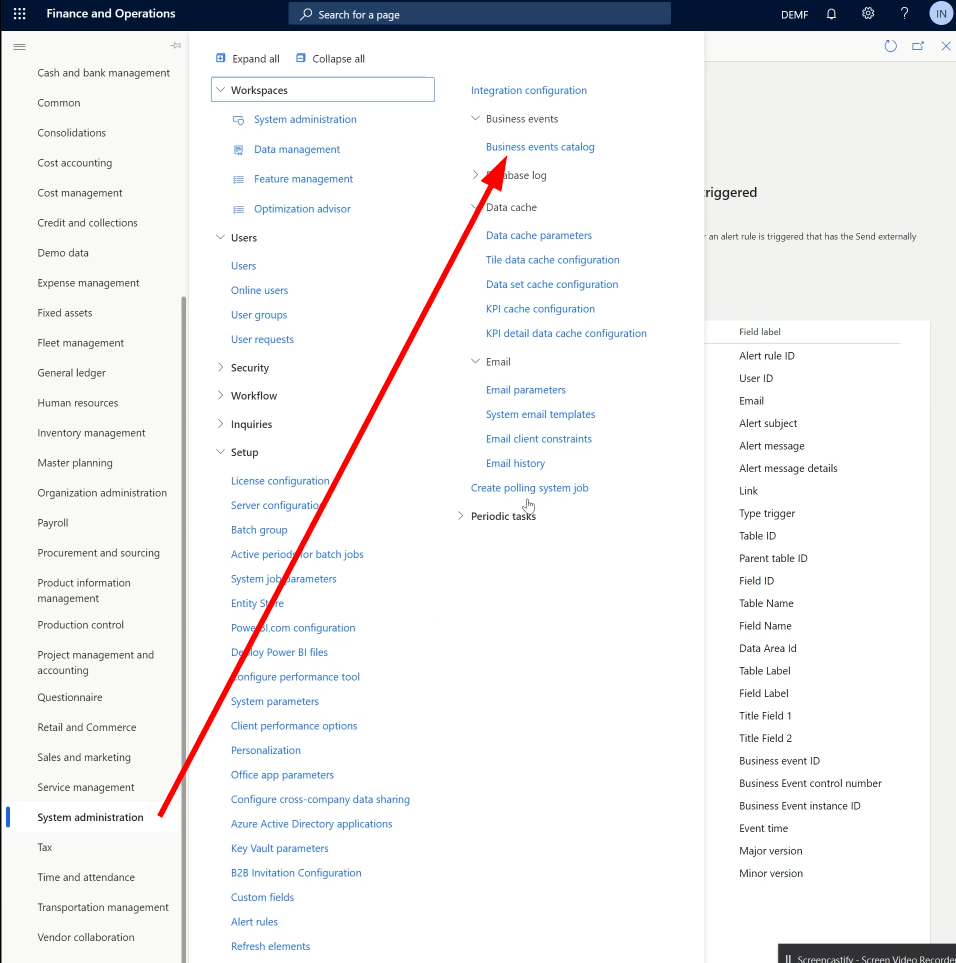
3. Open the Endpoints tab and click +New.
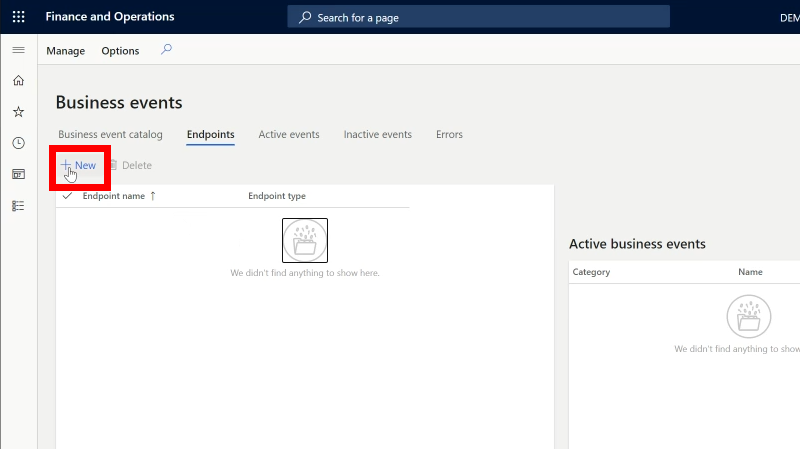
Select the HTTPS endpoint type and click Next.
Configure the new endpoint as follows:
Endpoint name | Enter the name of the endpoint. |
Endpoint type | HTTPS |
Azure Active Directory application ID | Enter the application ID that is created in the Azure Active Directory in the Azure portal.  |
Azure application secret | Enter the secret value for the application. Create a new client secret under Certificates & secrets.  |
Key vault DNS name | Enter the name from your Key Vault setup. You can find it in the Overview of the Key Vault you have created under the Vault URI field.  |
Key vault secret name | Enter the secret name for the endpoint resource you have created in Key Vault. 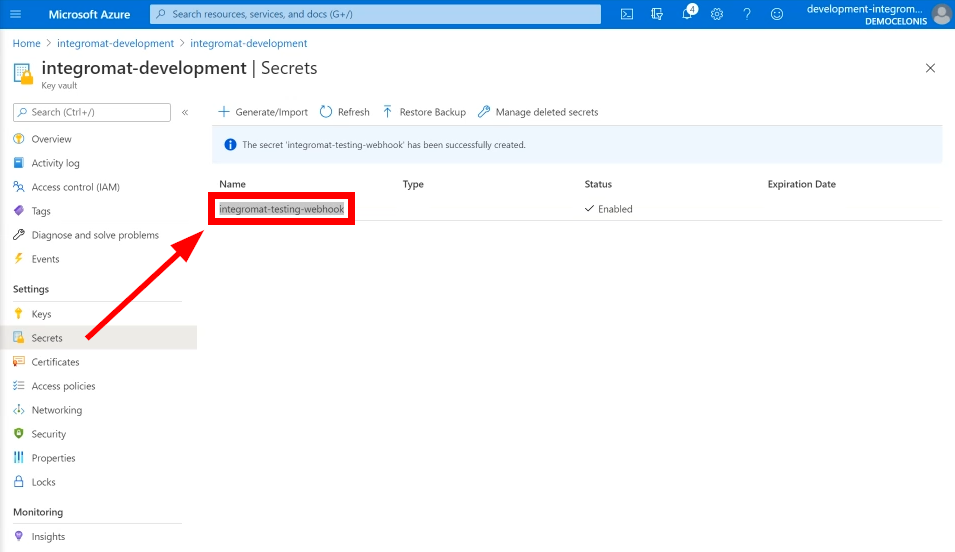 |
Business events in the business event catalog are not active by default. From the catalog, you can activate any business event that you want to trigger your Celonis platform Watch Events module.
1. Select the business event on the Business event catalog tab.
2. Click +Activate.
3. In the Configure new business event dialog, select the legal entity and the endpoint you have created and click OK to save the configuration.
4. Make sure that you see the event on the Active events tab.
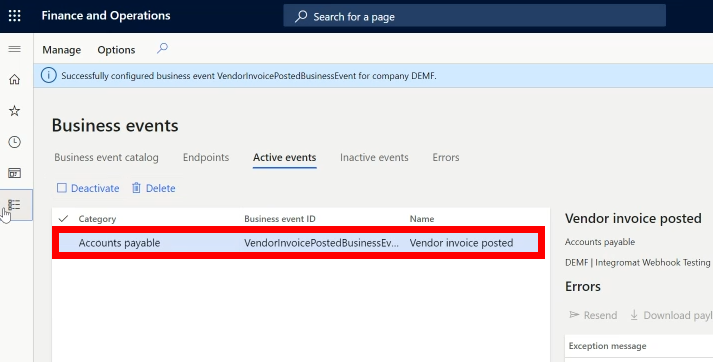
Now, every time the vendor invoice is posted, the Watch Events module in your Celonis platform scenario is triggered.
Make an API Call
Allows you to perform a custom API call.
Connection | Establish a connection to your Discourse account. |
URL | Enter a path relative to your host URL. For example: For the list of available endpoints, refer to the list of entities at |
Method | Select the HTTP method you want to use: GET to retrieve information for an entry. POST to create a new entry. PUT to update/replace an existing entry. PATCH to make a partial entry update. DELETE to delete an entry. |
Headers | Enter the desired request headers. You don't have to add authorization headers; we added those for you. |
Query String | Enter the request query string. |
Body | Enter the body content for your API call. |
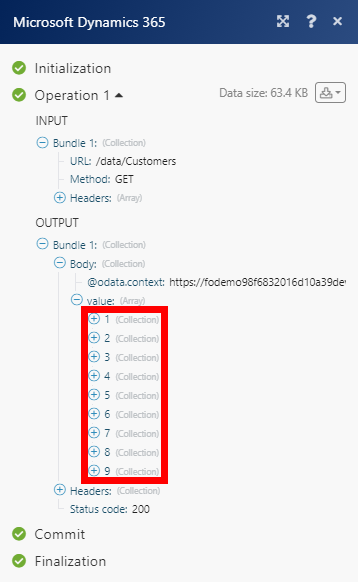
Example of Use - List Customers
The following API call returns all customers in your MS Dynamics 365 account:
URL :
/data/Customers
Method:
GET
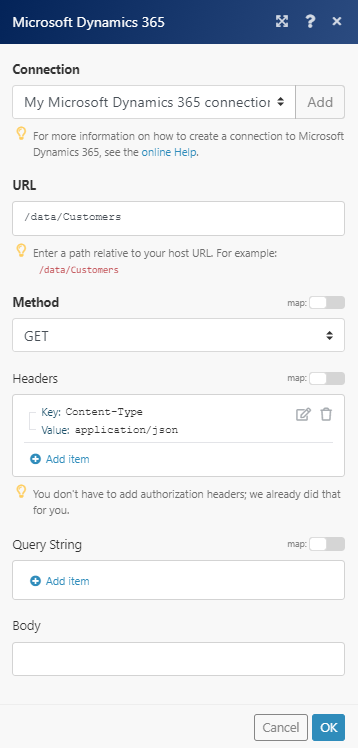
The result can be found in the module's Output under Bundle > Body > value.
In our example, 9 customers were returned: