Paid Early Report
Every month there are invoices that are paid early, potentially due to issues such as the missing prioritization of invoices. These early payments can then result in a loss of cash in hand, negatively impacting KPIs and reducing working capital.
To prevent this, the Paid Early Report action flow highlights early payments to defined users, as well as sending them aggregated data. This data includes total number of invoices or total value of early payments.
Note
This Action Flow (AF) can exist as a standalone asset or as a complement to your Analytical App.
Paid Early Report overview
Prerequisite: Standard AP Data Model
The process diagram for the Paid Early Report is as follows:
 |
This action flow performs the following actions:
Sets initial variables
Loops
Maps each iteration to a defined set of Company Codes
Queries data model for invoice details
Aggregates data into an array
Orders by invoice value
Slices top 5 rows
Iterates over each element
Formats the rows
Queries data model for aggregate measures (number of invoices or total invoices values)
Router - Passes info regarding company code 1000
Route - Passes info regarding company code 2000
Email - Sends email to recipient X
Email - Sends email to recipient Y
Configuring Paid Easly Report modules
1. Set Initial Variables
You can define the running variables for your process, allowing you to define the time frame, currency, early payment buffers, and any application links you want to refer to in the final email.
To define the running variables, click the Clock icon on the Action Flow Editor:
 |
Timeframe: Enter your time period of interest, e.g. MONTH or CALENDAR_WEEK
Currency: Enter the currency for the calculations, e.g. EUR or USD
Early Payment Buffer: Enter the buffer (in days) for what is considered an Early Payment, e.g. 5
App Link: Enter the link to your App that is going to be referred to in the body of the email, e.g.https://ap-operational-app-template.eu-3.celonis.cloud/package-manager/ui/studio/ui/assets/63ee65dc-ecb4-4ed3-8327-4e603197c7a0
2. Map Loop and Company Codes
In this module you can define the sets that will be used for aggregating your Invoices or KPIs.
To configure the map loop and company codes, click the icon on the Action Flow Editor.
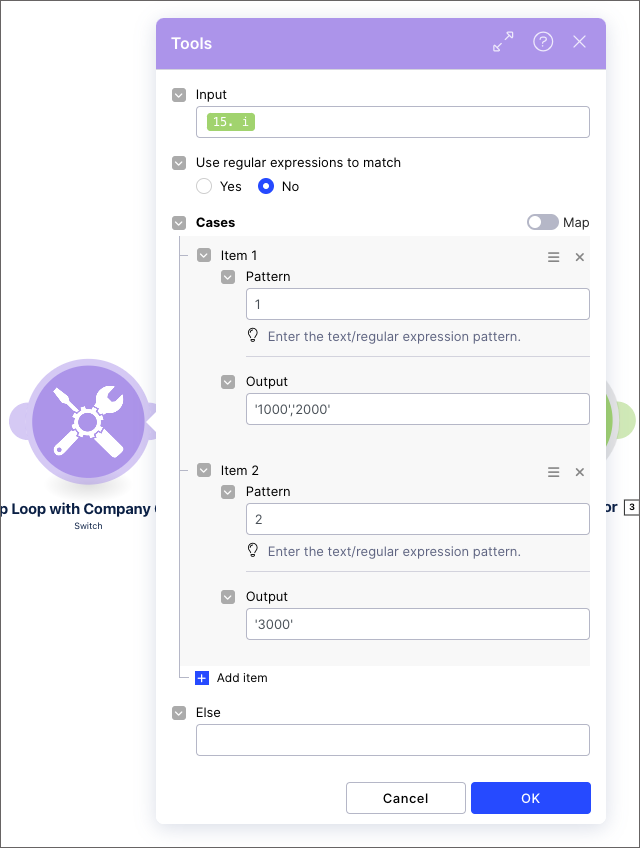 |
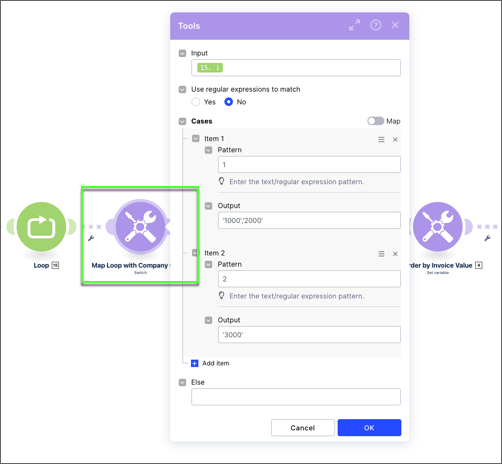
In the image, you can see two different outputs. In the first iteration, this module will output ‘1000’,’2000’. This output means the KPIs will be calculated for invoices belonging to these Company Codes.
In the second iteration, they will be calculated for invoices belonging to Company Code ‘3000’.
You can add as many rules as you want, including having Outputs with more than one Company Code (e.g. if your country is composed of Company Codes A and B, you can add a rule like “Pattern = 3, Output = ‘A’,’B’ “ .) You will also need to increase the maximum number of iterations in module 2.Loop for each new rule you add.
3. Query Invoice Details
To get the Invoice details, you have to set up the Get Rows module.
Note
You don't have to change any fields or filters.
4. Router
In this module, you can set up the filters that will be applied when displaying the data in the email.
To configure your router, click the connections on the Action Flow Editor.
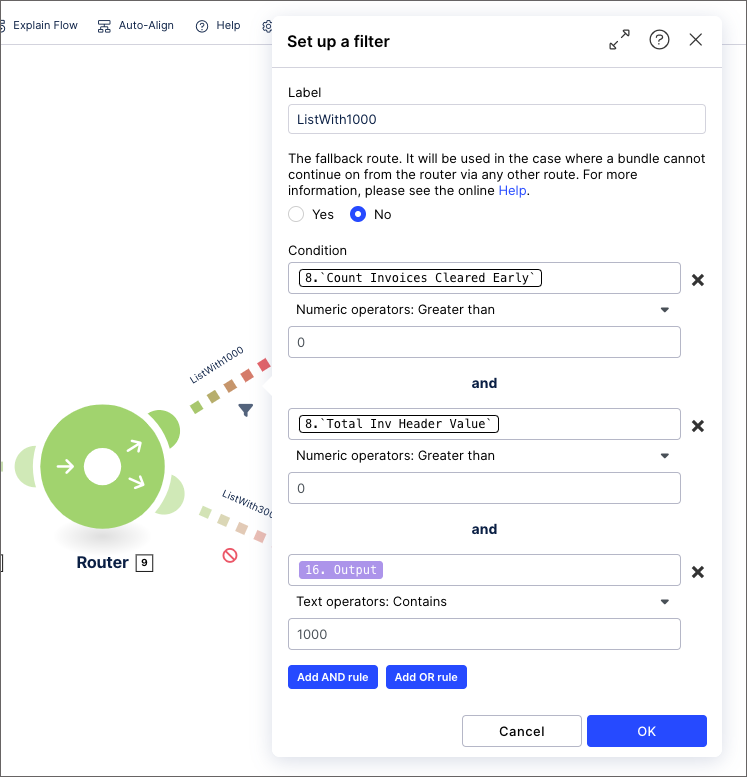 |
In our example, we will be passing information regarding the iteration that contained Company Code 1000 (and ‘2000’ since the list also contained a second Company Code) for the next module of the AF.
You can add as many routing paths as you would like. In the case you want the same recipient to receive the information about two different lists of Company Codes (defined in module3.Map Loop and Company Codes) you will need to set up 2 routes, one for each list.
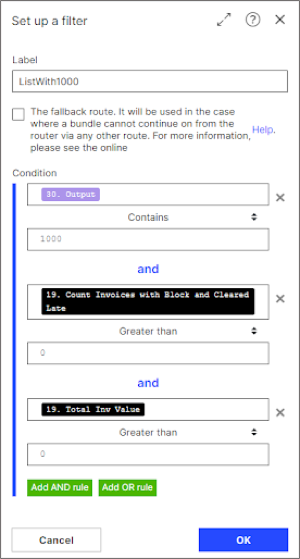 |
You need to set your desired Company Code value in the first condition, e.g.
Condition 1: “30.Output contains 1000”
Conditions 2 and 3 do not require changes.
5. Email
In this module, you need to configure the email connection and to define the recipient(s) of the email.
To configure your email settings, click the Email icon on the Action Flow Editor:
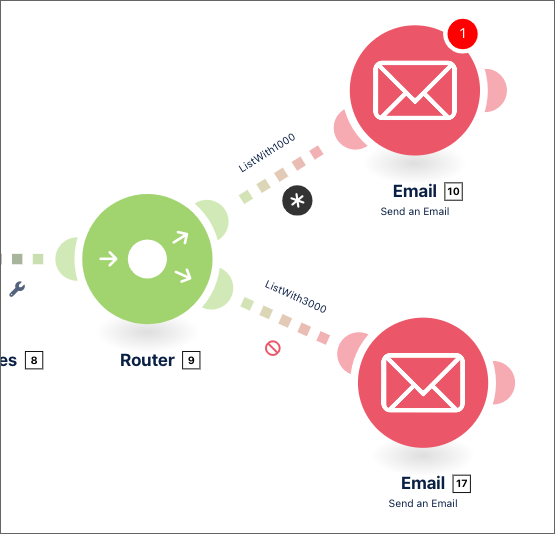 |
Change the following settings:
Connection: Connect to your mail account and grant Celonis permission to read and write emails.
To: Define the recipient you want to send the emails to, e.g. johndoe@domain.com
Downloading Action Flow blueprints
To download blueprints for Action Flows, go to Marketplace. In the Marketplace page for your Action Flow, click the Download button to get the blueprint.
Blueprints can be imported into your Celonis Platform Team so that you can quickly make the required changes without needing to build the Action Flow from scratch.
Potential Alternatives
Alternative 1:
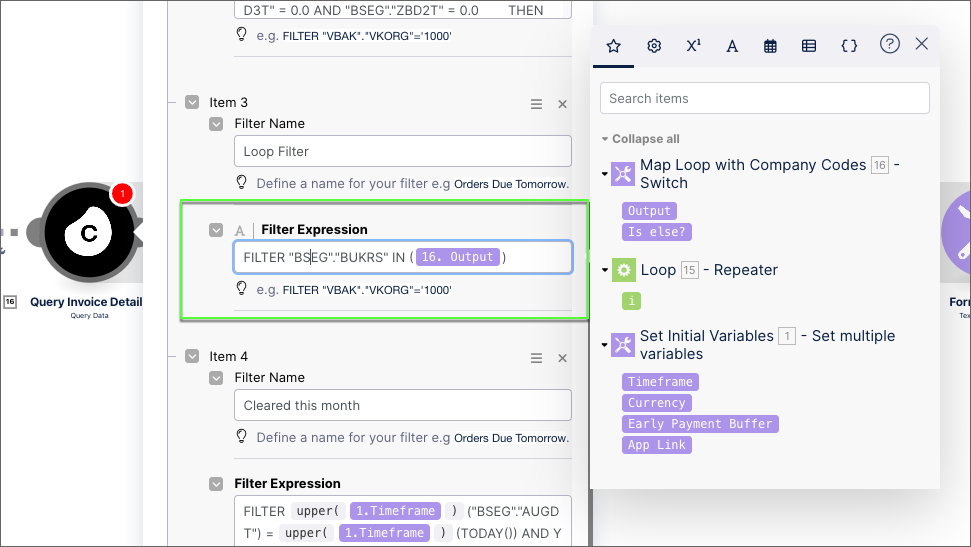
You can change the filters in the queries to use a different field, instead of the current one “BSEG”.”BUKRS”. For this you need to:
1) Change the rules in theMap Loop into Company Codesmodule.
 |
2) Change the filter inside all the Celonis Query Data modules.
 |
Alternative 2:
You can add more routes in the following way:
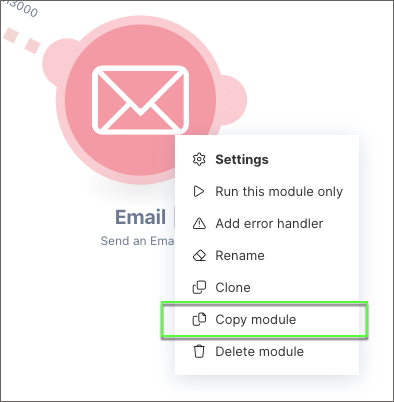
Right-click the email module on the Action Flow editor.
Select Copy Module.
Paste the copied module onto the Action Flow editor.
Link to new email module to the Router.
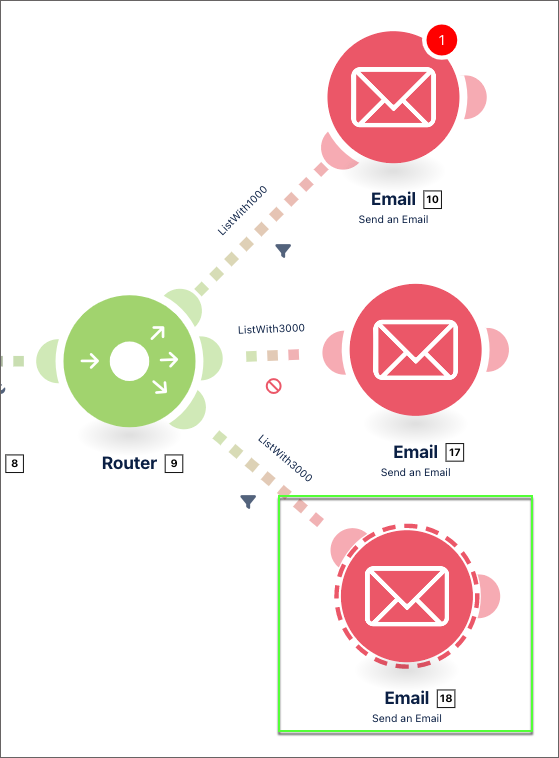
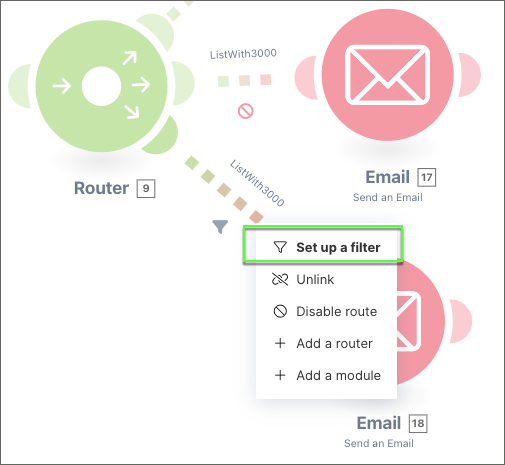
Right-click the connector between the route and the email flow and select Set up a Filter.
Enter your filter details as required.