Configuring tasks and actions for the object-centric Inventory Management Planning Parameter Optimization app
The Inventory Management Planning Parameter Optimization app manages tasks and actions using Studio’s Task Management function, which you access by clicking the list icon in the top navigation of any Studio page. You can customize the supplied tasks and actions as you want, remove them, or add your own custom actions. The tasks are activated by triggers in the app’s Knowledge Model, and you can edit the triggers to change what they monitor and what objects they apply for.
The Inventory Management Planning Parameter Optimization app comes with these tasks:
Update purchase lead times
Update production lead times
The triggers are:
Update purchase lead time
Update production lead time
Update safety stock
Update reorder point
The app has these actions available out of the box:
Open SAP MD04 (via web GUI)
Open SAP MM03 (via web GUI)
Write all recommendations to ERP (requires an Action Flow)
Note
Each action is connected to the MaterialMasterPlant object. Parameter recommendations for other objects will require their own default actions.
Here’s how to configure the app’s tasks and actions:
In the Celonis navigation menu, select Studio.
In the Studio overview, find the Inventory Management Planning Parameter Optimization app in the space where you installed it, and click its tile to open it in Studio.
Click the Task Management icon (the list) in the Studio top navigation to see the list of tasks for the app.
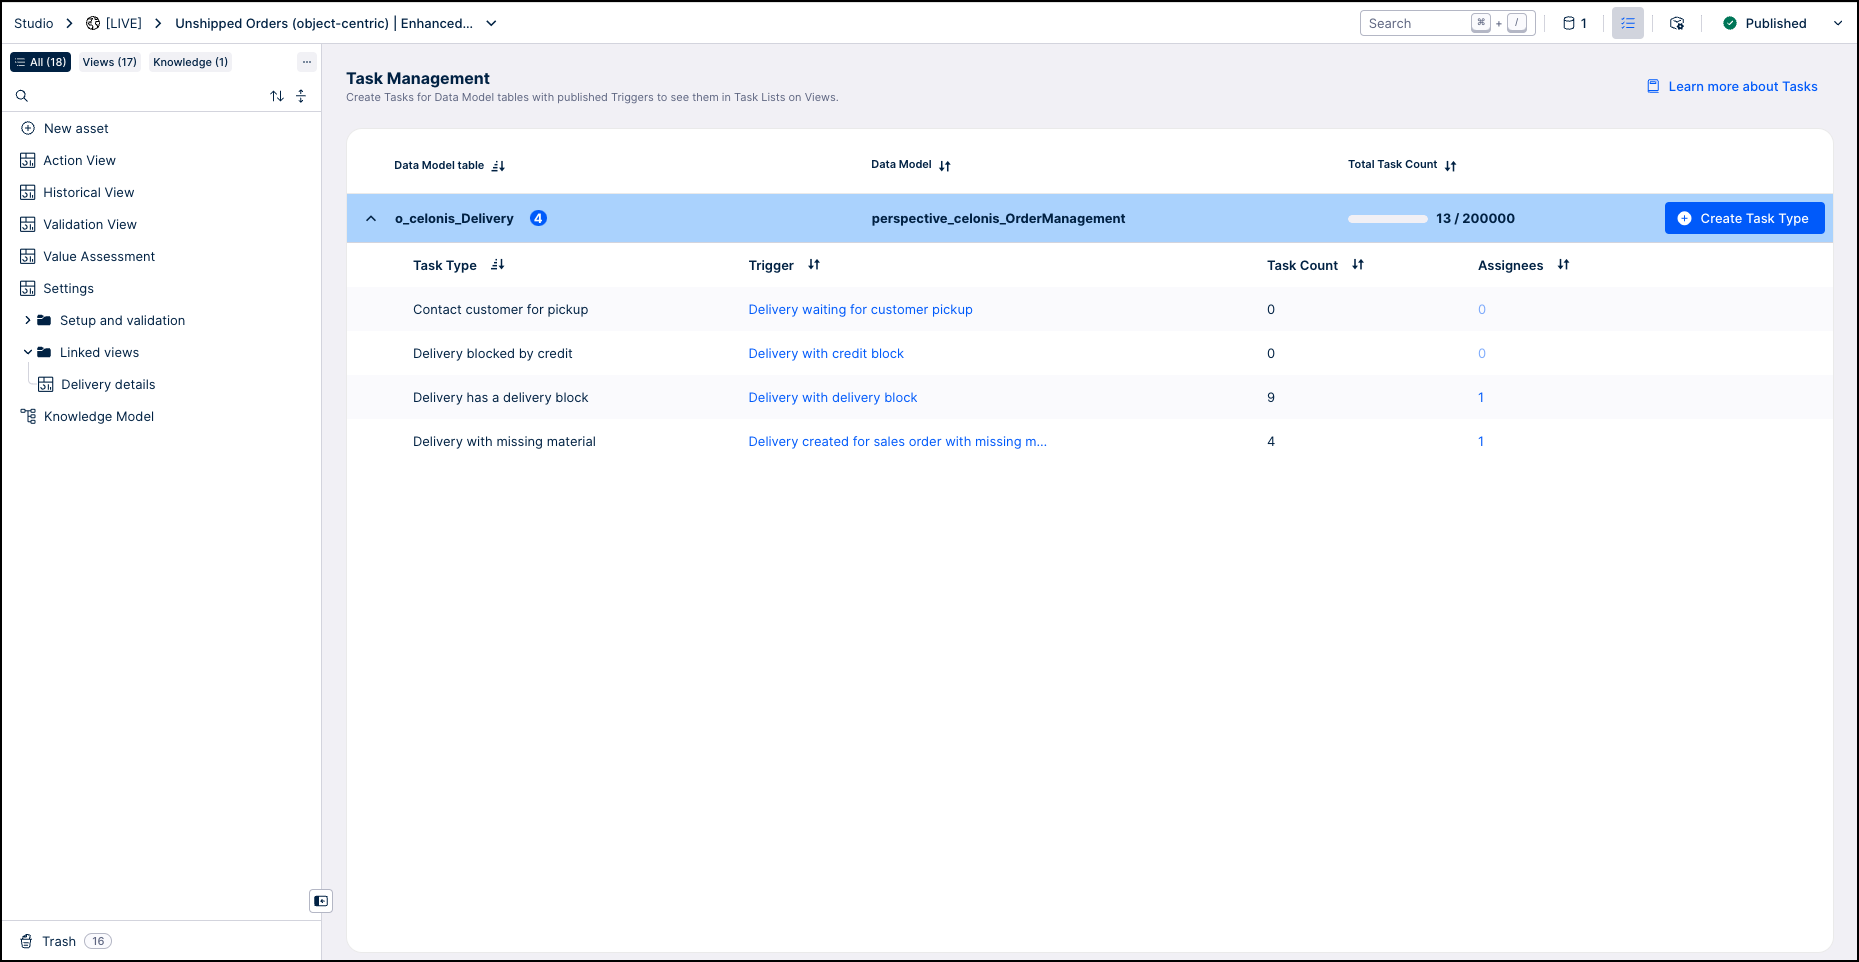
In the list of tasks, find the one you want to edit, and click the Edit icon (the pencil) next to it.
Hover over the action button that you want to edit, and click the Edit icon (the pencil) that appears.
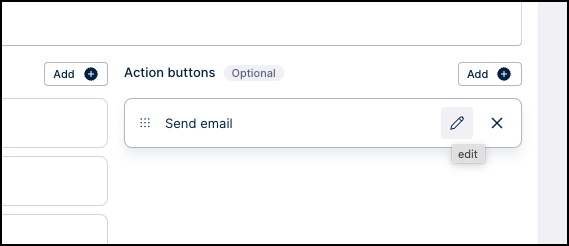
Customize the action as you want, then click Next.
Customize the button name and tooltip to reflect any changes you made, then click Done.
Click Next to preview the task, verify the results, then click Save.
To check or edit a trigger, click its name in the Task Management listing. Or you can go to the Knowledge Models folder in the app navigation and select “Knowledge Model”, then select the Triggers section of the Knowledge Model to see the list of triggers for the app.
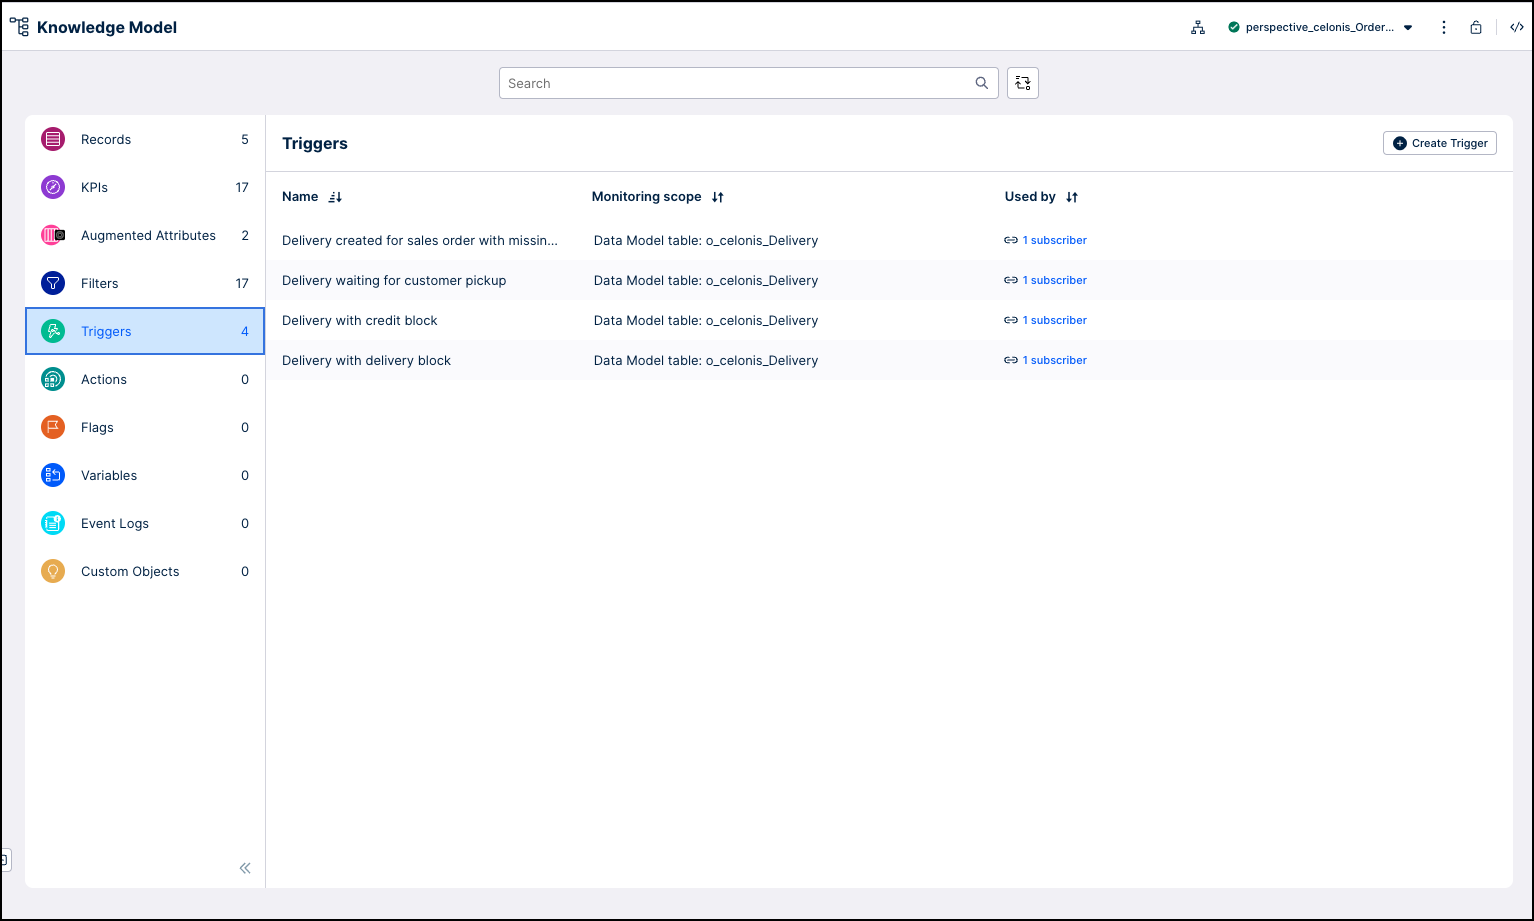
Select any trigger that you want to edit. You can add columns with data for the trigger to monitor, and apply filters to define which objects trigger the task.
Tip
The Filters section of the Knowledge Model has saved filters that you can use or edit. Or you can create filters while you’re editing the trigger. Filters has the instructions to work with filters in the Knowledge Model.
When you’ve made all the customizations you want to the tasks and actions, use the Publish button at the top of the screen in your Studio space to publish a new version of the app.
Tasks to configure
Each recommendation computed by Celonis can be further processed through tasks to review and potentially write back to the source system. You can set up tasks to update each of these planning parameters in the source system:
Purchase lead time
Production lead time
Safety stock
Reorder point
You can use either a recommended value, a custom value, or a simulated value to update the parameters, and you can bulk update parameters. All these tasks require an action flow. Use the Action Flow blueprints described at Change data in SAP to start setting up a flow able to write parameter recommendations to your source system.
You can also add your own actions as well as these. See Available SAP actions for a list of the possible actions.
To configure the Open SAP MD04/MM03 action, first activate the web GUI for your source system. We’ve set this skill up with a template for an SAP system, so you can update the URL with the host and port for your SAP web GUI. If you’re using a different source system, work out the appropriate URLs with query strings to open the record you want in each situation.
Then in each of the tasks, follow the instructions above to edit the “Execution Output” step in the “Open SAP MD04/MM03” action to add your URL.