Configuring an Insight Explorer
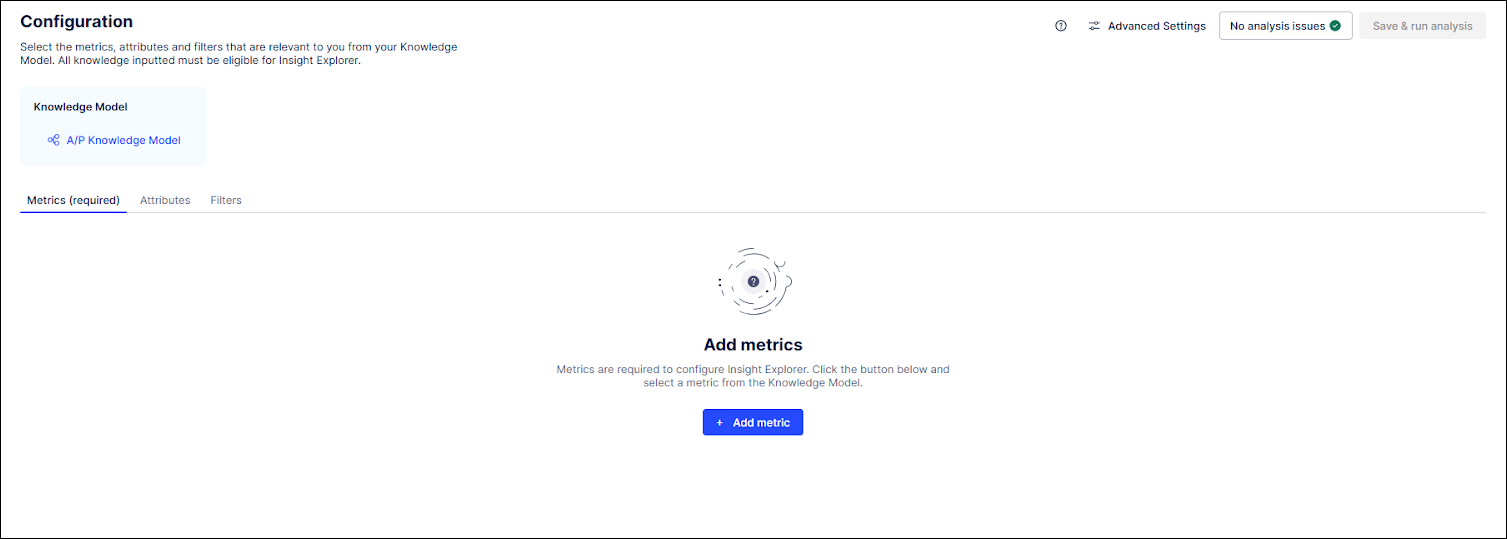
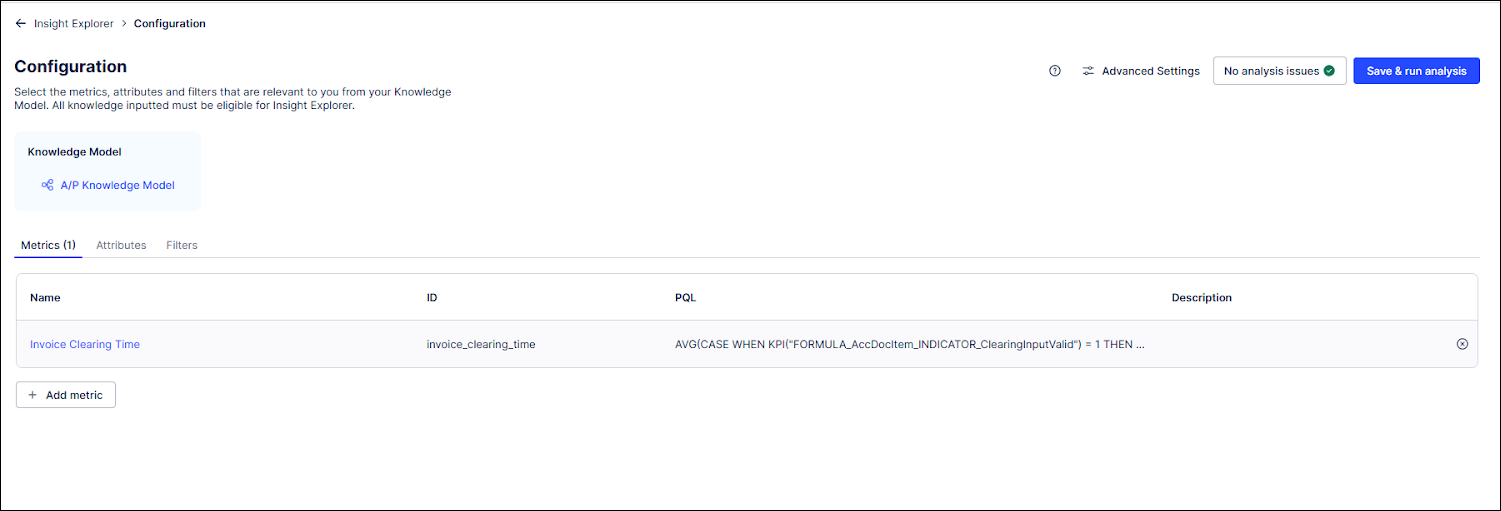
Once your Insight Explorer is created, you will be taken to the Configuration screen. Here you can choose what knowledge should be analyzed by Insight Explorer along with other analysis parameters. The minimum requirement is to provide at least one metric for which you want to discover insights. The remaining steps are optional.
If you need to make changes to your existing configuration, you can return to the Configuration screen at any time by clicking on the pencil icon at the far right of the Insight Explorer header.
 |
Insight Explorer Terminology
Metric: A metric is an aggregated number, such as SLO Adherence or On-Time Delivery.
Aggregation type: The aggregation type of a metric describes how multiple values are aggregated into a single value. Common aggregation types include
AVGandSUM.Attribute: An attribute groups objects into semantically useful categories. An attribute can be autogenerated from your Data Model columns or calculated using PQL. Examples of attributes would be Region or Material.
In order to configure your Insight Explorer, you will need:
Access to the Knowledge Model containing the information you want to analyze
Access to the existing Insight Explorer you want to configure
Metrics are how Insight Explorer knows what you want it to analyze in your data. You are required to add at least one eligible metric before your Insight Explorer can begin generating insights.
On the Configuration screen, click the Add metric button on the Metrics tab.
Select an eligible metric from the list of KPIs available in the Knowledge Model or choose one of the AI-recommended metrics from the list below.
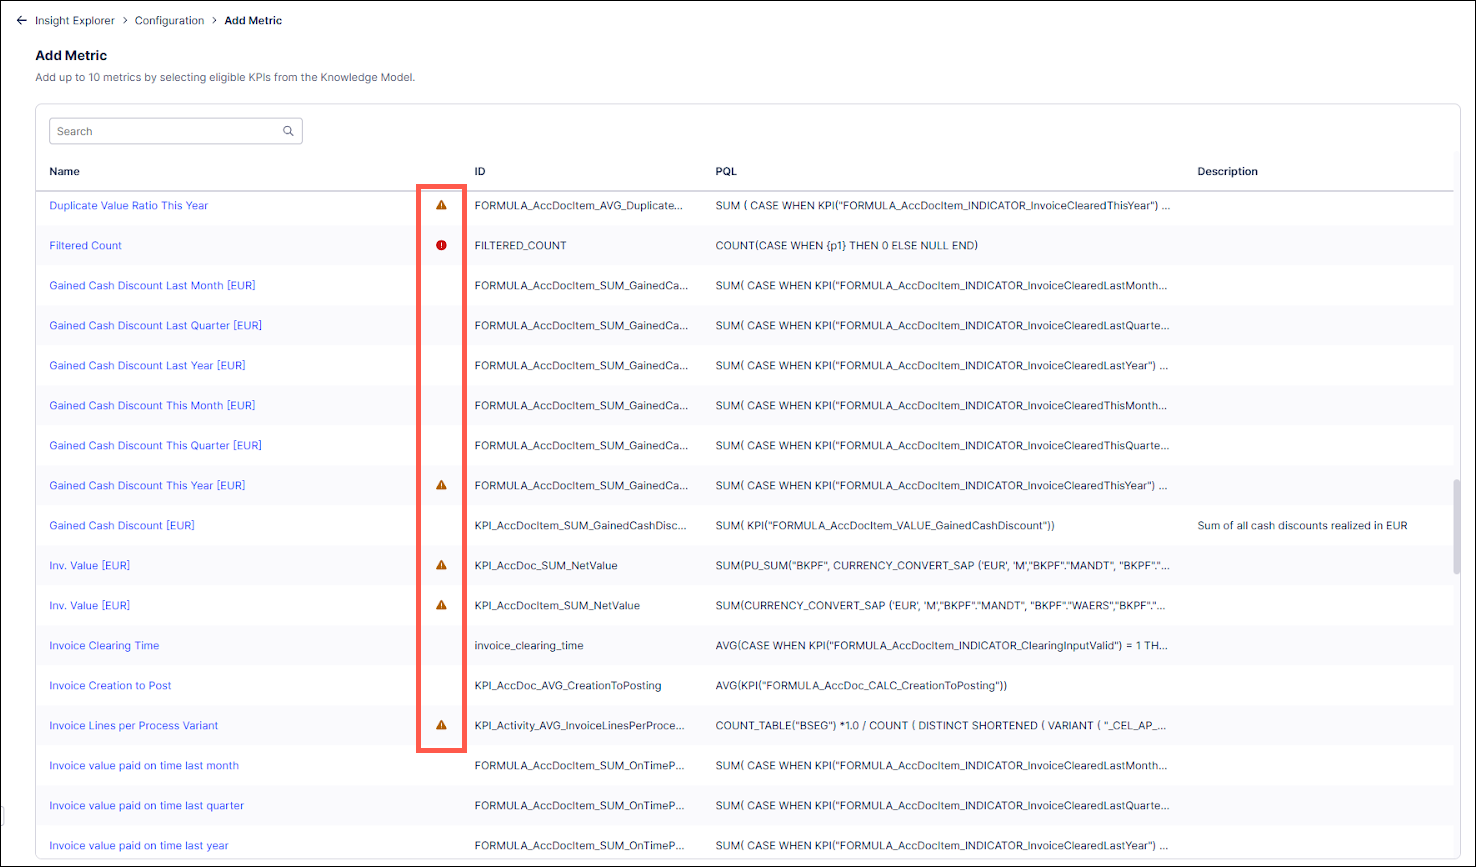
If no icon appears next to the metric, it means the metric is eligible for Insight Explorer.
A warning icon
 means the metric needs additional attention.
An error icon
 means the metric is not eligible in its current state.
If there is a warning or error, click the metric to see a message explaining why the issue is occurring. See Troubleshoot Insight Explorer for all possible issues and suggested actions.
To select one of the KPIs from the Metric Recommendations section, click on the metric name to review the description and then click the Add to Insight Explorer button. These metrics were detected by AI as process inefficiencies for the selected event log and are not currently part of the Knowledge Model.
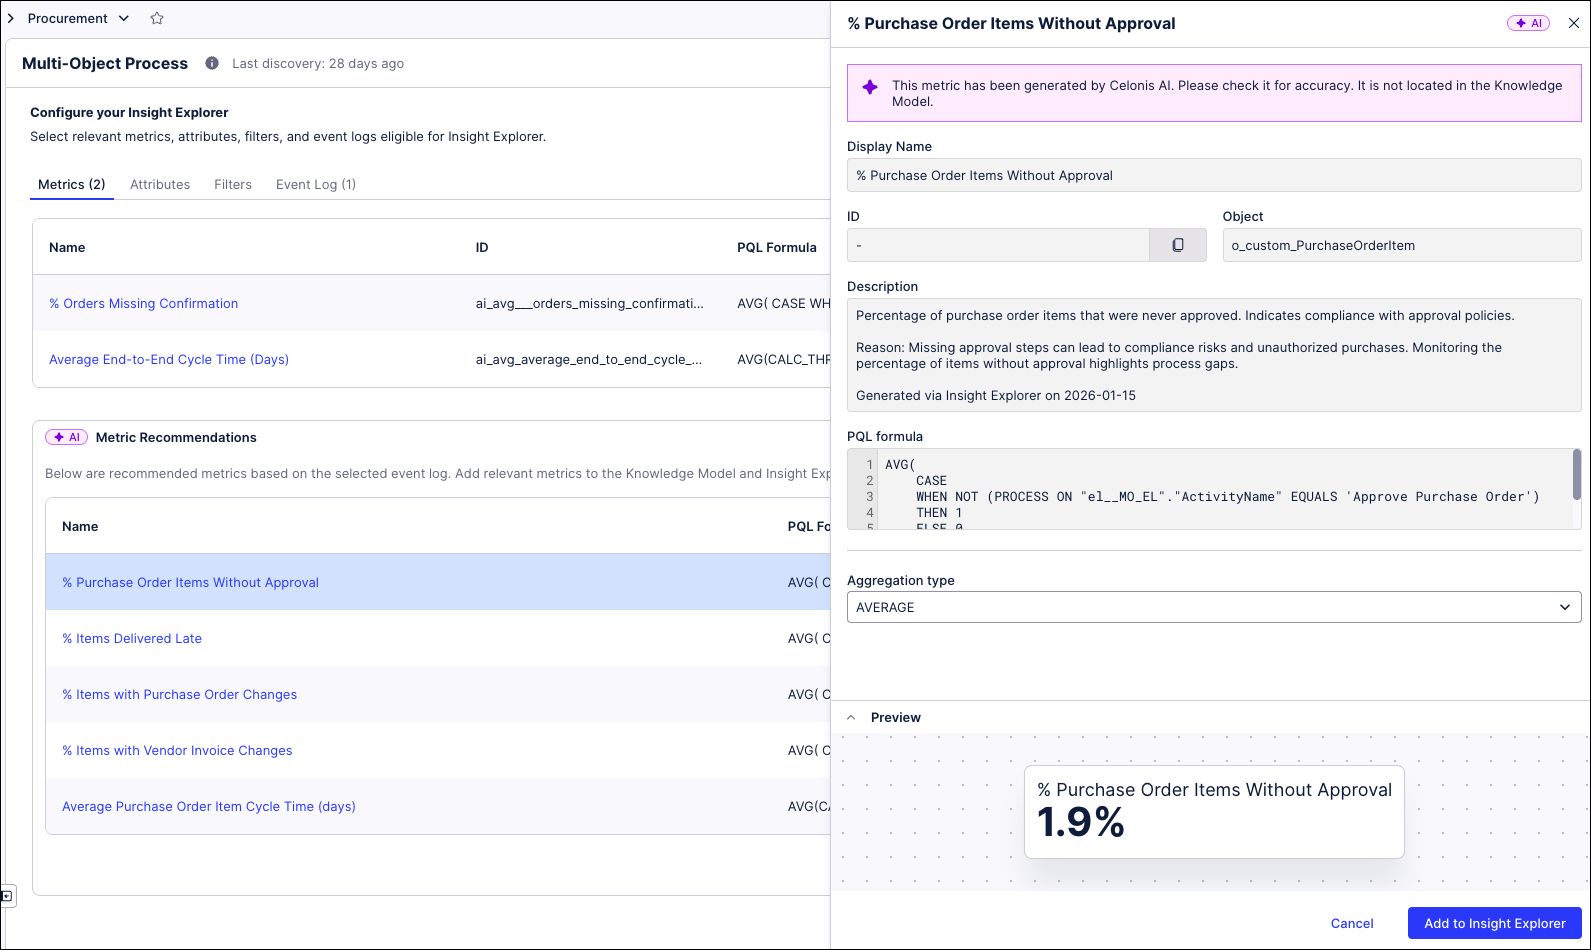
In the side panel, select the appropriate aggregation type for the metric. If Insight Explorer is able to detect the aggregation type, the dropdown is already populated.
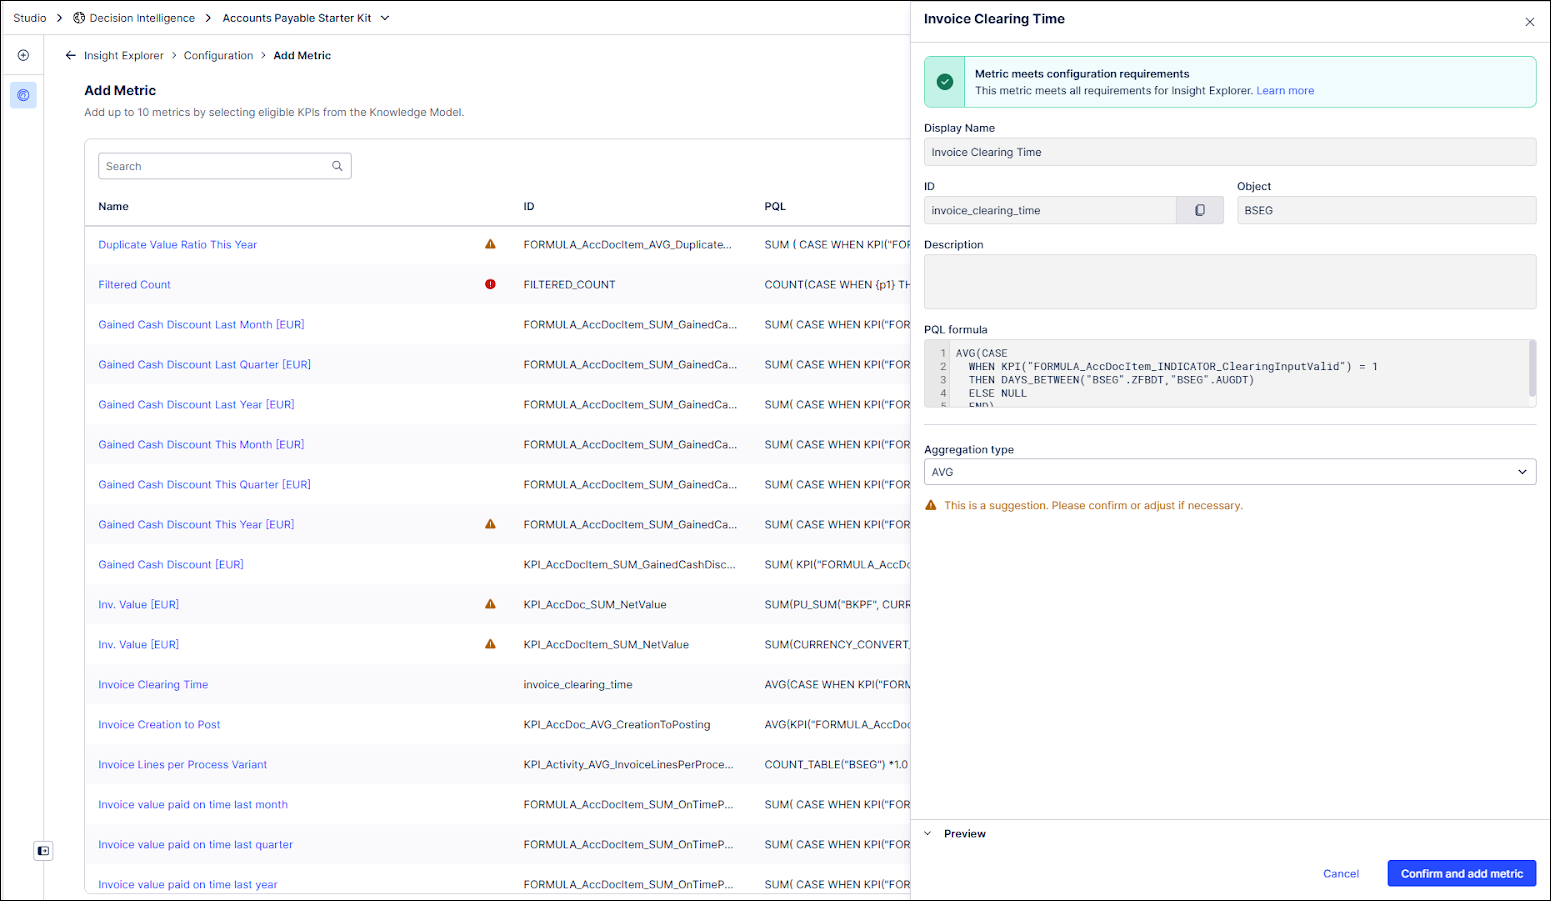
Click Confirm and add metric. The metric is added to your configuration and displayed in the Metrics tab.
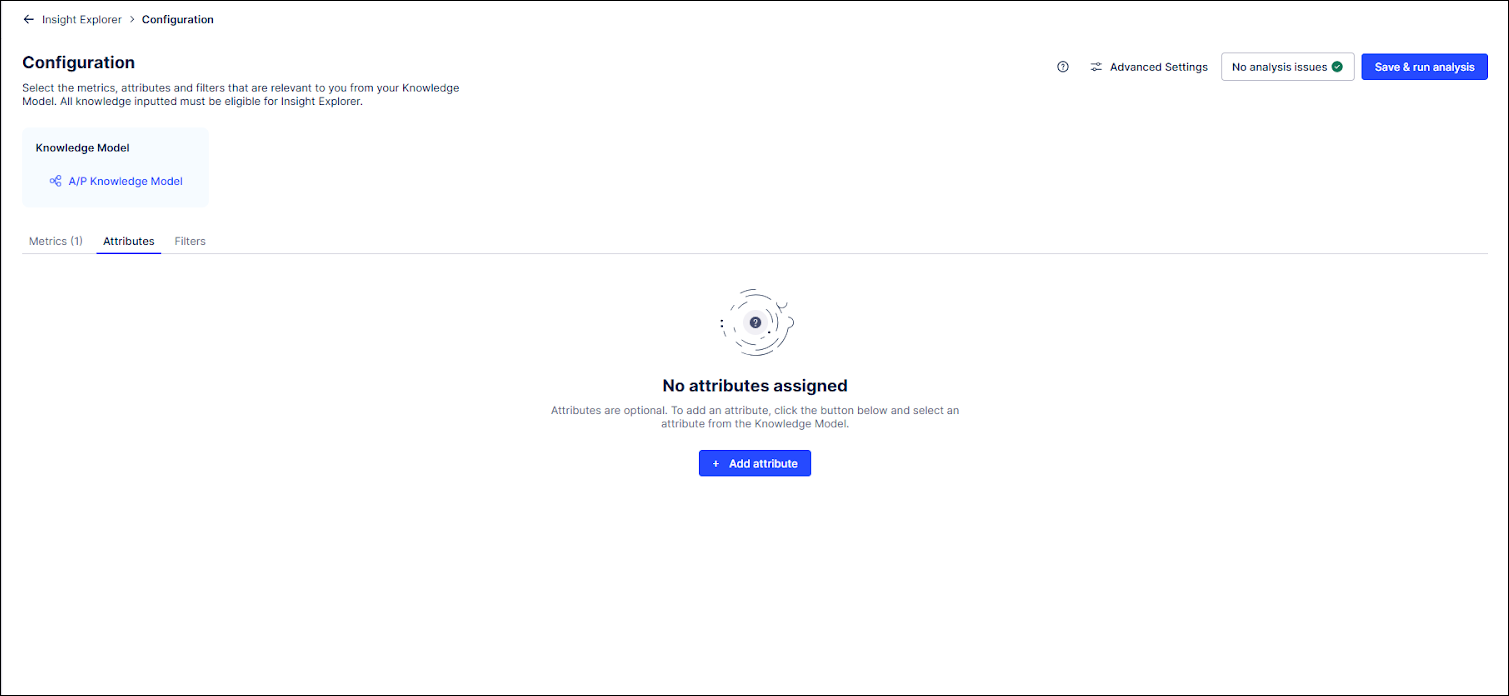
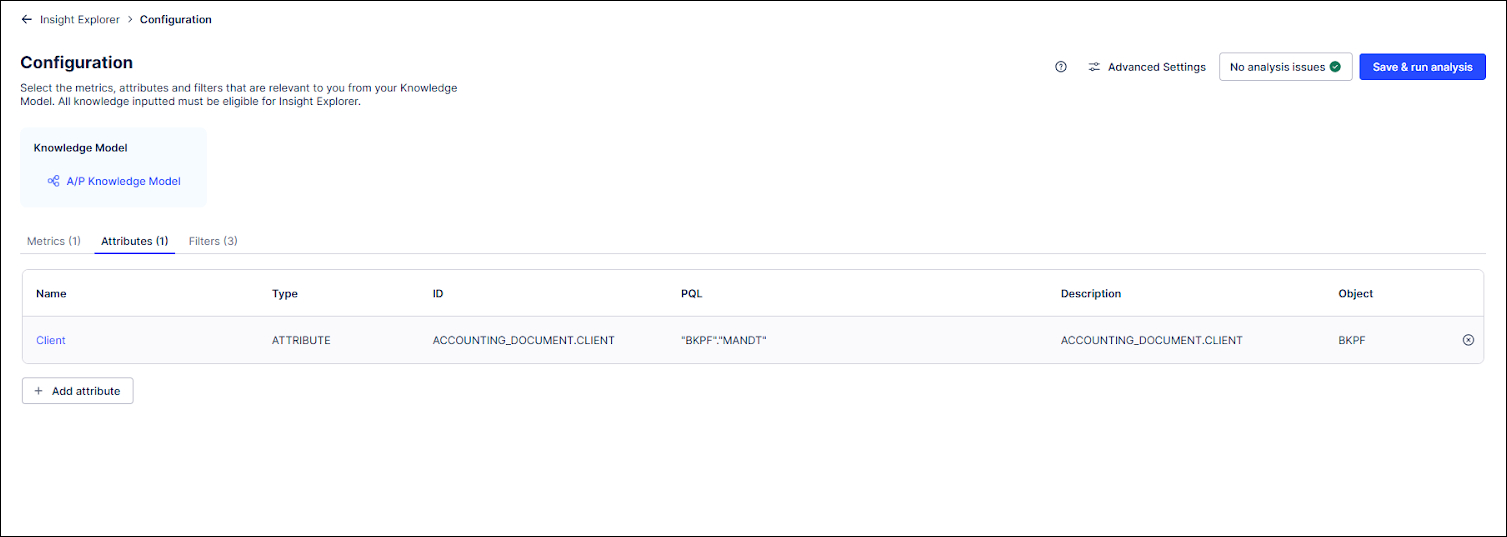
Insight Explorer uses attributes to split the data into subgroups and find patterns in how your metrics behave across these subgroups. Insight Explorer can automatically recommend attributes that influence your metrics without your input, so this step is optional. You can still add any attributes that are especially important to consider. Any attributes you add are given more weight by the algorithm but are not guaranteed to show up in the results.
Click the Add attribute button on the Attributes tab.
Select an eligible attribute from the list of KPIs and Record Attributes available in the Knowledge Model.
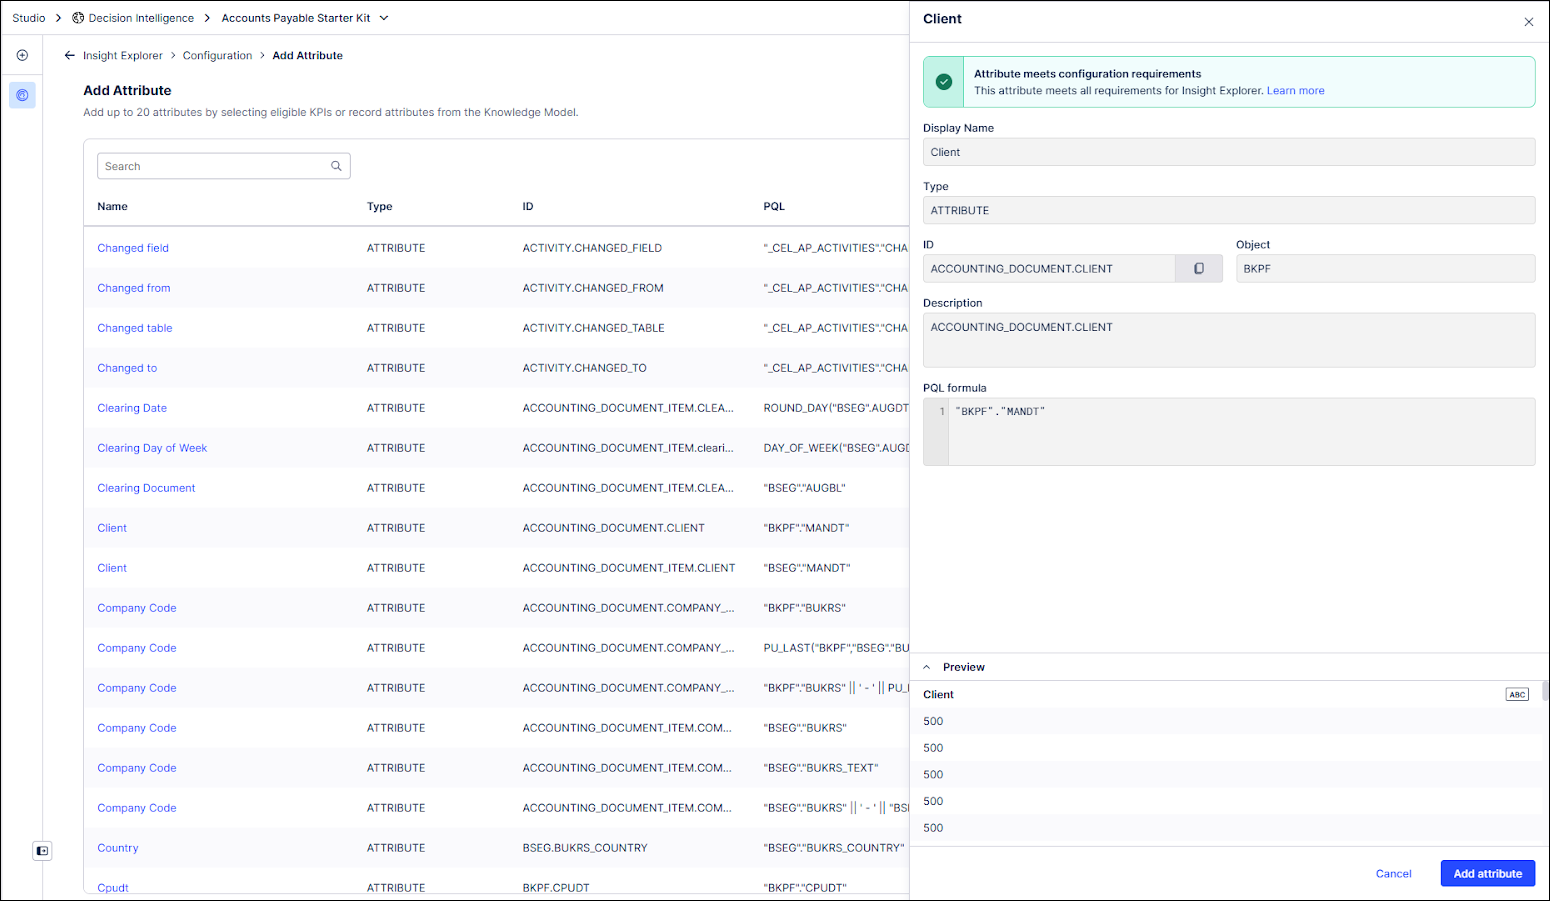
If no icon displays next to the attribute, it means the attribute is eligible for Insight Explorer.
A warning icon
means the attribute needs additional attention.An error icon
means the attribute is not eligible in its current state.If there is a warning or error, click the attribute to see a message explaining why the issue is occurring. See Troubleshoot Insight Explorer for all possible issues and suggested actions.
Click Add attribute in the side panel. The attribute is added to your configuration and displayed in the Attributes tab.
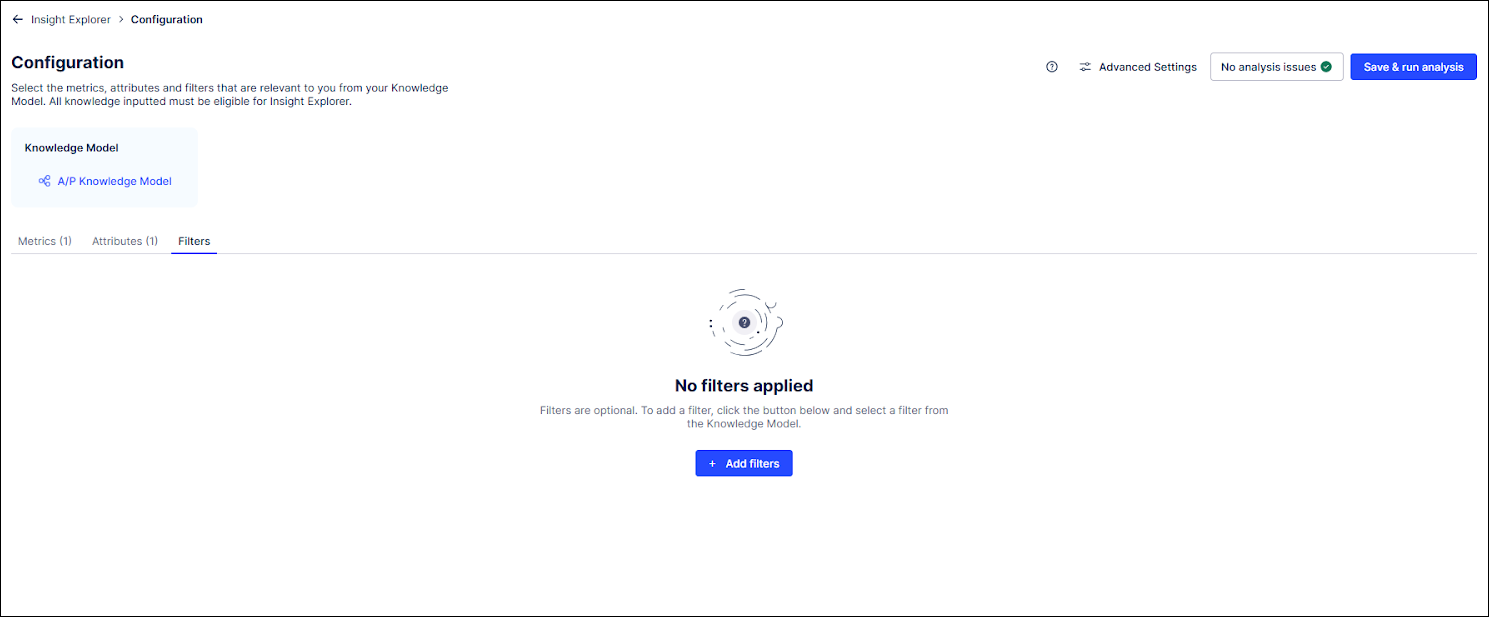
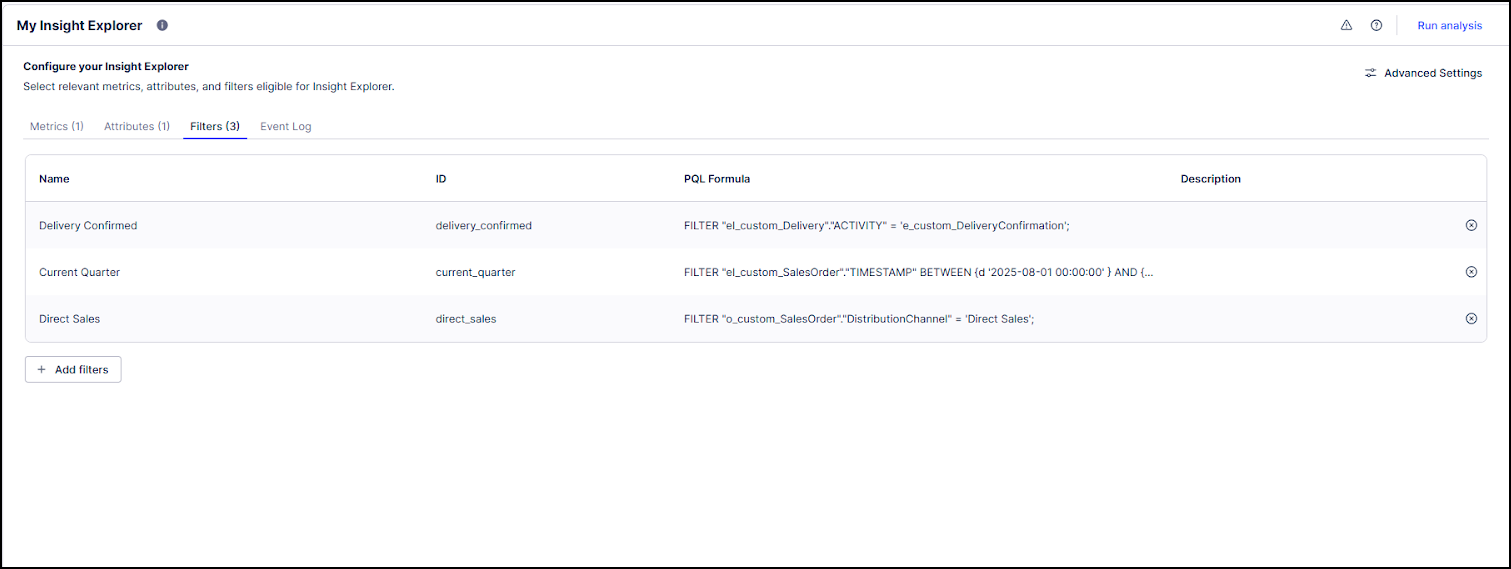
Adding filters to an Insight Explorer narrows the scope of the data analyzed by that Insight Explorer. Doing so allows you to focus on a specific segment of your data and reduce noise. For example, you can filter on only completed instances of the process or a particular business unit or time period.
Note
Any Global Filters from the selected Knowledge Model are applied to Insight Explorer by default.
On the Configuration screen, select the Filters tab and click the Add filters button.
Select from the list of filters available in the Knowledge Model. If you want to use a filter that does not exist in the Knowledge Model, click Create Knowledge Model Filter to create a new Knowledge Model filter.
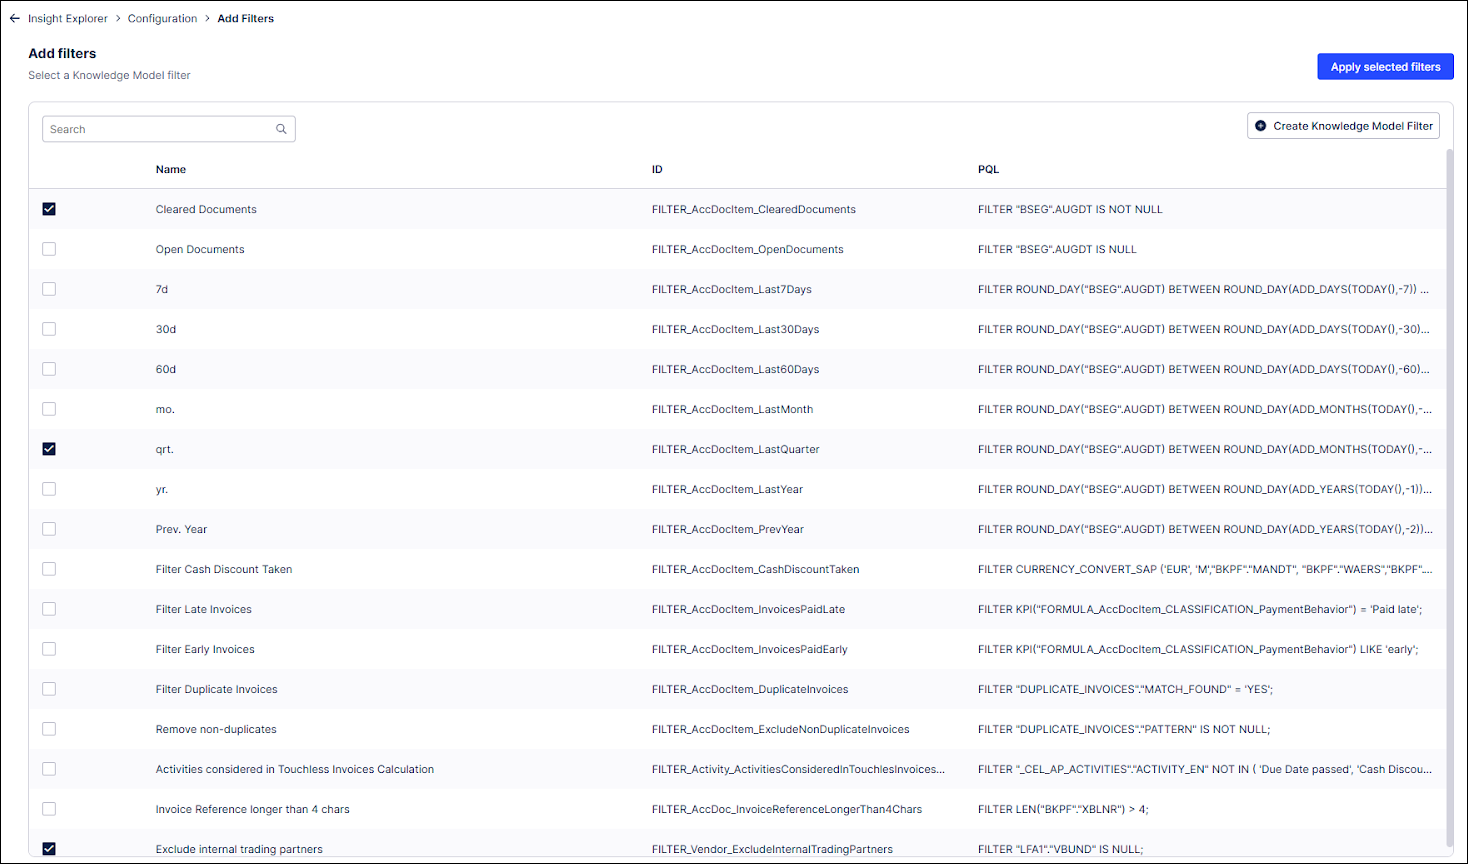
Click Apply selected filters. The filter is added to your configuration and displayed on the Filters tab.
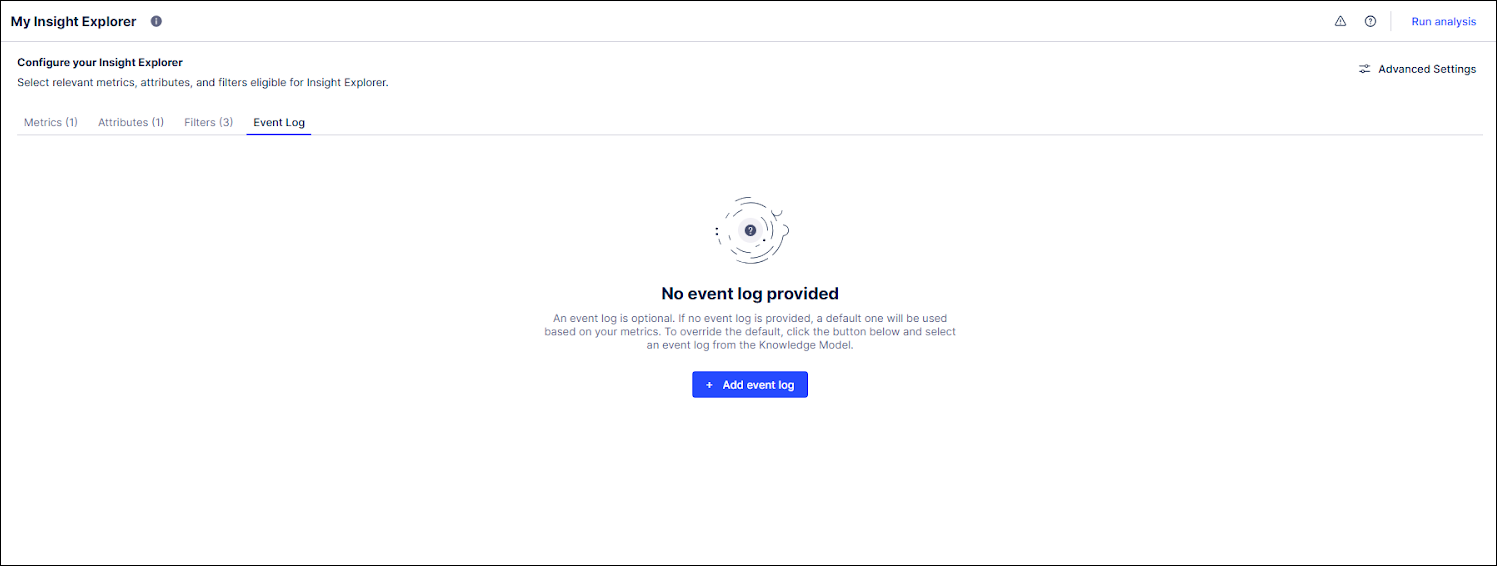
You can specify which event log Insight Explorer should analyze. This is useful when you have multiple event logs per object to view your process at different levels of granularity.
The event log you add is used to generate process attributes, timestamps for cohort trend insights, and several components on each insight’s details page including the Case Explorer and Process Explorer. If you do not add any event log, Insight Explorer defaults to the event log associated with the lead object in your configuration.
Click the Add event log button in the Event Log tab.
Select from the list of Event Logs available in the Knowledge Model.
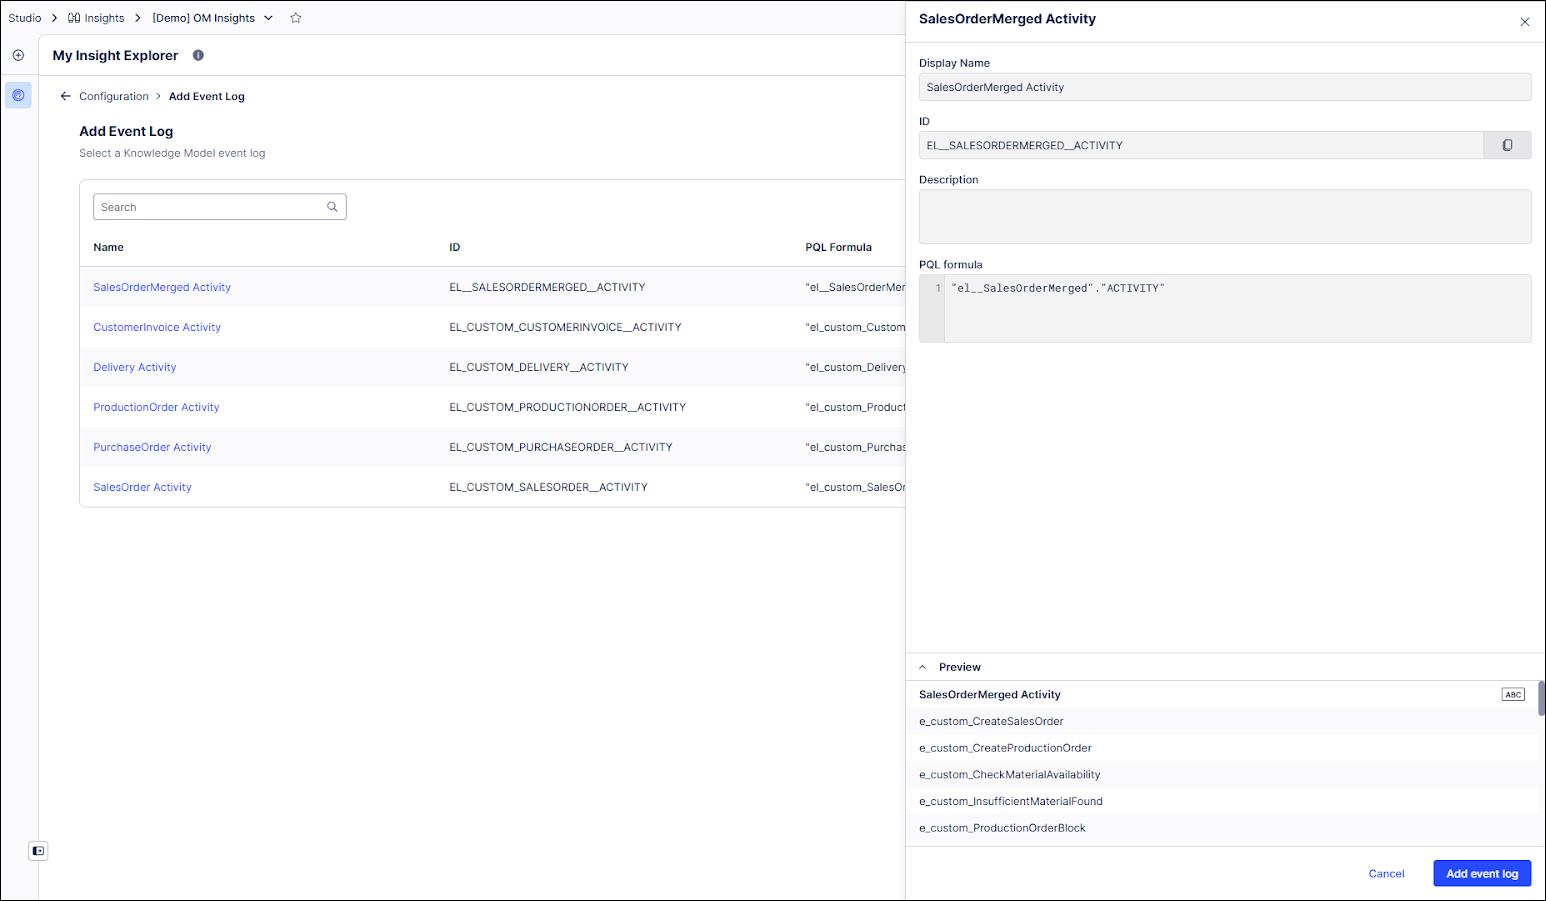
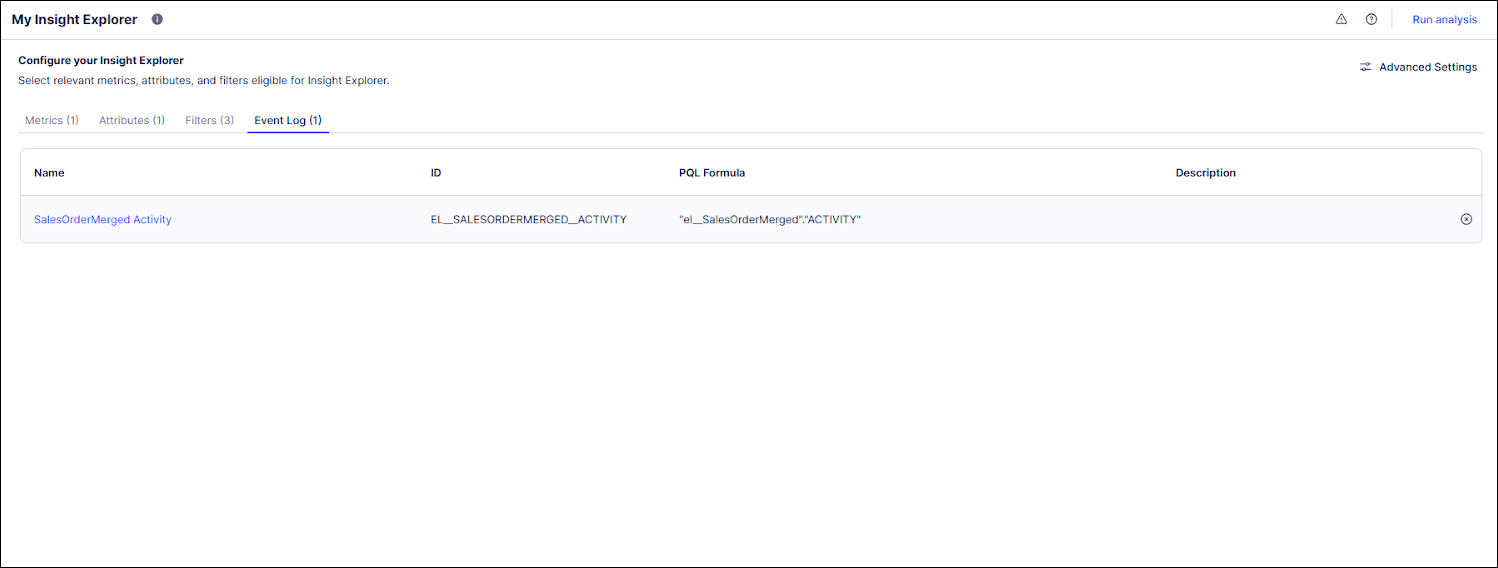
Click Add event log in the side panel. The event log is added to your configuration and displayed in the Event Log tab.
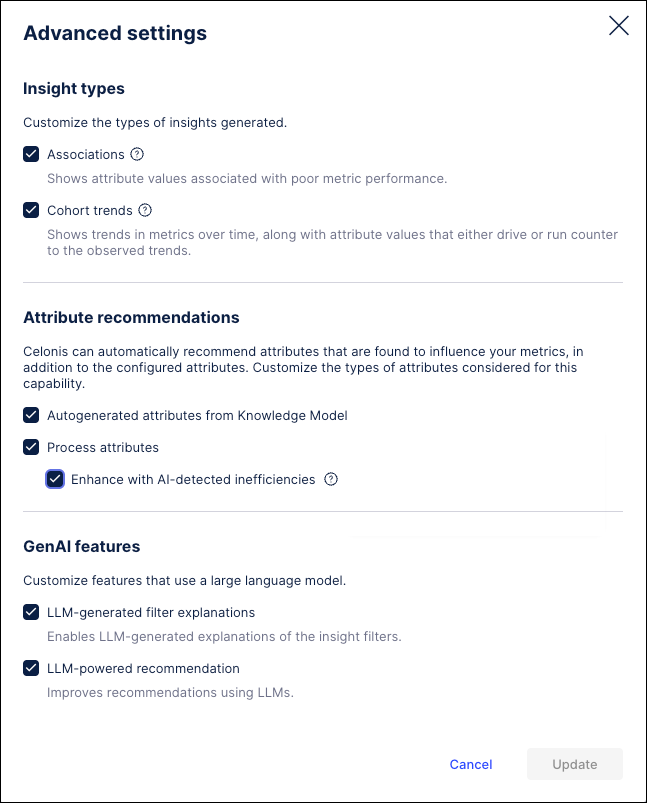
The Advanced settings window allows you to customize certain analysis parameters used to generate insights, activate the inefficiency AI-agent, and continue to tailor Insight Explorer to your specific needs. You can access the advanced settings by clicking the Advanced Settings button at the top right of the Configuration screen.