Installing the RFC module
Celonis RFC module is responsible for extracting data from the SAP database based on information received from the SAP extraction client. The module gets the job metadata from the extractor client, i.e. which table, which columns, filters, etc, and then generates a background job in SAP. The job extracts the data and writes it in CSV files in a directory that is monitored by the Extractor.
Note
Installing the RFC module is a step in connecting your SAP instance with Celonis Platform
Before installing the RFC module, ensure that you meet the system requirements listed here:
In your Celonis Platform, go to Admin & Settings > Download Portal.
Download the latest version of the RFC module that fits your system.
In your SAP instance, check the folder where transports are placed with the transaction AL11 and look under DIR_TRANS.
Unzip the ZIP file with the RFC module.
From your unzipped package, copy the cofile (K...) into DIR_TRANS/cofiles and the data file (R...) into DIR_TRANS/data.
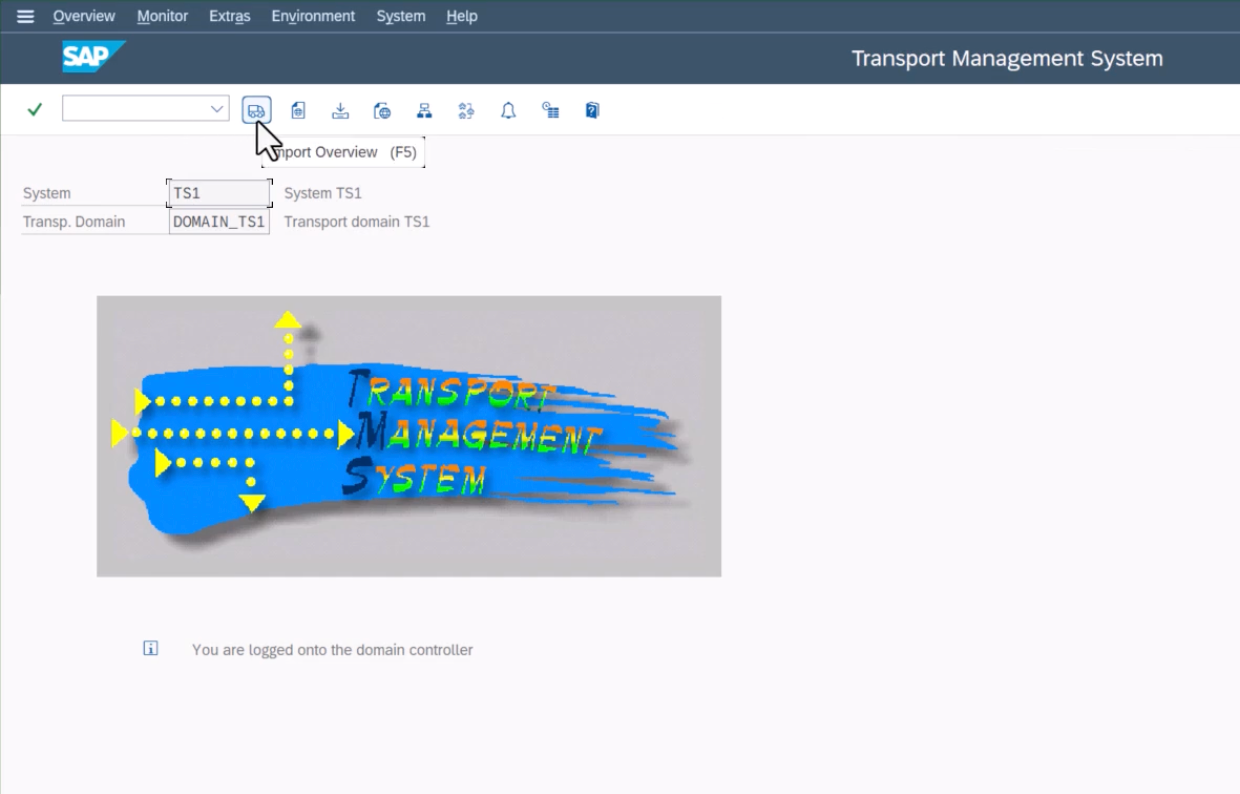
In SAP, run the STMS transaction:
Click on import overview (F5).
Double-click on the import queue of the target system
Click Extras > Other Requests > Add.
Enter the name of the transport which is AI1K... (where "..." should be replaced by the number that is contained in the file names of the two transport files).
Figure 1.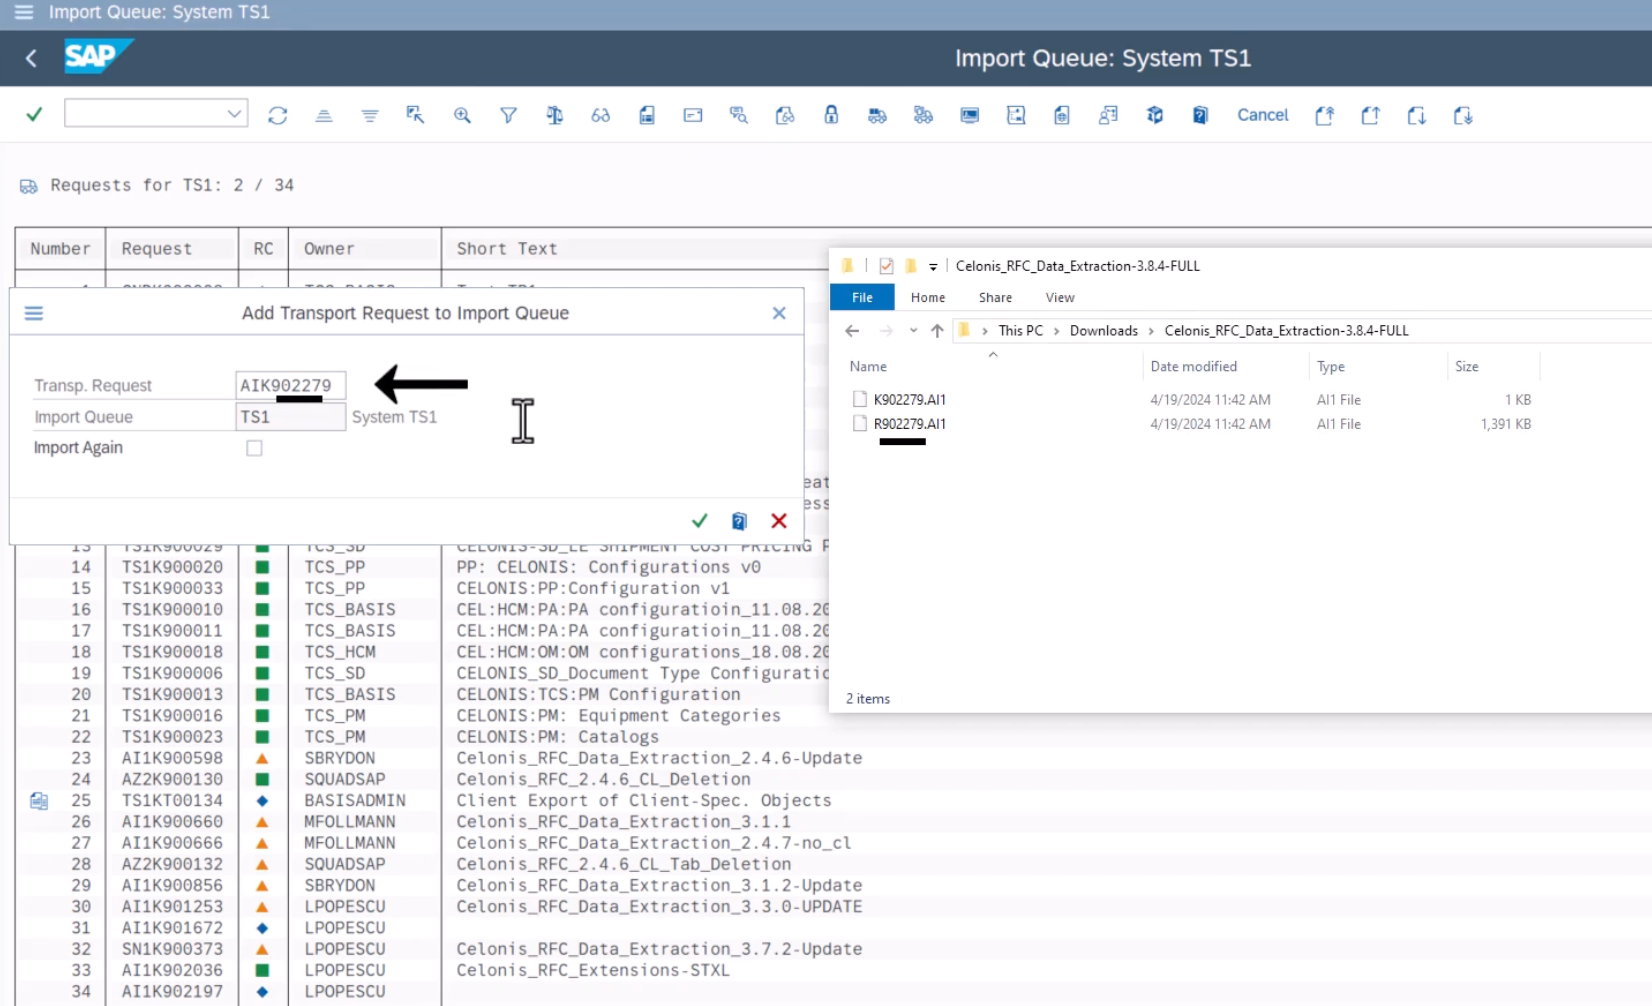
Example: adding transport request to import queue.
Click Import.
Note
If you're using the RFC module version 3.9 or later, you can skip this step. With newer versions of the RFC module, a staging table inside the SAP database is used for storing temporary files. Using a staging table for data extraction must be manually enabled in the advanced settings of your data connection. For details, Extracting data using staging .
Create a dedicated directory on the file system of your SAP (preferably a network drive) and make sure that the user running the SAP system has read and write access to it.
Warning
In case you are using Logon Groups, or there are multiple application servers where the extraction jobs can run, make sure that the directory is on a network drive, and is accessible from all the servers.
In your SAP system, run the FILE transaction.
Find the Logical Path Z_CELONIS_TARGET in the list
Edit the entry by clicking on the button to the left of the new entry and then double-click on the folder "assignment logical and physical paths"
Set a path for UNIX and/or Windows. The path should be the directory on the system or a network drive that you created in Step 1.
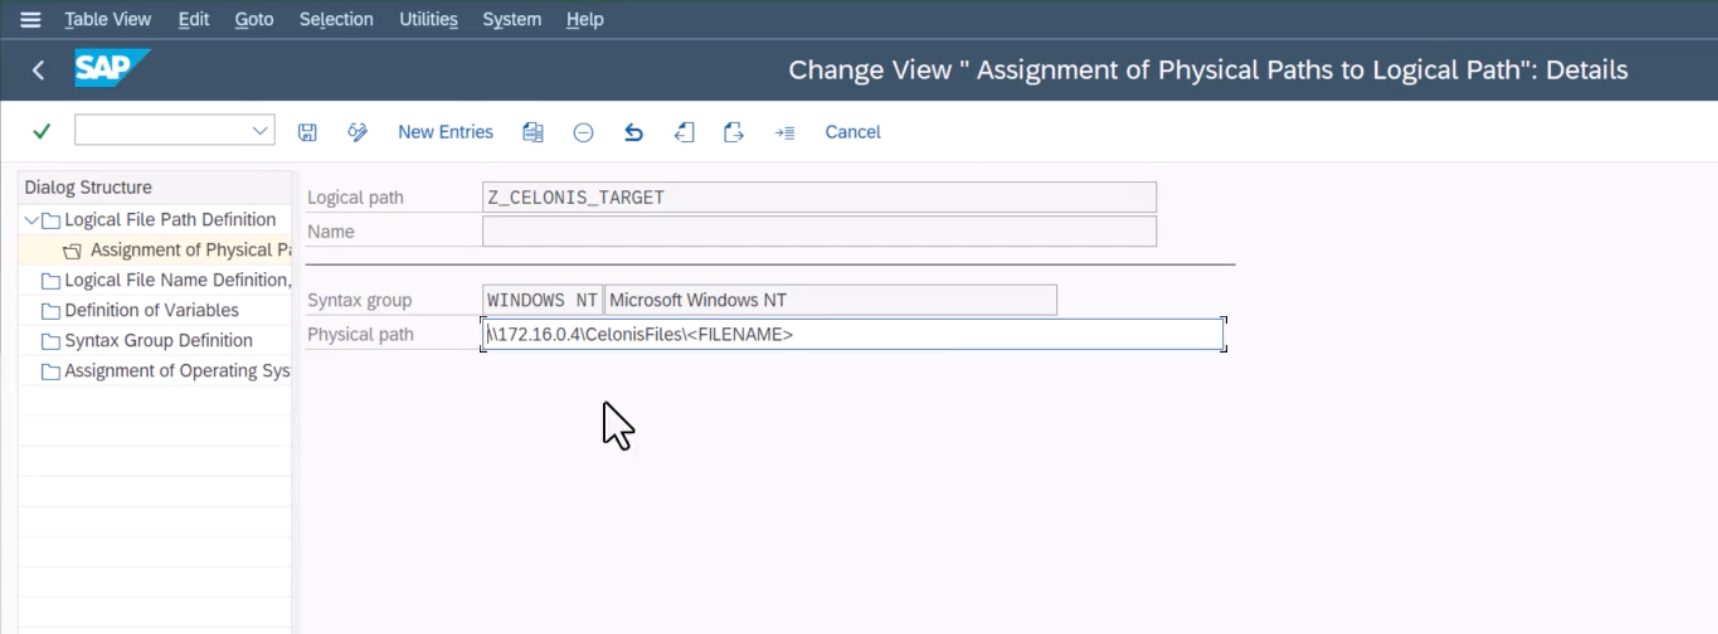
Make sure to include the <FILENAME> placeholder at the end of the directory.
Z_CELONIS_TARGE for multiple clients
When setting up the physical path for Z_CELONIS_TARGET, you can use a dynamic <CLIENT> parameter for client number. For example:
tmp/<CLIENT>/CELONIS/<FILENAME>
On runtime, the <CLIENT> parameter will be replaced with the client number for which the extraction is running. For example:
tmp/100/CELONIS
tmp/800/CELONIS
You now have to configure user permissions for SAP connection. See Create users for SAP connection.
Enable near real-time data extraction and analysis of SAP systems. See Setting up the Replication Cockpit.
We've gathered some resources and troubleshooting tips that will help you resolve some problems you might encounter when installing the RFC module.
Symptom
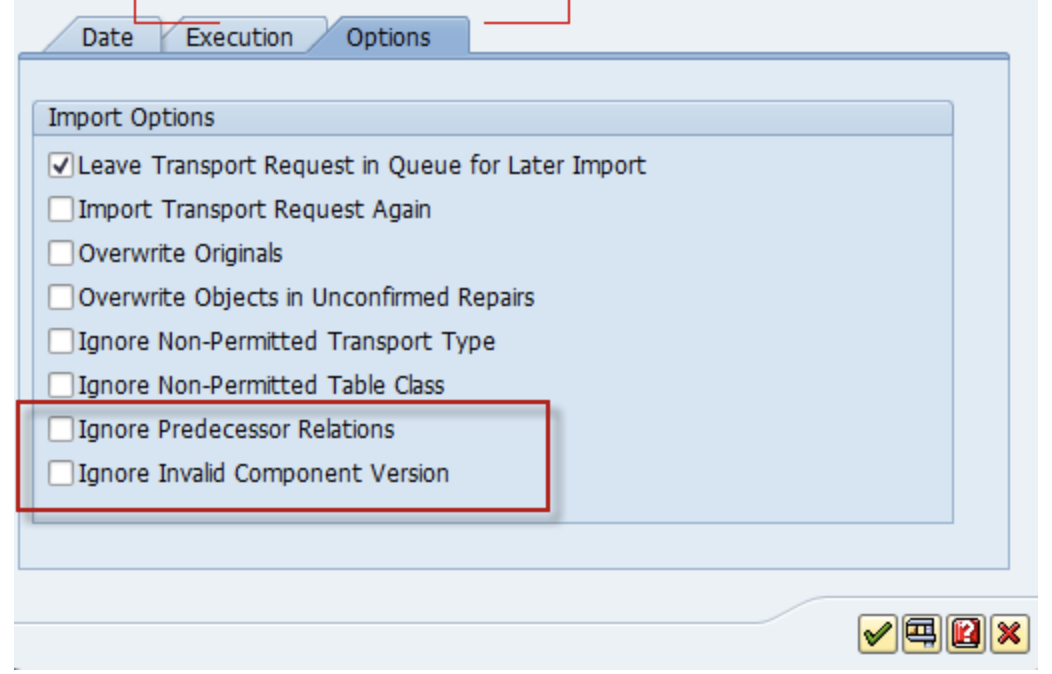
When importing the RFC Module into your SAP system you may get the error message: "Does not match component version" or "Checking components of the requests" as s hown below.
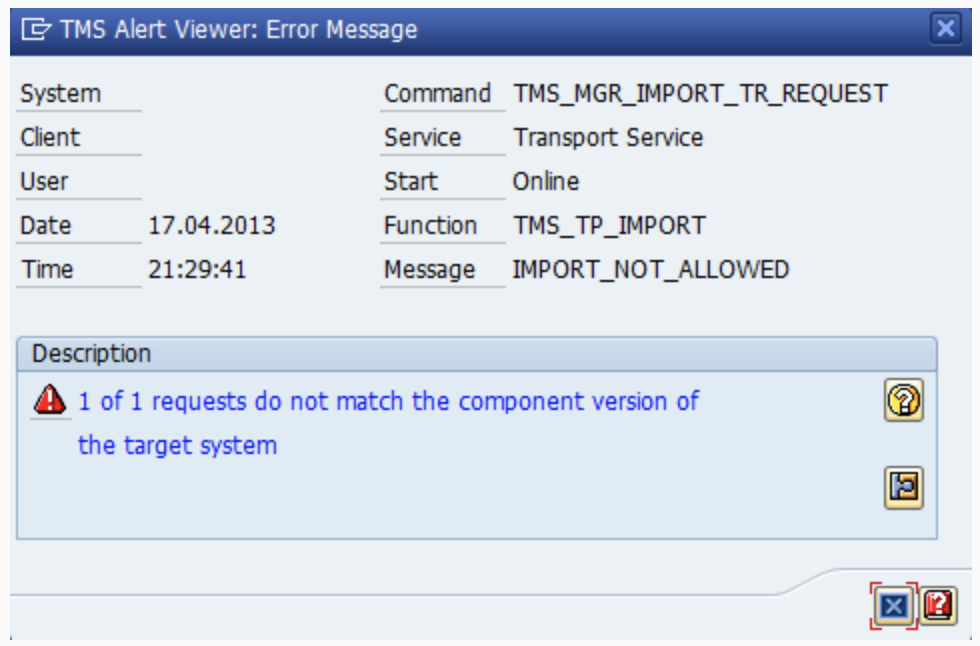 |
Cause
With Version SAP_BASIS 702 a new feature was added to the TMS system to check the component version of the transport which was released and the component version of the system where the transport was going to be imported. If there is a difference, this difference is highlighted in the import queue (transaction stms_import) and if you try to import the transport, the import will stop with a warning message about the difference in the SAPCOMPONENT versions.
Solution
Ideally, the source system and target system should match in relation to component versions, but this is not possible for the RFC Module, because Celonis has only 1 development system, while our customers have a multitude.
You can bypass the warning with the import option "Ignore invalid component version". You will see this option in the options tab upon import.
 |