AI Settings
The AI integration within the Celonis Platform allows teams to leverage applications powered by Large Language Model (LLM) infrastructure. The AI Settings screen serves as the central hub for Admin users to control, activate, and track these services.
The AI Settings screen allows you to:
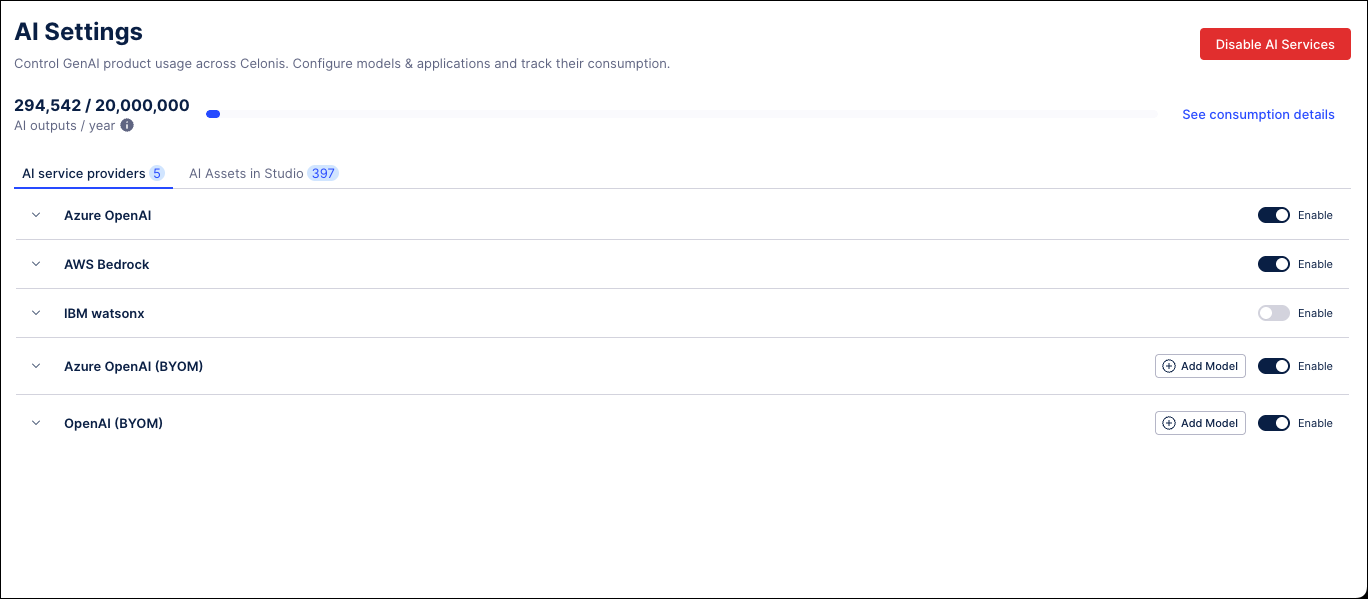
Enable and disable AI service providers: Use the AI service providers section to toggle specific LLM providers on or off. You must have at least one provider enabled for Celonis AI products to operate; otherwise, tasks requiring Process Copilot or Annotation Builder will fail.
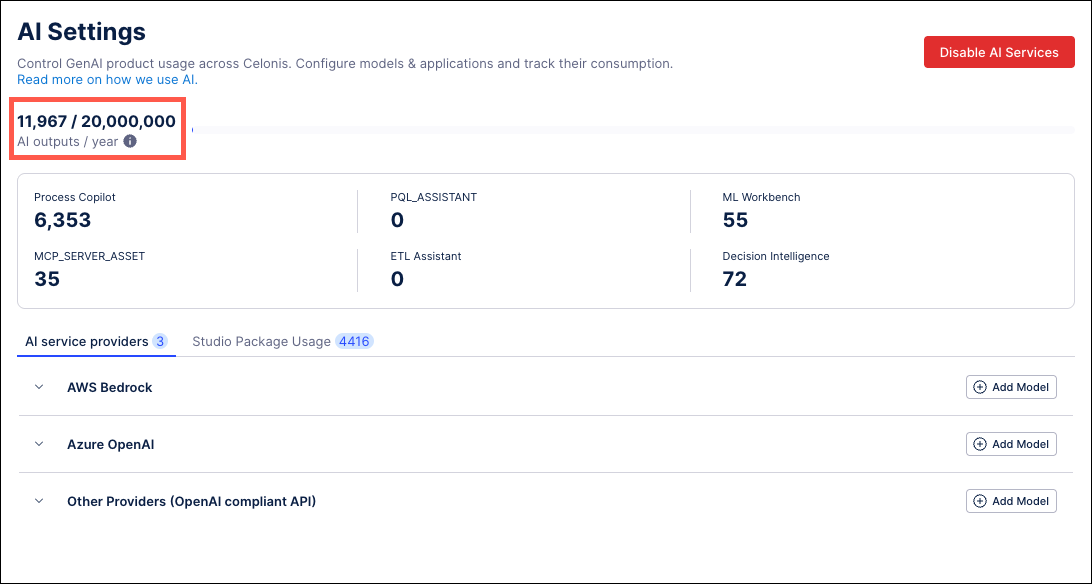
Monitor AI consumption: The AI Settings screen tracks your annual AI output consumption. An output is recorded each time a Celonis AI product creates an annotation, insight, or response. Click the Studio Package Usage or ML Workbench Usage tabs to explore the usage of your individual AI assets. From these tabs, you can search, sort, and control usage of individual assets.
In order to access the AI Settings screen in the Celonis Platform, you must meet the following requirements:
Admin permissions for your Celonis team.
Note
When enabling services in the Celonis Platform, Admins will be required to accept the “User consent for enabling AI Services” agreement. This agreement allows Admin users to accept the AI services terms directly within the Celonis Platform. Accepting this agreement activates these service models and allows users to access all available features.
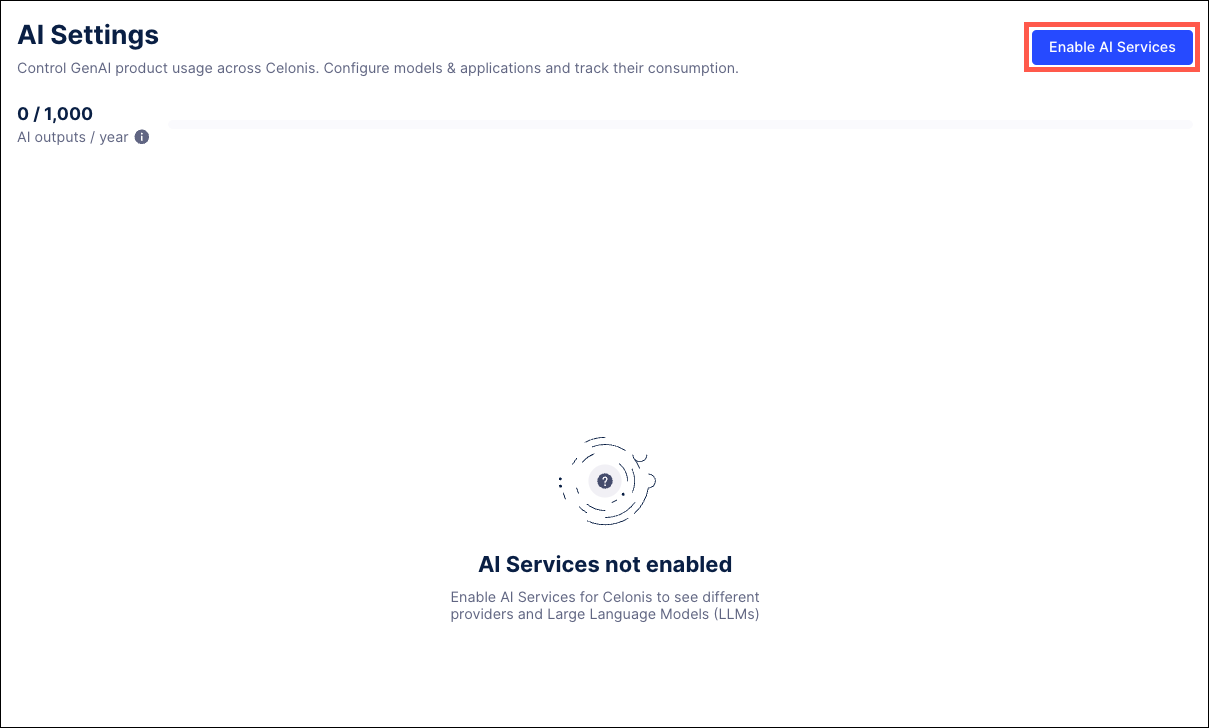
To enable AI services for your Celonis Platform team:
Go to Admin & Settings > AI Settings.
Click the Enable AI Services button in the upper right corner.
In the User consent for enabling AI services window, select the checkbox to agree to the Global Terms and Conditions and click Next.
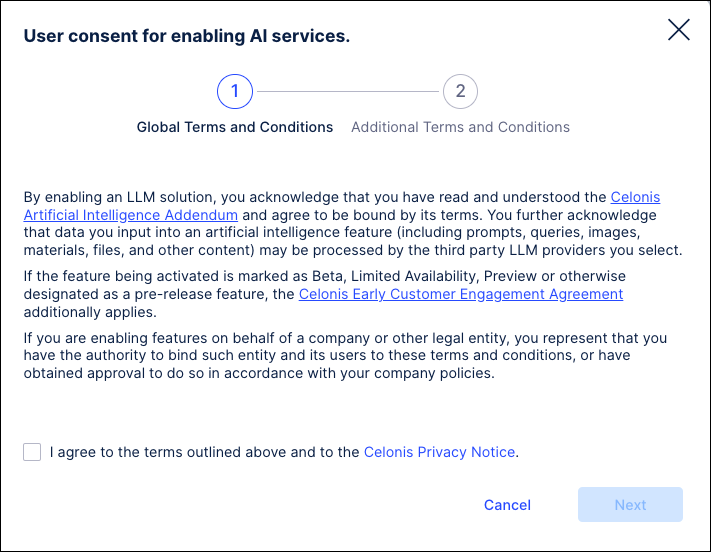
Use the checkbox to accept the Additional Terms and Conditions and then click Save.
All available AI service providers are enabled for this environment.

Admins users can use the Bring your own Model (BYOM) option to connect self-hosted LLMs on Azure, AWS and OpenAI-compliant environments and make the new model accessible to their Celonis teams. The BYOM feature also allows Admins to reuse existing LLM deployments in the Celonis Platform through API keys or OAuth2 for OpenAI-compliant LLMs. Azure-specific and AWS-specific configurations are also available for adding LLMs hosted on Azure and AWS.
Go to Admin & Settings > AI Settings.
Click the Add Model button on the right side for the type of service being added - AWS Bedrock, Azure OpenAI, or Other Providers (OpenAI compliant API).
Note
When adding an OpenAI compliant API model, you will need to select if you want to build the model based on an API Key or using OAuth authentication. The fields available for configuration will vary based on this selection.

In the add model window, complete the fields as needed. See the screenshots below for the information required to add each type of model.
Note
The fields required to configure a deployment using the BYOM method will vary based on the type of model selected.

Add AWS model

Add Microsoft Azure model

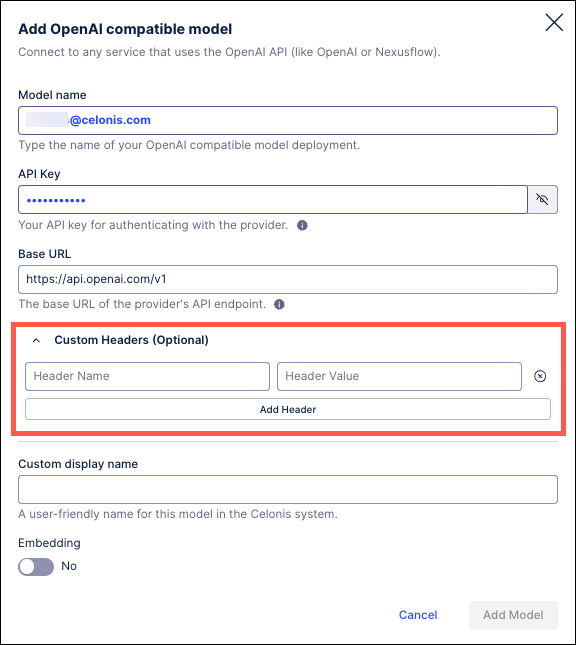
Add OpenAI compatible model - API key
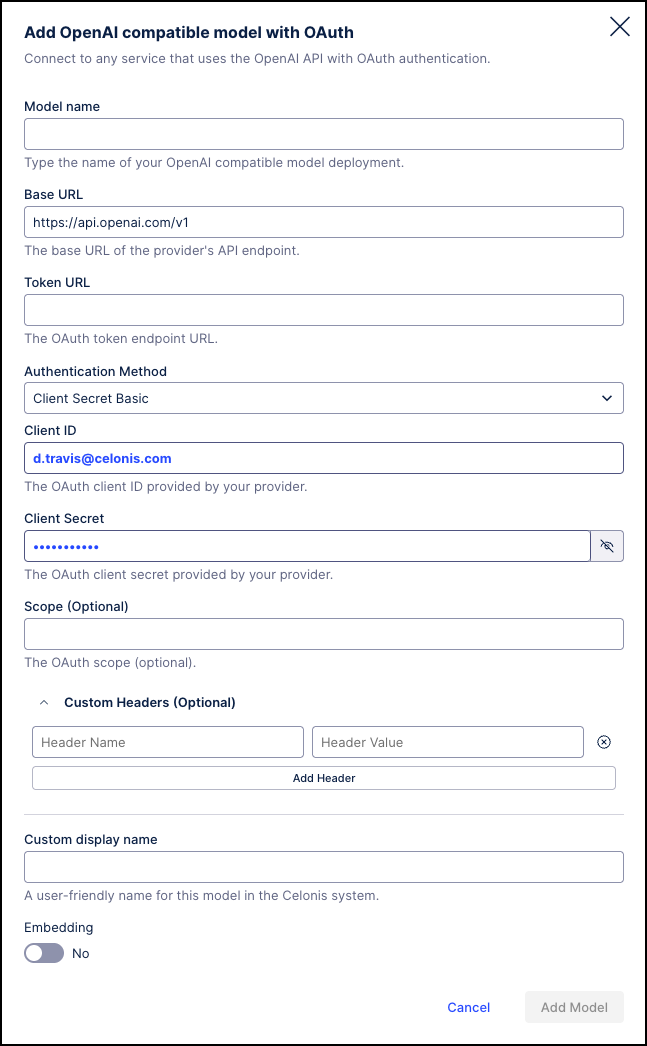
Add OpenAI compatible model - OAuth client
For the OpenAI compatible models, you can also use the optional Custom Headers to include your own custom fields in the model. Click the Add Header button and then enter the name and value for your custom header.
Note
Custom headers must be whitelisted before they can be used in a new model. Contact Celonis Support to have your custom headers whitelisted in order to use them with a BYOM model. If your custom headers are not whitelisted, your new service can not be saved.
Click the Add Header button again to insert additional custom fields or click the X icon to the right of the Header Value field to remove a custom header.
Set the Embedding toggle to "Yes" if you want to create an embedding model instead of the default LLM model.
Note
This setting cannot be changed once the model is created.
Click the Add Model button at the bottom of the screen. Your configuration is verified and the new service is added in the corresponding section.
Toggle the switch to on in order to enable the new model.
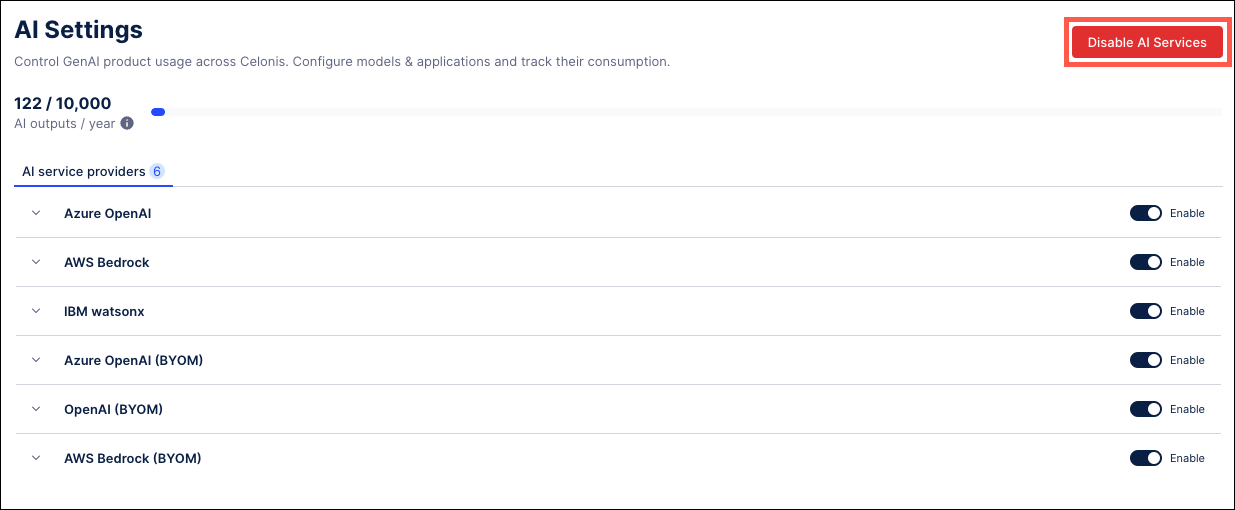
Admin users have the option to manually stop all the AI Services currently running by clicking the Disable AI Services button. Disabling these services will mean that none of your AI applications will be able to access data from these models.
Go to Admin & Settings > AI Settings.
Click the Disable AI Services button in the upper right corner.
On the Disable AI Services screen, select the checkbox and enter "STOP" in the text field.
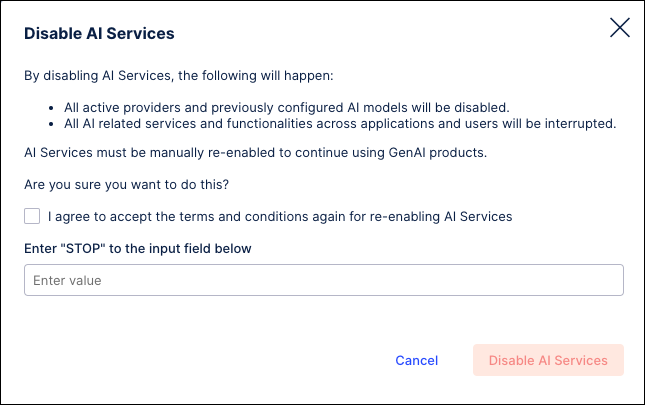
Click the Disable AI Services button to confirm that you want to stop the services from running.
Admins can click on a service provider to view the individual AI models available from that provider. Admins can then use the toggle switches to enable or disable each individual service within the Celonis Platform. If an LLM is disabled, its configuration is retained and will not need to be reconfigured if the model is enabled again.
Note
Users will be asked for confirmation when enabling or disabling any service.
Go to Admin & Settings > AI Settings.
In the AI service providers section, click the arrow to the left of the provider name to expand and display a list of available models.
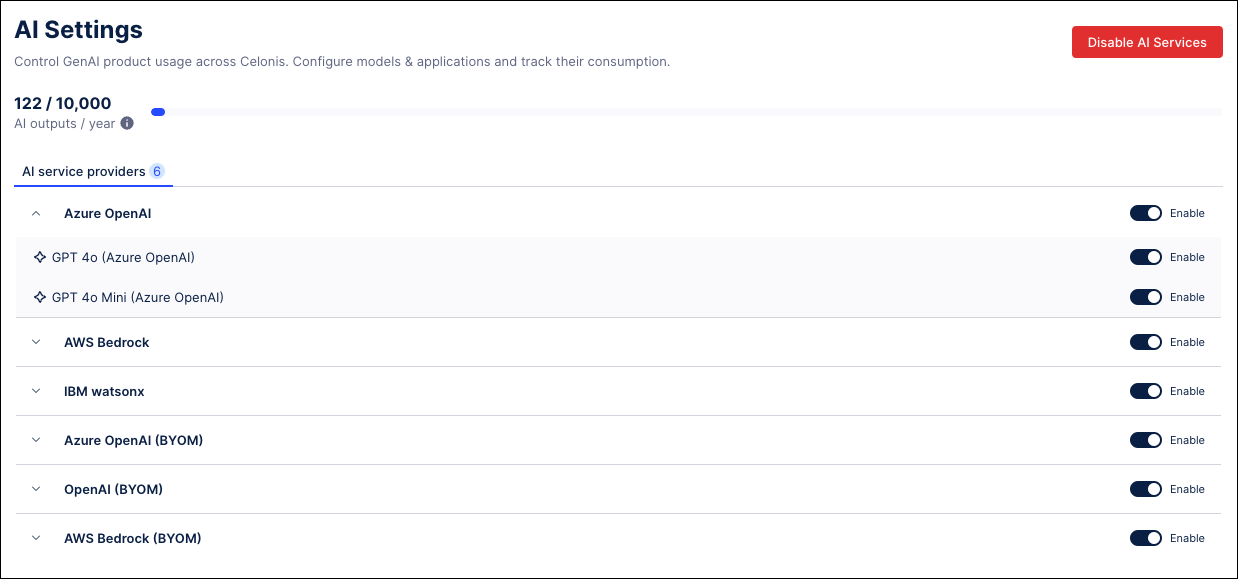
Use the toggle switch to the right to enable or disable each individual model.
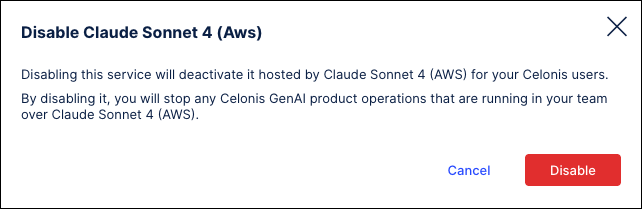
When disabling a service, users will need to confirm the action by clicking the Disable button.
The Studio Package Usage and ML Workbench Usage tabs provide a detailed breakdown of your team’s AI Assets, such as Annotation Builders, Process Copilots, or Machine Learning Notebooks that are currently in use. From these tabs, Admins can see where each AI asset is being used, the type of asset, the LLM assigned to this product, and the service provider it is using. Admins can also use the toggle switch to disable individual assets and pause any AI Output consumption by that asset.
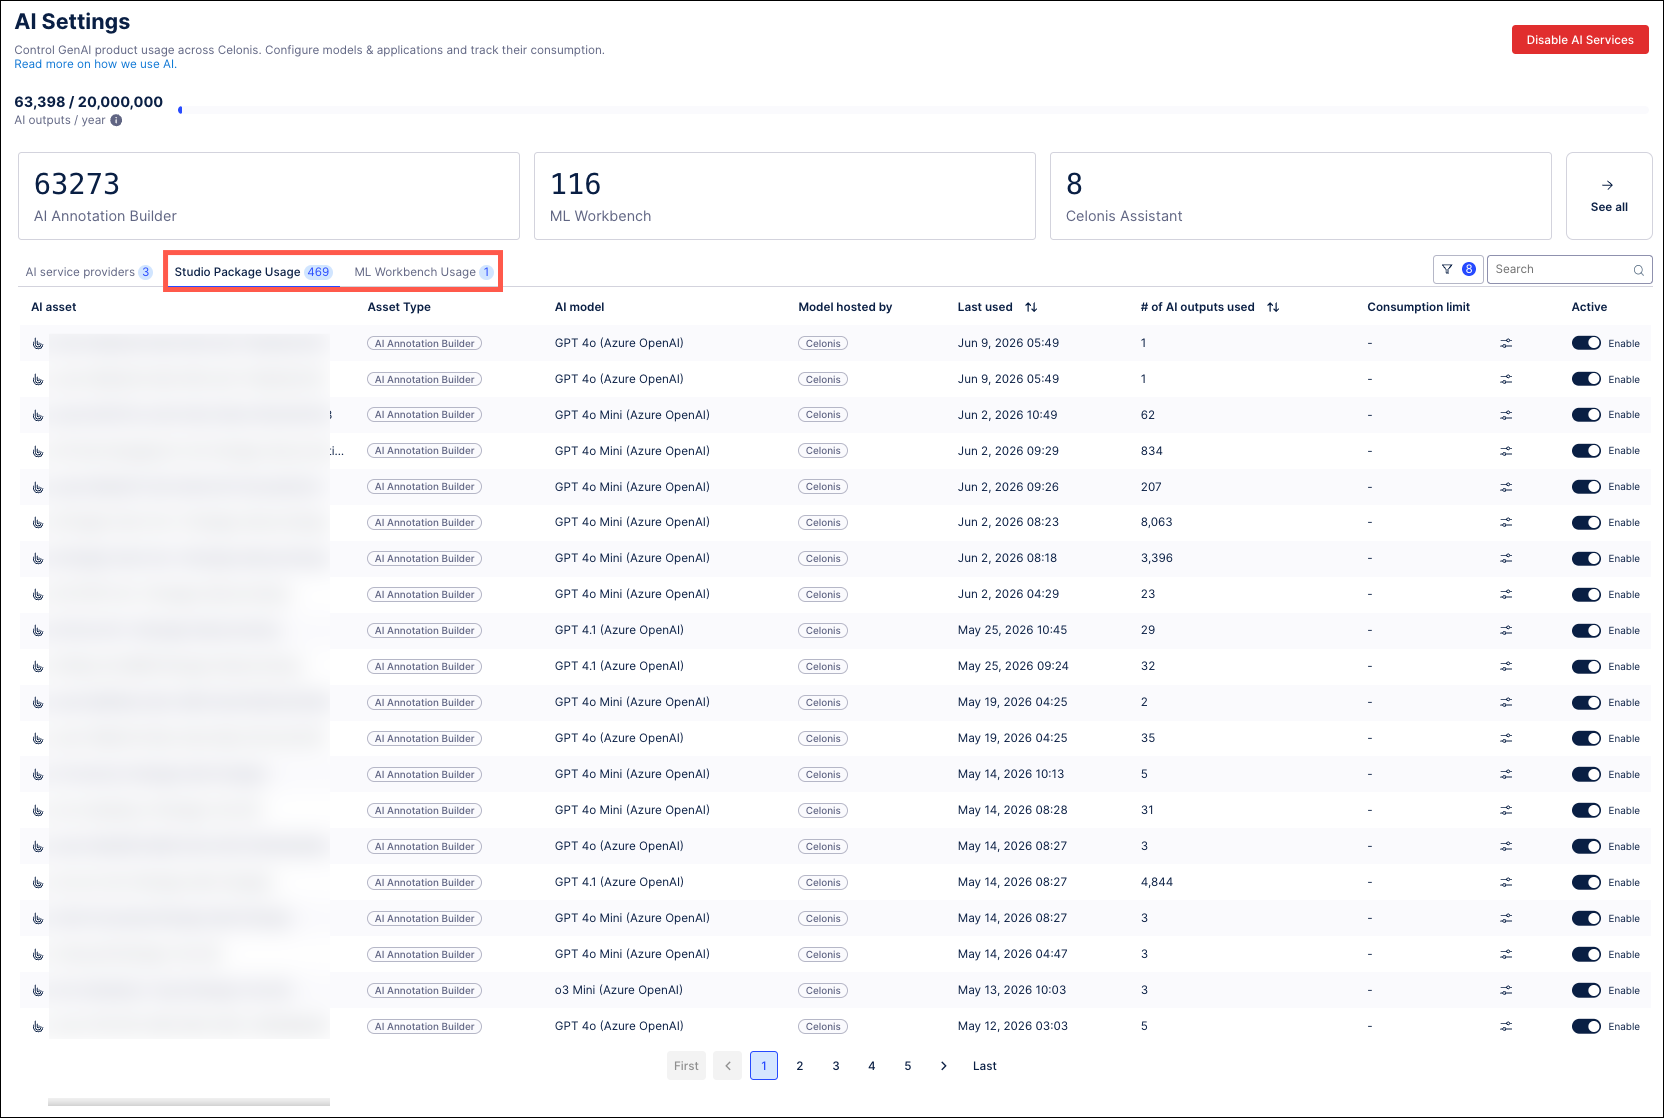 |
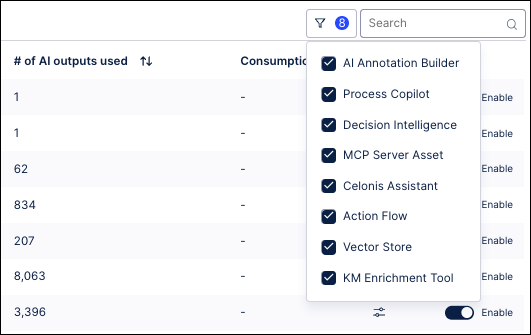
The Search field above the table allows you to locate a specific asset by asset name or the name of the AI model used. You can also use the filter dropdown to choose the specific Asset Types you want to view.
Setting consumption limits and notifications
On the Studio Package Usage and ML Workbench Usage tabs, you can set specific consumption limits for an individual asset and choose to trigger notifications when certain consumption limits are reached. Click the  icon in the Consumption limit column to set the limits for that speicifc asset. On the Set Asset Consumption Limits screen, use the field to provide this asset with a maximum number of outputs it can consume. You can see the current consumption total for this asset as well as the number of available outputs you have remaining.
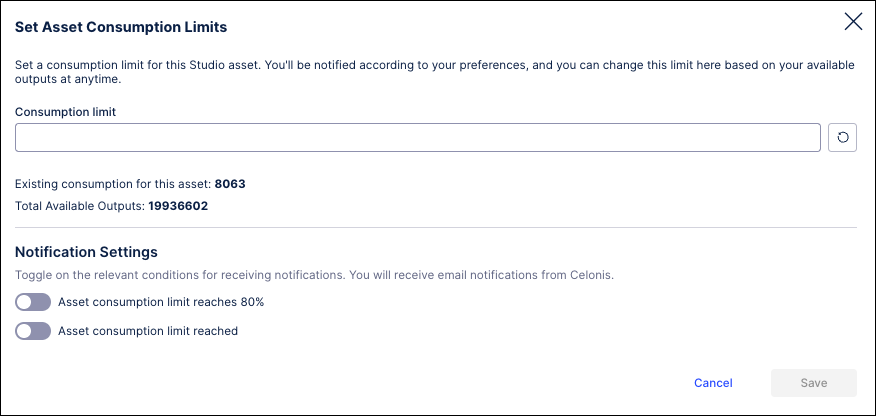
In the Notification Settings section at the bottom of the screen, use the toggle switches to choose the conditions that will result in a notificaiton being sent to the Admin users for this team. Using these settings, you can choose to receive notifications when this individual asset uses 80% of its assigned consumption limit and when the total consumption limit has been reached.
Click Save when finished and the assigned consumption limit will now display on the usage tab.