Filtering Studio Views
When creating and editing a Studio View, you can add PQL based predefined filters to the View and enable temporary filters for your App user. These filters allow you or an app user to display only the data that meets specified conditions, such as filtering data based on a data range or show information specific to an object or category.
Predefined filters: These are filters that are applied to the data when the View is being created or edited, with the published version of the View then showing already filtered data. You can set predefined filters on a Knowledge Model level, for the whole View, a tab within a View, containers and container tabs, and on individual components.
To learn how to configure predefined View filters, see: Setting predefined filters.
Temporary filtering options for App users: You can also enable or disable the ability for App users to apply temporary filters to published versions of your View and the individual components within the View. These temporary filters can be set per user, with any filters applied by the user being persisted and applied the next time they load the View.
To understand how to configure temporary filtering options for App users, see: Temporary filters for Apps.
Setting predefined filters
Any filters you create in a Studio View in edit mode are known as predefined filters and include:
You can also create filters using filter PQL.
By creating Knowledge Model (KM) filters, you can write a Filter Statement in PQL that is applied to either the component it is being used in or across all objects within the KM (known as a Global Filter). KM filters aren't visible to the user when viewing the published version of the View as an App.
In this example, a global filter has been created to indicate if the invoice for an order has been billed. The Filter Statement (PQL) for this KM filter is:
FILTER o_celonis_DeliveryItem.IsBilled = 1;
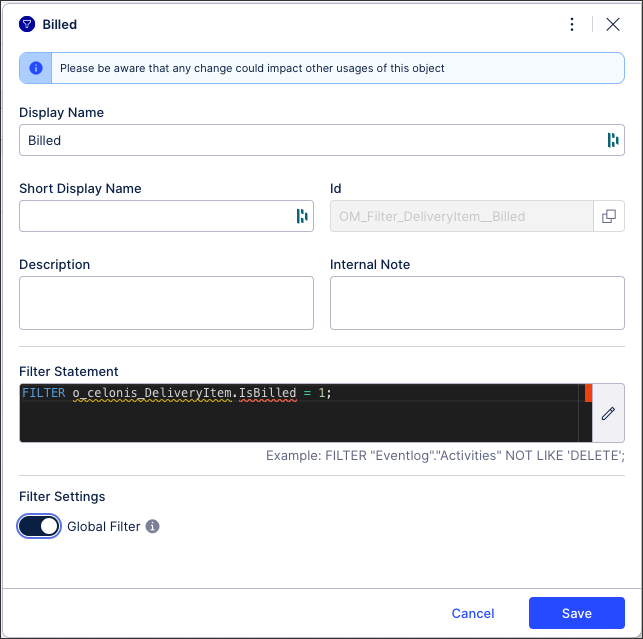 |
As this is a global filter, the filter is already applied to Studio Views where it is referenced. For KM filters that aren't global filters, they can be used when configuring your Views or components within Studio.
For more information about KM filters, see: Filters.
When editing your Studio View, you can configure predefined filters for all users when the View is published and viewed as an App. These filters can be configured by adding existing KM filters to the View and / or by creating a custom View filter. You can add multiple filters to your View, including multiple KM filters and custom filters.
Adding KM filters to a View
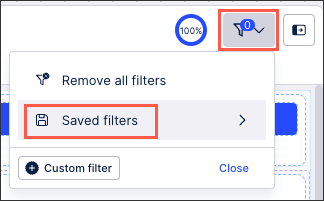
In View edit mode, click Filters - Saved filters:
 |
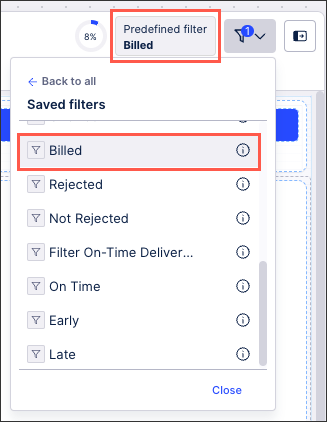
Then search for an select the KM filter you want to apply to this View. In this example, we've searched for 'Last' as our search term and selected to filter on the Last 7 days:
 |
Creating a custom View filter
You can also create a PQL based custom View filter for your View using the Filter Editor.
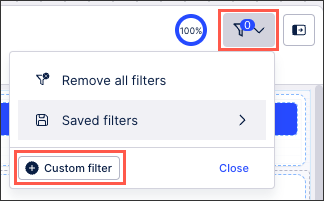
To create a custom filter, click Filters - Custom filter.
 |
This opens the Filter Editor, allowing you to create your PQL based filter statement. See: Using the Filter editor.
Predefined View filter settings
After adding a KM filter or a custom filter to your View, it appears on the toolbar.
 |
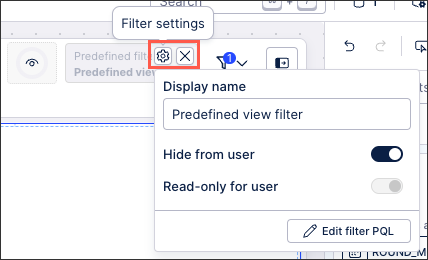
You can then click the Filter settings icon where you have the following settings:
Display name: A name label for the filter when viewed in edit mode.
Hide from user: When enabled, this hides the applied filters in the published version of this View. The filter is still applied to the data, the user just doesn't see that the data is being filtered. By default, the filter will be visible for the App user.
Read-only for user: When enabled, the user can see that a filter has been applied to the View but they aren't edit or disable it.
Remove filter: This removes the filter from the View. If you're removing a KM filter, the filter is still saved to the KM. If you're removing a custom filter that hasn't been saved to the KM, you must create it again to re-apply it to the view.
 |
View or hide case count indicator
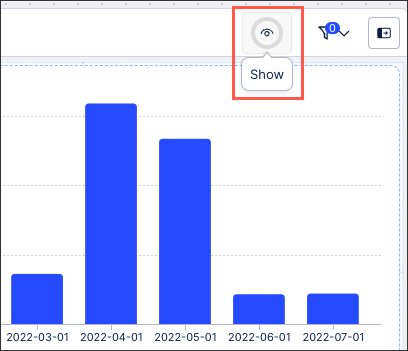
In View edit mode, you can show or hide the case count indicator for your published Apps. This indicator shows you the percentage and total numbers of cases available in the current View, which updates based on the filters applied to the data.
 |
This case count data comes from the following sources:
Case-centric: The case count is based on the case table defined in the Data Model.
Object-centric: The case count is based on the lead object in the default event log for the perspective.
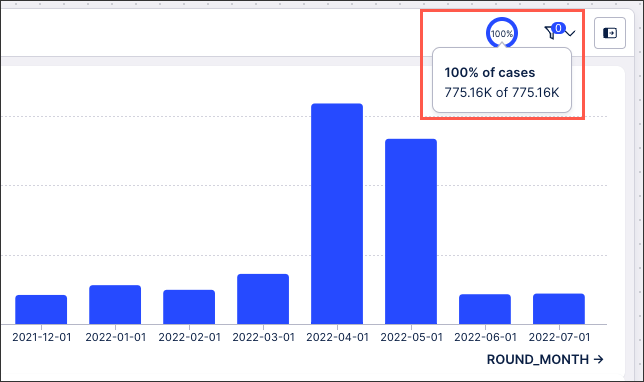
Example with no filters applied: 100% of the cases are visible, which is over 775k.
 |
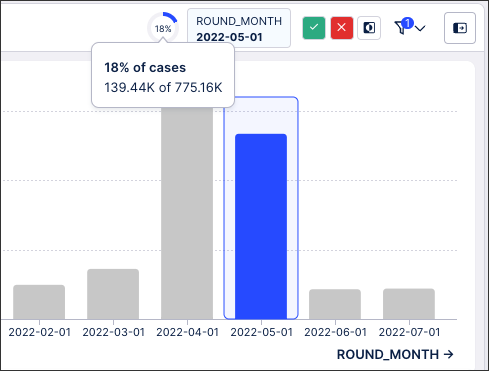
Example with filters applied: 18% of the cases are visible, which is 139k from the total of 775k available.
 |
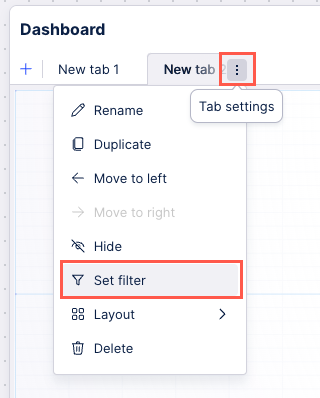
You can also add Knowledge Model filters to individual tabs within a View, available in Views with two or more tabs. These filters are not visible to the App users in a published App.
To add a KM filter to a tab, click Tab settings - Set filter:
 |
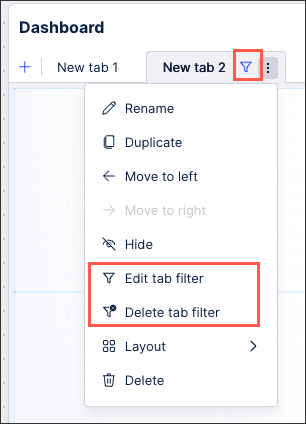
You can then edit or delete the tab filter by clicking either the Edit Filter button on the tab or returning to Tab settings:
 |
You can configure predefined filters for individual components within your View, allowing you to either select from an existing Knowledge Model filter or write a PQL statement for the component. You can also set predefined filters for components included in containers and tab containers.
To configure a predefined filter for a component, open the component settings menu and click the Filter icon:
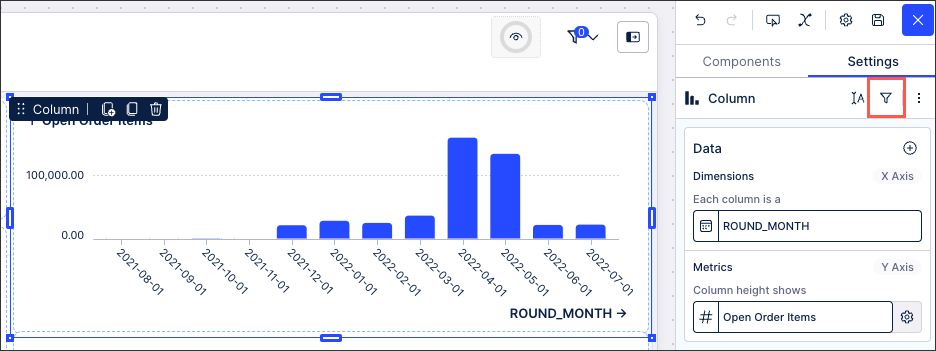 |
This takes you into the PQL Editor, allowing you to write a PQL statement for the component. For more about the PQL Editor, see: PQL editor.
You can use the Filter Editor to write custom PQL filter statements for your Views and tabs based on the tables provided in your Data Model and your Knowledge Model.
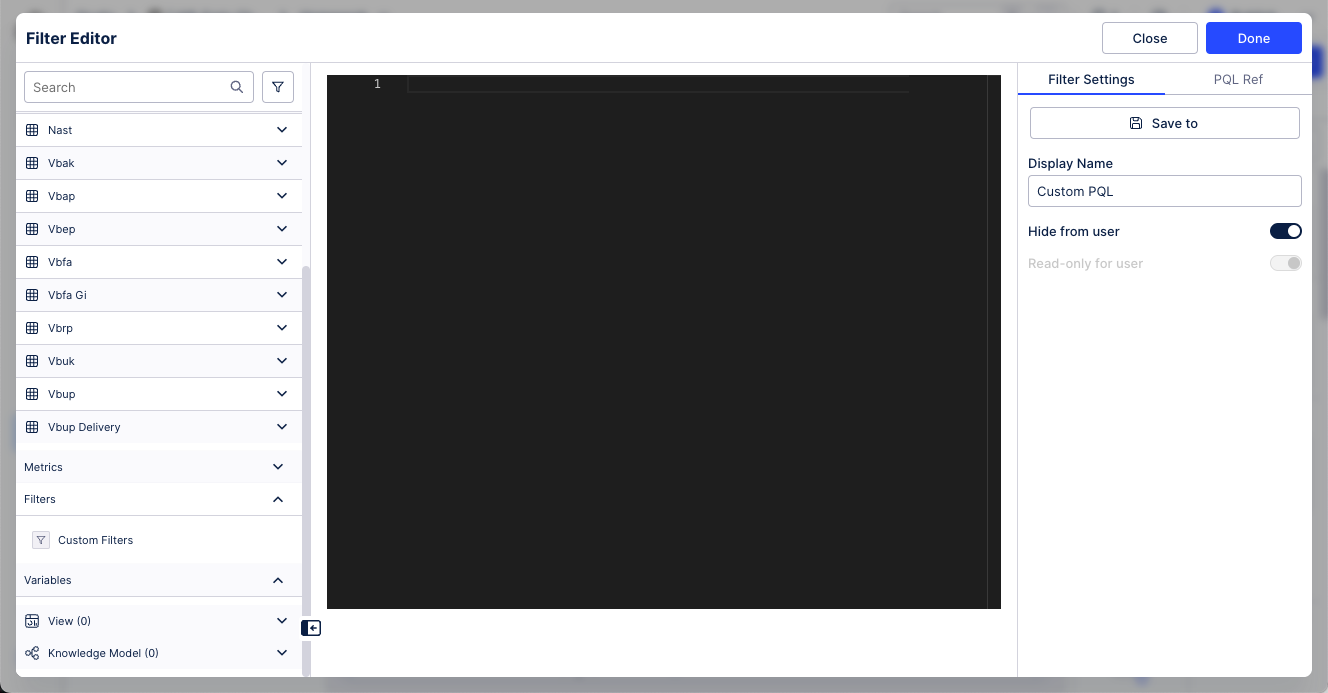 |
When creating your custom filter, you have the following options:
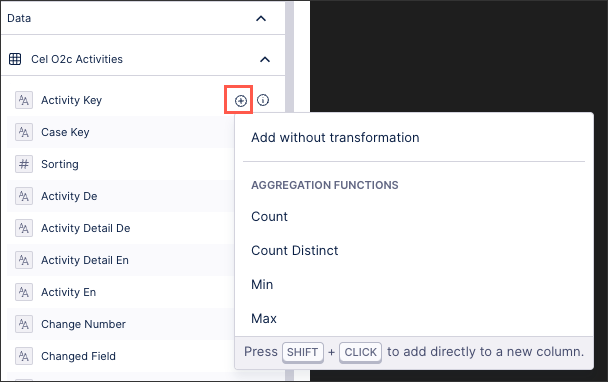
Add data with and without transformations
By clicking the table itself, you can add this to your PQL reference without any transformations.
Alternatively, click + and you select an aggregation function to apply to your filter statement.
 |
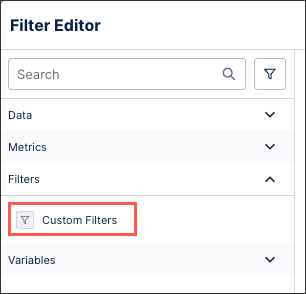
Add Knowledge Model filters and variables
You can also use the Filter Editor to add existing KM filters or variables to your filter statement:
 |
Configure filter settings
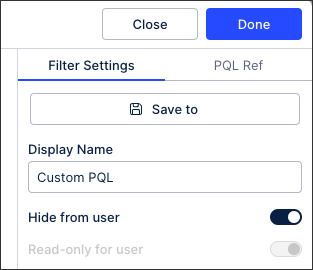
When creating your custom filter, you have the following options:
Save to KM: This allows you to save your custom filter to your Knowledge Model, allowing you to reuse it across all package assets using that KM.
Display name: A name label for the filter when viewed in edit mode.
Hide from user: When enabled, this hides the applied filters in the published version of this View. The filter is still applied to the data, the user just doesn't see that the data is being filtered.
Read-only for user: When enabled, the user can see that a filter has been applied to the View but they aren't edit or disable it.
 |
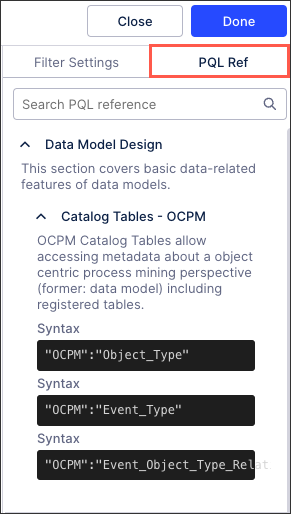
View PQL references
The Filter Editor also includes a library of PQL references, giving you further information and syntax references for all available PQL functions.
 |
You can view PQL statements that are generated when:
Filters are created using filter components.
Built-in filters are added.
Copying, pasting and editing these PQL statements lets you can quickly and easily create your own PQL filter statements which you can save to the Knowledge Model or as custom filters.
Note
Predefined filters don't have a filter editor but you can edit the PQL and save it to the Knowledge Model from the PQL Editor. For more information, see Using the Filter editor and Knowledge Model filters.
In Edit mode, select filter options for your View.
Select the PQL statement button
 .
.The filter and its PQL statement display.
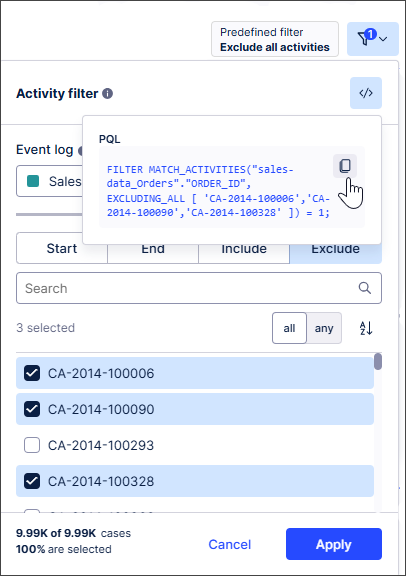
Select the Copy button to copy the PQL statement for your filter.
Paste the filter PQL statement into the PQL Editor or Filter Editor.
Edit the filter PQL statement (optional).
Save the filter to the Knowledge Model.
Tip
For more information, see Using the Filter editor and Knowledge Model filters.
Copying filters between Views
Any filters you set in a View can also be copied into other Views within your Celonis Platform team, saving you from manually configuring them each time. Copied filters are saved on a clipboard for 10 minutes, with a prompt for you to apply the filter when you open subsequent Views.
Copying filters works best when the same Knowledge Model is used, though this is not mandatory.
To copy filters between Views in Apps or Studio Interactive Mode:
Click Filters - Copy filters to View.
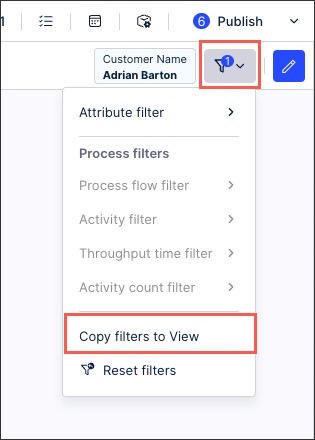
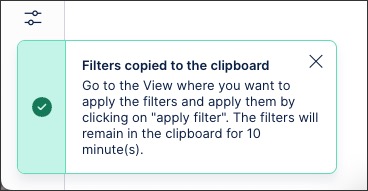
A confirmation message is displayed, informing you that you have 10 minutes to copy the filters into another View:
Open another View and click Apply Filters.
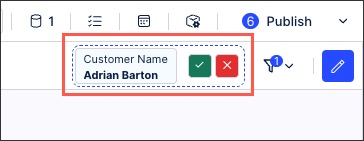
The filter is now applied to both the original View and the View it was copied into.