Local extractor for SAP ECC and SAP S/4HANA
You can use a local extractor for SAP ECC and SAP S/4HANA, allowing you to perform a one-time extraction of your data. This process makes use of a native RFC function - RFC_READ_TABLE - that allows the third parties to extract data provided they have the necessary user permissions in their SAP system.
To use the local extractor to extract data from your SAP ECC and SAP S/4HANA systems, you must meet the following prerequisites:
Minimum supported SAP system:
SAP S/4HANA: All versions supported.
SAP ECC: Netweaver (NW) 7.31 or higher. For NW versions between 740-756, you may be required to install an SAP Note (3291780 or 2246160). If this note is not installed, you may see a 'RFC_READ_TABLE not compatible' error when attempting a dry run.
SAP user authorization: Access to an SAP system user that has the authorization to do the following:
Execute selected RFC functions.
Read access to the necessary tables.
The package described in the steps below comes with a sample role (CELONIS_DESKTOP_EXTRACTOR.SAP) that has all these authorizations if necessary.
Local machine:
Windows or Linux (64 bit).
Java 17 runtime (pre-packaged, so no installation is required).
SAP JCo library for the respective OS.
To install the local extractor, follow these steps:
To download the package:
Click Admin & Settings.
Click Download Portal.
Locate and download the Celonis Desktop Extractor package.
Extract the package locally.
The package includes the following files:
An SAP role template with the authorizations that are required to run the app (CELONIS_DESKTOP_EXTRACTOR.SAP).
The .jar file / the extractor programme.
An empty folder titled “jco” where the SAP JCo library should be copied.
The packaged Java library that will be used so that you don’t have to install Java.
An extraction template for the O2C process.
The script to launch the application.
To communicate with SAP, the extractor needs to establish a connection to the system and be able to make RFC calls. To achieve this, the SAP Java Connector (SAP JCo) library is used (maintained by SAP). The JCo library should be downloaded and set up separately. This involves two steps:
Download the respective package from the SAP Marketplace. This step should be performed by someone who has an SAP Service User (S User), which authorizes users to download software from SAP portals.
Copy the JCo files into the dedicated folder “jco” in the package directory, the extractor is configured to read the files from there. The library contains 2 files - a Java part “sapjco3.jar”, and an operating system-specific part, for example, sapjco3.[.dll | .so].
Once the JCo library is set up, the extractor is ready to connect to SAP.
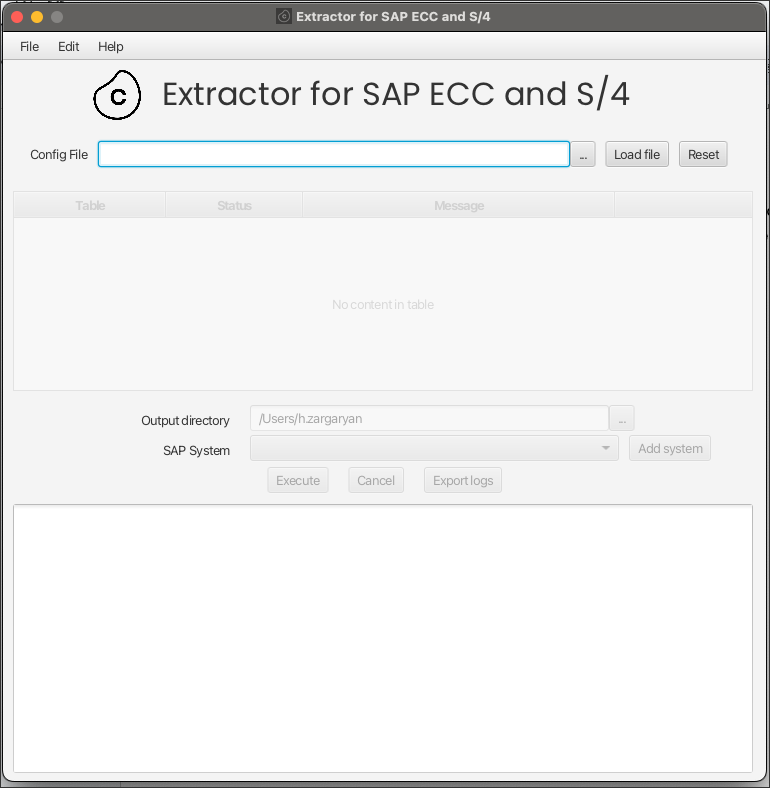
The application is launched by running the script run.[.sh | bat] distributed inside the package. This executes a command in the terminal which invokes the application.
If successful, the following confirmation window is displayed:
 |
The first step is to define the extraction configuration, to specify what you want to extract. This is done by uploading an Excel file with all the required inputs; which tables and columns to extract and what filters to apply. The package already includes a template with the tables for the O2C process.
You can download more process templates following the steps from this page: Generating the ABAP report.
To upload the template:
Click on the three-dot button to browse the folders.
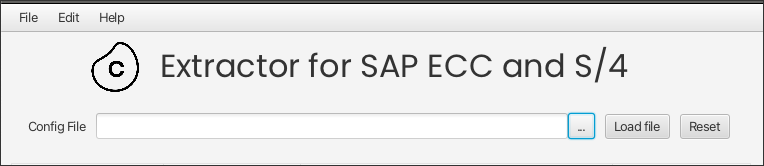
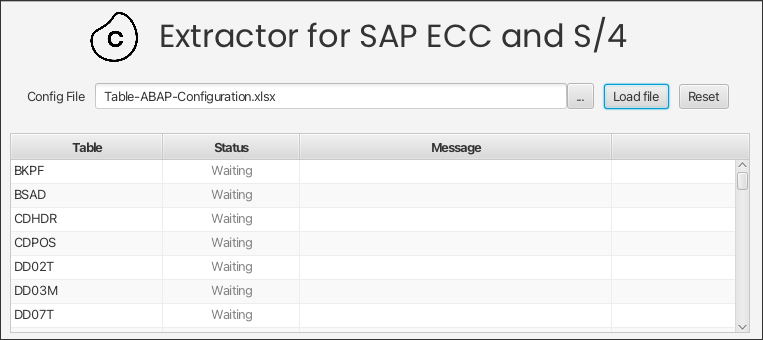
Select the file and click Load file.
The tables from the template will be displayed.
Click Edit - SAP Systems.
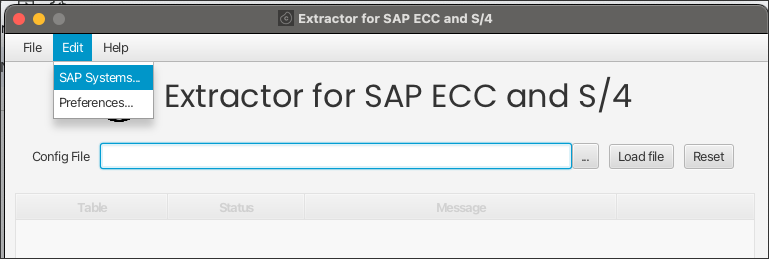
Initially it will be empty, since there are no connections defined yet.
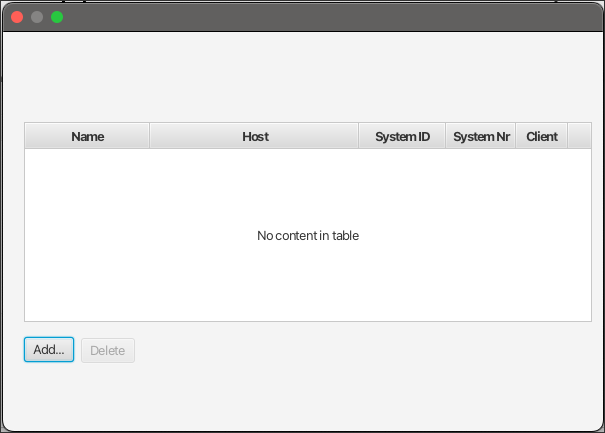
Click Add and define the credentials of the SAP system that you want to connect to. Then click Save.
The added system is now available in the dropdown.
Define the directory where the output should be written, select the SAP system you want to extract data from, and click Execute.
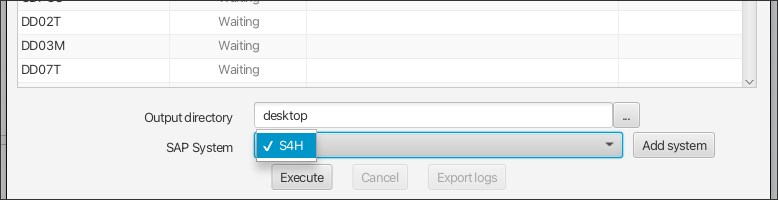
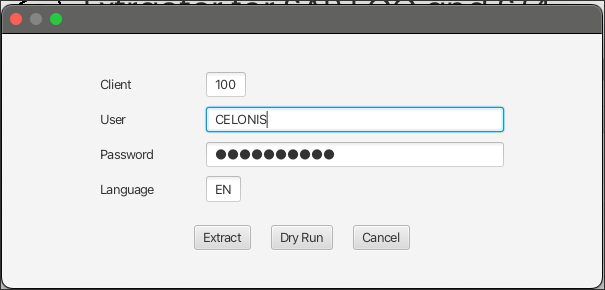
You will be prompted to enter your username password.
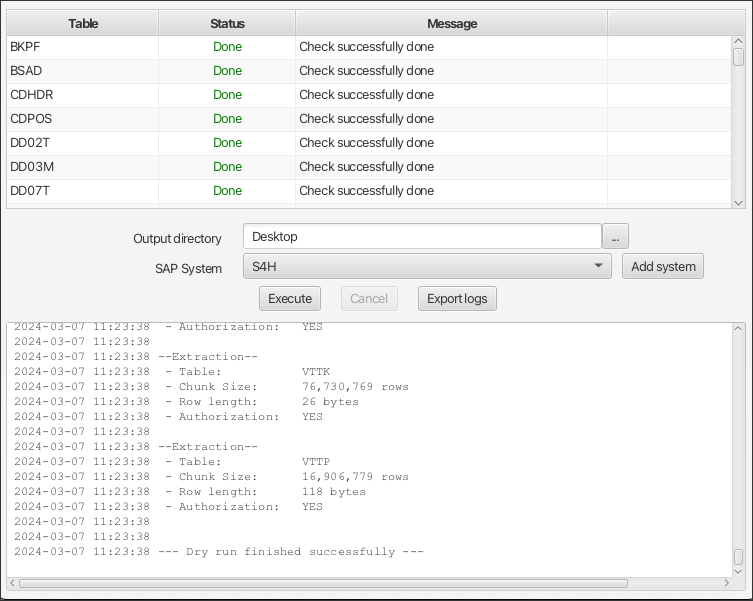
Afterwards you can do a “Dry Run”, or start the Extraction right away. We recommend doing a dry run first. This checks that:
You can connect to the SAP system.
The system has the required version of the function RFC_READ_TABLE.
Your user is authorized to call the required functions and read from the selected tables.
Once the Dry Run progresses, messages will be displayed for the validated tables. You can also see the details of the Dry Run in the logs on the dialogue bottom. If everything is ok, you can go ahead with the extraction.
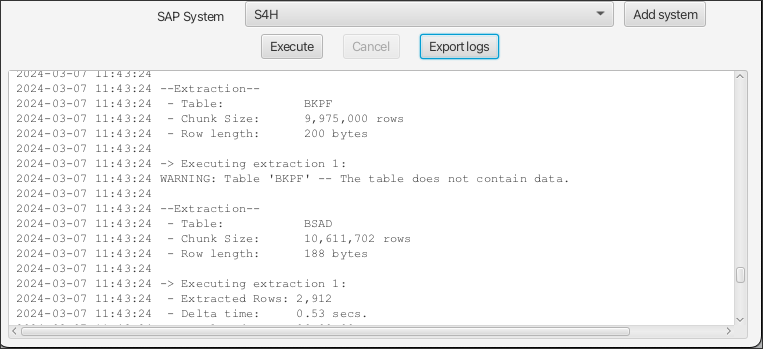
You start the extraction by clicking Execute. This will establish a connection to SAP and start writing the data to files on your machine in the “Output directory” defined by you.
 |
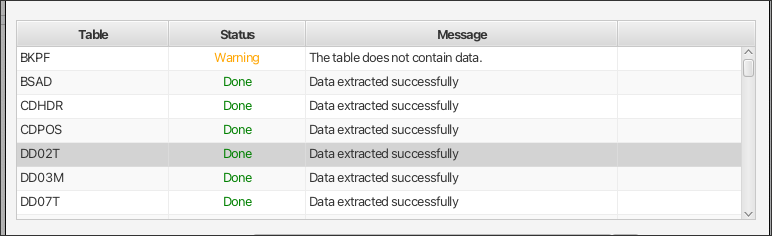
As the extraction progresses, the table statuses will be updated accordingly in the Extractor GUI. Note that you might see warnings for the empty tables.
 |
You can also check and export the detailed logs.
 |
For every extracted table a compressed file will be generated with all the csv files. You can upload these files to Celonis via the File Uploader.